.png)
Setting up Home Assistant armed my home with the smarts I always wanted. The next logical step was to create automation using the different IoT devices. Still teething around my way with automation, I found the visual editor easy to use instead of editing the YAML configuration files. Thankfully, Home Assistant provides a handful of user-friendly features to kick off the journey to build automation with the least hassle. Here are some features that help me create flawless automation in Home Assistant besides using it for cool things.
Related
5 things I wish I had known before using Home Assistant
Despite the steep learning curve, there are features to help you catch up quickly and rich community support to help with solutions.
5 Organize the automation better in the interface
Grouping and filtering help
Scrolling through several automations is arduous and often overwhelming. Thankfully, the Home Assistant interface lets me organize various automations in three ways: categories, labels, and floors. Since my home is on the ground level, I primarily sort the groups by labels and categories. For starters, I filter the automations by area or devices to look for specific ones to tweak or replicate. I had assigned categories for grouping those automations into tabular groups, regardless of location or state.
That's how I group all the automations of lights and notifications together. Different grouping options allow me to narrow down and truncate redundant automations, especially related to notifications.
4 Individually test actions or conditions
Helps in crafting complex automations
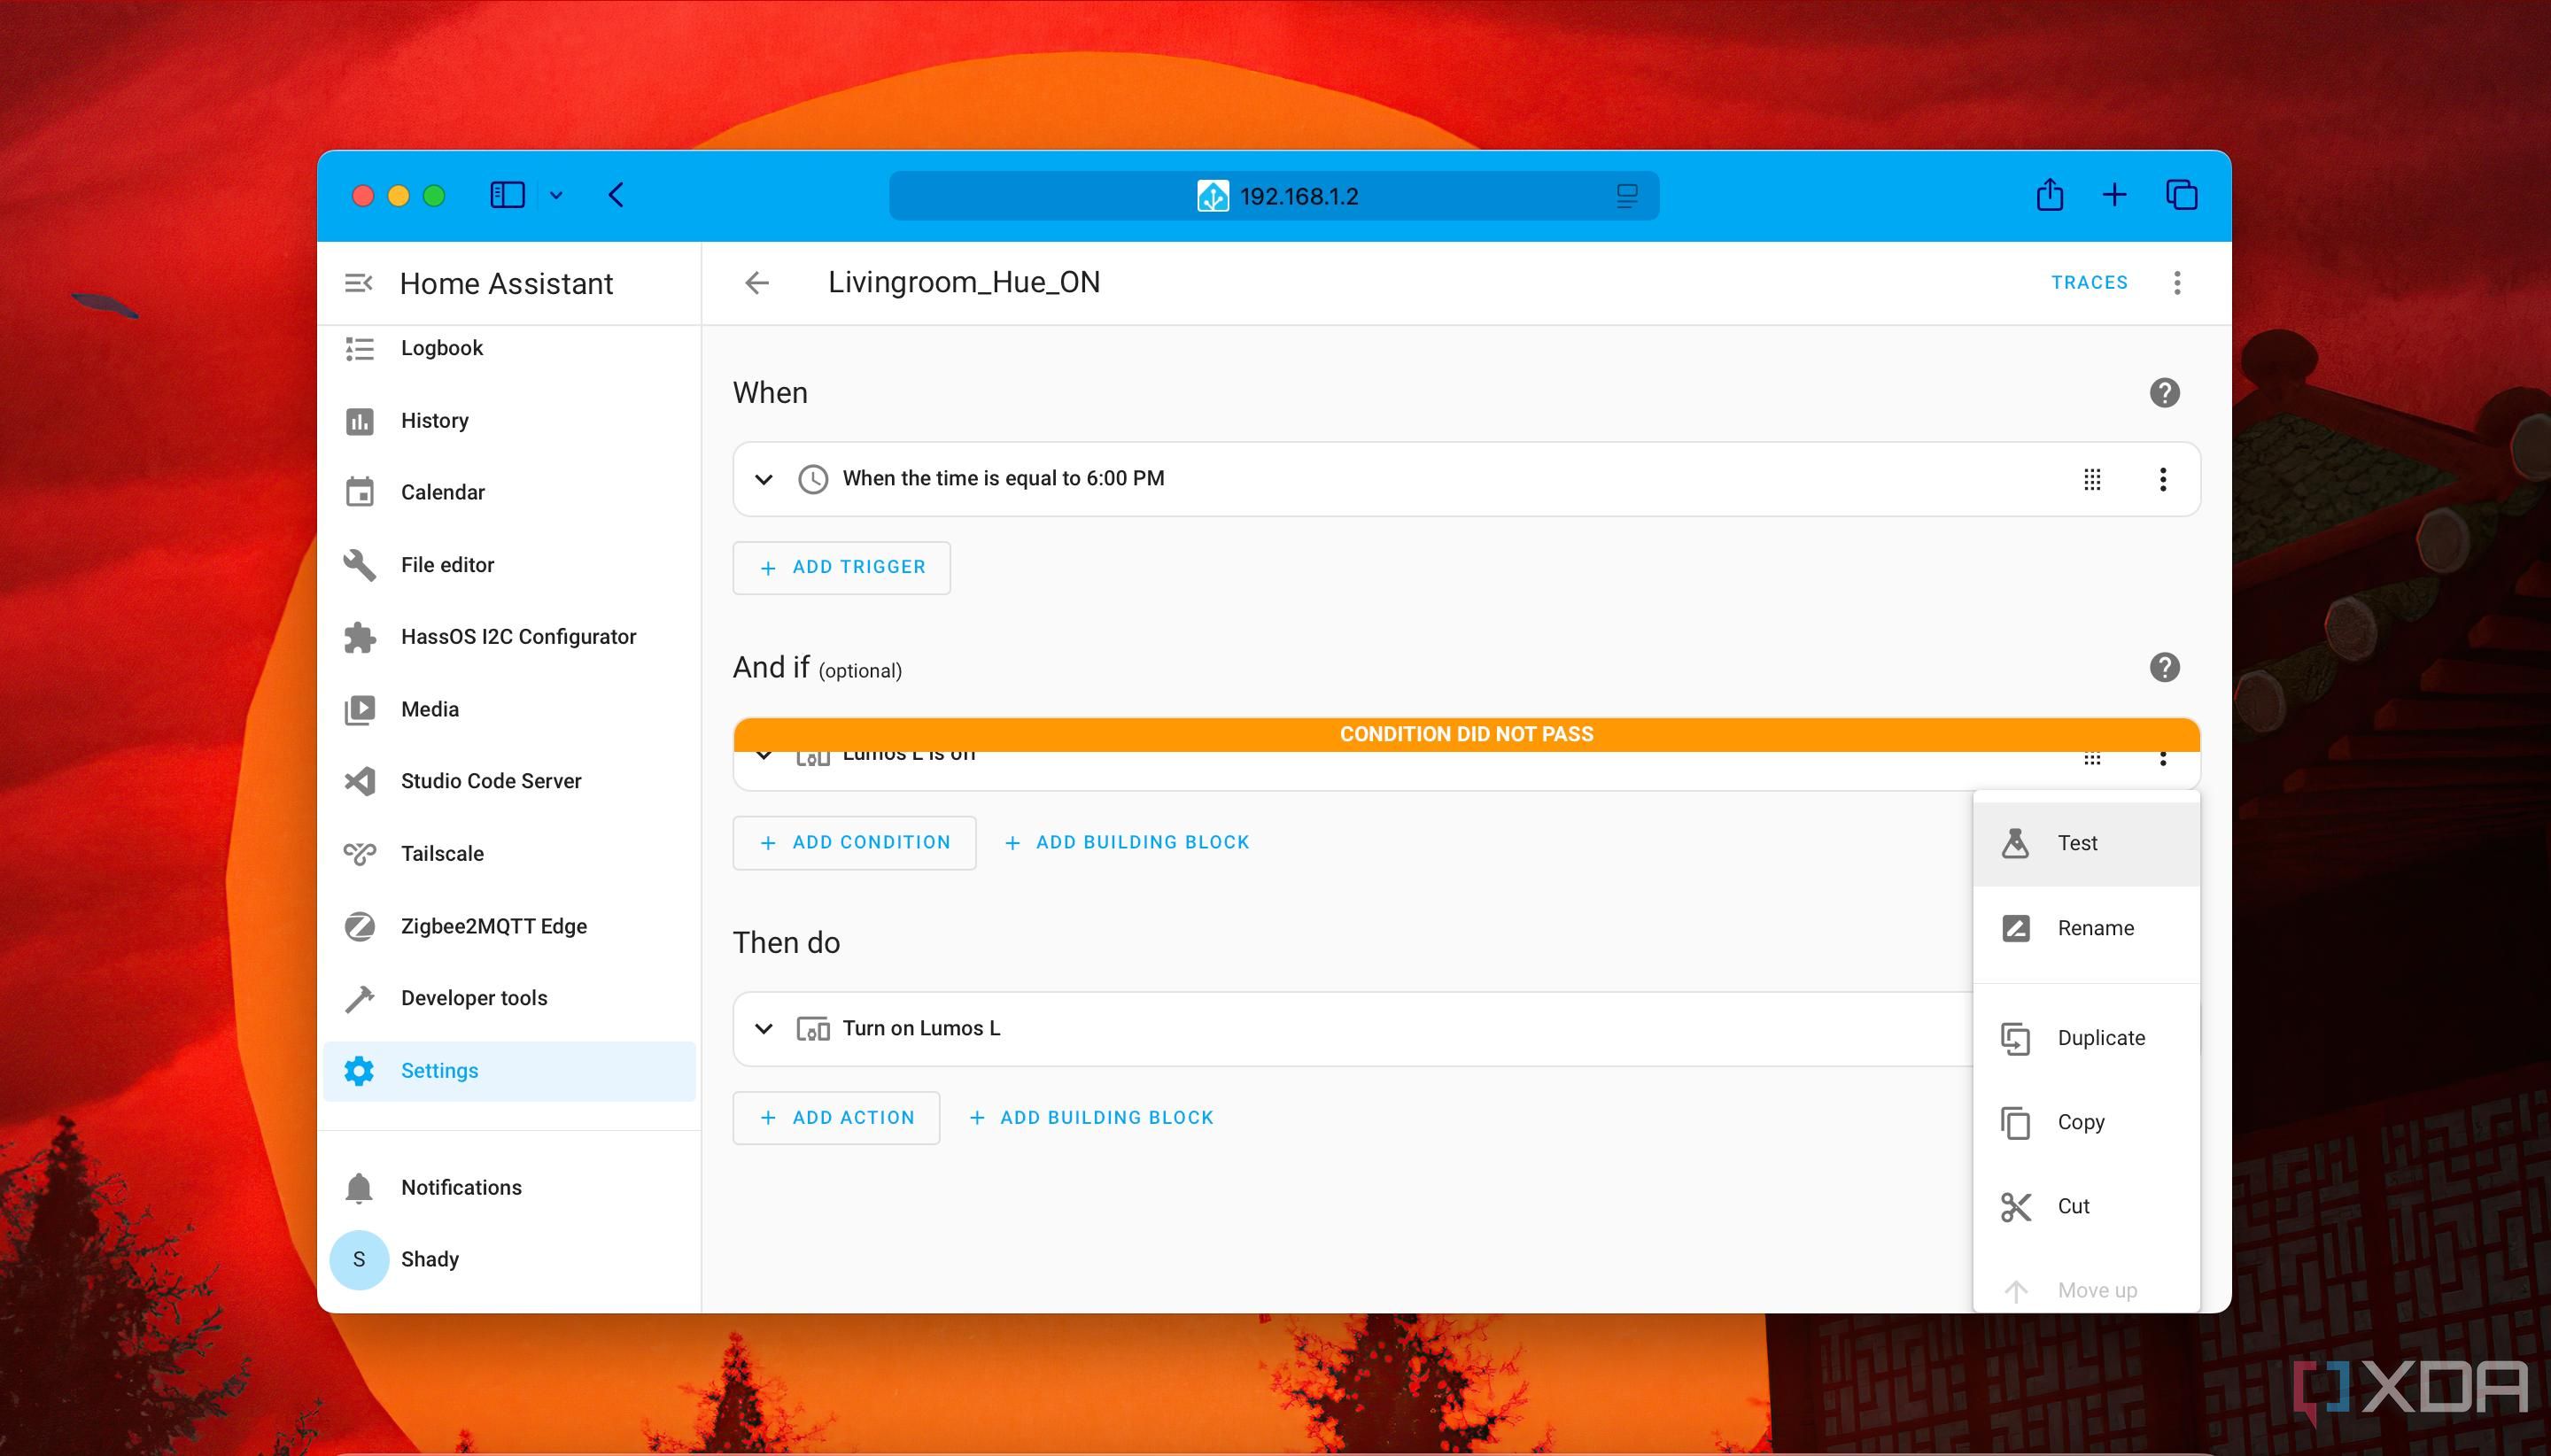
Like most smart home software, even Home Assistant allows testing an automation I create before I save it. Usually, I am not a fan of crafting complex automation. However, Home Assistant goes a step further by letting me test a component or action involved in automation. That's quite helpful when using the visual editor to add a condition to satisfy so that an automation can run.
Testing a component or condition helps me determine whether it'll cause an automation to work. Sometimes I couldn't get the smart lights to switch between different colors while building an automation, since I didn't define it in the previous block to check if the light was on or off. The actions or components depend on the state of a previous block or trigger to work.
3 Check the interactive graph of an automation run
Follow the trace
Troubleshooting a failed automation is relatively easy since Home Assistant records each step as a trace. Whenever I click on the Traces option in the top-left corner of an automation, I get an interactive map of the automation run. That interactive map helps me figure out an automation's route or flow. If an automation didn't execute as expected, I could determine the exact step where it stopped to troubleshoot it.
The Trace timeline option is next to the interactive map, showing the steps executed in an automation and the time it took to run. You can pinpoint the exact step that may have caused an automation to fail and not execute entirely. Also, the Automation Config tab next to Trace Timeline can help you review the configuration in YAML format to double-check all the parameters.
2 User-friendly logbook for event history
An easy way to check errors
Typically, I dive deep into log files to solve an error whenever an automation doesn't work. However, the Logbook section on the sidebar helps me avoid that and is handy for figuring out whether the automation works. Picking a particular date and time in the calendar loadout helps outline details about automation and associated devices. Unfortunately, it doesn't offer search functionality to scour through the logs with specific keywords or queries.
Logbook offers sorting options to filter out entries by entity, area, device, or label. I click either of those options, which are represented by different colors, to reveal a list to focus on results based on a specific entity, device, or area. That's how I compiled a log of notifications of the times when my internet connection went down.
1 Replicating automation with Scenes and Blueprints
Get started quickly
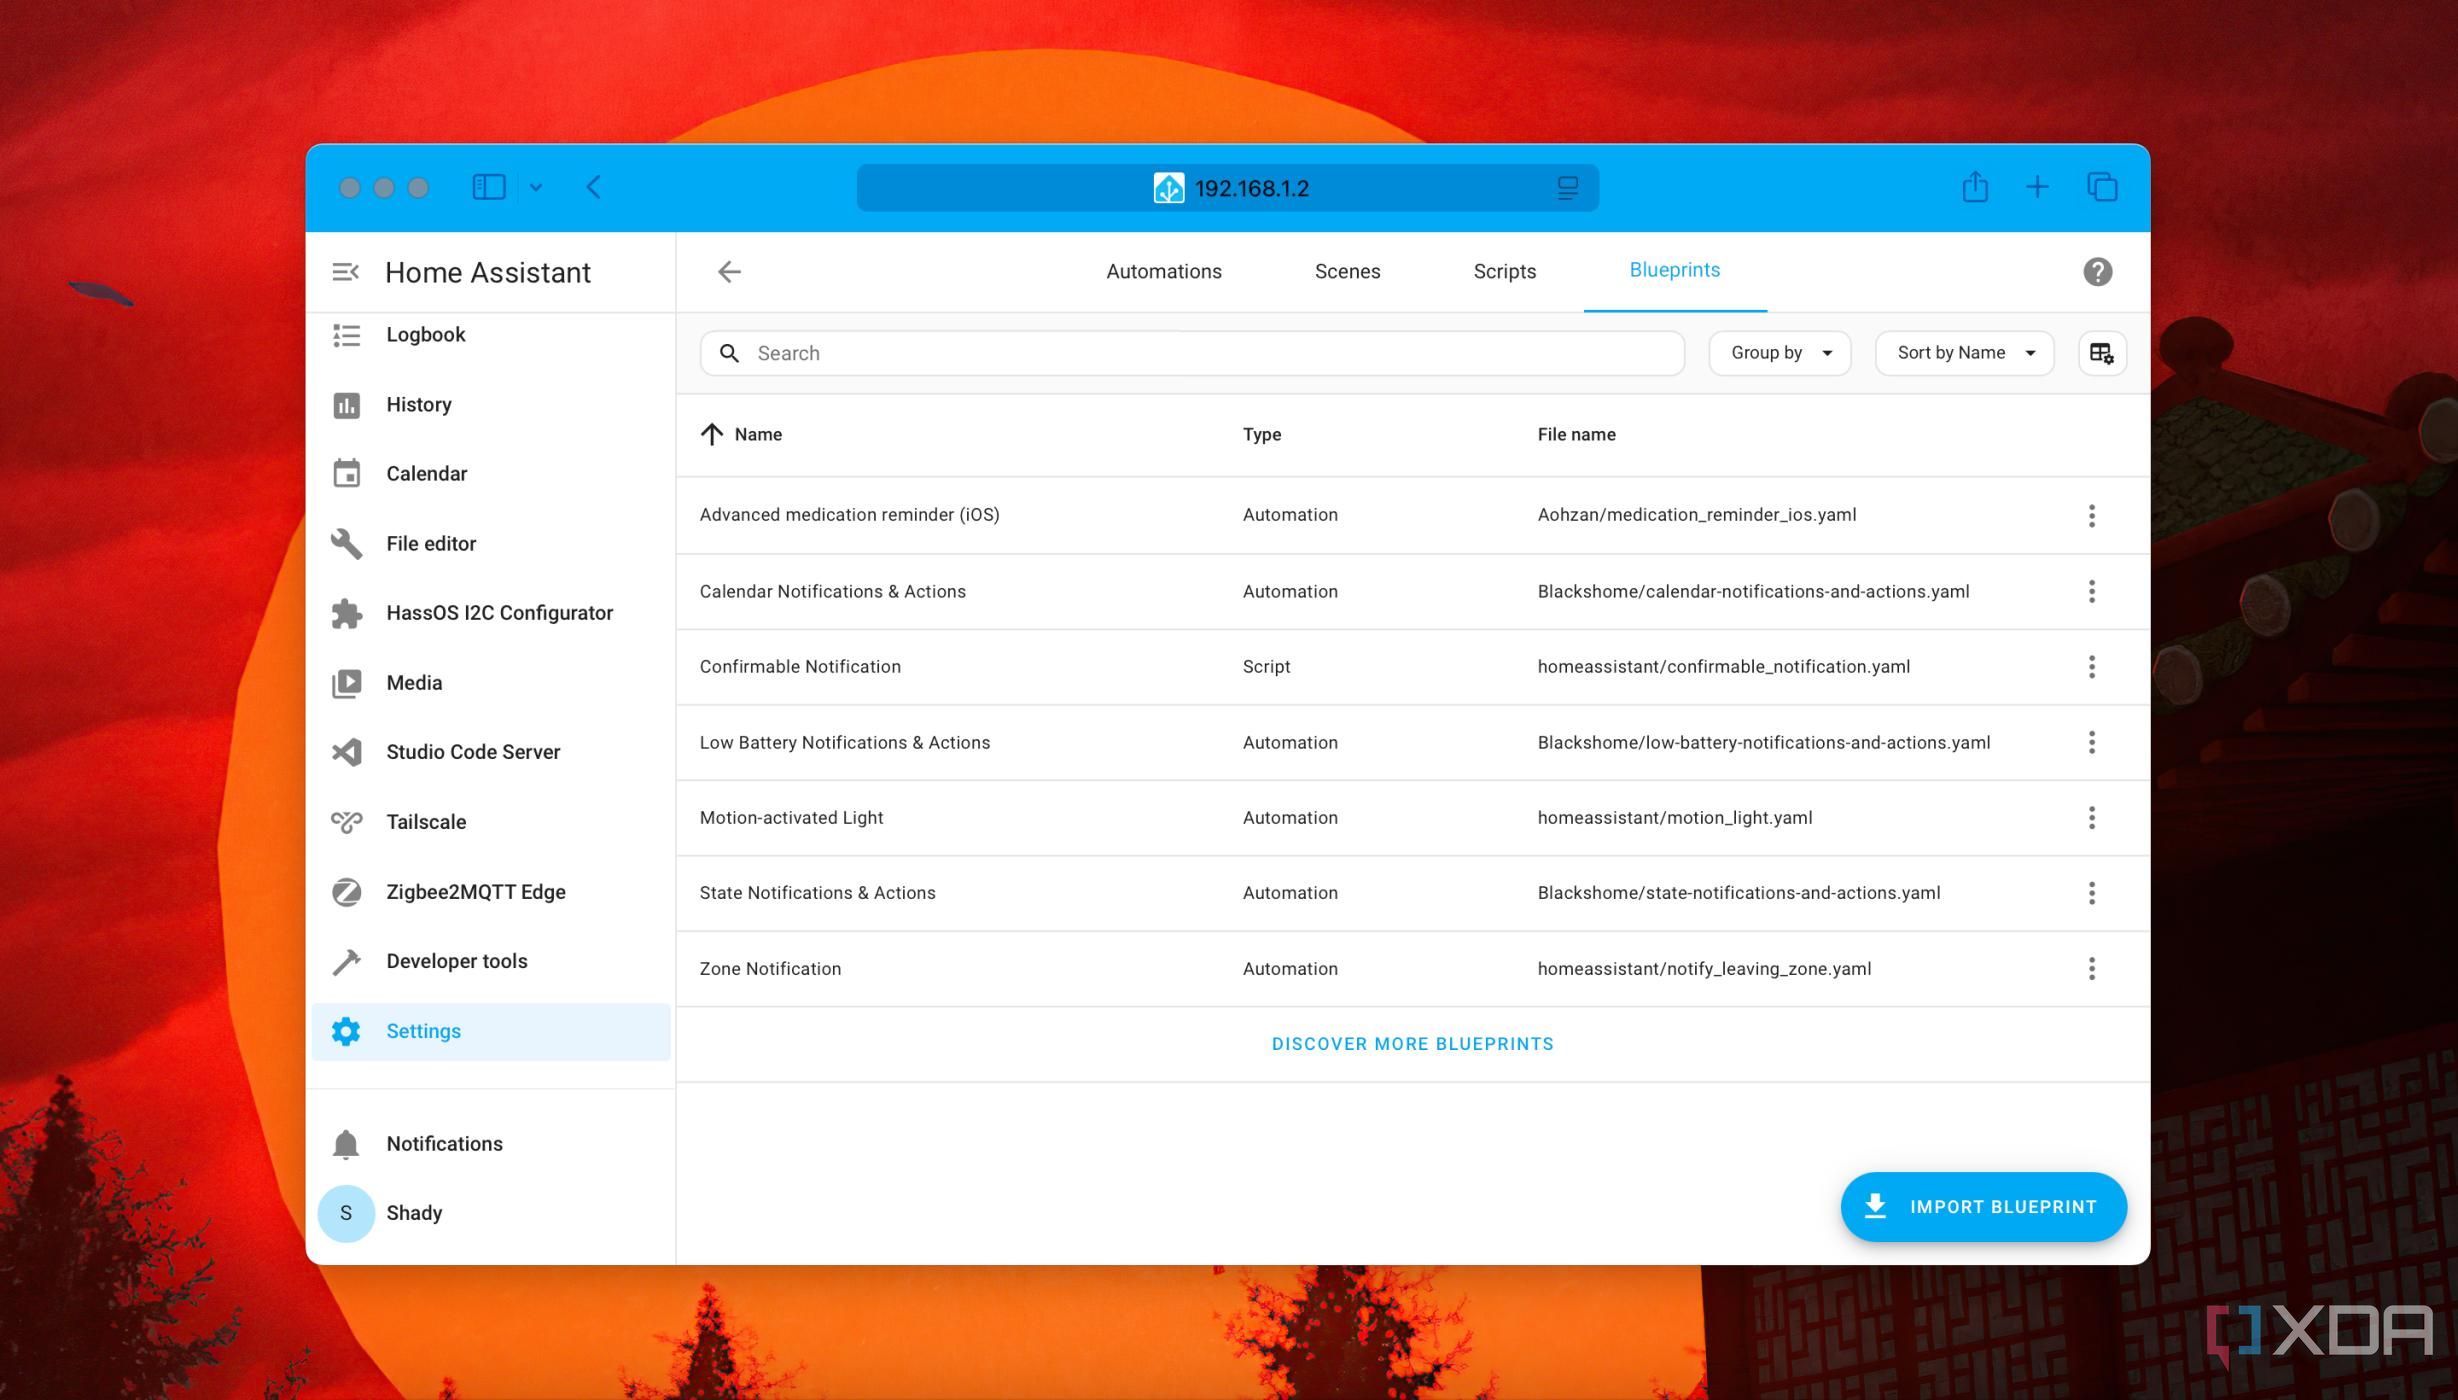
Some basic automations are easy to set up thanks to the Blueprints, which are readymade and generic templates. They are easily customizable in the visual editor or as YAML files to tweak for different purposes. When starting out with automation, I found several useful ones in the Blueprints Exchange of the Home Assistant community, like medication reminders. Most serve as guides for replicating them for other devices or parameters.
Meanwhile, Scenes help set a particular mood or create a specific setting using a collection of devices. The popular movie-watching scene can make the lights change to a specific color and adjust their brightness. To set up a scene, I needed to define the state of the lights and turn them on based on specific parameters. The only odd part is that Home Assistant offers no action to turn off a scene, and you need to manually adjust the states of the devices or entities.
Related
Using building blocks of automation carefully
The Blueprints from the community proved to be a bedrock to help me create custom ones before I got the hang of the Automation Editor. Even after adding several automations, I still enjoy using the visual editor over meddling with the YAML config files. Troubleshooting the automation in Home Assistant became easy with Traces and individual action testing to ensure everything works fine. What blew me away was that I could use automation in Home Assistant without extra hardware.


 English (US) ·