.png)
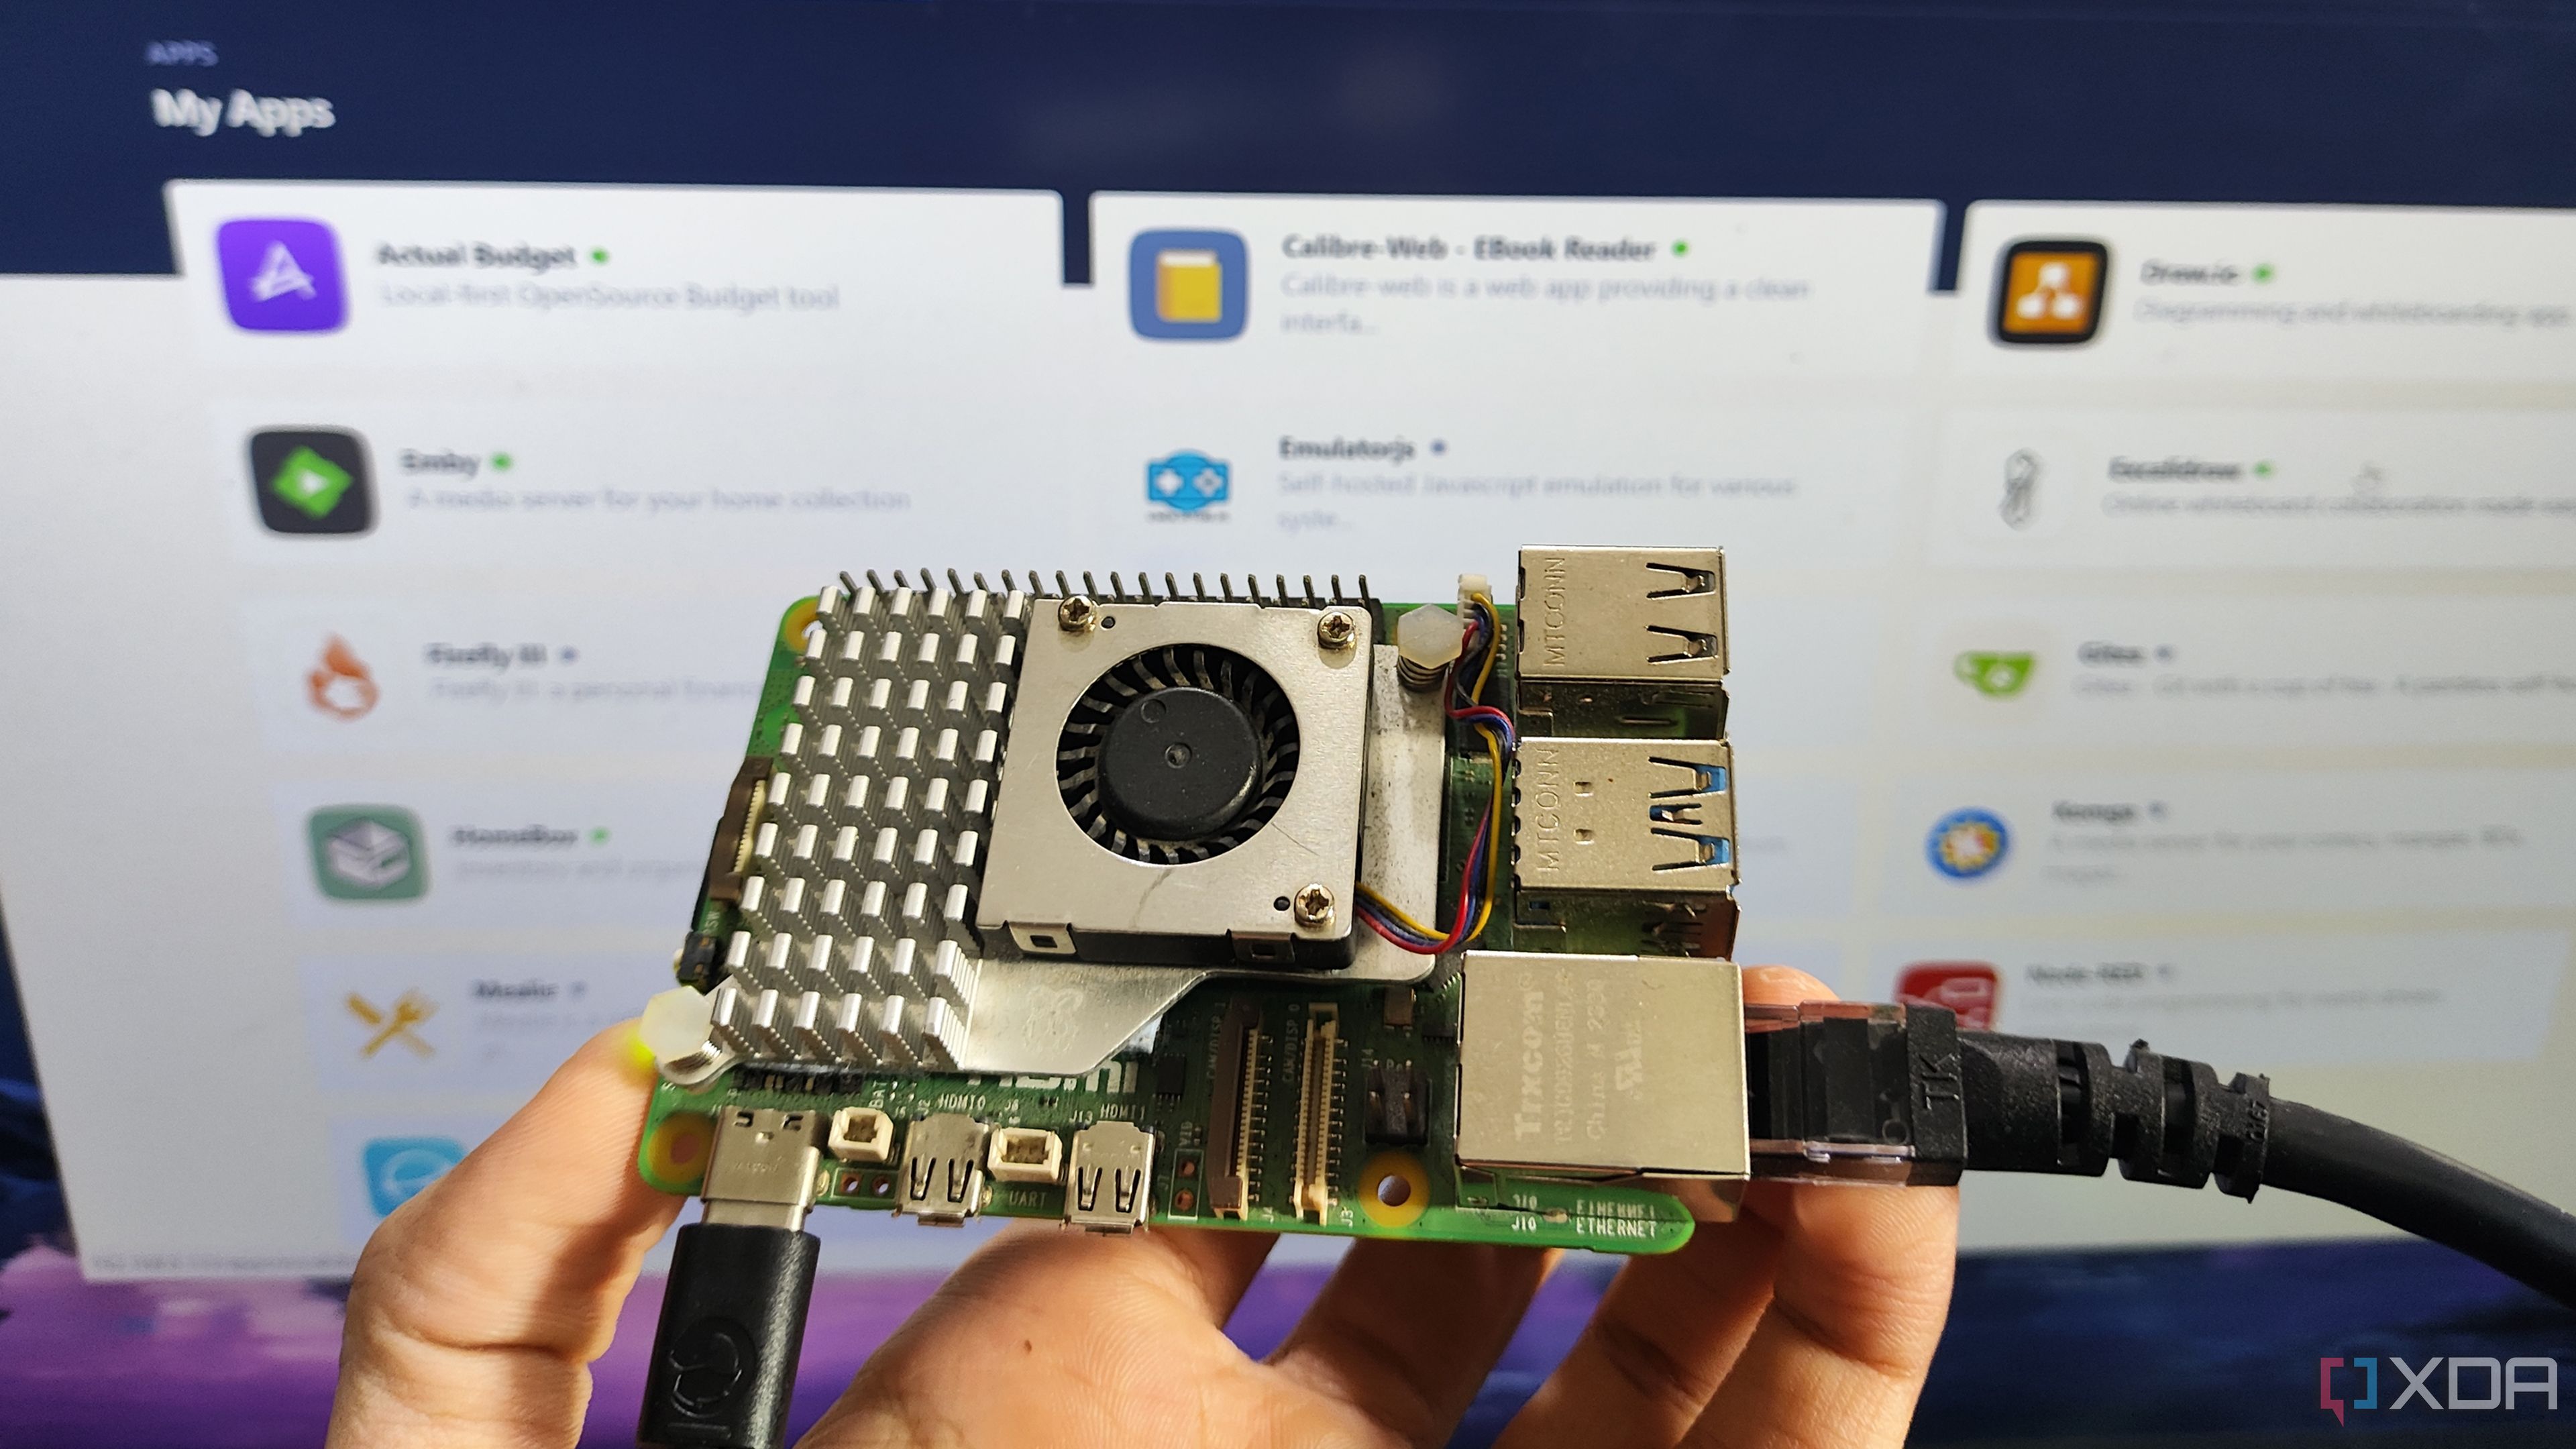
If you're just starting your journey into self-hosting with a Raspberry Pi, it's easy to feel overwhelmed by the options. The good news is that there are several tools explicitly built with beginners in mind. These tools simplify setup, reduce the need for complex configurations, and help you learn without getting stuck on technical roadblocks. Whether you're hosting media, monitoring services, or just trying to understand the basics, these software tools will make the process easier and more enjoyable.
Related
I use these 5 tools to turn my Raspberry Pi into a self-hosting behemoth
Even a Raspberry Pi can become a containerization war machine with the right set of apps
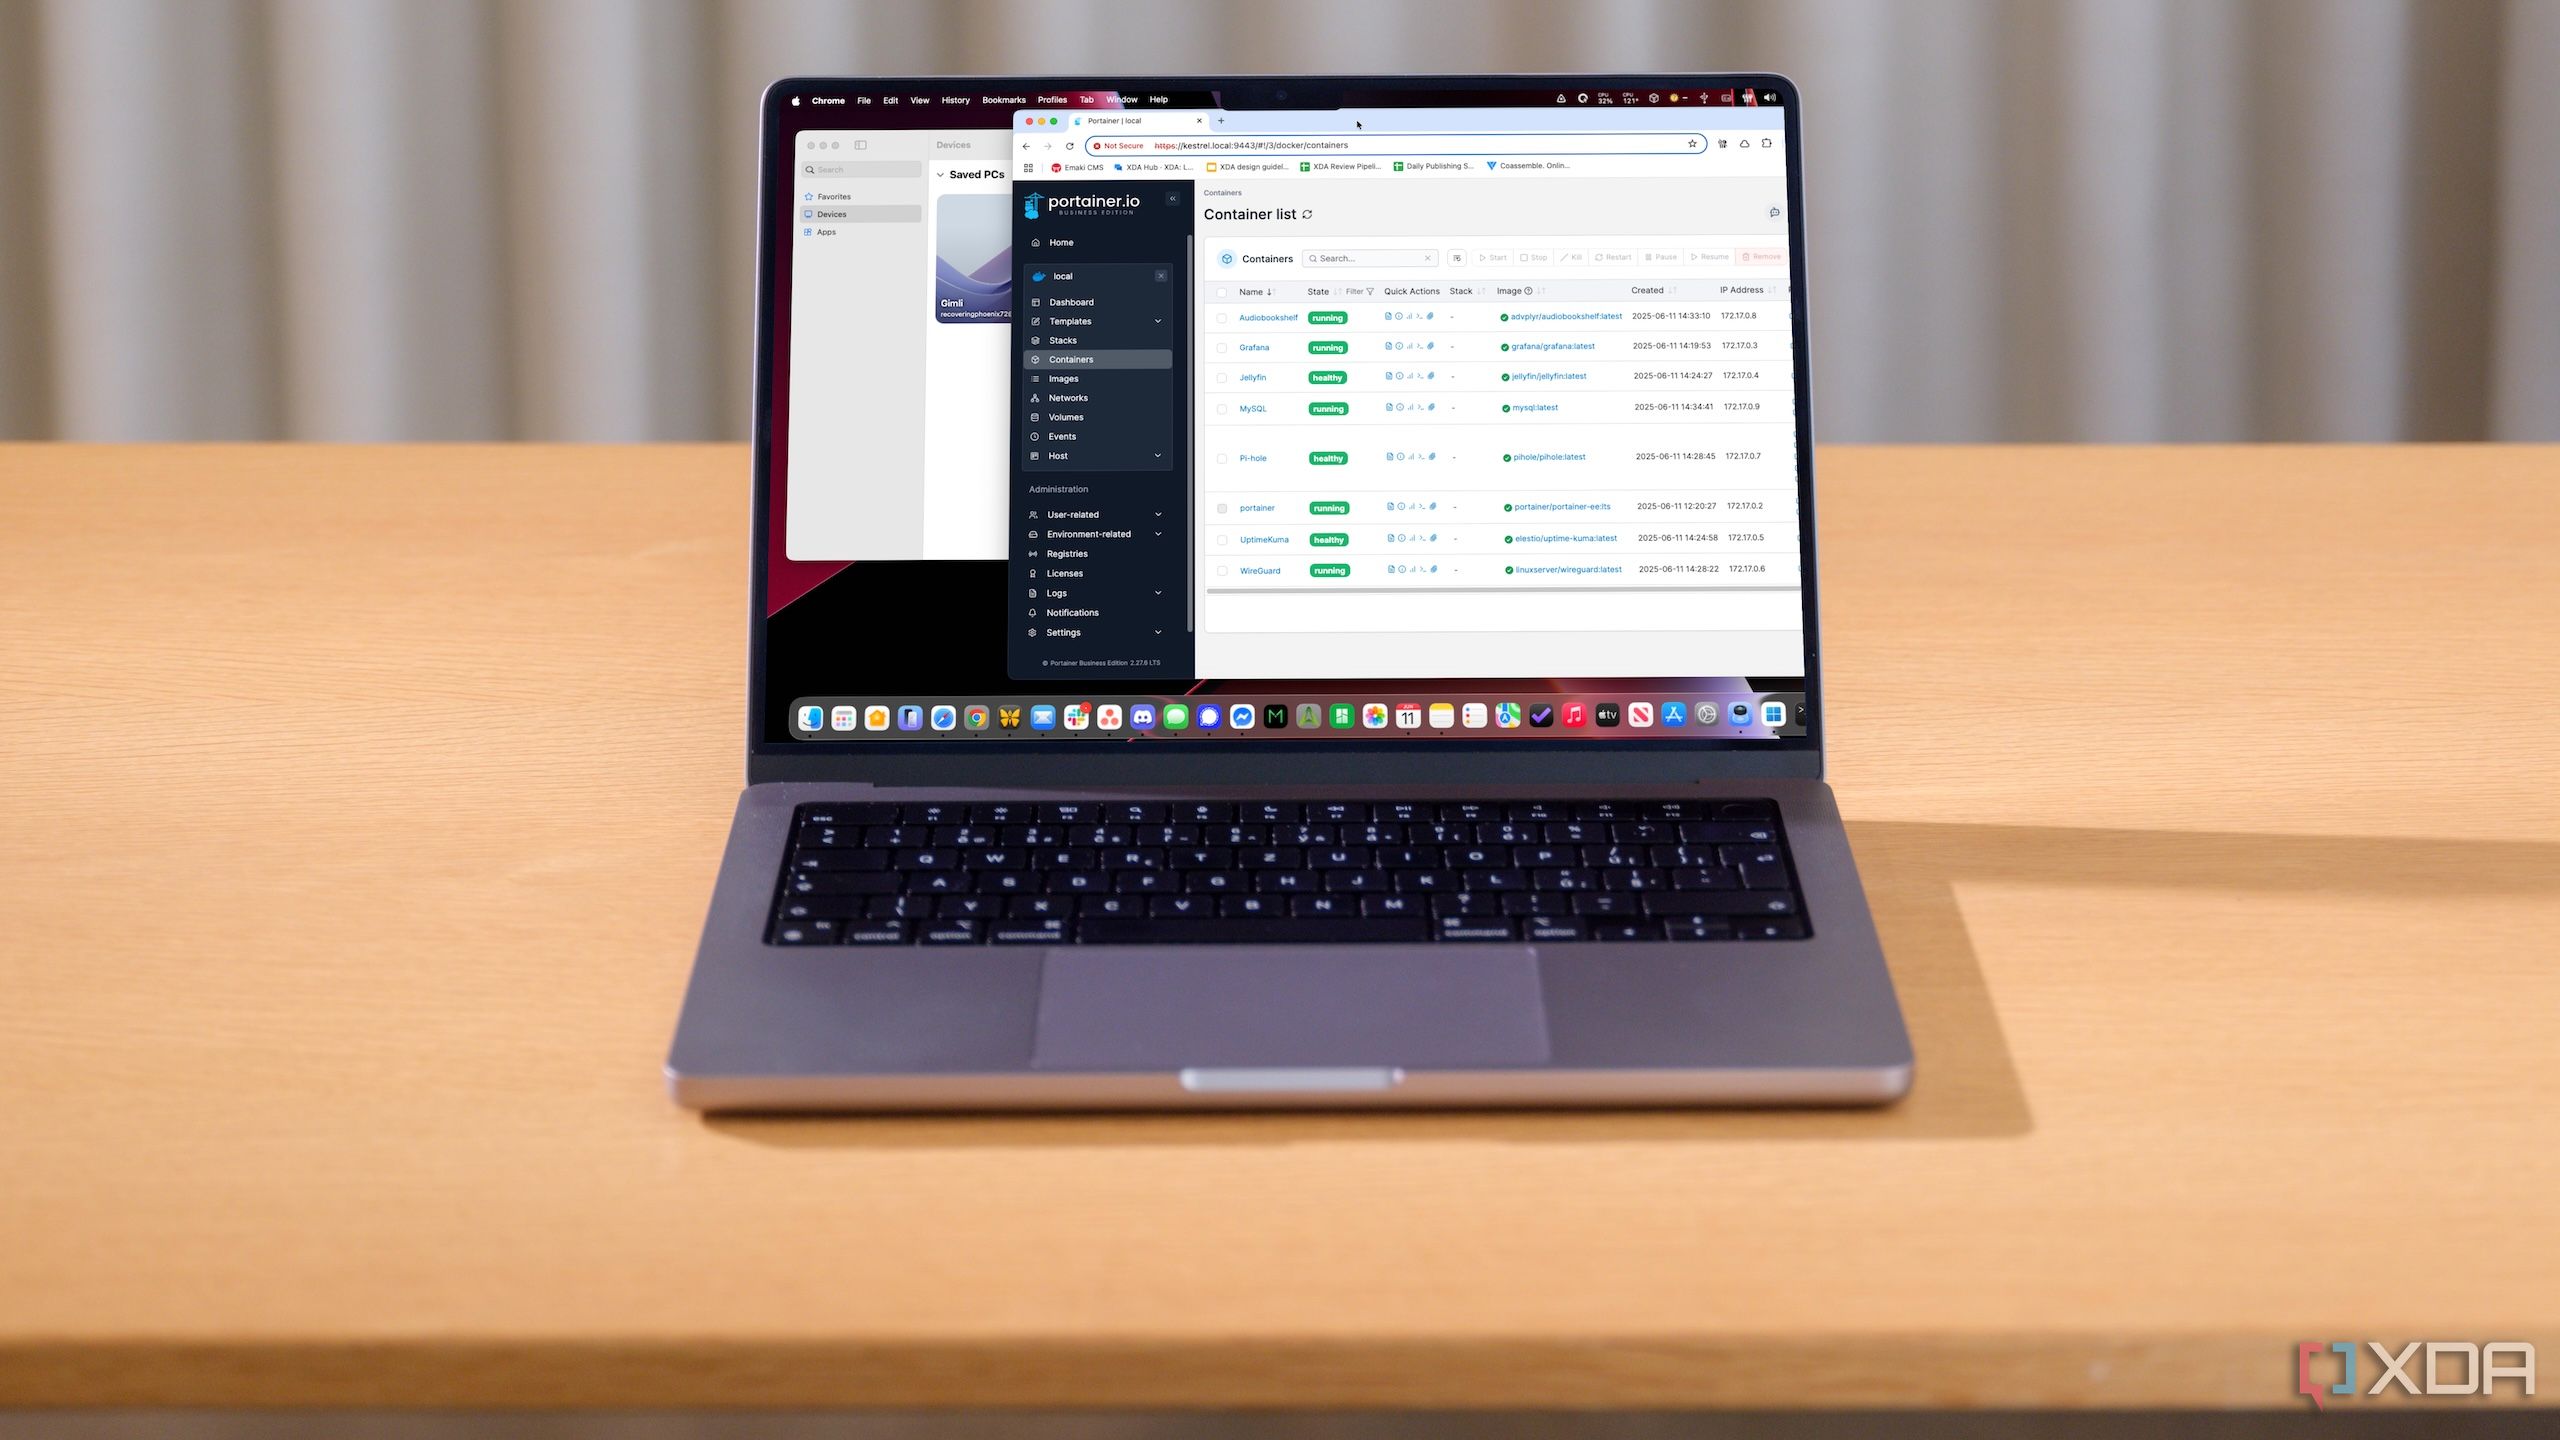
5 Portainer makes Docker easier to manage
A clean interface to control containers and stacks
Portainer is one of the best ways to manage Docker containers on a Raspberry Pi, eliminating the need for command-line tasks. Its web interface lets you deploy containers, monitor performance, and configure networks with just a few clicks. It's especially helpful when you're running multiple services and want a clear overview of their performance. Beginners will appreciate how Portainer demystifies Docker concepts that might otherwise be hard to understand.
Installing Portainer is straightforward and only takes a few minutes using Docker. Once it's running, you can access the dashboard from any web browser on your network. It also supports Docker Compose, which means you can deploy complex stacks like WordPress or Nextcloud with minimal effort. As your skills grow, you'll still find Portainer helpful thanks to its advanced features.
One of its biggest strengths is that it doesn't lock you into a particular ecosystem. You can mix and match containers from different sources, experiment with new images, and rollback changes easily. For someone new to self-hosting, Portainer strikes a nice balance between simplicity and power. It lets you focus on learning and experimenting instead of getting bogged down in the details.
4 Pi-hole blocks ads and trackers
Lightweight DNS-level filtering for your network
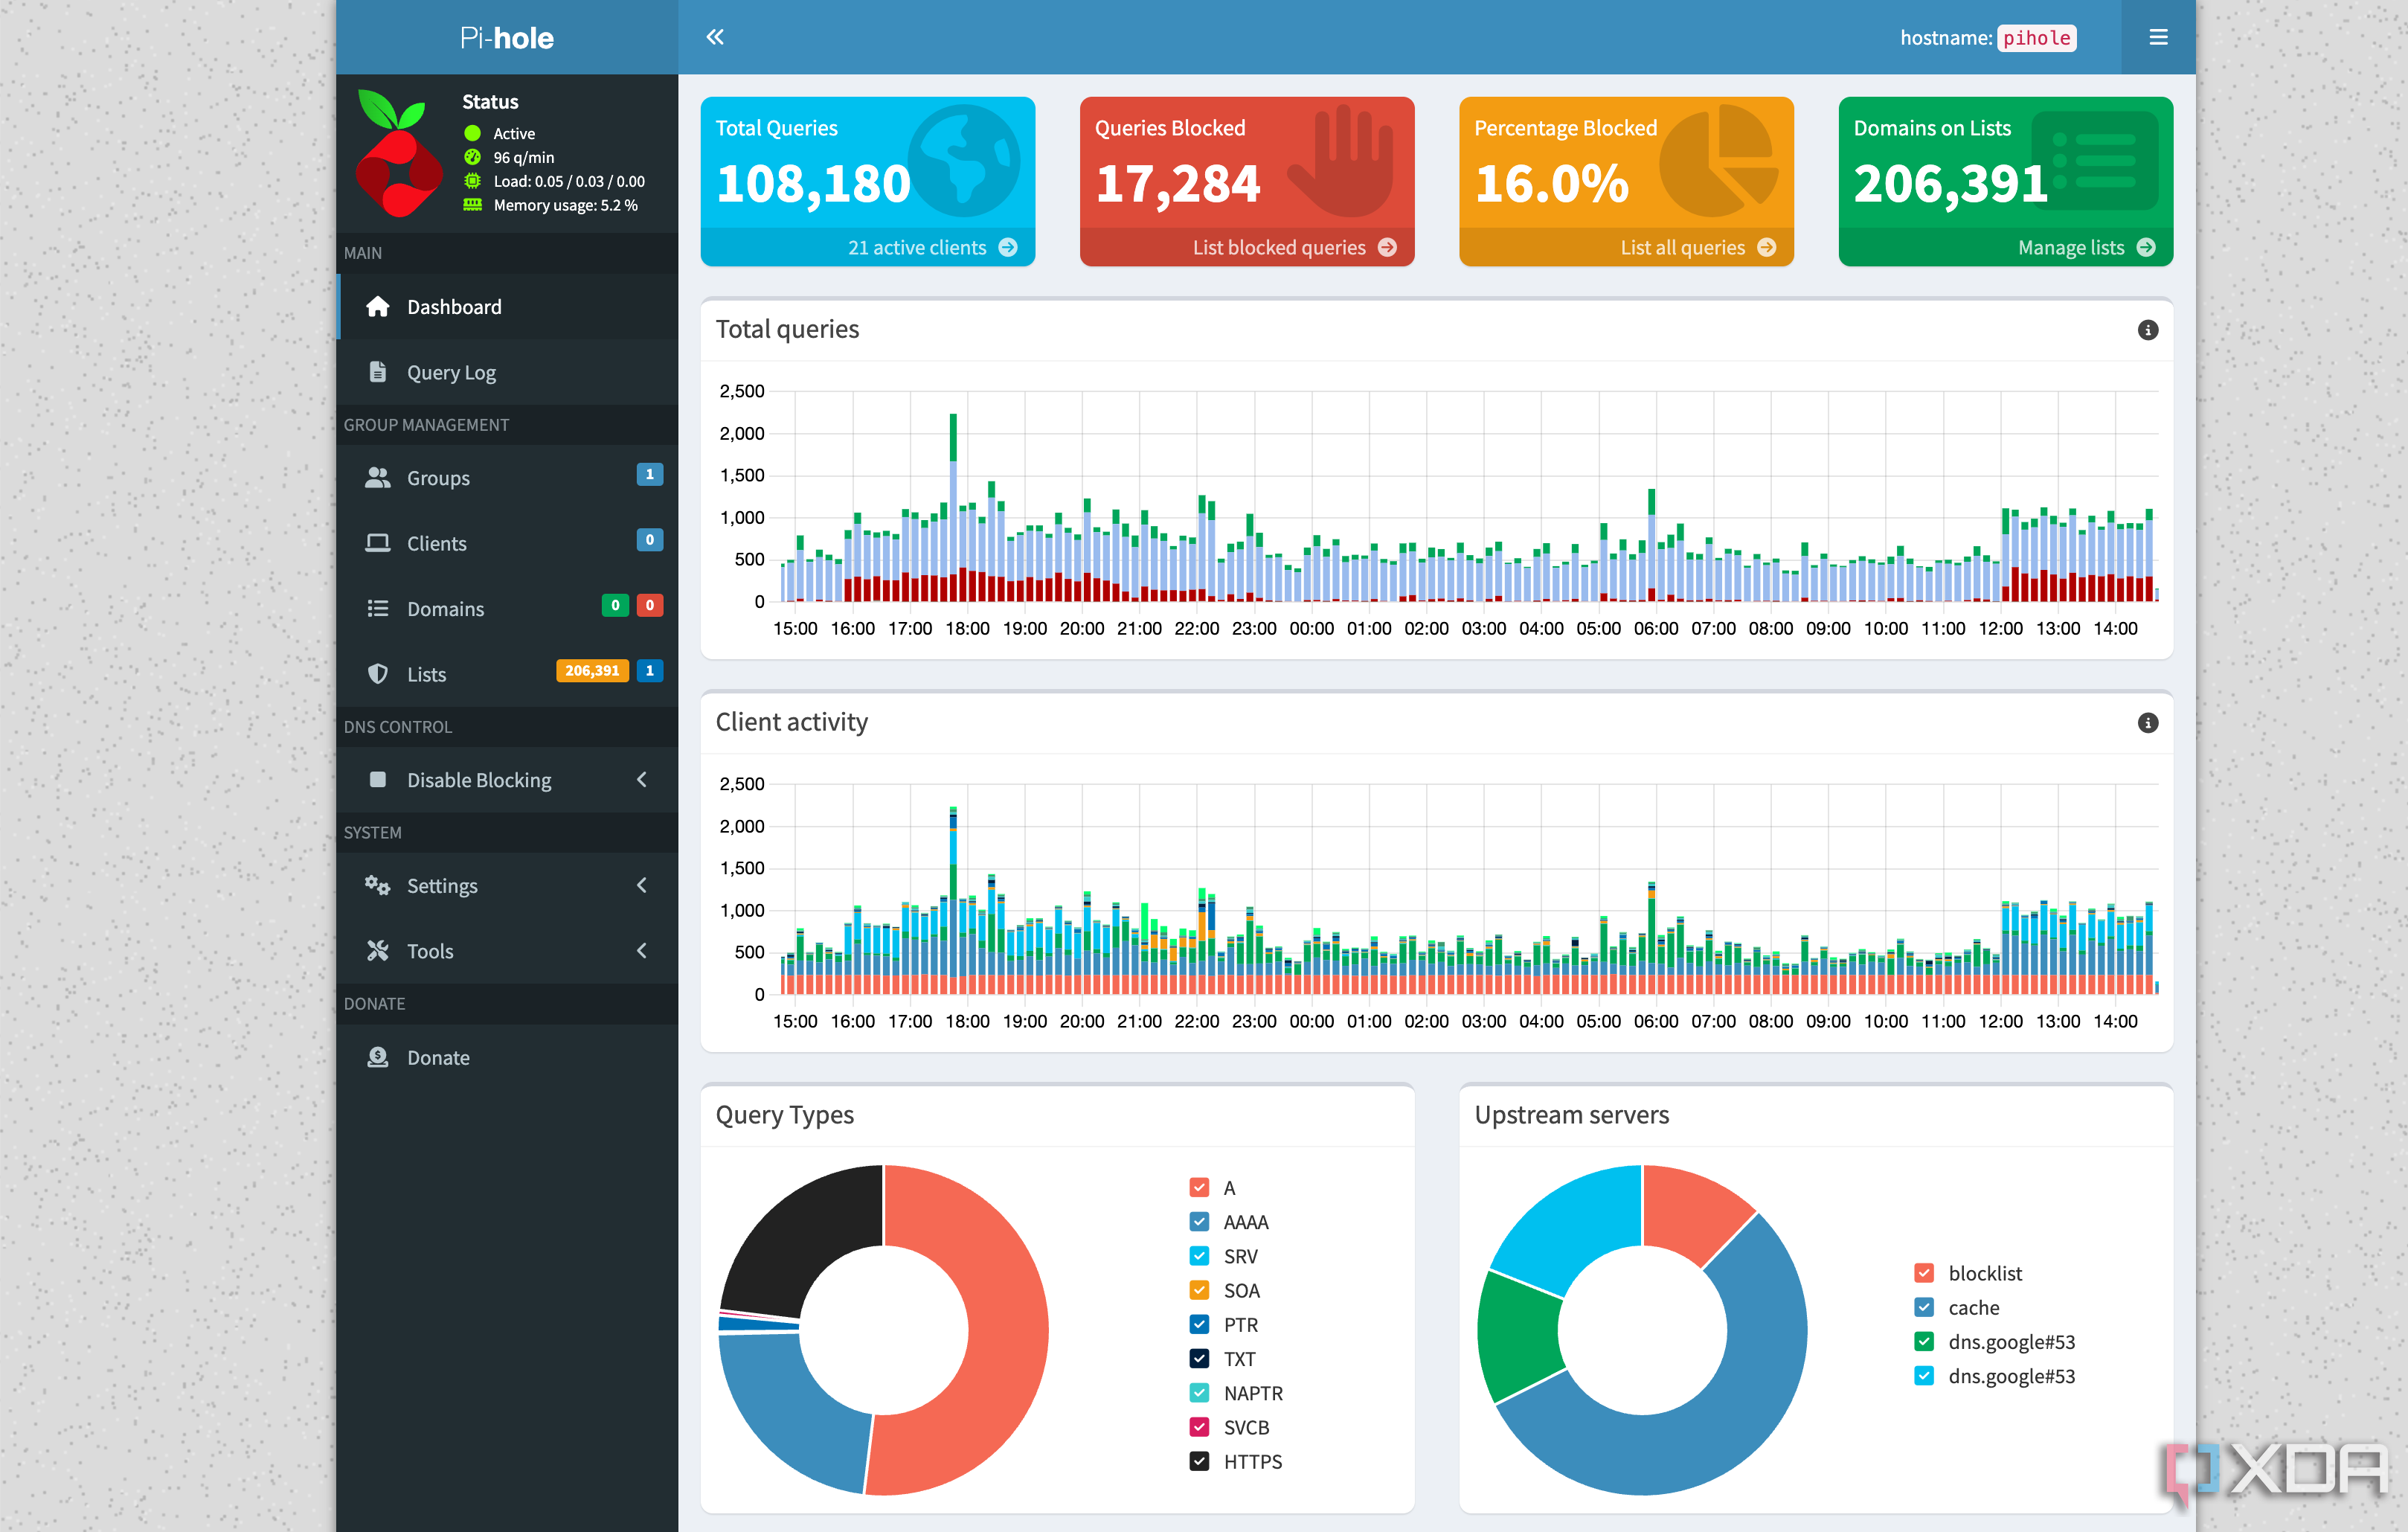
Pi-hole is a great starter project because it offers immediate, visible benefits. Once set up, it filters out ads, trackers, and even malicious domains for every device on your network. You don't need to install anything on your phone or laptop. It works as a local DNS server, quietly improving your browsing experience behind the scenes.
You can install Pi-hole in under 15 minutes, and the web interface is intuitive enough that even first-time users can manage block lists and view network stats. You'll start to see how devices connect to the Internet and which domains they talk to, giving you better control over your digital footprint. It's an easy entry point into network-level management without requiring a deep understanding of how DNS works.
For many beginners, Pi-hole also opens the door to more advanced projects. You might start exploring Unbound for DNS recursion or pair it with a VPN for ad-blocking away from home. It's a self-hosted tool that scales well with your curiosity. And since it uses very little power, it runs perfectly on even the smallest Raspberry Pi models.
3 Uptime Kuma tracks service availability
Beautiful uptime monitoring for self-hosted apps
Uptime Kuma helps you keep an eye on all your self-hosted services with simple status checks and elegant dashboards. It can ping your other Raspberry Pi apps, websites, or even remote servers and let you know if something goes down. For beginners, it's a great way to get into the habit of monitoring your own infrastructure. The alerts can be sent via email, Telegram, Discord, and many other channels.
Related
My home lab wouldn’t be the same without these 7 Docker containers
Nothing in my home would run as smoothly as it does if I hadn't deployed these Docker containers
What sets Uptime Kuma apart is its beginner-friendly interface. You can add a new monitor with just a few fields, and the default settings are usually all you need to get started. Once you have a few monitors set up, you can start experimenting with more advanced types like HTTP keyword, checks, or port-specific probes. It's a safe, low-risk environment for learning how to think like a system administrator.
Running Uptime Kuma on a Raspberry Pi doesn't require much in the way of resources. It performs well, even on a Pi Zero 2W, especially if it’s the only major service running. Over time, you'll start using it as a health dashboard for your network. It helps reinforce the importance of reliability and provides early warning signs when something requires your attention.
2 Nextcloud gives you private cloud storage
Host your own calendar, files, and photos
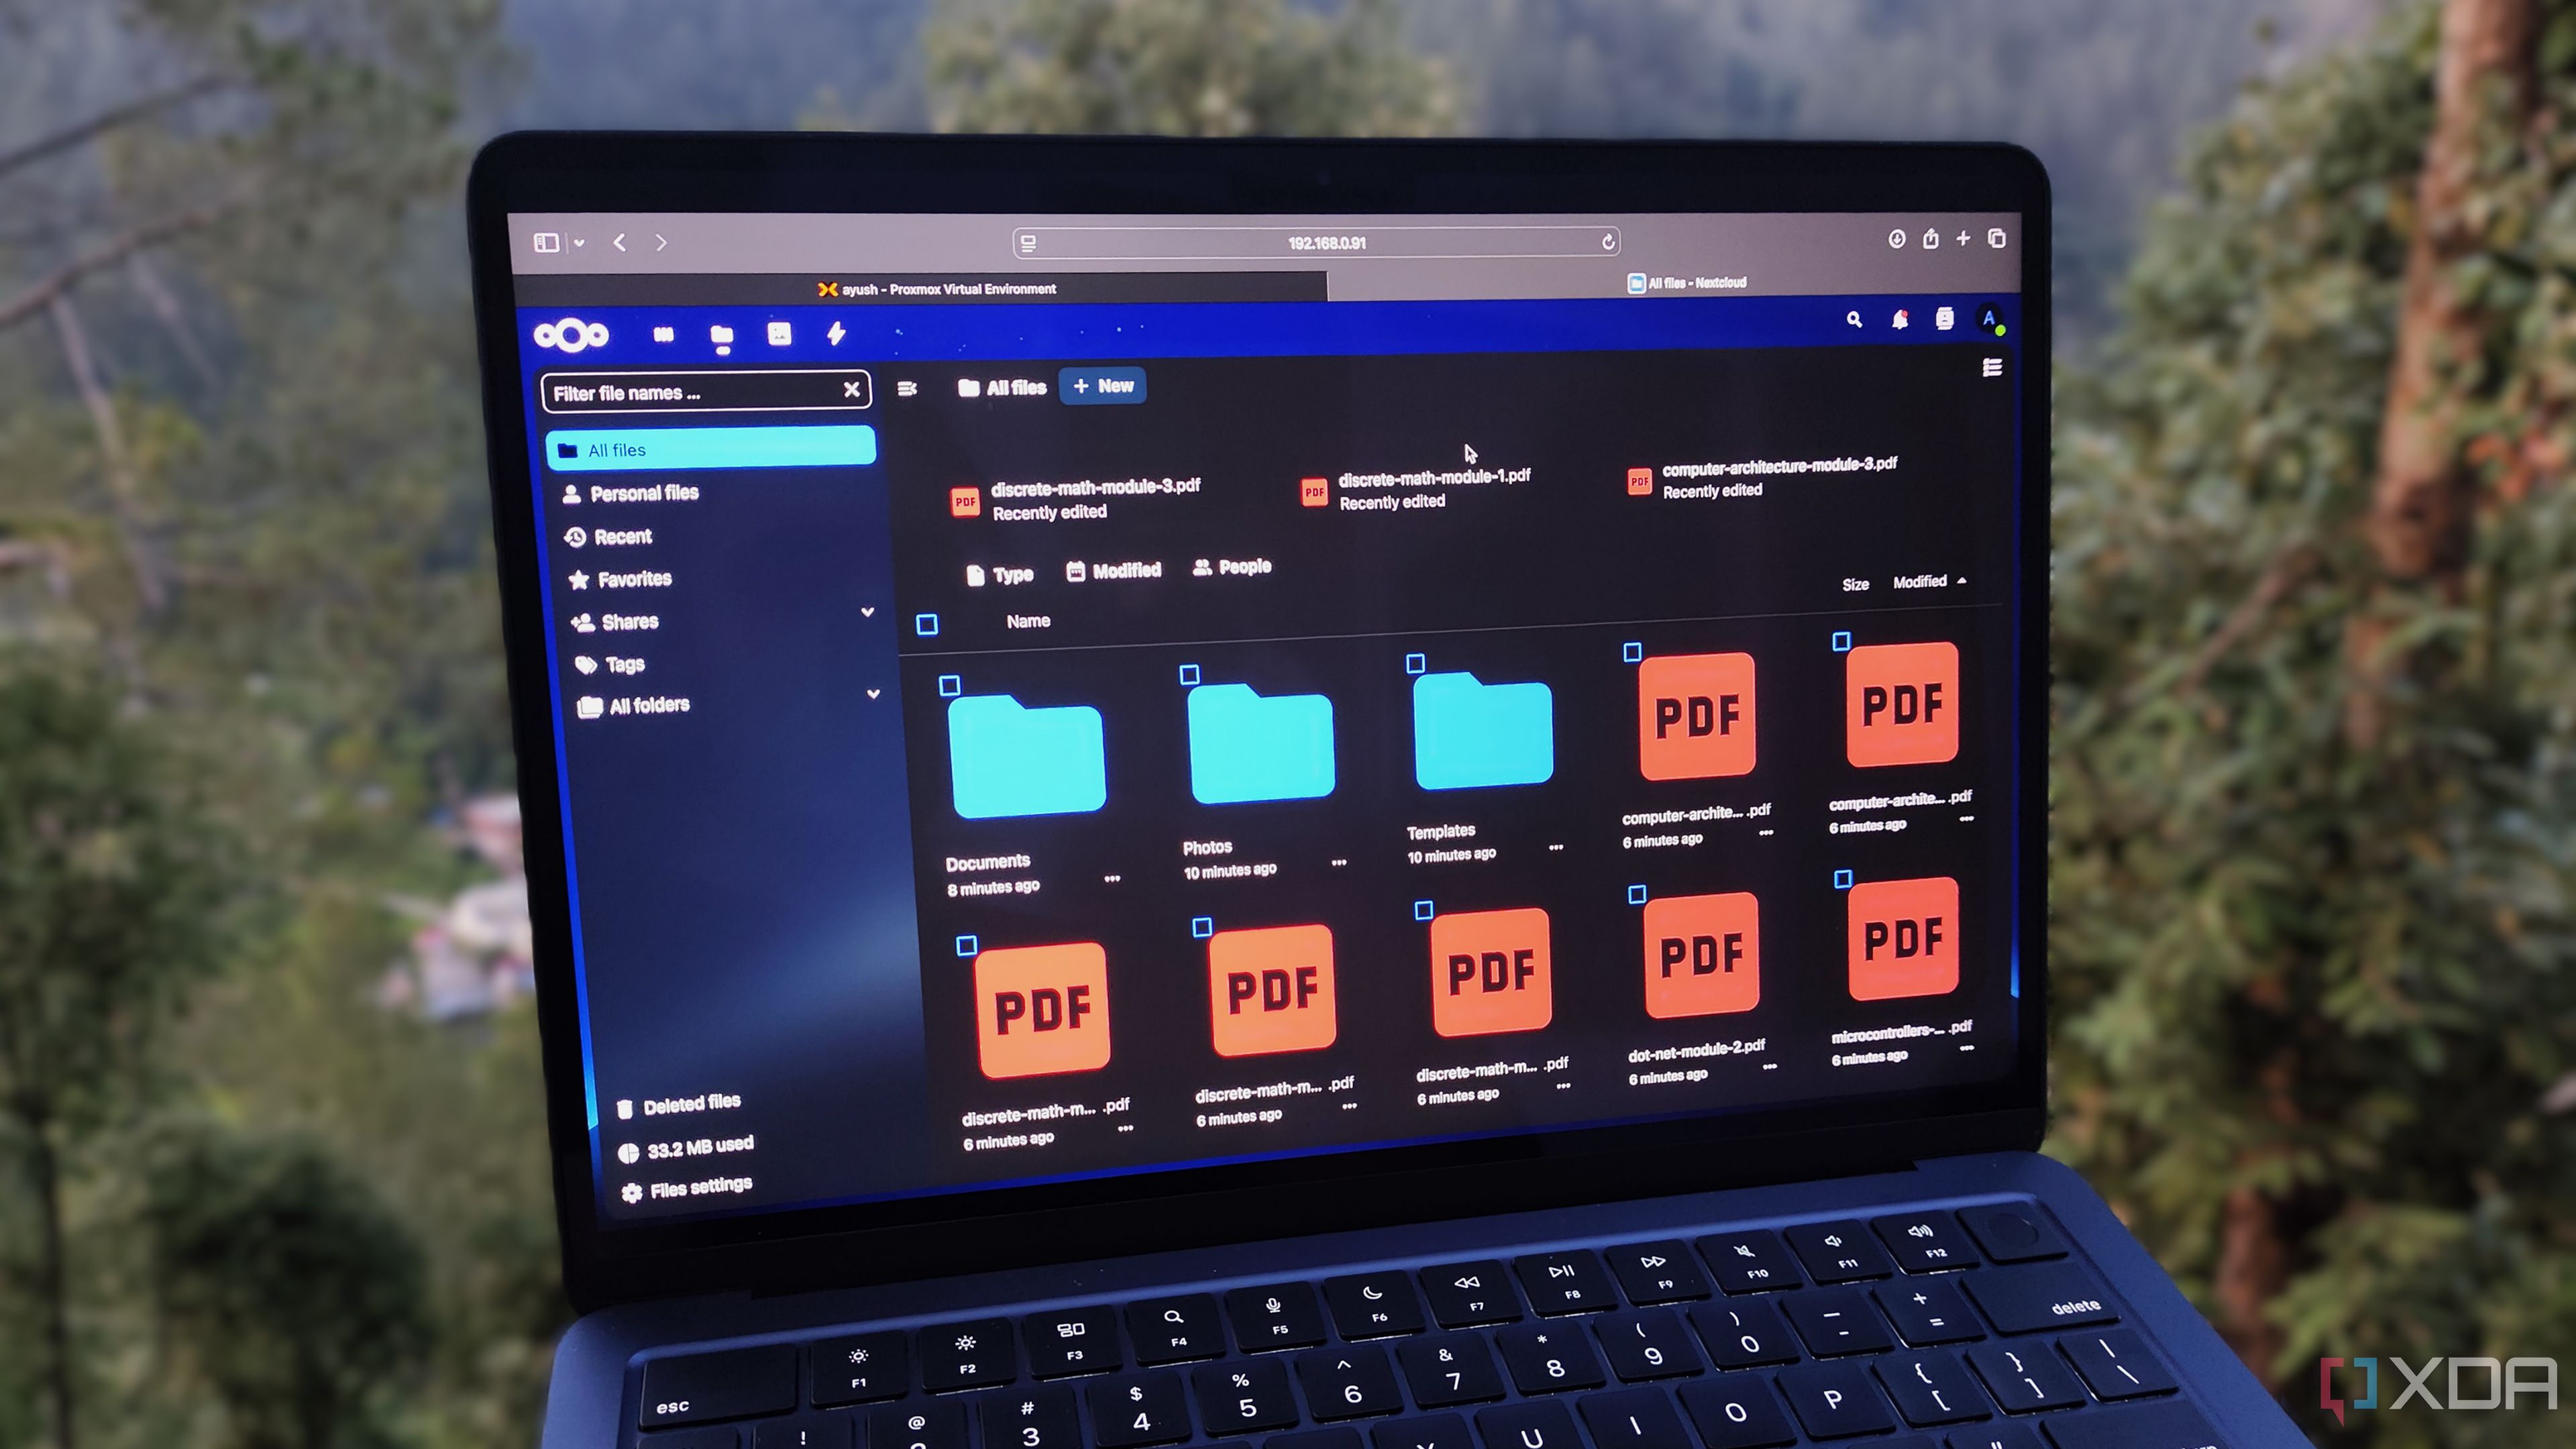
Nextcloud turns your Raspberry Pi into a personal cloud server, where you control your data. You can store files, sync calendars and contacts, and even stream music and videos. It's a compelling alternative to Google Drive or Dropbox, especially for privacy-minded users. While it's more resource-intensive than the other tools here, it's absolutely doable on a Raspberry Pi 4B with decent storage.
The web-based installer walks you through account setup, and from there, you can start syncing your devices using desktop and mobile apps. The core features work well out of the box, but the real fun begins when you explore its App Store. You'll find tools for notetaking, password management, photo galleries, and more. It's a fantastic way to build your own digital workspace, piece by piece.
For beginners, Nextcloud teaches valuable lessons about user permissions, SSL certificates, and storage optimization. As your usage grows, you'll likely start thinking more seriously about backups and system security. While it has a bit more of a learning curve than other tools on this list, the payoff is well worth it. You'll end up with a deeply customizable cloud solution that doesn't rely on anyone else's servers.
1 HomeBox keeps your home lab organized
Inventory, credentials, and documentation in one place
HomeBox is a more recent self-hosted app designed to help you document and manage your home lab hardware and software. It's a tidy solution for tracking your devices, credentials, IP addresses, and even licensing details. If you've already started tinkering with multiple Raspberry Pis, smart devices, or mini PCs, this tool helps you keep things straight. The interface is clean, and the layout is easy to understand.
You can tag devices, assign ownership, and attach notes or login details. It becomes a one-stop hub for your lab's documentation, which is especially helpful if you experiment frequently. As a beginner, this helps you develop good habits from the start. These are the habits that will pay off later when your network grows. Forgetting a static IP address or SSH password becomes less likely when everything is logged correctly.
HomeBox also supports user roles and simple data exports, so it scales well if you start working with others or want to back up your inventory. It's not flashy or overbuilt, which makes it approachable for people just starting to build their own home infrastructure. Hosting it on a Raspberry Pi provides the portability and reliability it needs to be your go-to resource for device management. Even better, you may find that you use HomeBox to keep an overall inventory of everything in your home.
Start simple, grow at your own pace
Getting into self-hosting with a Raspberry Pi doesn't have to be a huge technical challenge. Tools like Portainer, Pi-hole, Uptime Kuma, Nextcloud, and HomeBox are perfect starting points. They're easy to install, offer real-world benefits, and encourage you to explore more advanced concepts at your own pace. Best of all, they let you take more ownership of your digital life from the start.


 English (US) ·