.png)
Getting started with Docker can feel intimidating, especially when you're staring at the command line trying to remember the proper syntax. Portainer streamlines the entire process by providing a straightforward, visual interface for managing containers, images, volumes, networks, and more. If you’re just starting your Docker journey, Portainer is the ideal platform to gain confidence and begin experimenting without risk. Before you dive into running complex stacks, these five steps will help lay the groundwork for everything else you'll do.

Related
5 Connect Portainer to your Docker host
Make sure your environment is properly configured
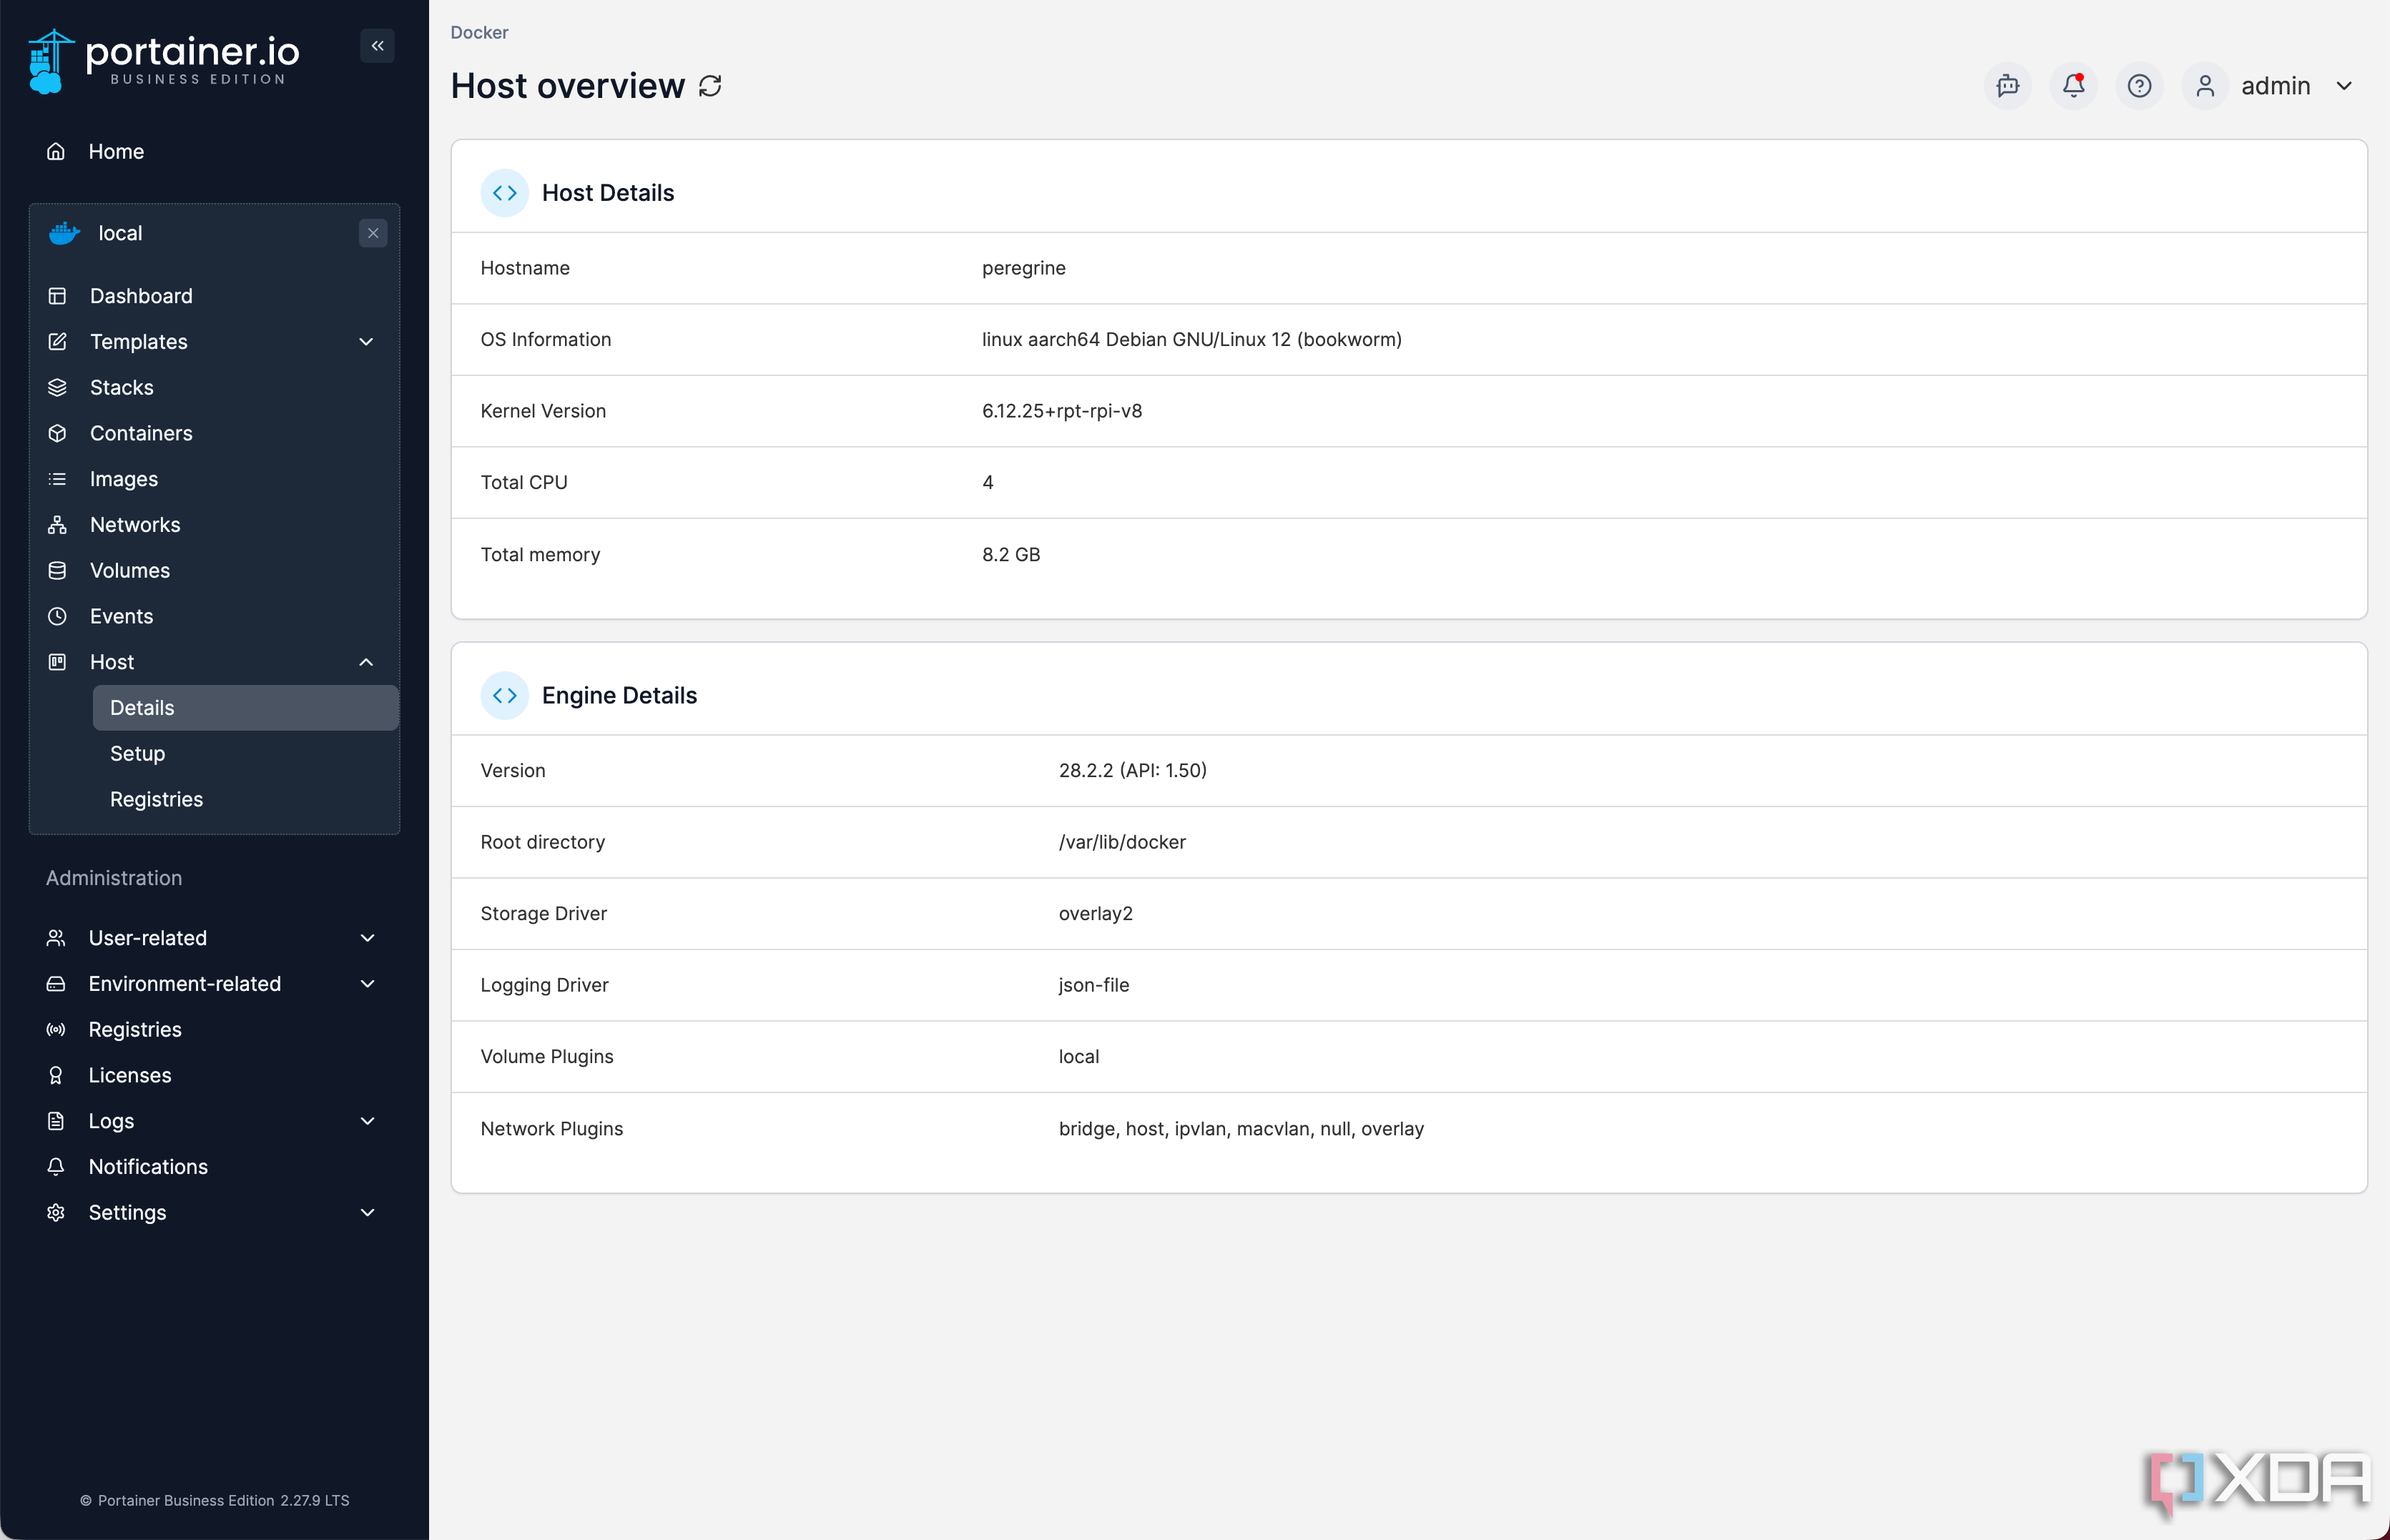
Once you have installed Portainer, your first task is to connect it to your Docker environment. If you installed Docker and Portainer on the same machine, selecting the local environment is usually enough. For remote Docker hosts, Portainer offers connection options over TCP or SSH, and it only takes a few fields to set up. The key is ensuring that Portainer can communicate with the Docker socket, allowing it to see and manage containers.
If you’re entirely new to Docker and Portainer, your best choice is to start with a local environment first. Remote Docker administration can be tricky, so it’s best to learn the simple basics of a local environment first. Walk before you run, you know?
After connecting, visit the dashboard to verify everything is working as expected. The environment summary displays your host’s status, Docker version, CPU usage, memory consumption, and the number of running and stopped containers. It's a great way to get familiar with your environment's baseline. Even if you’re only running one or two containers at first, this view gives you a good sense of what’s normal.
You’ll also see a list of system resources, such as volumes and networks, along with the containers that are using them. This helps you keep track of how your system is structured and can alert you to orphaned resources later on. Getting comfortable navigating this interface makes troubleshooting much easier down the road. It’s worth taking the time now to explore the dashboard and understand what each section represents.
4 Deploy your first container manually
Learn by launching a simple container
One of the best ways to learn Docker is by manually deploying a single container through Portainer. Choose a lightweight image, such as Nginx or Alpine, to start. These require minimal configuration and give you a feel for the options Portainer provides during container creation. You’ll walk through selecting an image, mapping ports, setting environment variables, and choosing whether to restart the container automatically.
As you work through this, pay attention to how each option affects the container. For example, if you publish port 80 to your host, you can visit that port in your browser to see your container in action. Mounting a volume lets you persist data or serve static content without modifying the container itself. Every checkbox and input field in Portainer’s container wizard is tied directly to a Docker flag or argument, so it’s also a good learning tool.
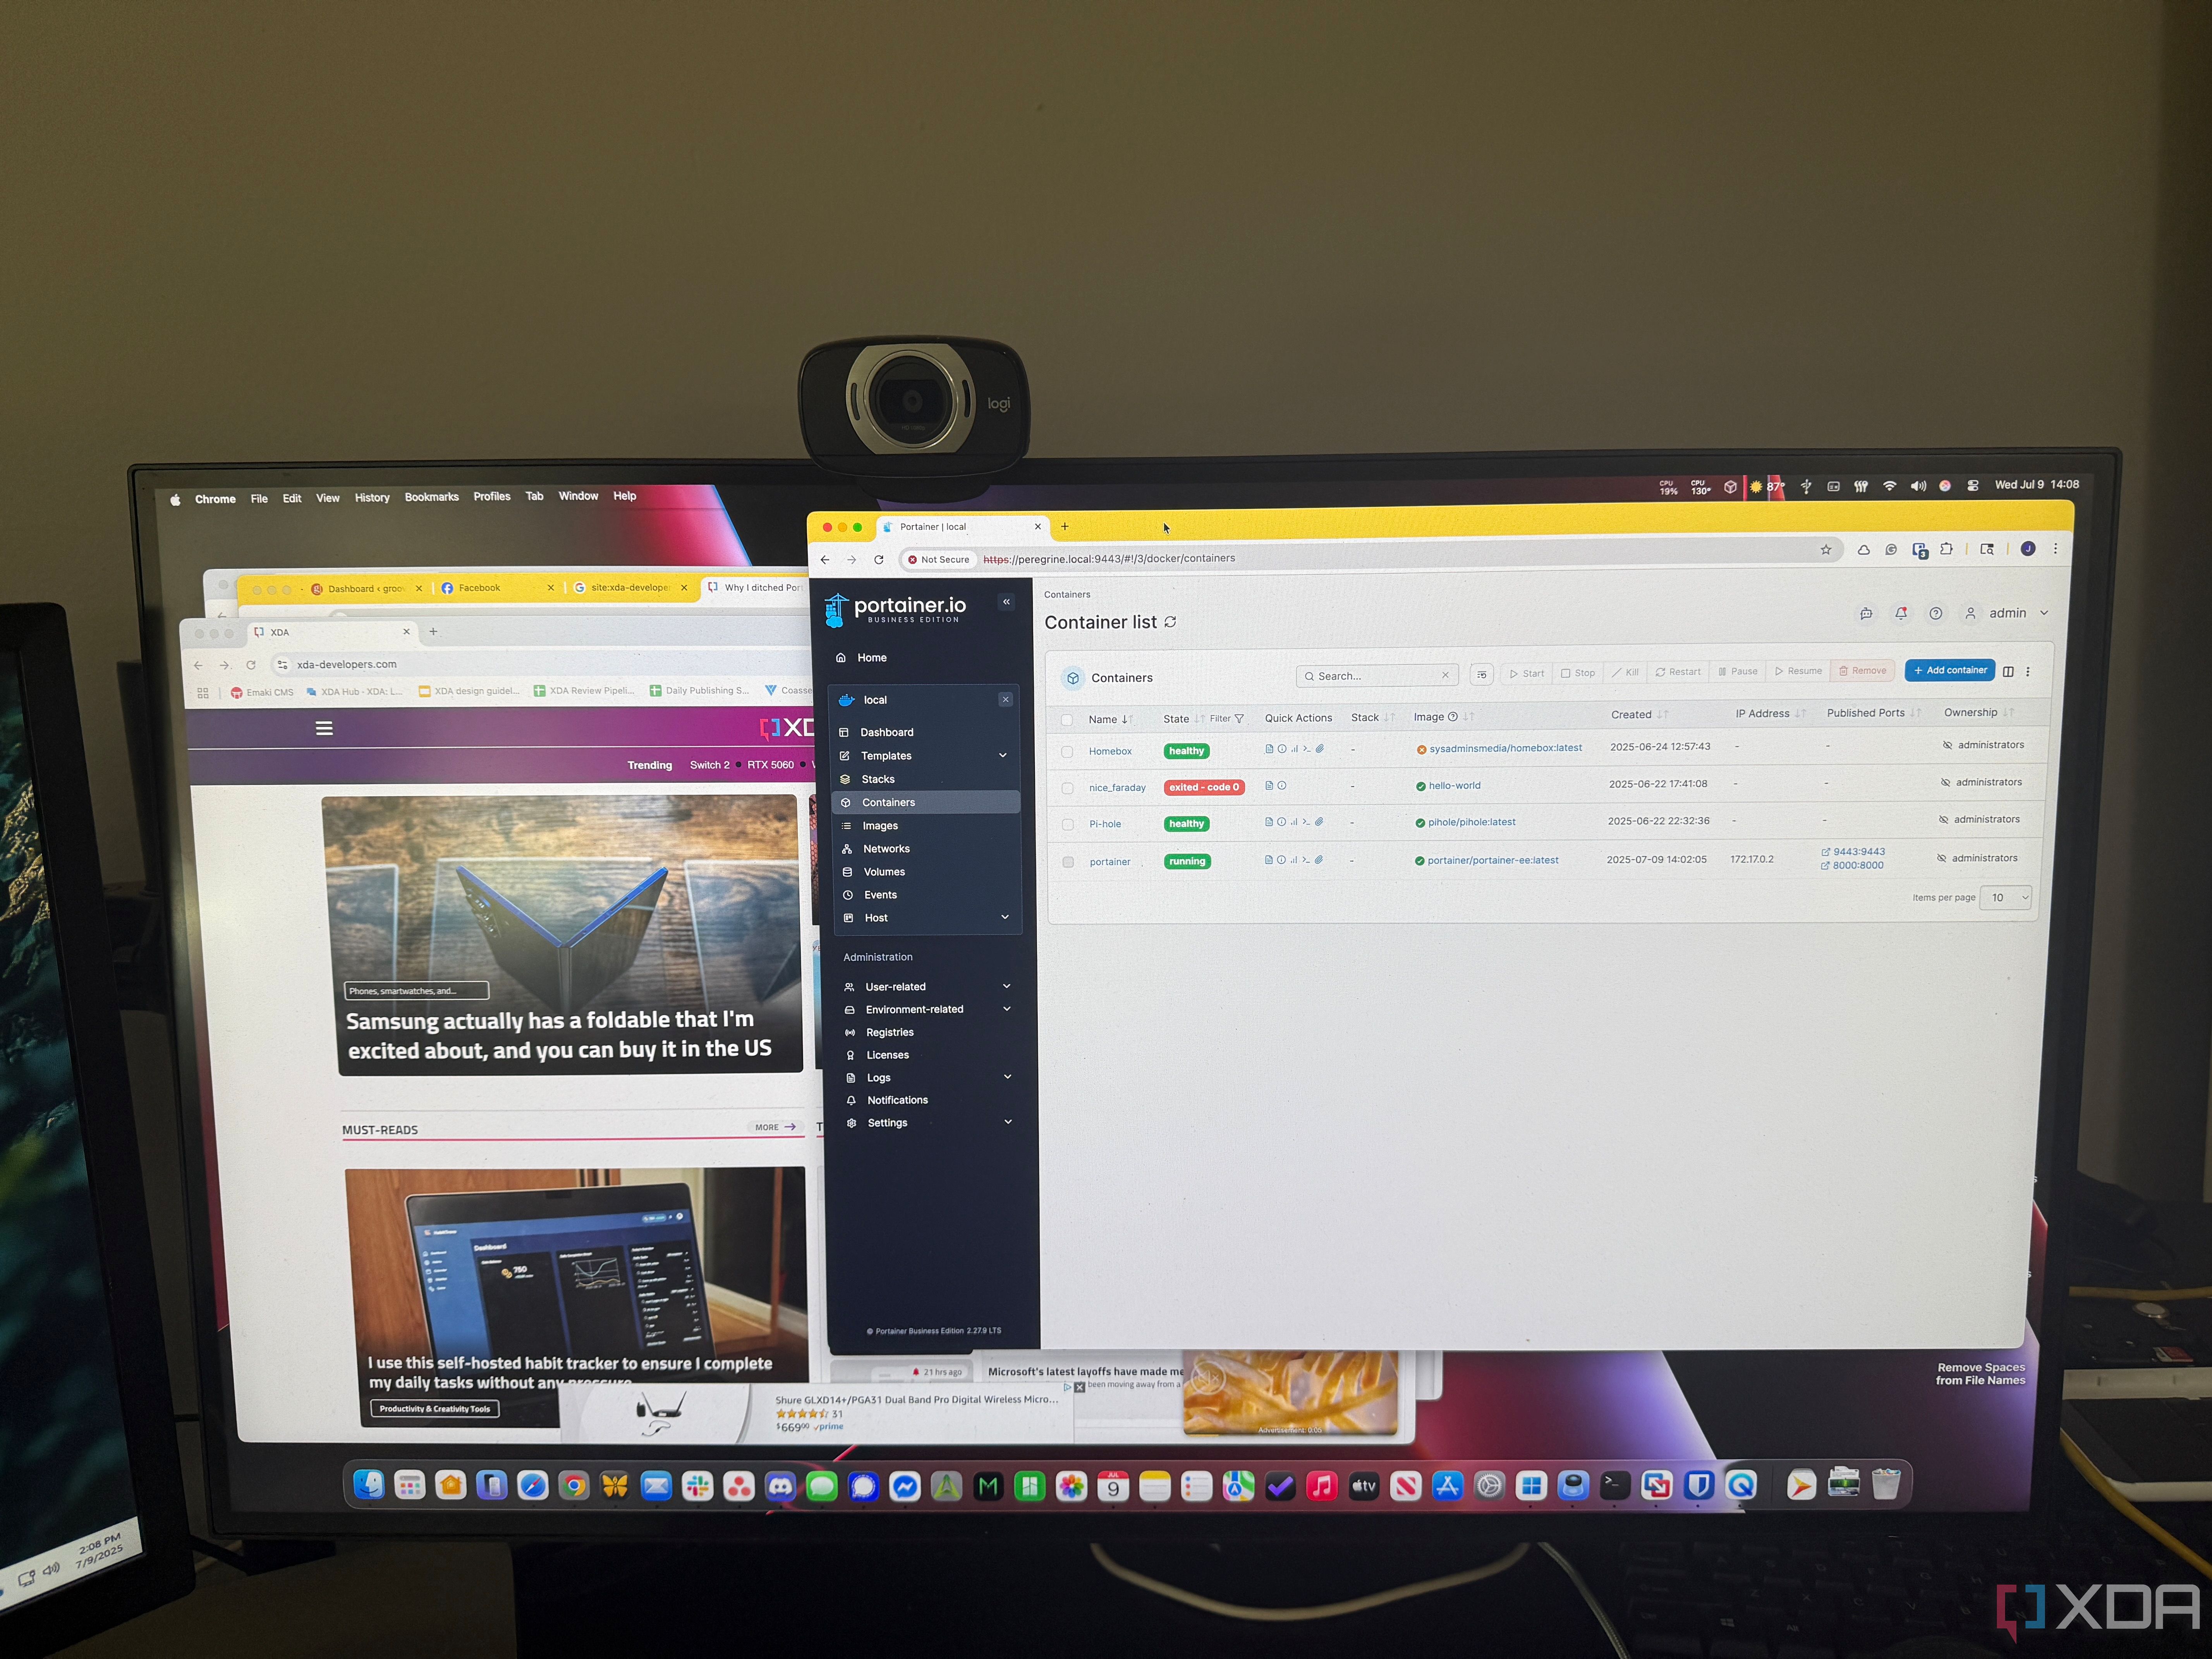
Once your container is up and running, explore the management tools Portainer provides. You can view live logs, enter a terminal session inside the container, inspect metadata, and stop or restart it at will. These features give you a safe place to experiment and understand what’s happening behind the scenes. You can also remove the container entirely and try again with different settings to see how changes affect behavior.
3 Set up persistent volumes
Keep container data safe and reusable

New Docker users often make the mistake of storing data directly inside containers. That works fine for throwaway experiments, but any application that handles user input, configuration files, or databases needs persistent storage. Portainer makes this easy by letting you create and manage named volumes through its interface. You can do this from the Volumes menu or during the container creation process.
When creating a volume, assign it a clear and descriptive name that accurately reflects its purpose. Then mount it to the appropriate path inside the container. For example, if you’re running a MySQL container, you’ll want to mount a volume to /var/lib/mysql to preserve the database between restarts. Without that, deleting the container would wipe out all your data.
Once created, volumes are reusable across containers, and Portainer lets you see which ones are in use. This visibility is essential when managing updates or cleaning up unused resources. You can even browse inside volumes directly from the UI if Portainer is running with sufficient permissions. Getting into the habit of using volumes early will help you avoid frustrating data losses later on.
2 Create your first stack with a compose file
Use stacks to manage multi-container apps
Once you're comfortable with individual containers, it’s time to step into Docker Compose and deploy your first stack. A stack is a group of containers that work together, usually described in a docker-compose.yml file. Portainer gives you an easy way to paste in a Compose file, name the stack, and deploy everything with a single click. This is the preferred method for running anything beyond the simplest apps.
Writing a Compose file might seem tricky at first, but you can start with basic examples. You can define a web server and database, configure their ports, link them together on a custom network, and set up volumes all in one file. Portainer will read the YAML file and create each service accordingly. Once deployed, you’ll see all the containers listed under that stack, and you can manage them individually or as a group.
The stacks interface is handy for monitoring and debugging multi-container apps. You can view logs from each service, restart them individually, and even update the Compose file later to make changes. This workflow mirrors how containers are deployed in production environments, so learning it now gives you a significant advantage. It also makes complex projects feel more manageable by grouping related services.
1 Explore the app templates
Try popular containers with minimal setup
One feature that often goes overlooked by beginners is Portainer’s built-in app templates. These are pre-configured containers that you can deploy instantly, often with minimal input required. You’ll find templates for common tools like WordPress, Portainer Agent, and various developer tools. Choosing one of these is a fast way to get something useful running while you’re still learning the ropes.
Each template shows you which image it uses and which ports it will expose. You can modify these settings before deployment if you want more control. After launching, the container behaves just like any you created manually, so you can still access logs, consoles, and other tools. It’s a great way to reverse-engineer setups by inspecting how they were configured.
Templates are also a great way to explore use cases you might not have considered yet. If you’re curious about hosting a media server, password manager, or development environment, there’s probably a template to help you get started. You can treat these as learning opportunities or as fully functional tools to keep in your Docker toolkit. The more you explore, the more value you’ll get from them.
Start small, build your confidence gradually, and everything else will come easier
Portainer gives Docker newcomers a friendly, visual way to understand containers and related tools. Taking time to connect your environment properly, launch simple containers, and explore data persistence helps build good habits from the start. Trying out Compose stacks and templates rounds out your experience by showing you what’s possible. With each small win, you’ll gain the confidence to tackle more advanced projects.
These first five steps are more than just tips. They’re practical building blocks that lead to better Docker setups and fewer frustrating mistakes. As your needs grow, you’ll already have the skills and awareness to manage complexity with ease. Keep experimenting, and Portainer will grow right along with you.


 English (US) ·