.png)
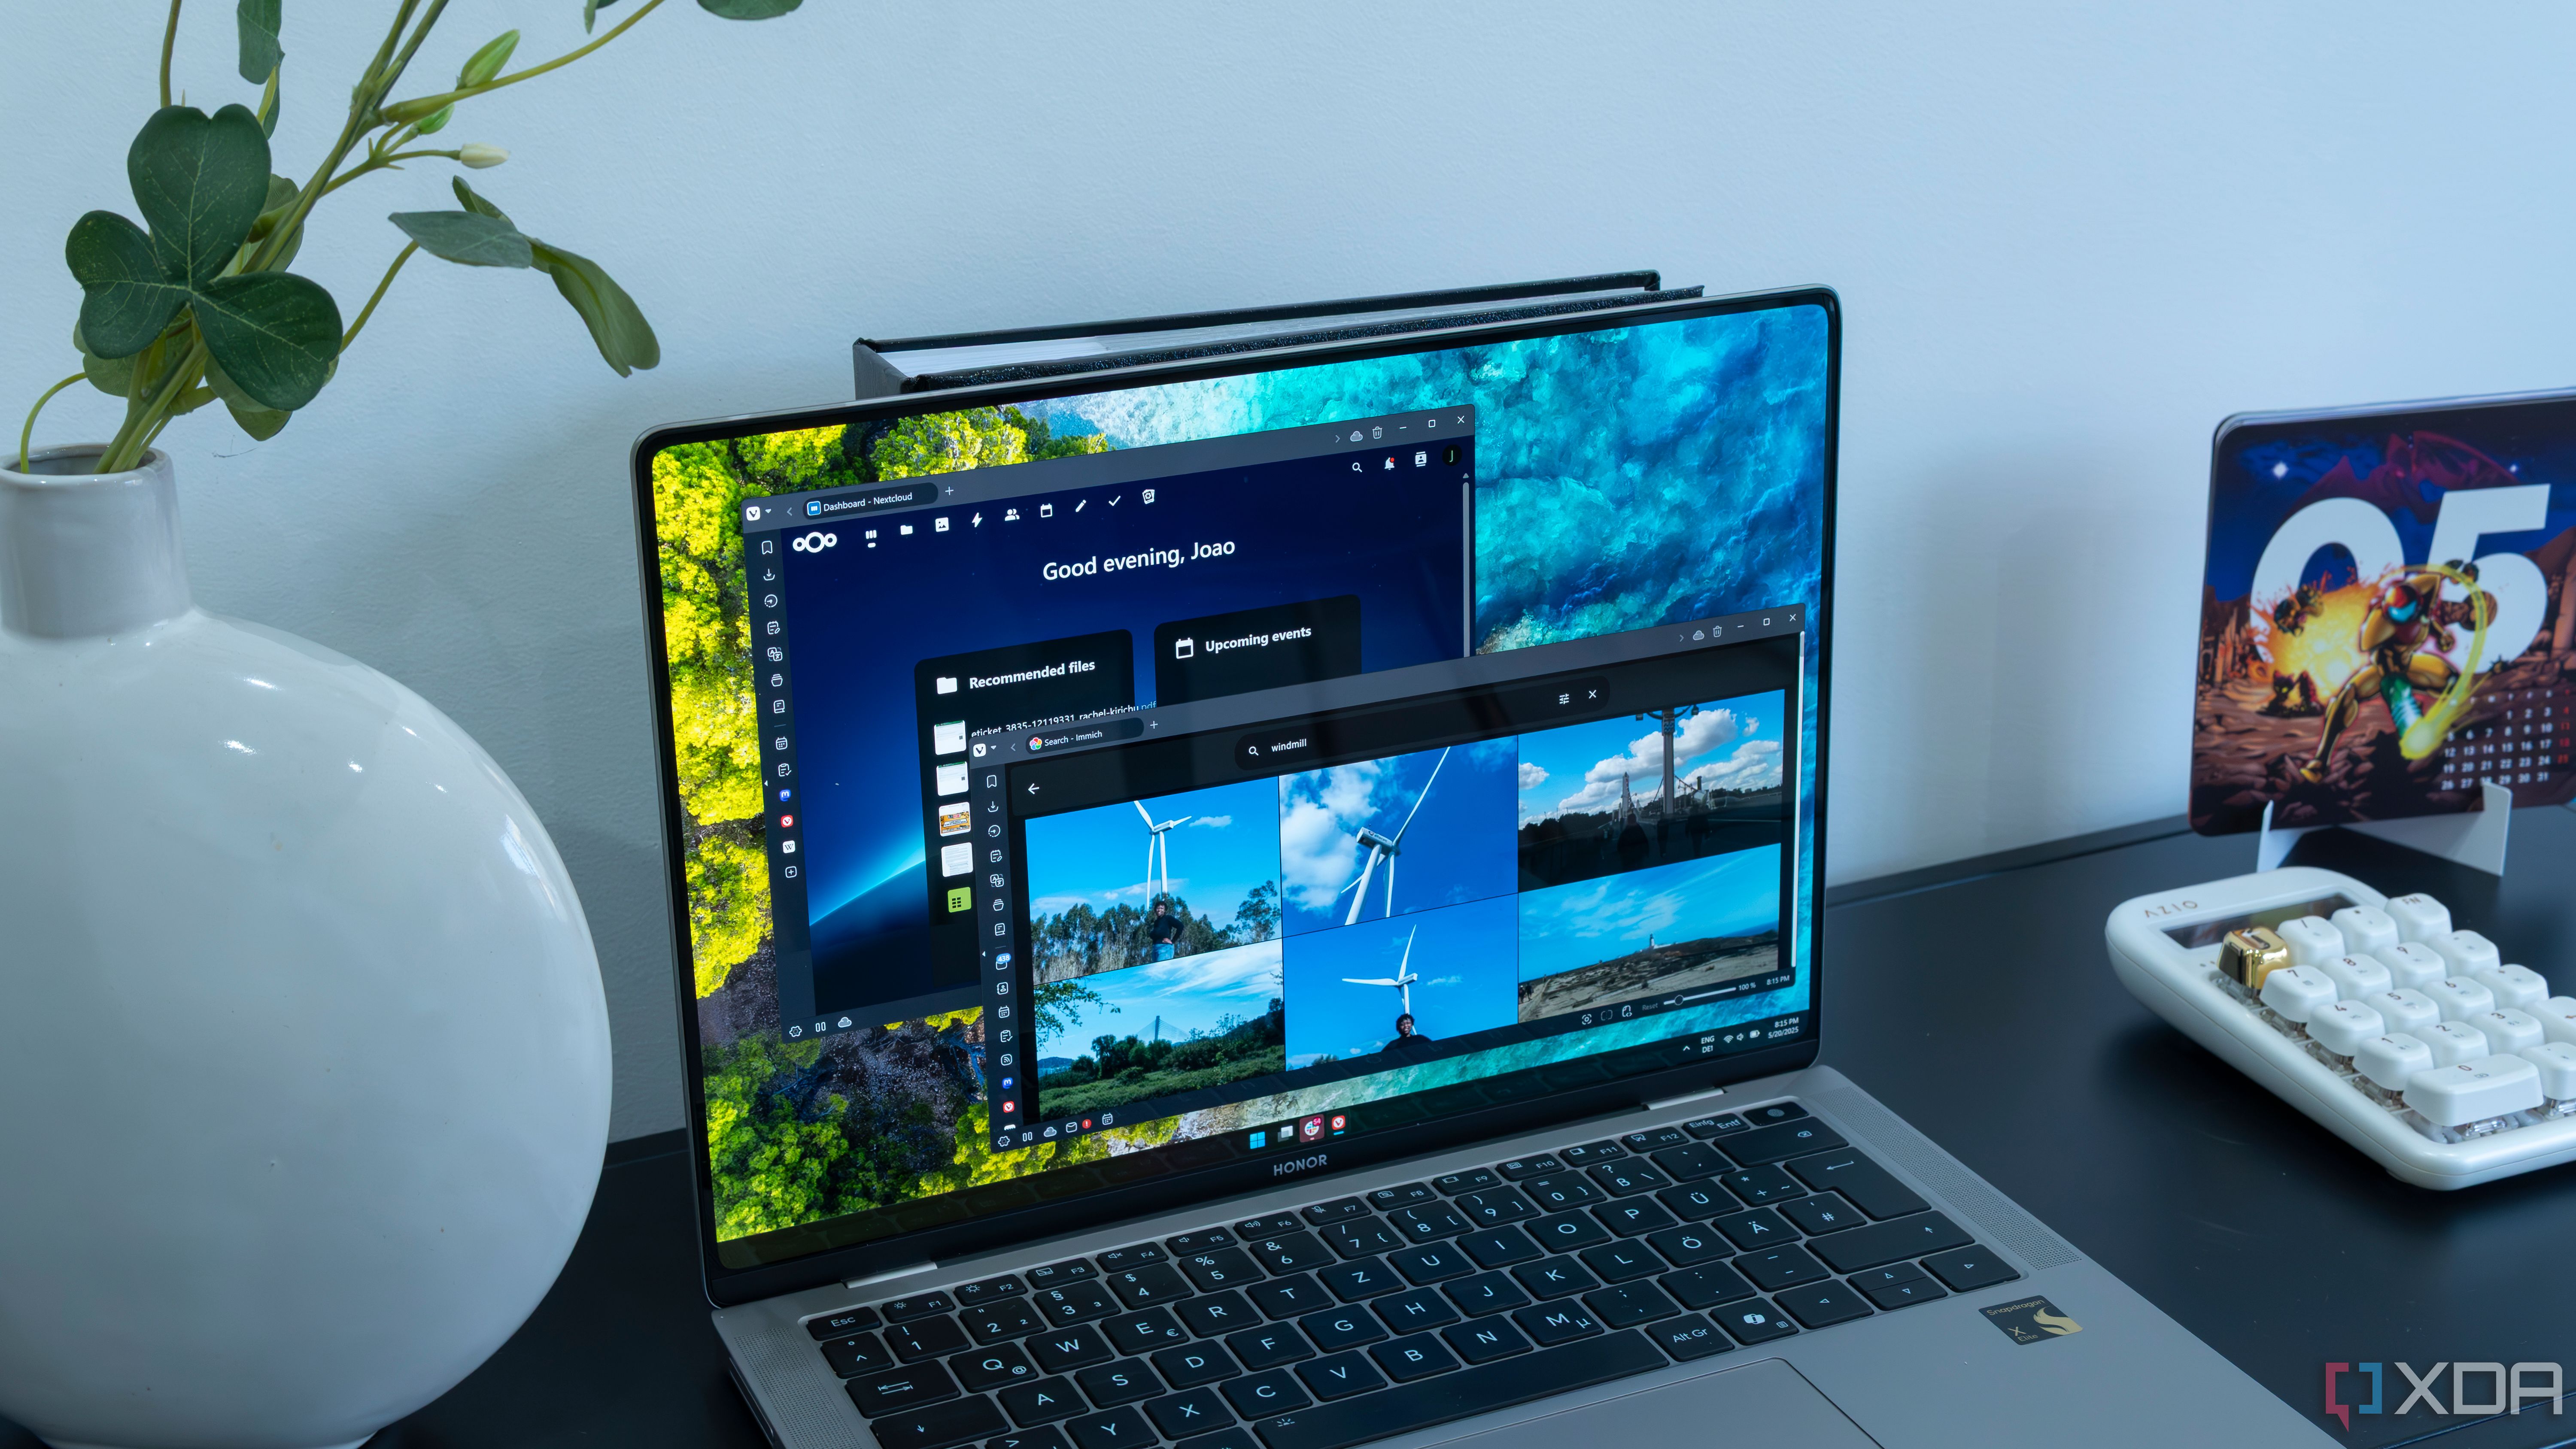
Setting up my home lab was one of the best projects I have undertaken, and I'm very happy to have this computer at home that can store all my documents, photos, and even media so that I can consume it at any time without relying on the internet or expensive cloud services.
But as I started setting up more and more of these services, I realized that it would be a bit inconvenient to remember all the port numbers to access each of them. On top of that, some of these services require an encrypted connection with a trusted certificate for extra security, as is the case with Bitwarden. While I could use HTTPS within the internal network, these services wouldn't recognize the certificate as trustworthy, so they still wouldn't work. The solution to both of these problems came in the form of a custom domain, paired with the Nginx Proxy Manager and Tailscale.
Related
Why I needed a custom domain
Security is too important
While the convenience of a custom domain is certainly nice, I could have gotten by with just using the IP address for each of my self-hosted services. Remembering port numbers would take some time, but with browser history, I'd eventually find my way to access each service relatively quickly. Plus, Tailscale could also enable remote connections even without that custom domain.
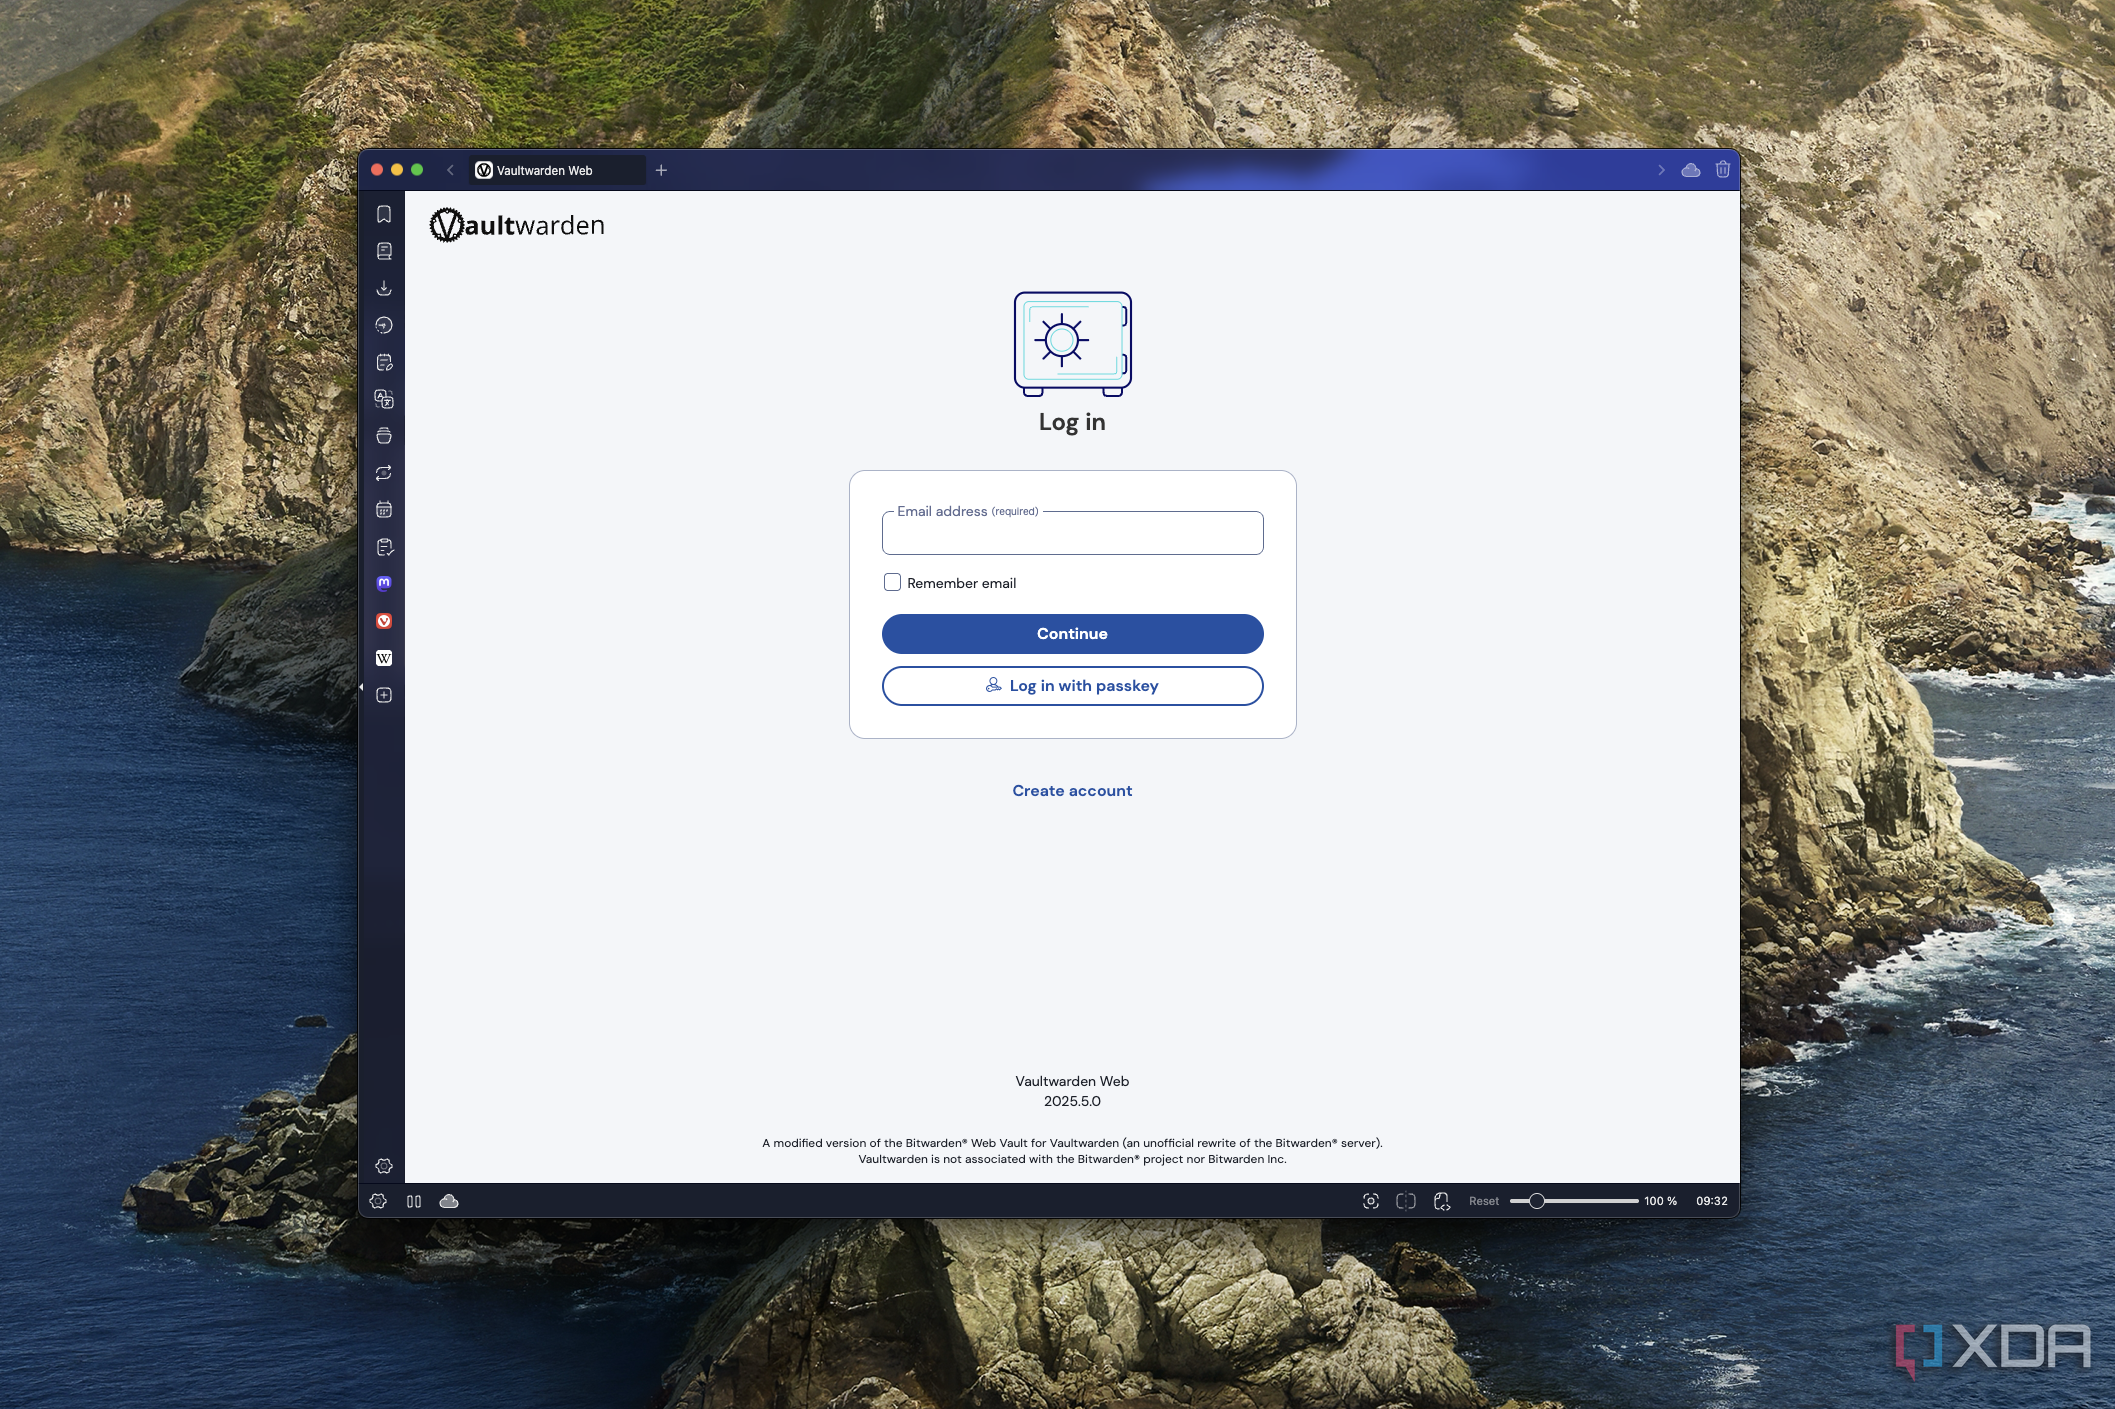
The big catalyst that got me to make this move was security. I first started realizing a custom domain would be needed when I was using Nextcloud for the first time. While I ended up going in Bitwarden in the end, I initially wanted to set up Nextcloud Passwords, and the service was just unusable unless I had a verifiably secure connection. As time went on, I found other things that need extra security. ConvertX, for example, requires HTTPS to work with certain file types, as do other file converters like Vert.
There are other ways you can set up self-signed certificates that would be trusted by these services, but when you pair that with the convenience of using custom URLs, getting a custom domain made the most sense. Especially when I wanted the server to also be accessible to my wife, who probably wouldn't be as willing to memorize strings of numbers.
Related
5 things you can do to protect your self-hosted password manager
Your private password repository needs to be protected at all costs!
Buying and setting up a custom domain
It's not that expensive
Owning a custom domain seemed like it would be too expensive at first, but thankfully, there are a lot more domain formats out there than I remember there being last time I looked into something like this. I was able to buy a domain based on my name from Namecheap, and it cost me a little over $1 for the first year. I know the cost will go up for future renewals, but even then, it'll be pretty cheap.
Then, I had to switch the name servers over to Cloudflare. You can sign up for a free Cloudflare account, and migrating the domain has no cost. This allows me to rely on Cloudflare to handle DNS requests and route traffic from the domain to the appropriate IP address.
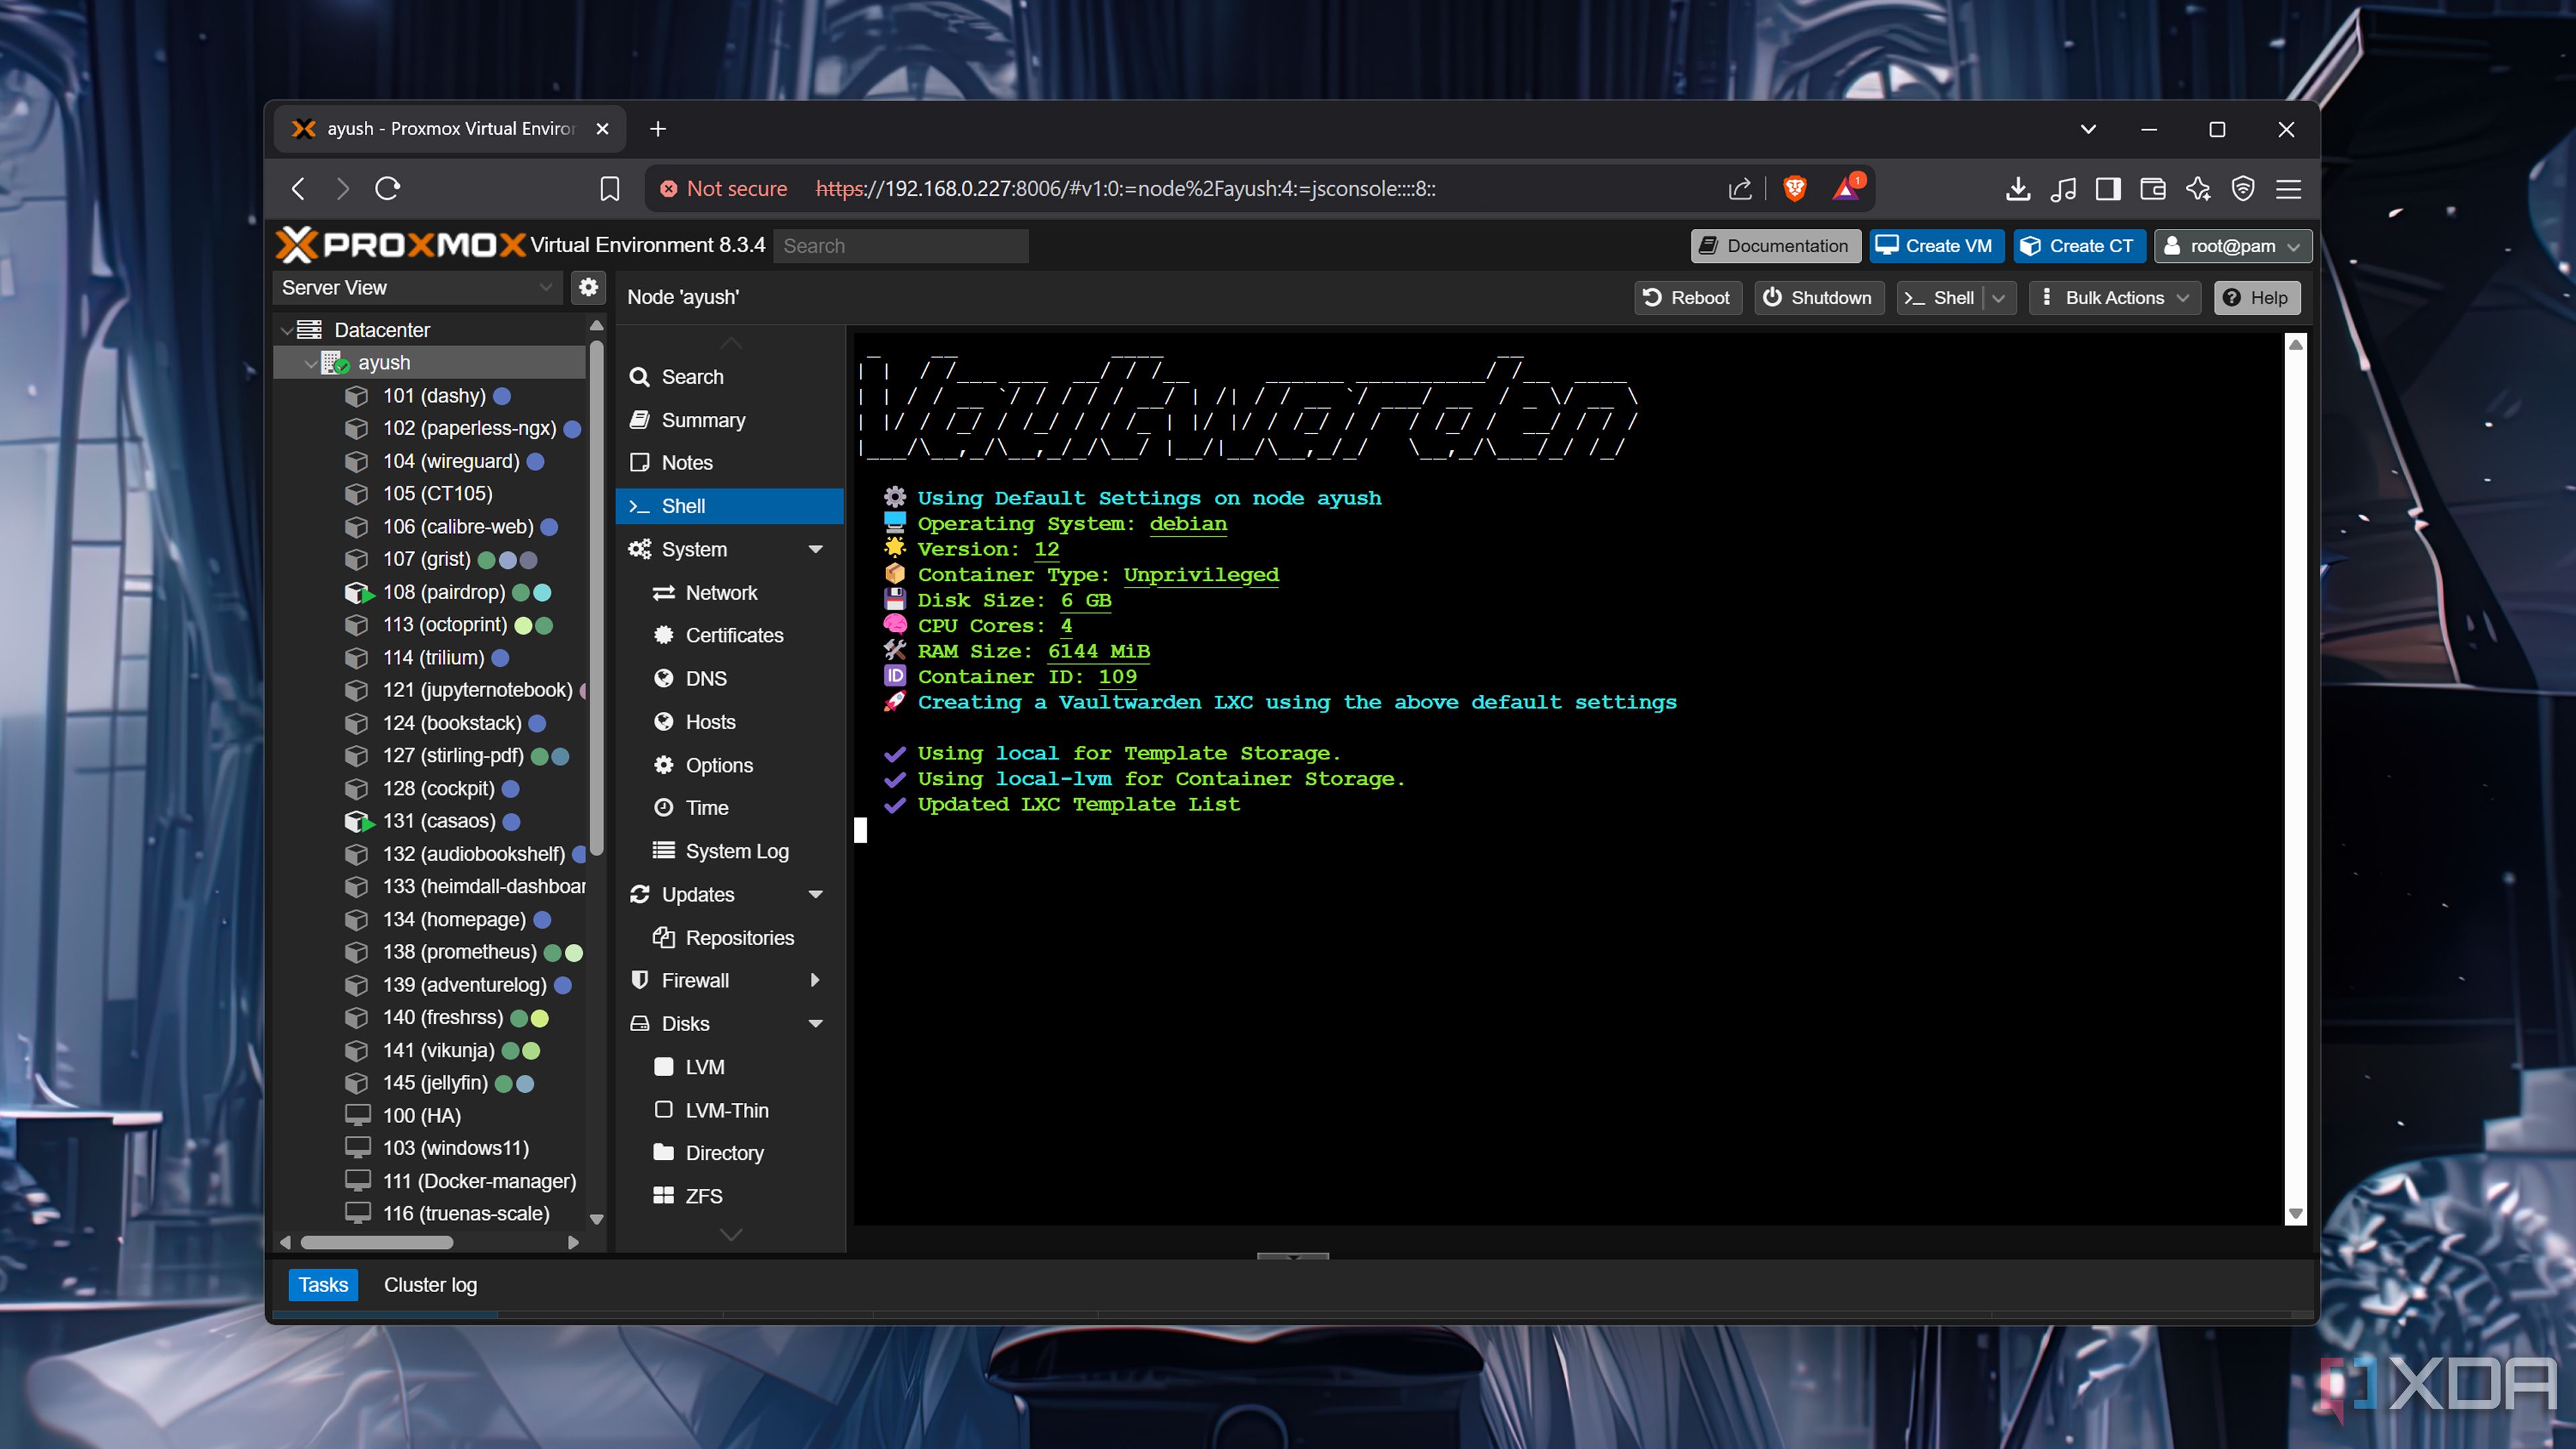
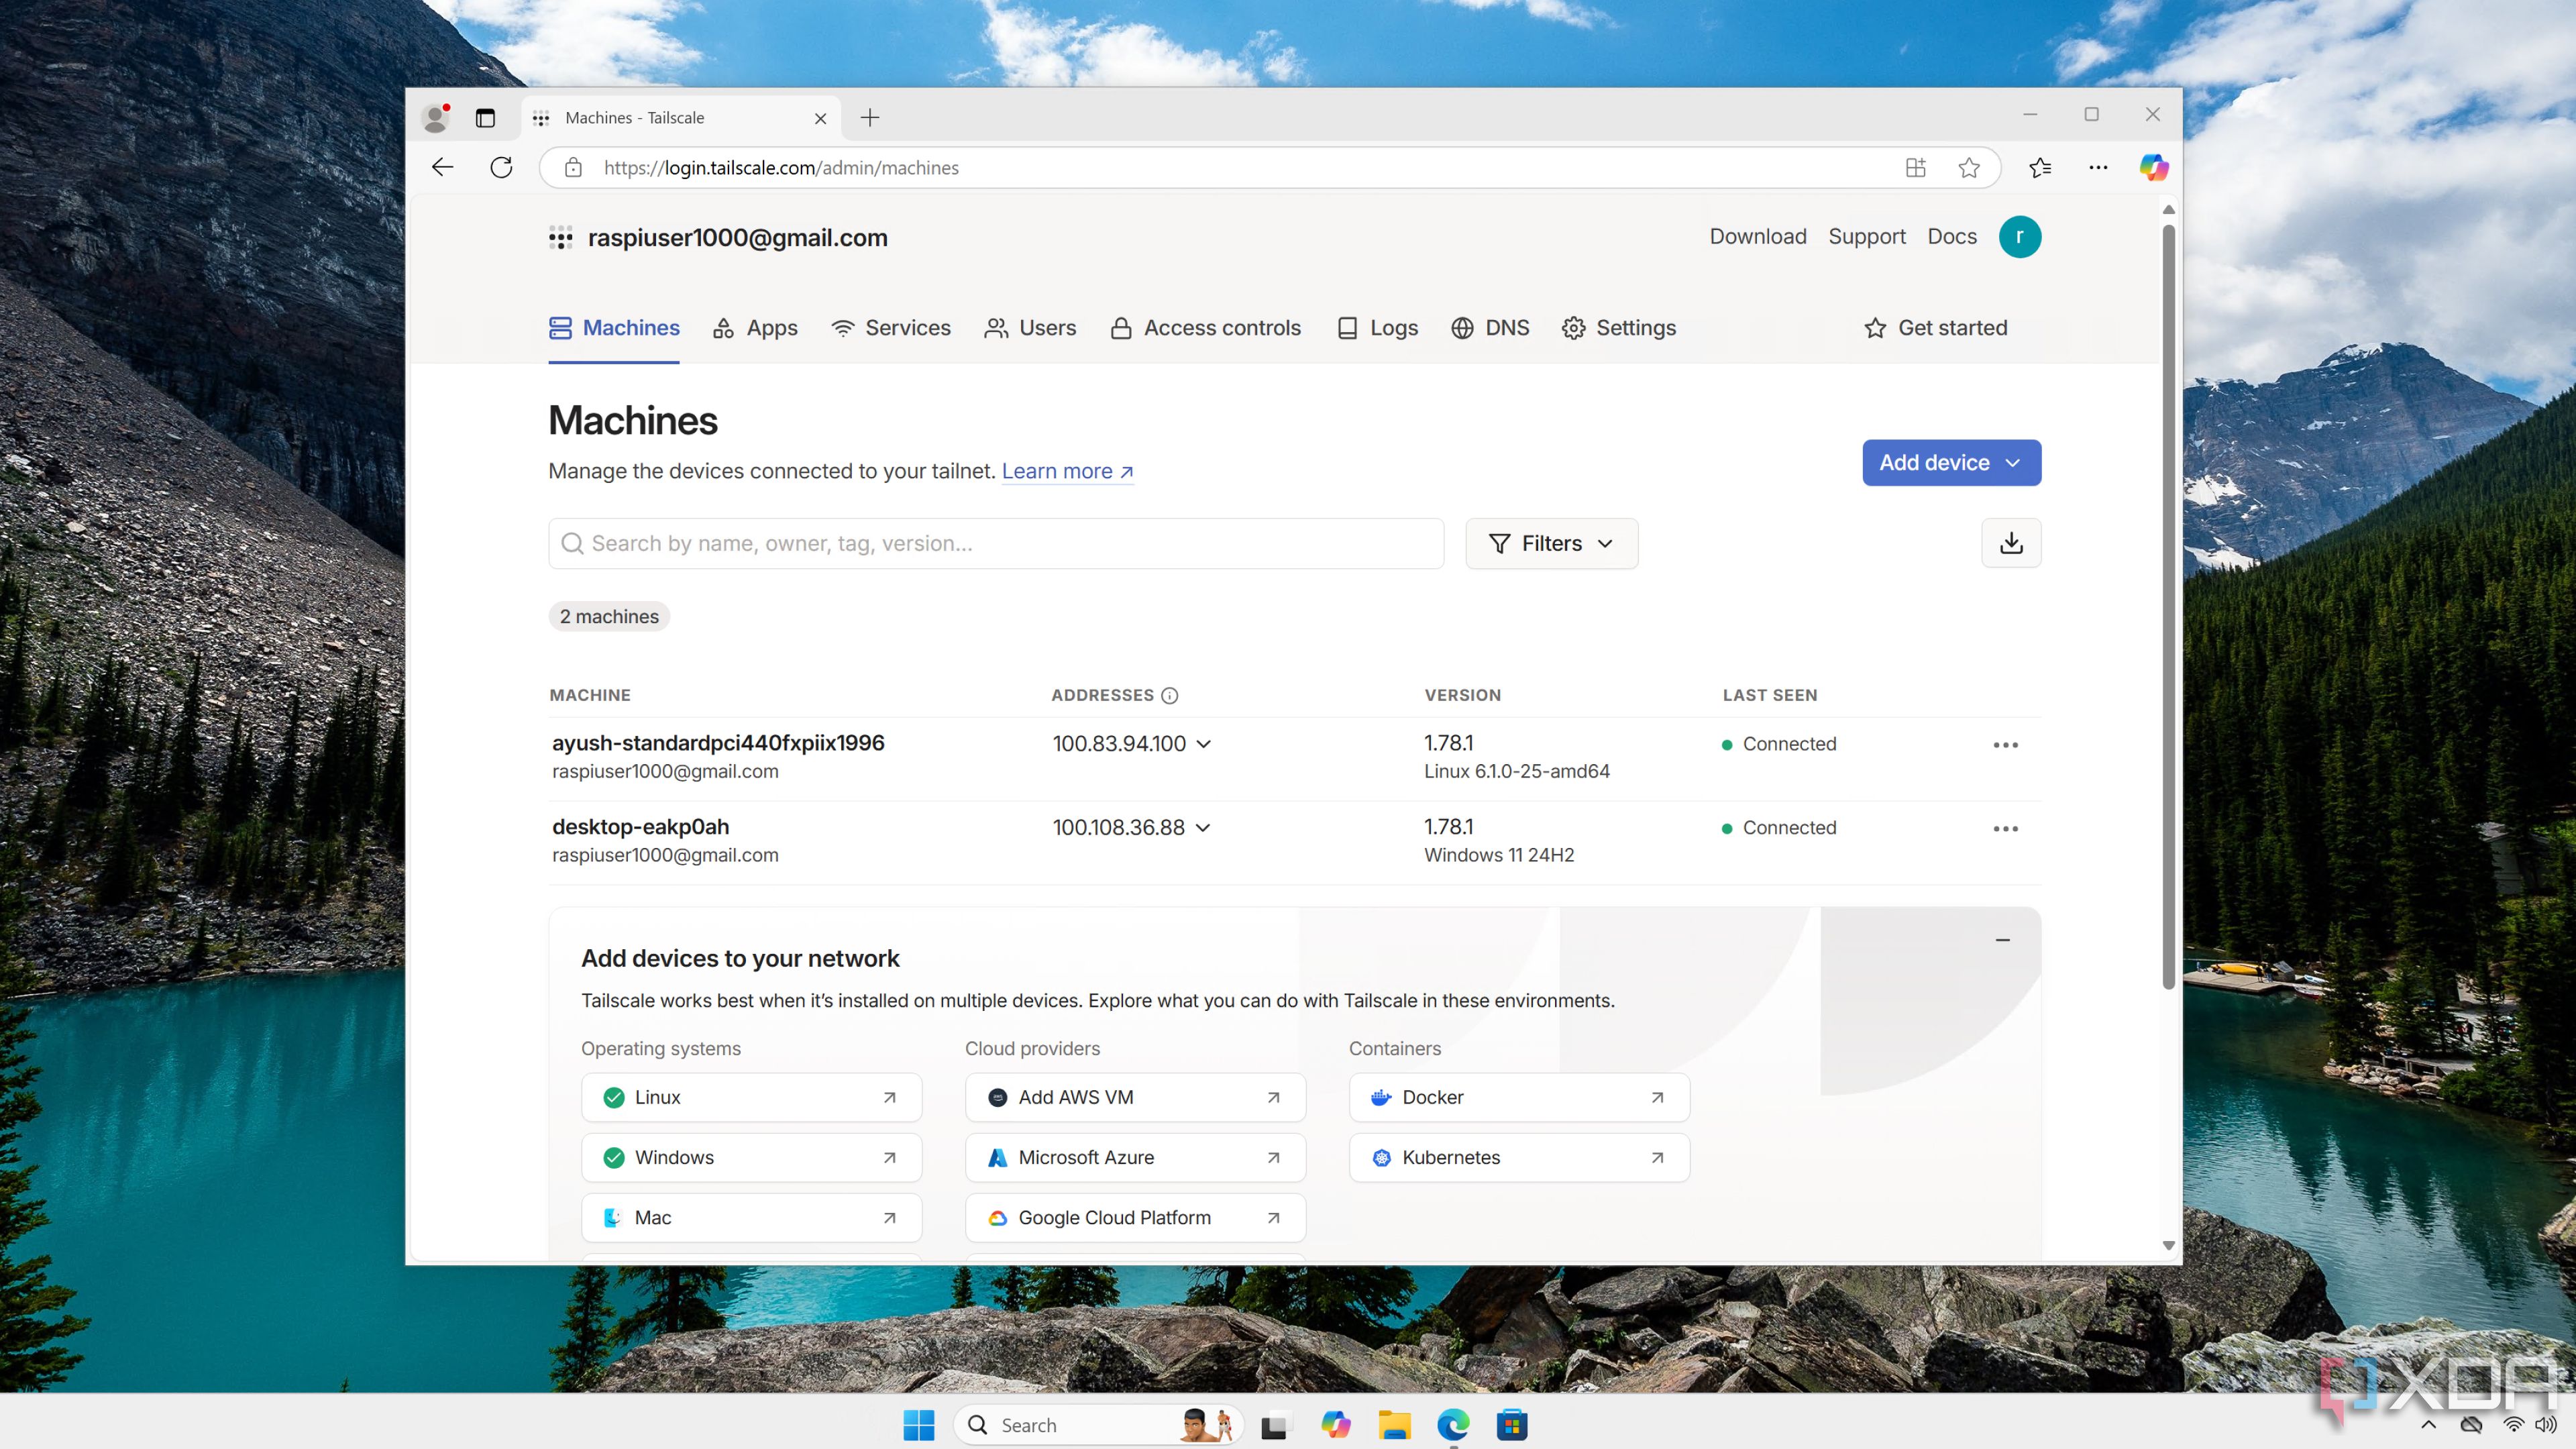
At this point, Tailscale also comes into play. For each subdomain I wanted to use, I had to create it manually and ensure that the A record pointed to a Tailscale IP and that Cloudflare's DNS proxy was switched off. This is because Tailscale's IPs are accessibly only to those logged into the Tailnet, which Cloudflare isn't. I only wanted Cloudflare to resolve the DNS and route it to Tailscale. Of course, that means I had Tailscale installed on my NAS beforehand so that it was part of my tailnet. Then, it was a matter of handling the traffic within my home network.
Related
I use Tailscale to remotely access my self-hosted services - here's how
Tailscale provides an easy way to access your home server from external networks
Routing traffic to each service
Not too hard, but with some setbacks
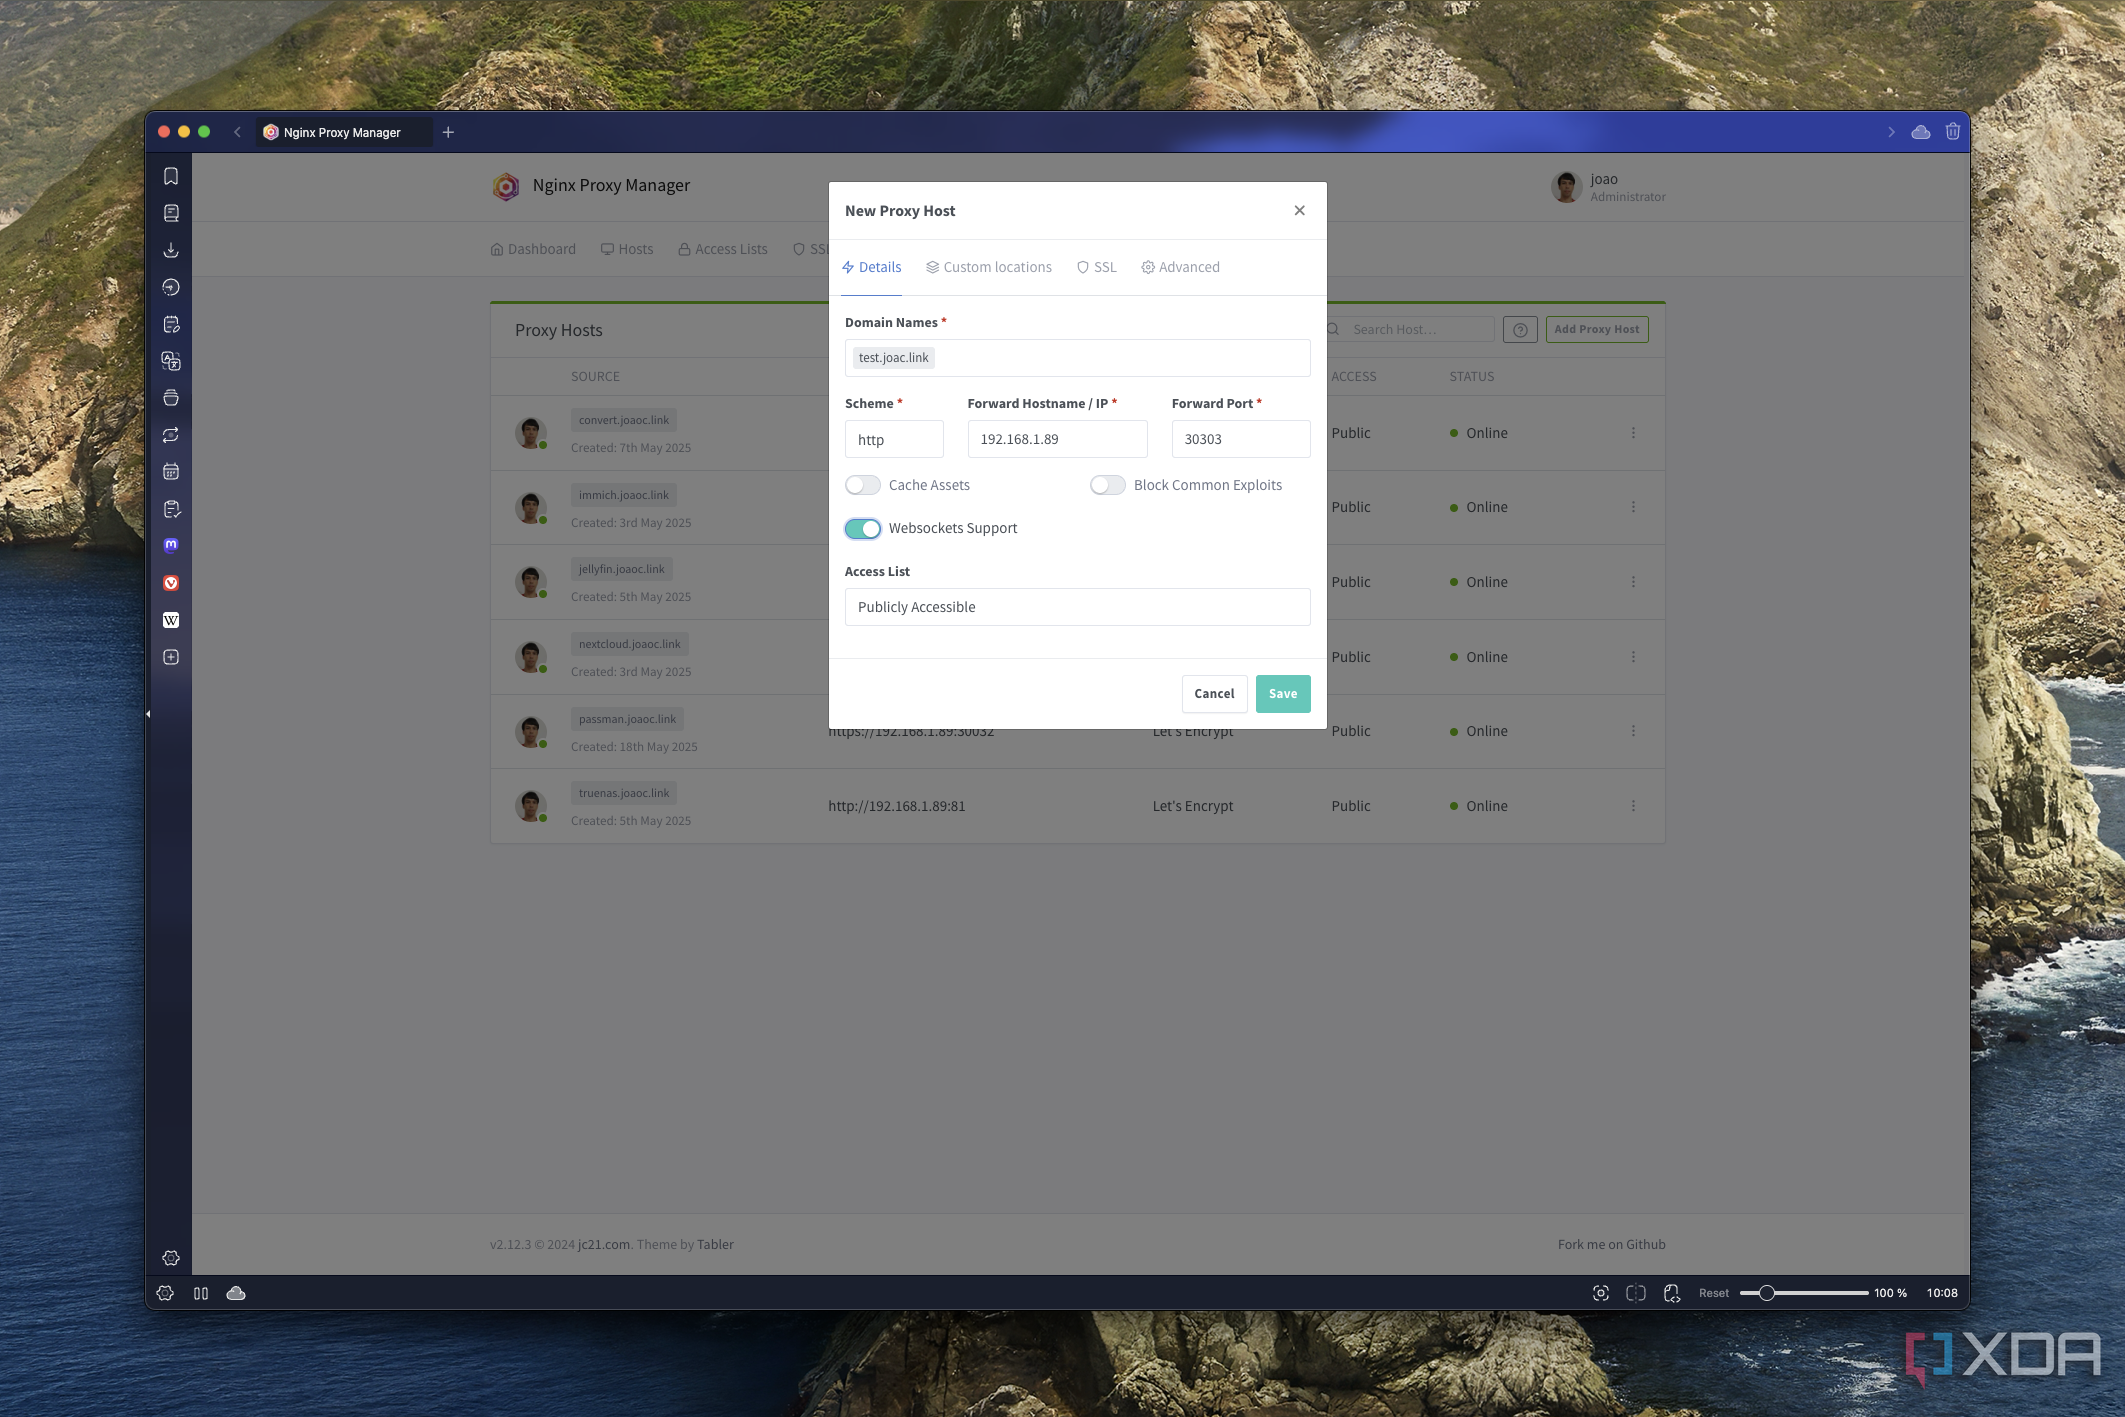
At this point, all I needed to do was set up Nginx Proxy manager so that traffic from each of the subdomains I created was routed to the appropriate IP address and port for the service I wanted to use. This part was relatively easy; all I had to do was create entries matching each of the subdomains to the proper IP address and port, as well as enable Websockets.
Nginx is also where I had to enable encryption, though. When setting up each of the routes, I had to go into the SSL tab and choose the option to create a new new SSL certificate. Then, I'd enable the Use DNS Challenge option, choose Cloudflare as the DNS provider, and enter the API key provided by Cloudflare to get things working.
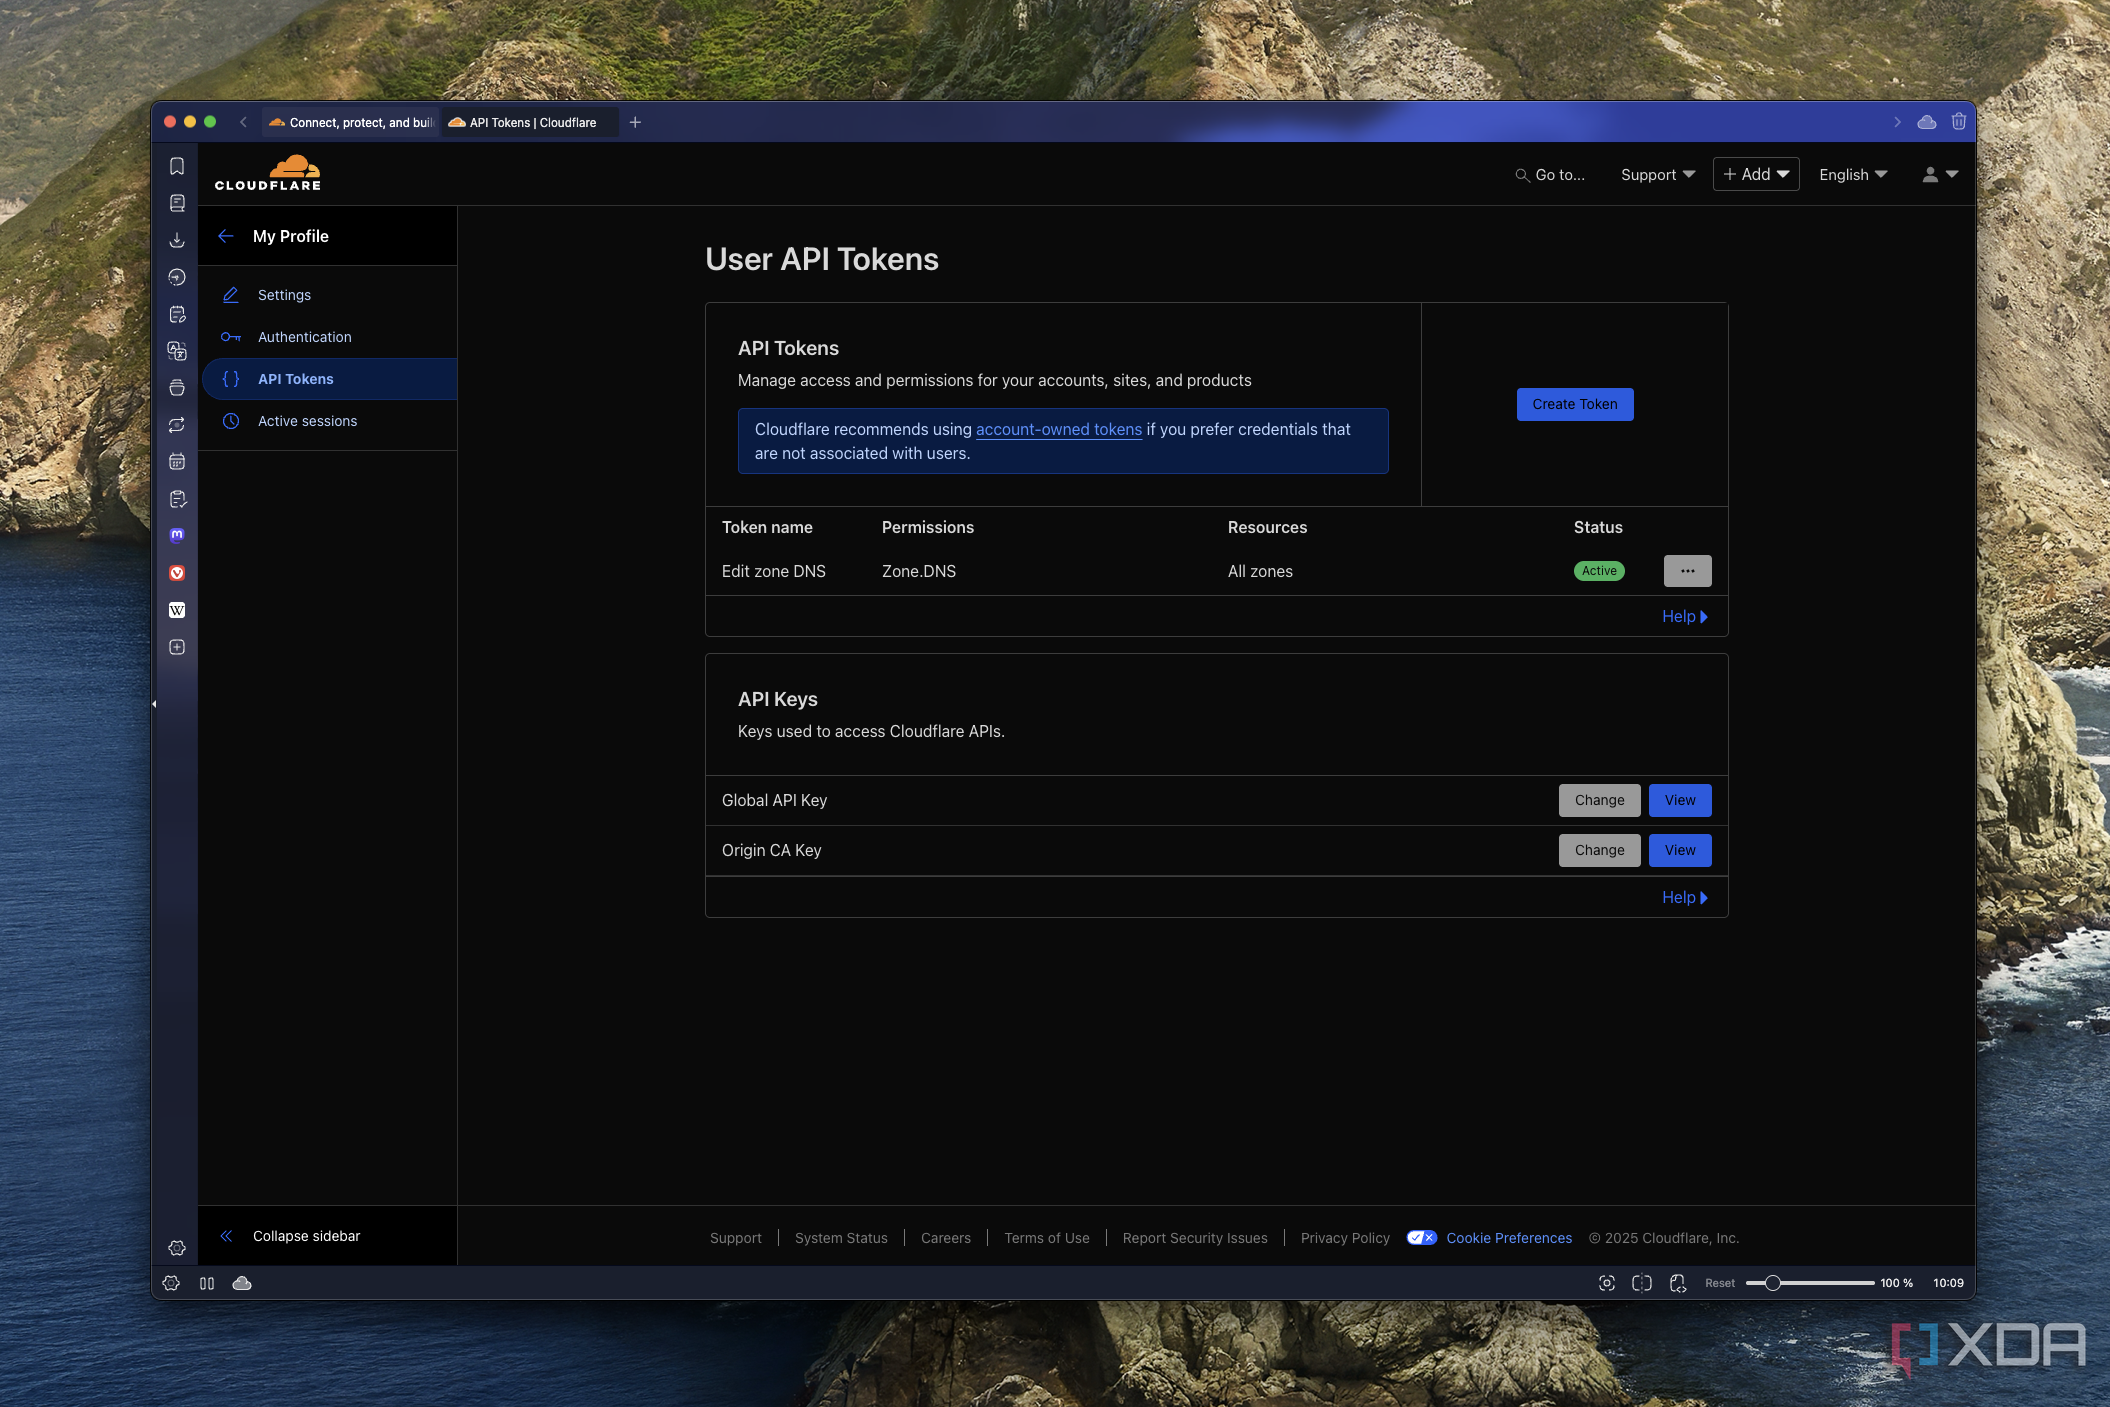
You can get this in your Cloudflare dashboard by going to your profile settings (in the top right) and into the API Tokiens section. Simply create a token with the Edit zone DNS template and save the token that's generated. You won't be able to view it again, so be sure to save it in case you want to set up more custom domains later.
This is all fairly easy once you're used to it, though it can seem intimidating if you're doing it for the first time. Either way, this ensured my remote connections would be secure, so I could use any services that require an encrypted connection.
With all that set up, I should have been ready to go, but there was one more problem. Cloudflare routes the traffic to the IP address of my NAS, and my TrueNAS instance was on ports 80 and 443, which are the first ports Tailscale checks when making the connection. This made it so that every URL would just load up the TrueNAS UI, because upon connecting to the machine, it would immediately find a page to load, and Nginx wasn't even involved in the process. What I had to do was change the TrueNAS ports to be one number higher, so that when Tailscale connected to the machine, it had the chance to be routed through Nginx to the respective port.
This also wasn't hard to do, but it took some time to figure out what was happening, and my colleague Adam Conway provided a lot of help on that front.
Related
A small investment that's worth it
A custom domain does come with an associated cost, but thankfully, domains have gotten pretty cheap unless you want something more popular like a .com or .net domain. I chose a .link domain, and since my name isn't that common, it was easy to find one for cheap. You can even go with something like .store if you're only planning to ever use the domain privately.
For this low cost, the increased security (and the fact that encryption is trusted by my self-hosted services) along with the ease of use make this a worthy investment. If you want to make things easier for yourself, I recommend you set one up for yourself.
Related


 English (US) ·