.png)
Keeping track of receipts is a drag. Whether it’s for budgeting, expense-tracking, or tax time, the sheer volume of emails and paper slips can quickly become overwhelming. For ages, I found myself logging these expenses and tax entries, or simply giving up, and it often led to a disorganized mess. Here is where Notion’s databases come into play. I have spent some time refining a system that automates the entire process of turning my email receipts into neatly organized entries in Notion.
Let me walk you through my exact setup and show you how I achieved this set-and-forget financial workflow that truly changed how I manage receipts.
Related
You're missing out if you haven't tried these Notion templates
Setting up a Notion page from scratch is counterproductive. Instead, try these templates to get started.
Before we start
While Notion offers several automation tricks, it doesn’t connect directly to your Gmail account. You need to use a third-party service to connect both accounts and create a trigger. Although there are several such tools out there, in this example, I will use Zapier. It’s one of the popular automation tools out there, offers a straightforward UI, ample features, and works with thousands of productivity tools, including the likes of Gmail and Notion.
I have also created a rule in Gmail that automatically applies the ‘Receipts’ label to emails from Amazon, Best Buy, Walmart, eBay, and other relevant recipients. I will use this label while creating a Zap in Zapier (more on that in a minute).
Create a new database in Notion
Before I connect Gmail to Notion and automate the entire process, it’s important to create a database in Notion. I will use this database to create new entries based on incoming emails that fall into the Receipts label. First, make sure to create a new account at Zapier and use the steps below.
- Launch Notion and create a new page with an icon and a banner
- Type /database and insert a new database with a relevant name (Gmail).
-
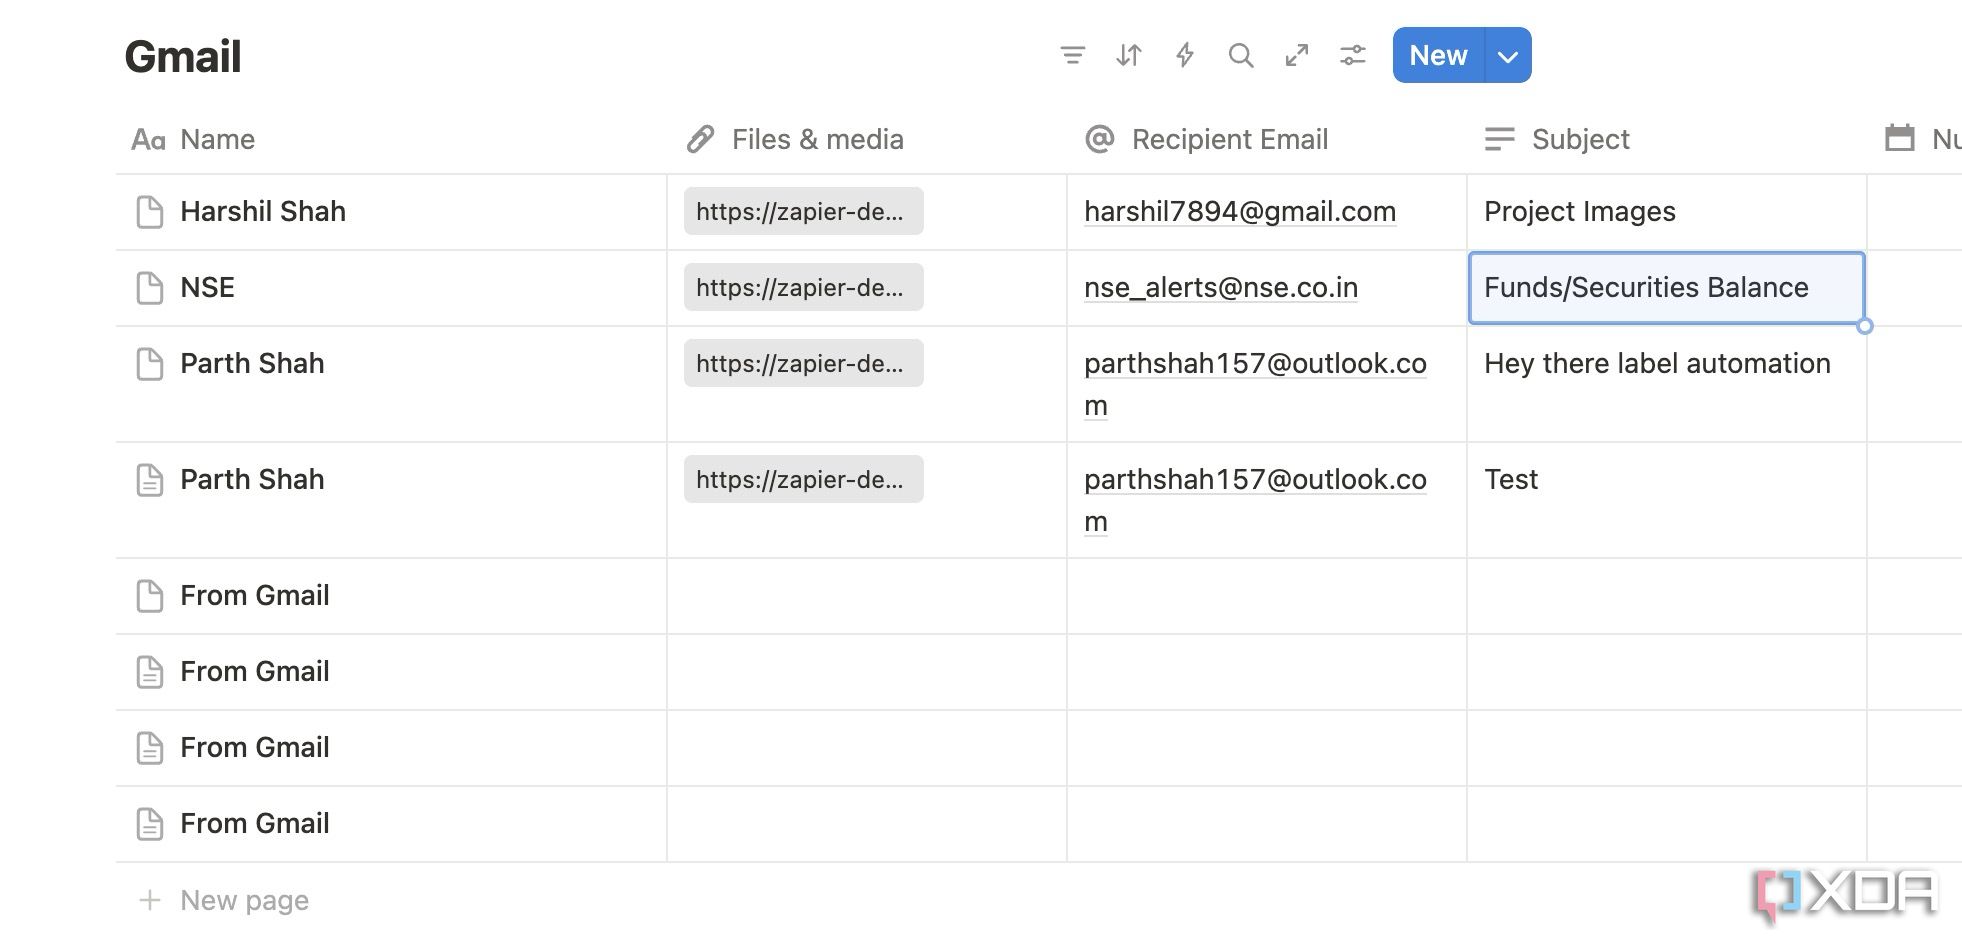
I have added columns like Name (text), Files & media, Recipient Email, and Subject.
Now, it’s time to connect our Notion account with Zapier.
Related
7 Notion database tricks that eliminated every spreadsheet in my workflow
I ditched spreadsheets and started using these Notion database functions instead
Connect your Notion account with Zapier
Once your Notion database is ready with basic details, use the steps below.
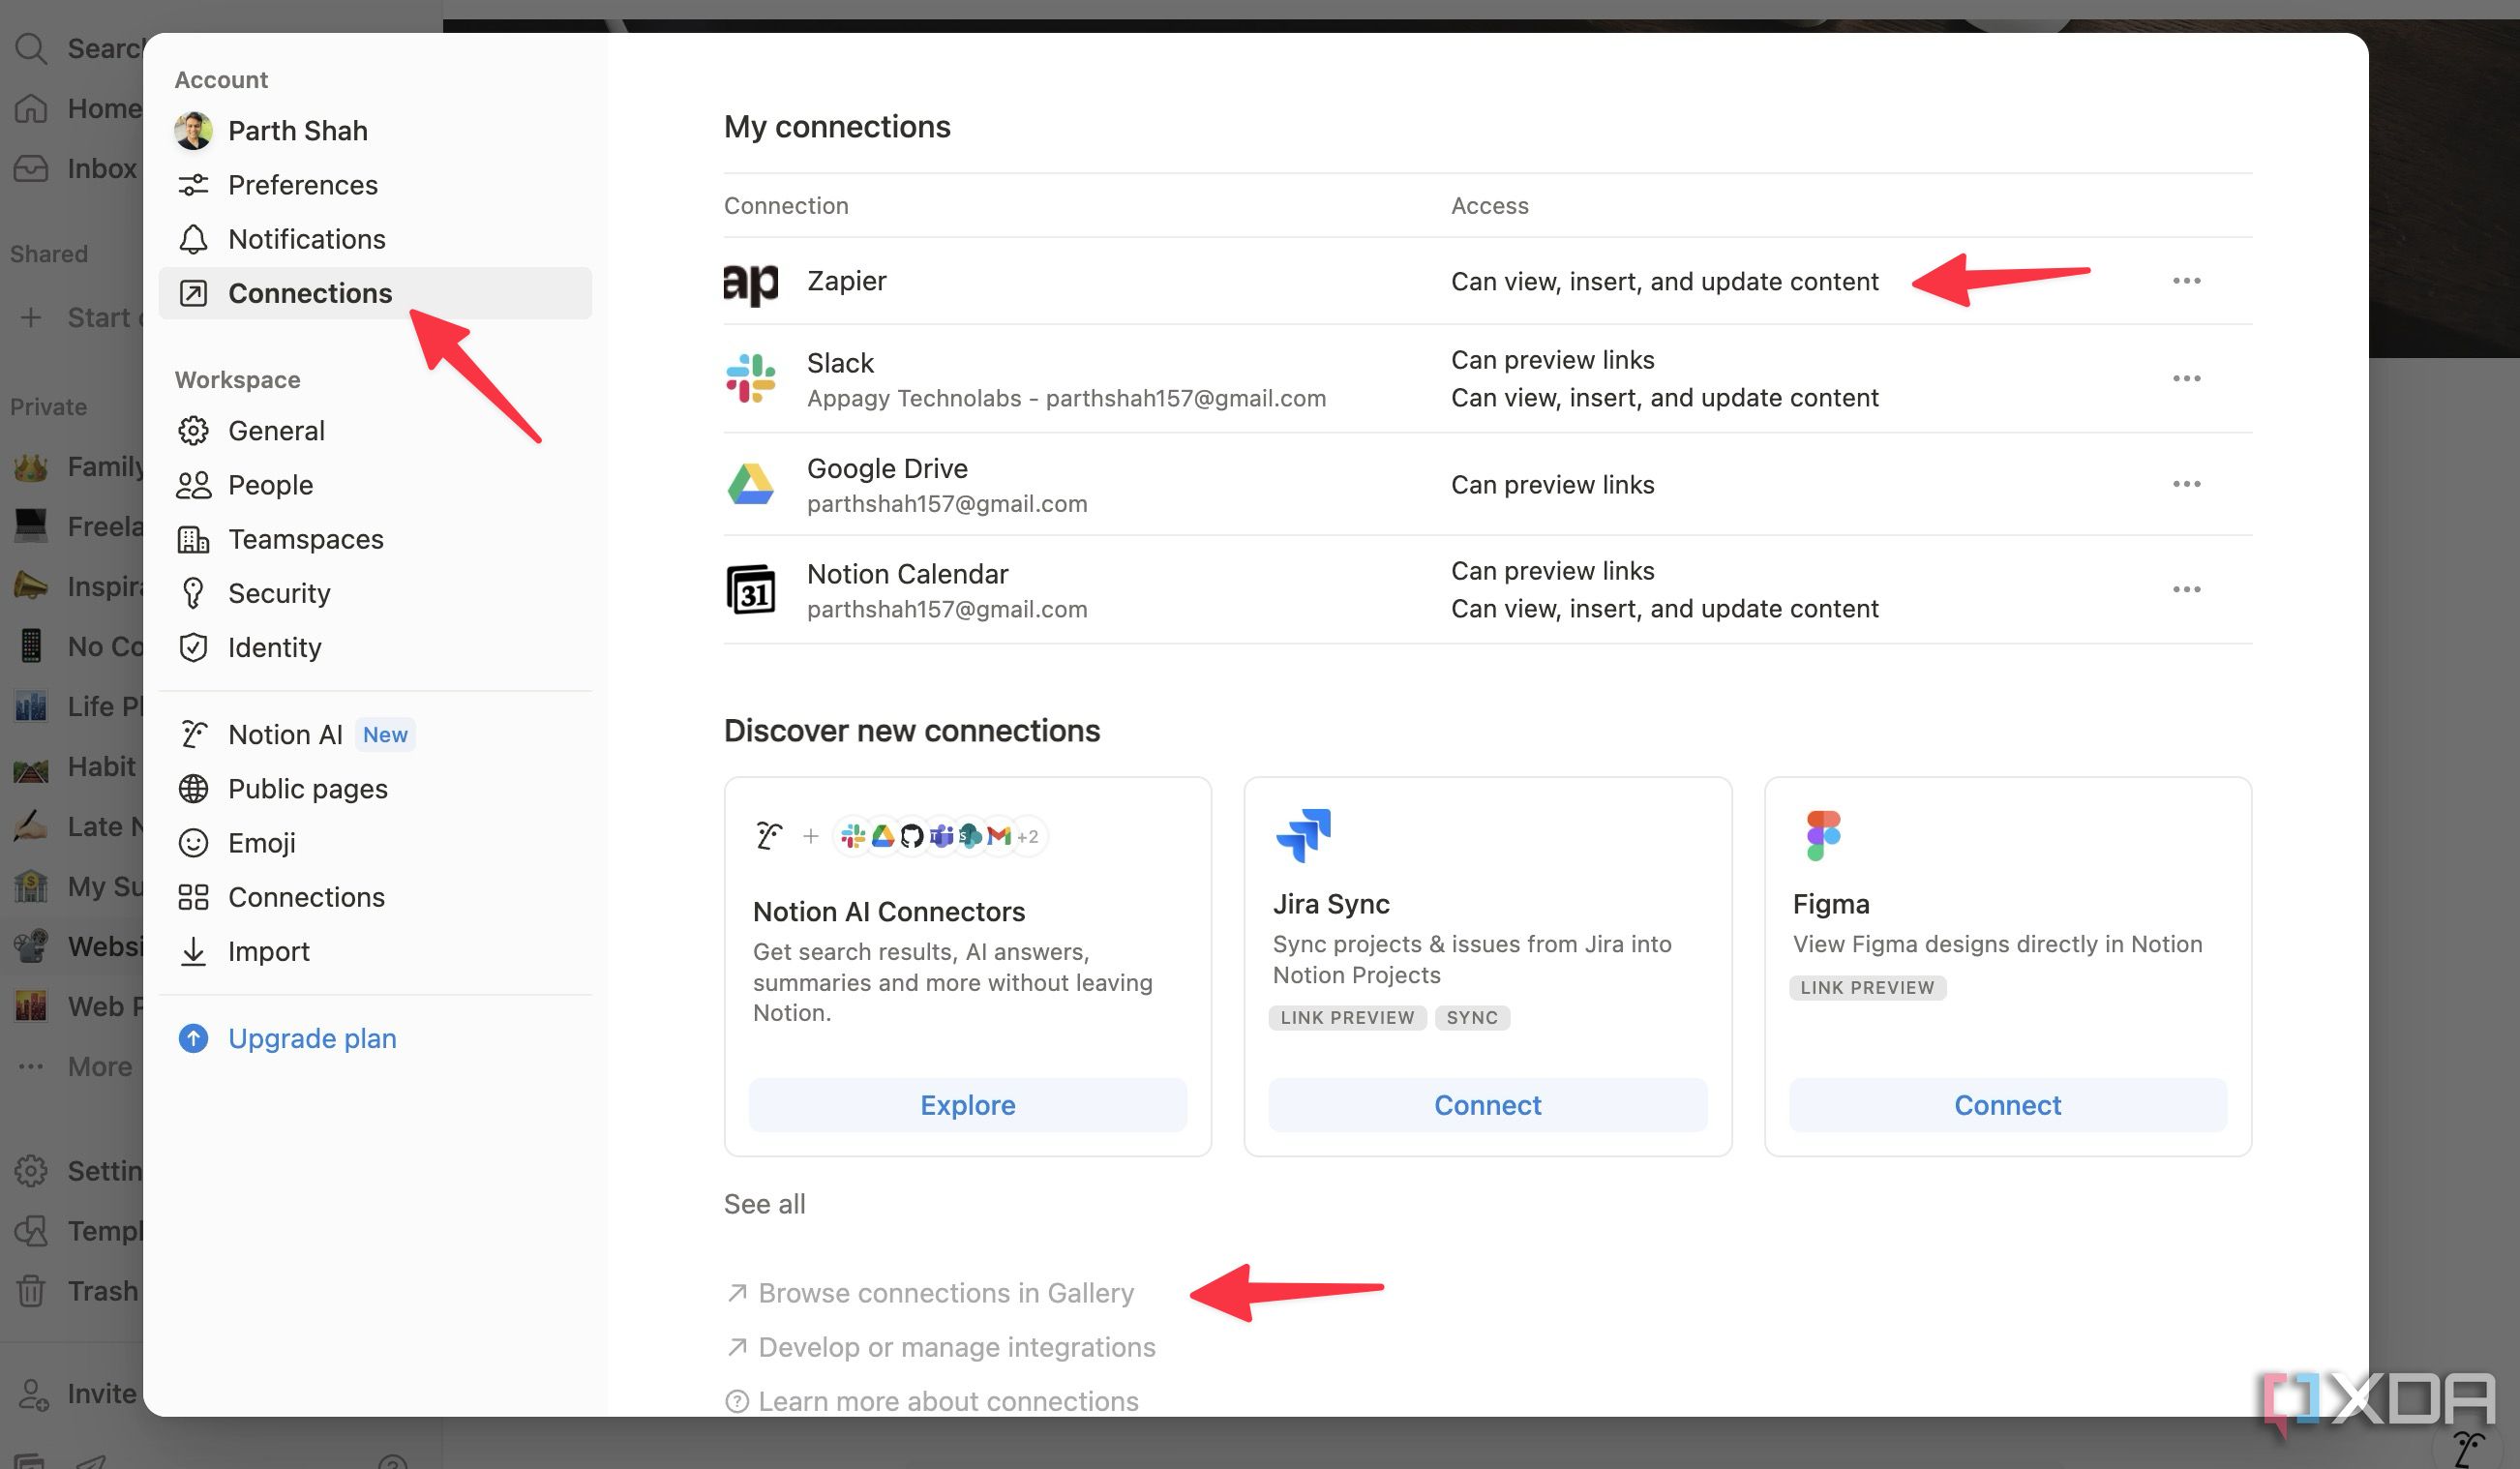
- Launch Notion and head into Settings from the sidebar.
- Scroll to Connections.
- Browse the Notion Connections gallery and find Zapier.
-
Add it to your Notion account by following the on-screen instructions.
You can skip this section and connect your Notion account to Zapier while creating your first Zap.
Create a Zap
Now that you have created a rule in Gmail, added a database in Notion, and connected your account with Zapier, it’s time create a Zap using the steps below.
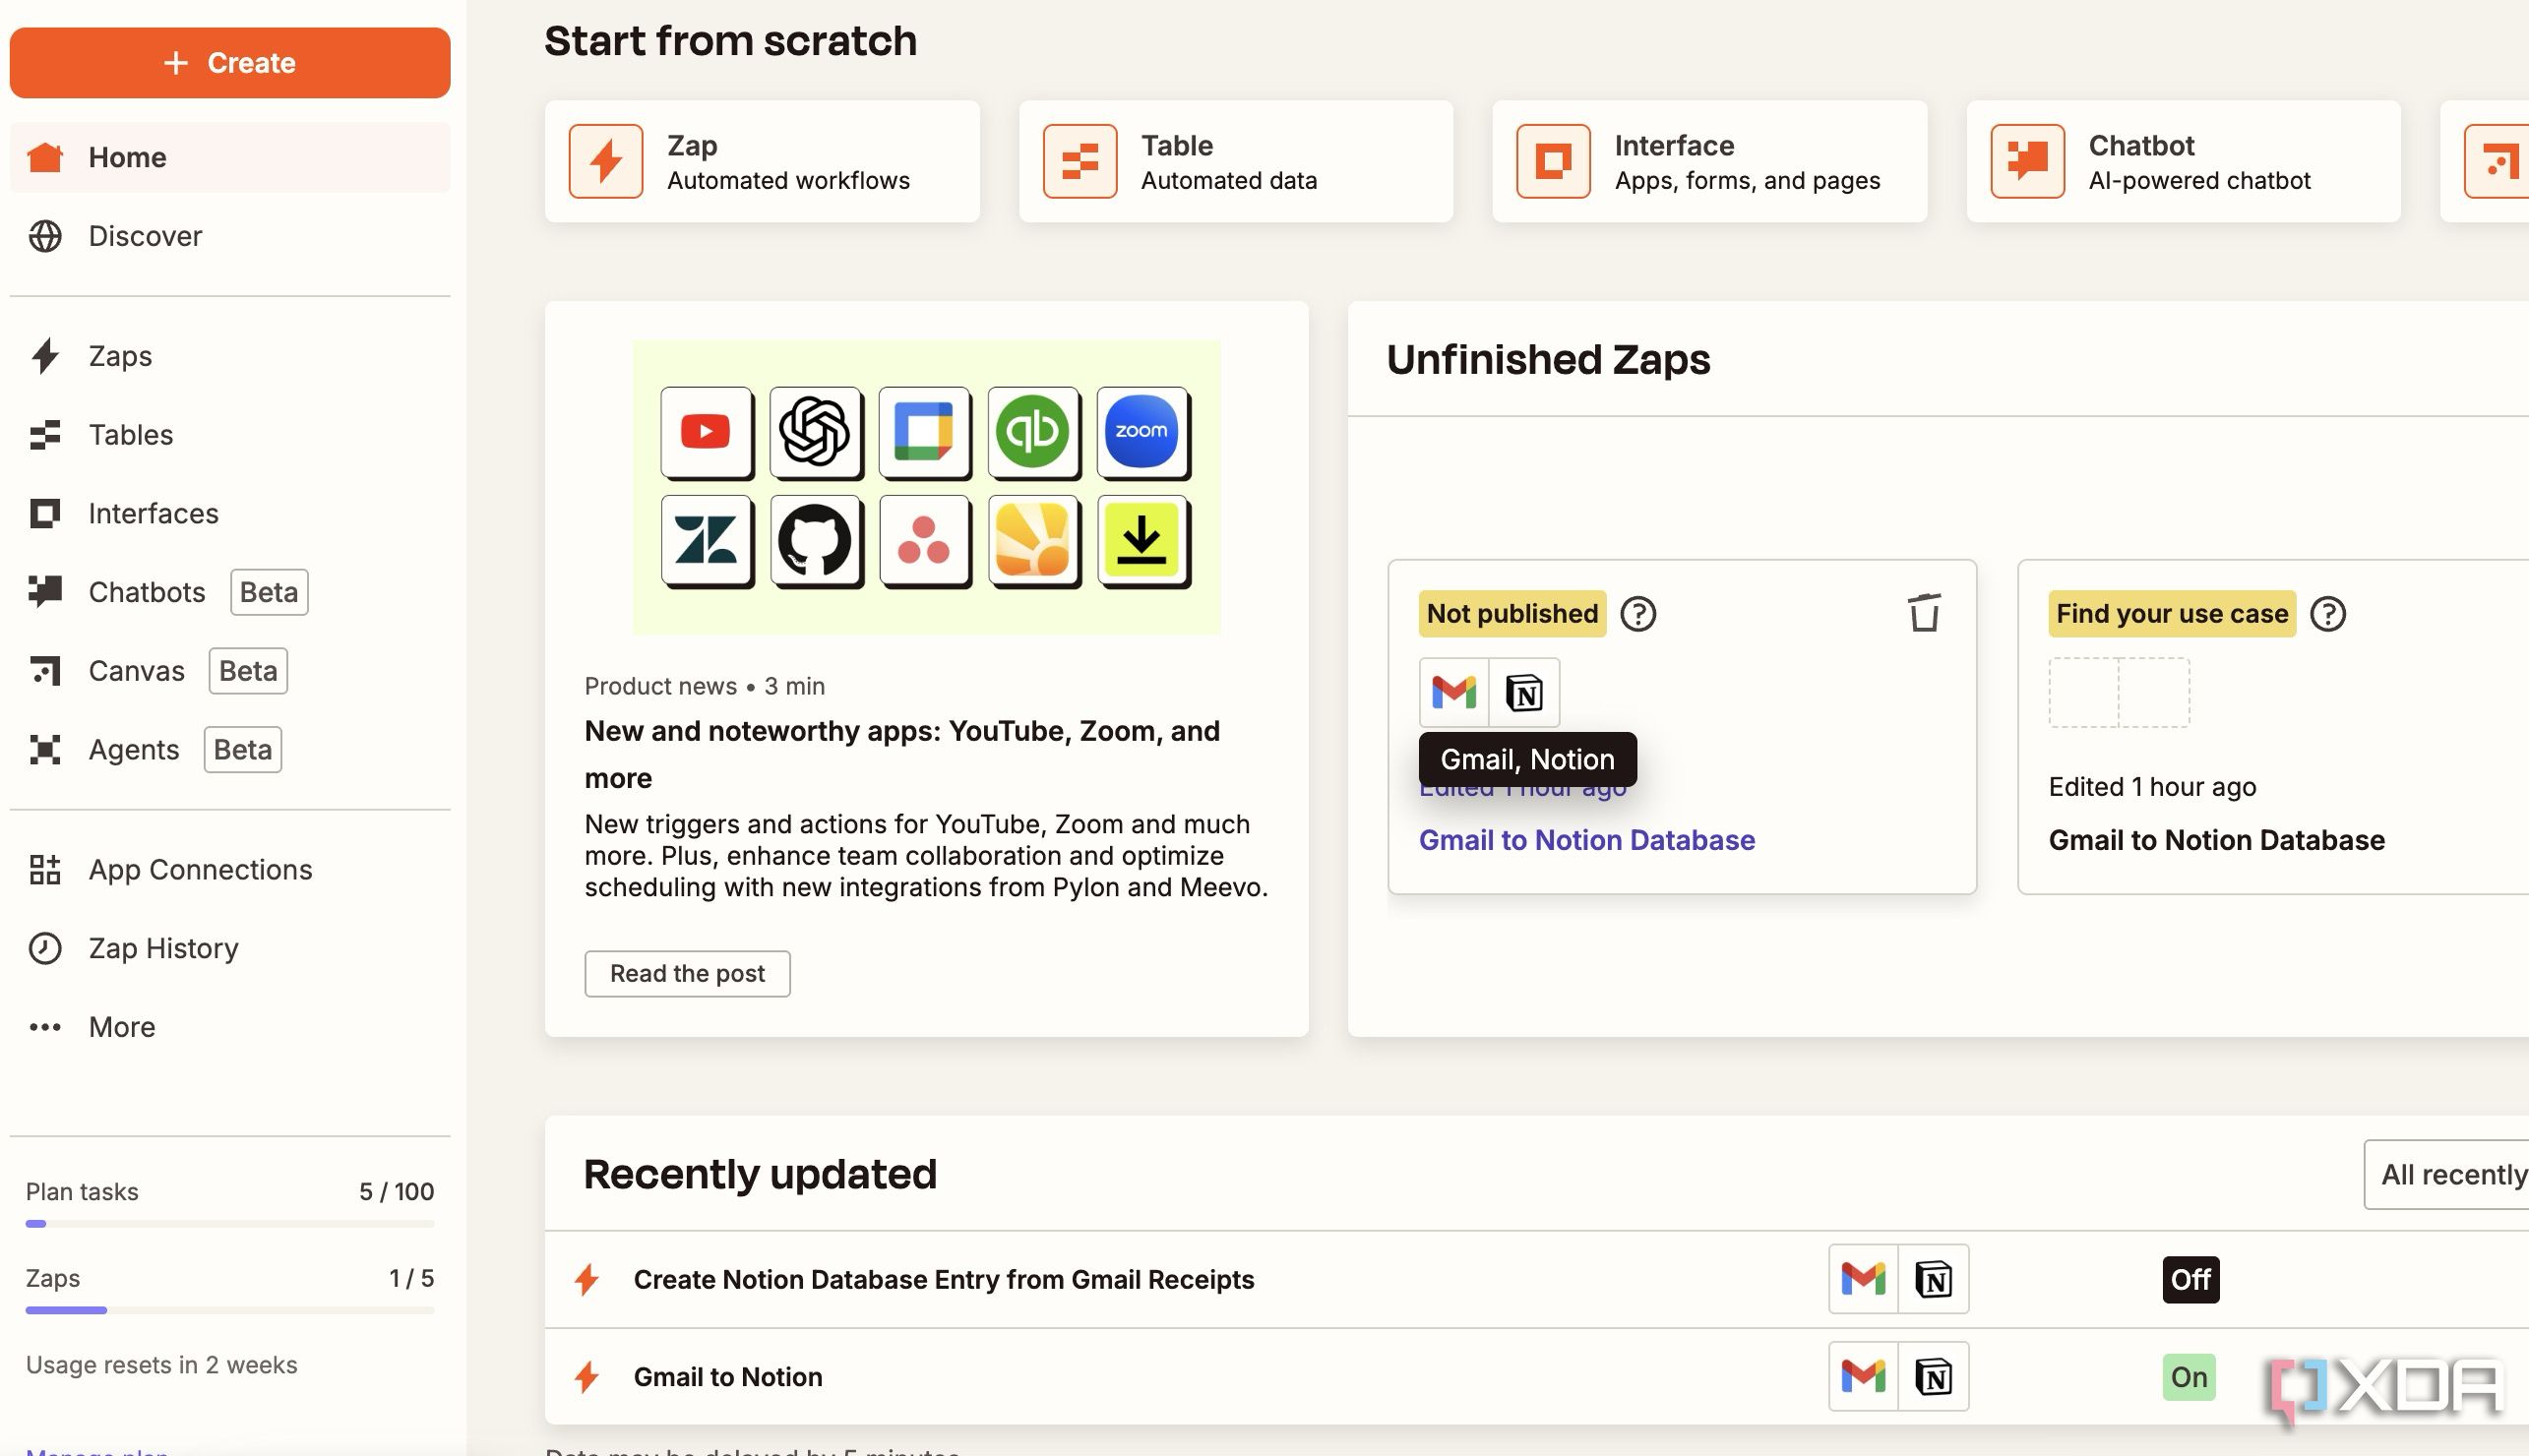
- Navigate to Zapier and sign in with your account details.
- Click + in the top-left corner and select Zap.
- Let’s give it a relevant name: Gmail to Notion.
- Click Trigger and select Gmail from the following menu. Go through the on-screen instructions so that Zapier can connect to and read your Gmail inbox.
- Expand Trigger event and select New Labeled Email. Click Continue.
- Select Receipts label (the one we created earlier and set a rule for) under the Configure menu. Click Continue and Test the trigger (it shall show recently labeled emails).
- Click Action and find Notion.
- Select Create Database Item under the Action event. Select your database from Notion account (Gmail).
- You will see all the Database properties (Name, Files & media, Recipient Email, and Subject).
- It’s time to fill in these details. For example, click the + icon beside Name and select From Name. Similarly, select Recipient Email and insert From Email. Click Subject and add the email subject.
- Crucially, select the + icon beside Files & media and click Attachment. Here is where the magic happens. Zapier finds the Gmail attachment and adds it to your Notion database entry.
- Glance over your Zap and click Continue. You can now test it from the following menu.
- Click Publish, and you are good to go.
Zapier runs the automation every 15 minutes.
Check your email receipts in Notion
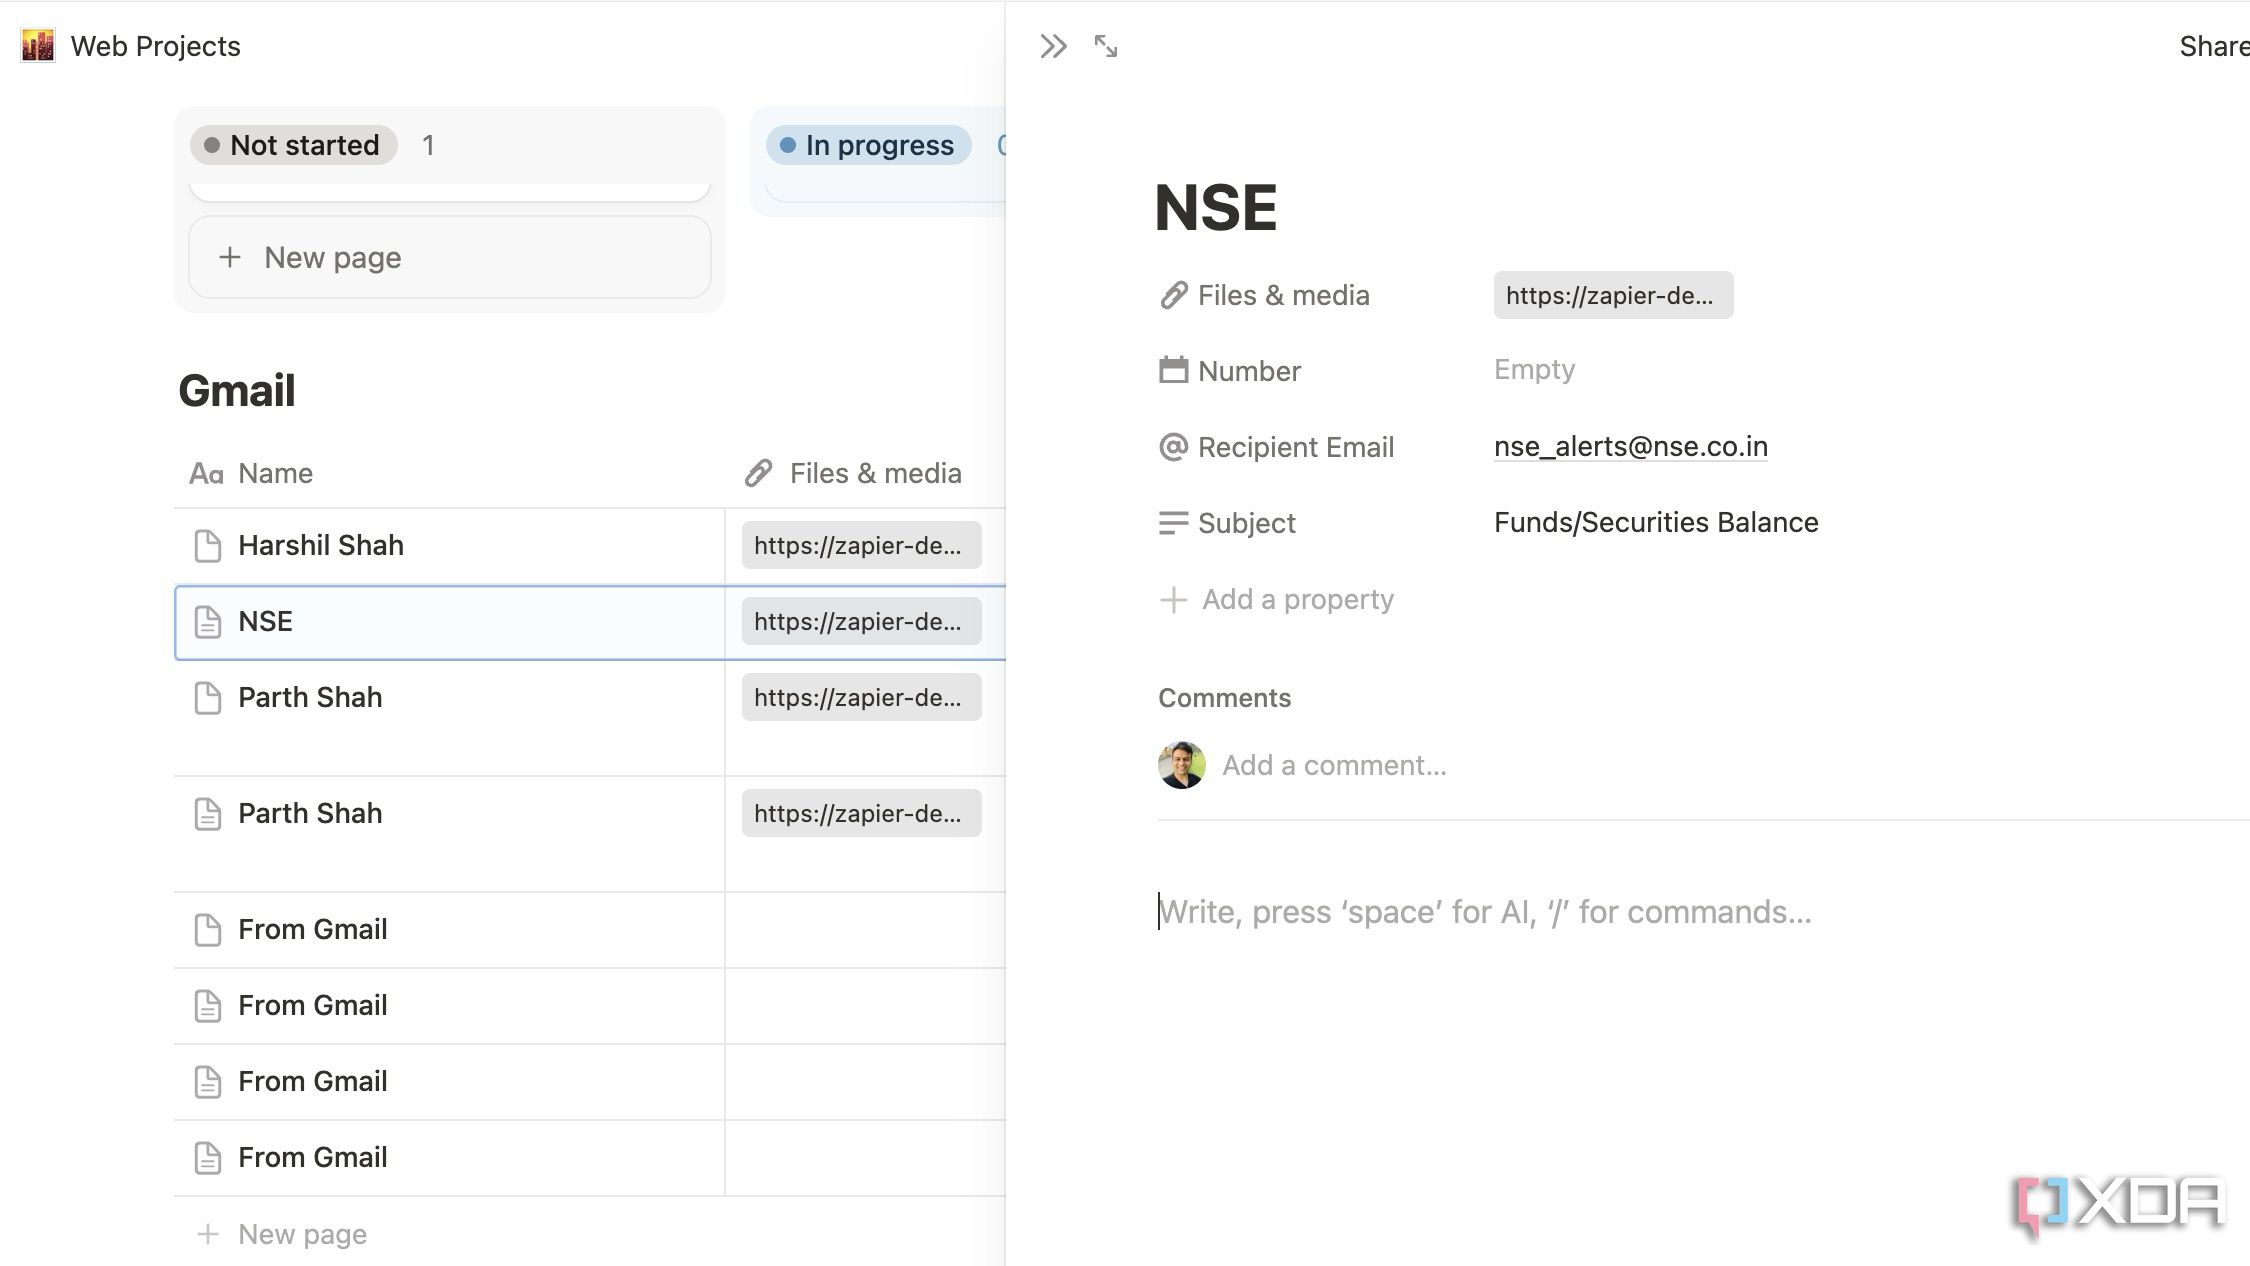
You can now head back to the Notion database and check your email receipts as new entries. It shows the sender's name, attaches the receipt under the Files & media, displays the recipient's email, and the Subject. You can expand the entry, click the link under Files & media and download the attachment to your device.
You can even get creative and add more columns in the Notion database and fill in those details from your Gmail message (like email body content). At any point, you can head back to the Zapier home and edit the Zap as per your convenience. The possibilities are endless here.
No more manual entry!
Overall, this automated system for transforming email receipts into Notion database entries has been nothing short of revolutionary for my personal finance tracking. What used to be a tedious, often time-consuming task is now a seamless, hands-off process. Now, I no longer need to sift through emails or have last-minute stress when it’s time to review my spending.
What are you waiting for? Follow the steps above and build your own seamless workflow in no time. Check out our dedicated post if you are looking for more such Notion hacks.


 English (US) ·