.png)
Controlling a desktop or server remotely can be frustrating, especially when you lose network access or need to manage the BIOS. That’s where the PiKVM project shines. After setting one up using a Raspberry Pi 4B and an HDMI-CSI bridge adapter, I now have full keyboard, video, and mouse control over my primary system, even during reboots. It’s saved me from having to shuffle between rooms or plug in a second monitor when something goes wrong.
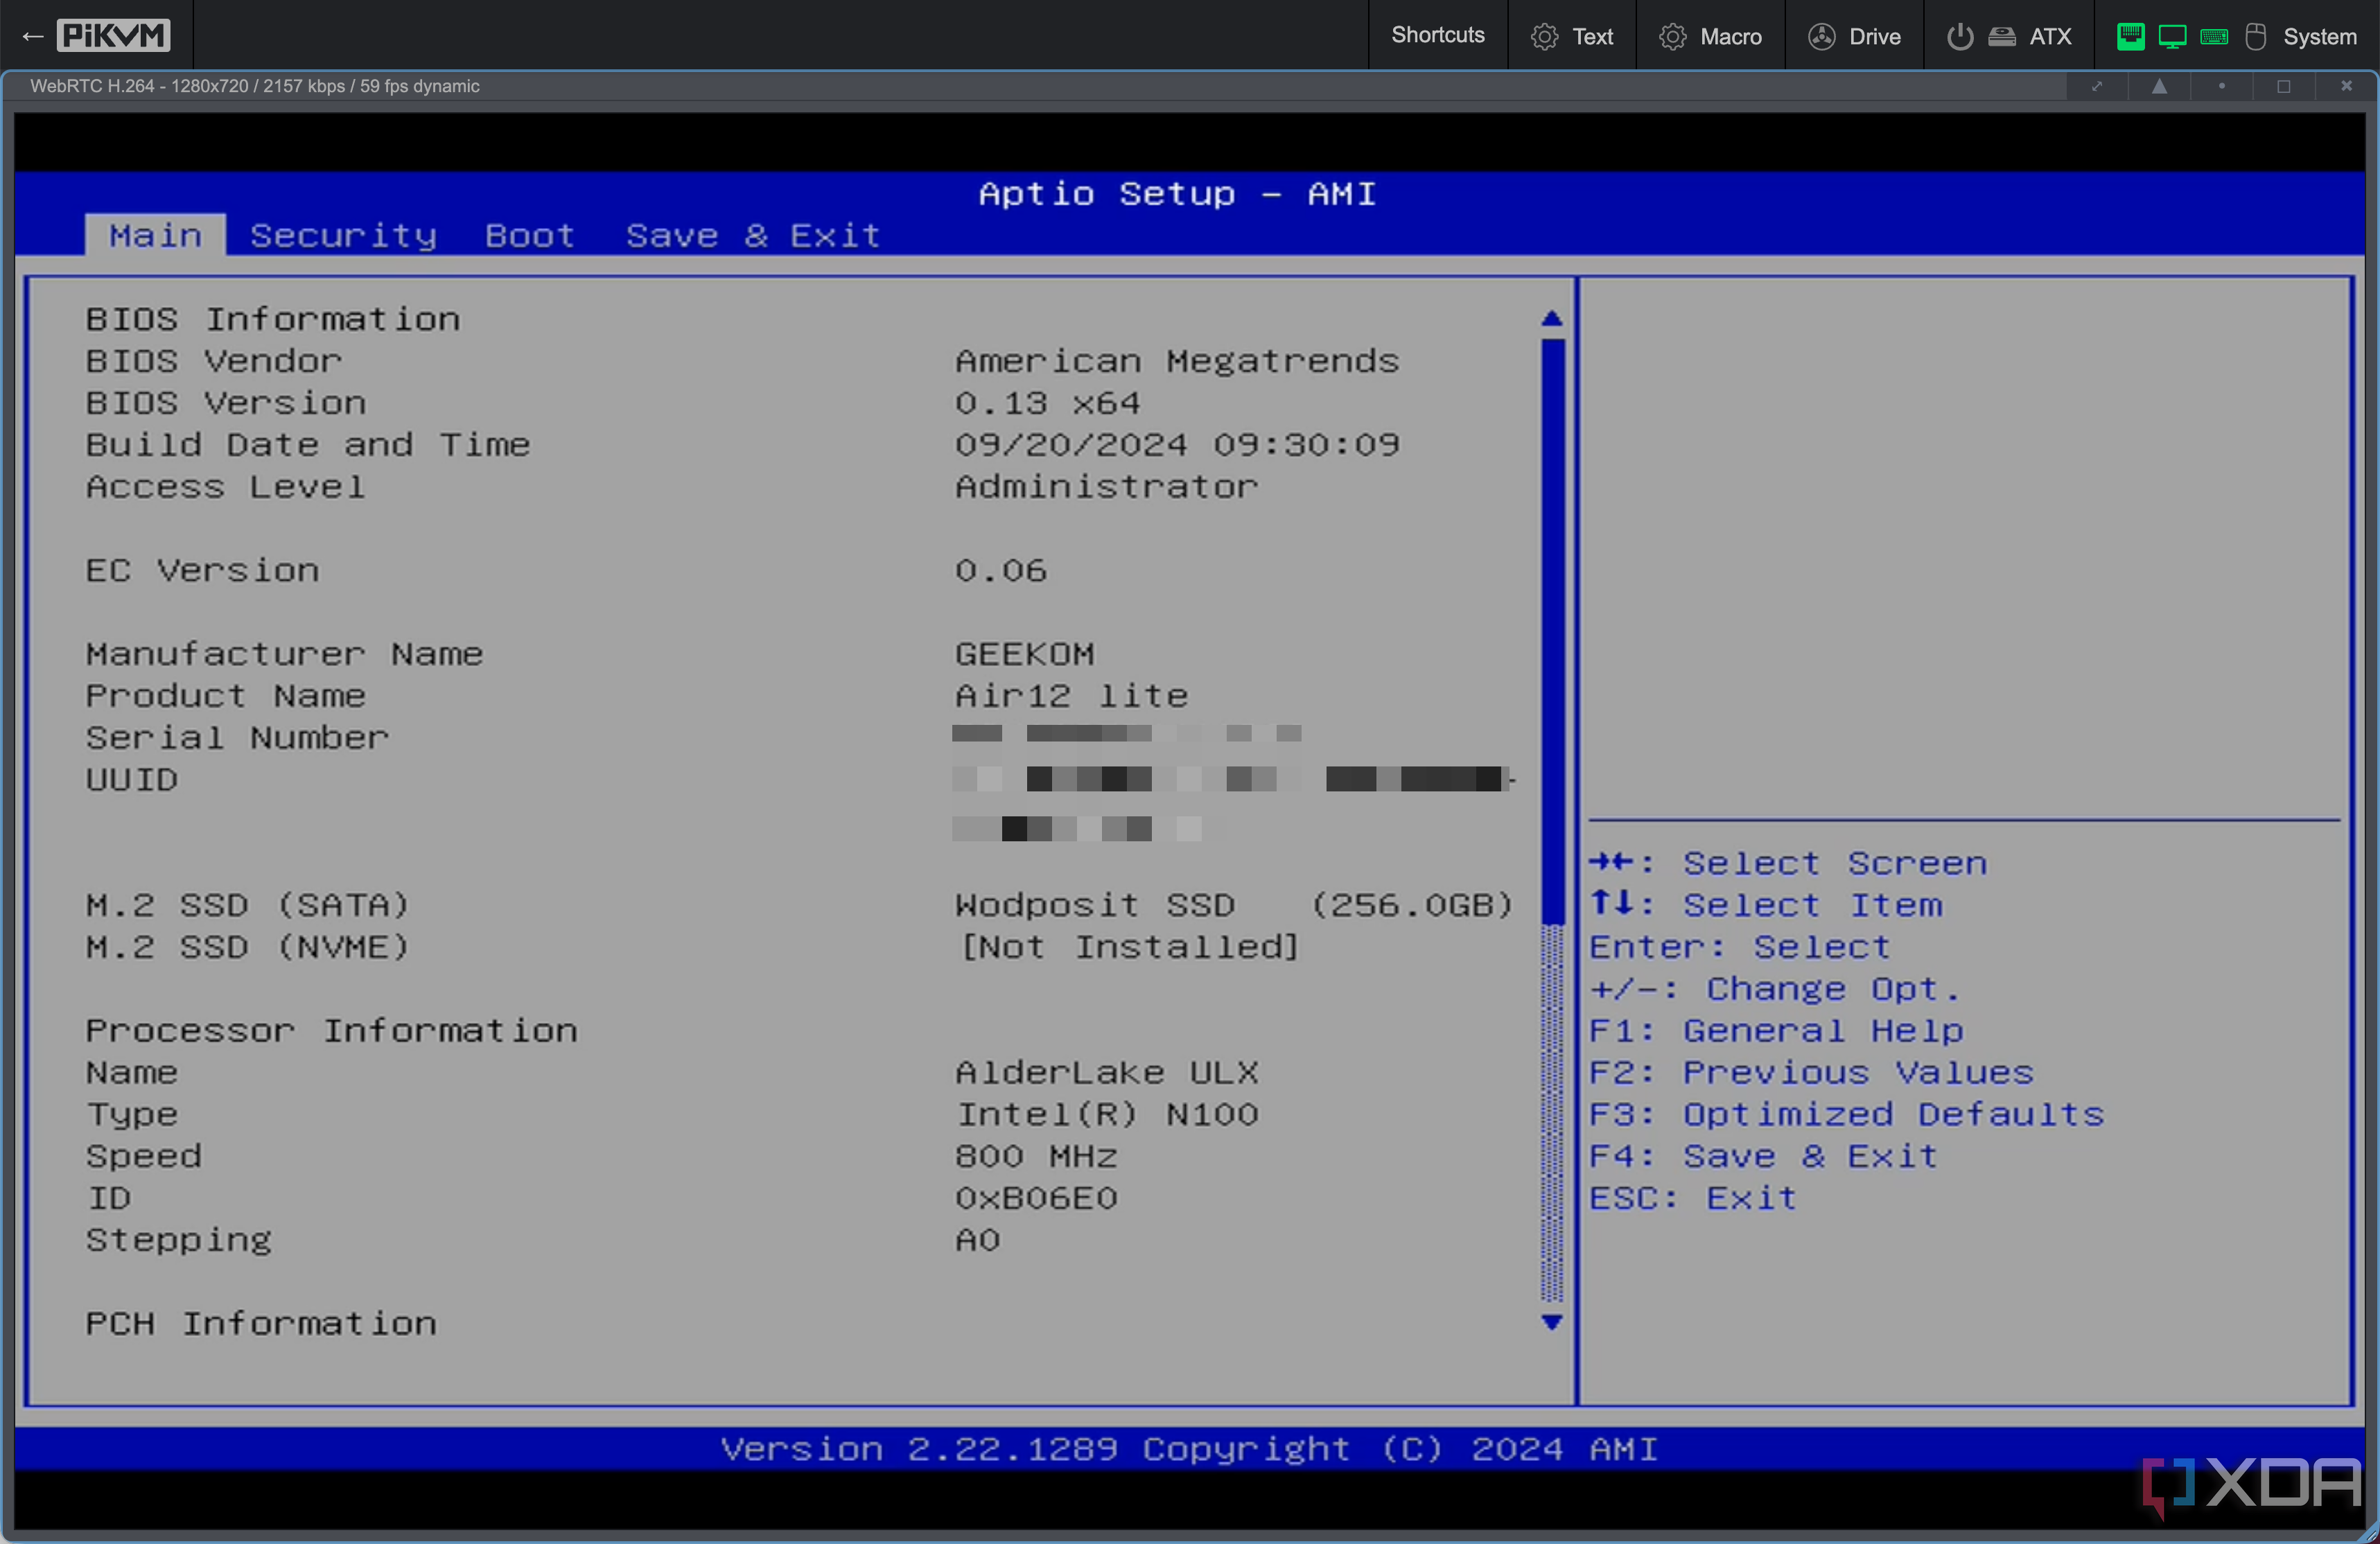
This setup provides me with browser-based access to my PC’s screen in real-time, from anywhere on my network. I can force shutdowns, restart into the BIOS, or even reinstall an OS if necessary. It feels more like having a physical KVM switch than just remote desktop software. That’s because the PiKVM operates independently of the host system’s OS, so you can access your machine even when it’s completely offline.
Related
How I turned my Raspberry Pi into a classic DOS PC
You can play 1990s PC games on DOSBox, but using your Raspberry Pi as a dedicated retro PC is easier with Faux86.
Full control before and after boot
There are numerous remote access tools, but most of them fail as soon as the OS crashes or the system reboots. PiKVM doesn’t rely on the target PC being functional. Instead, it grabs the HDMI output directly and emulates USB keyboard and mouse input. It works whether you’re in the BIOS, the GRUB menu, or staring at a crash screen.
That level of low-level access is usually limited to expensive IPMI setups on server-grade boards. For DIY users or small home labs, PiKVM provides nearly the same functionality without the need for hundreds of dollars in specialized gear. It’s also much more flexible than screen-sharing tools, which depend on the host OS and user permissions.
I’ve used it to troubleshoot a failed bootloader, configure BIOS settings, and even recover from a corrupted disk image. And all of that happened without touching the physical keyboard or monitor. Once I started using it, I realized how useful that kind of independence really is.
What you need to build one
Hardware and software requirements for setup
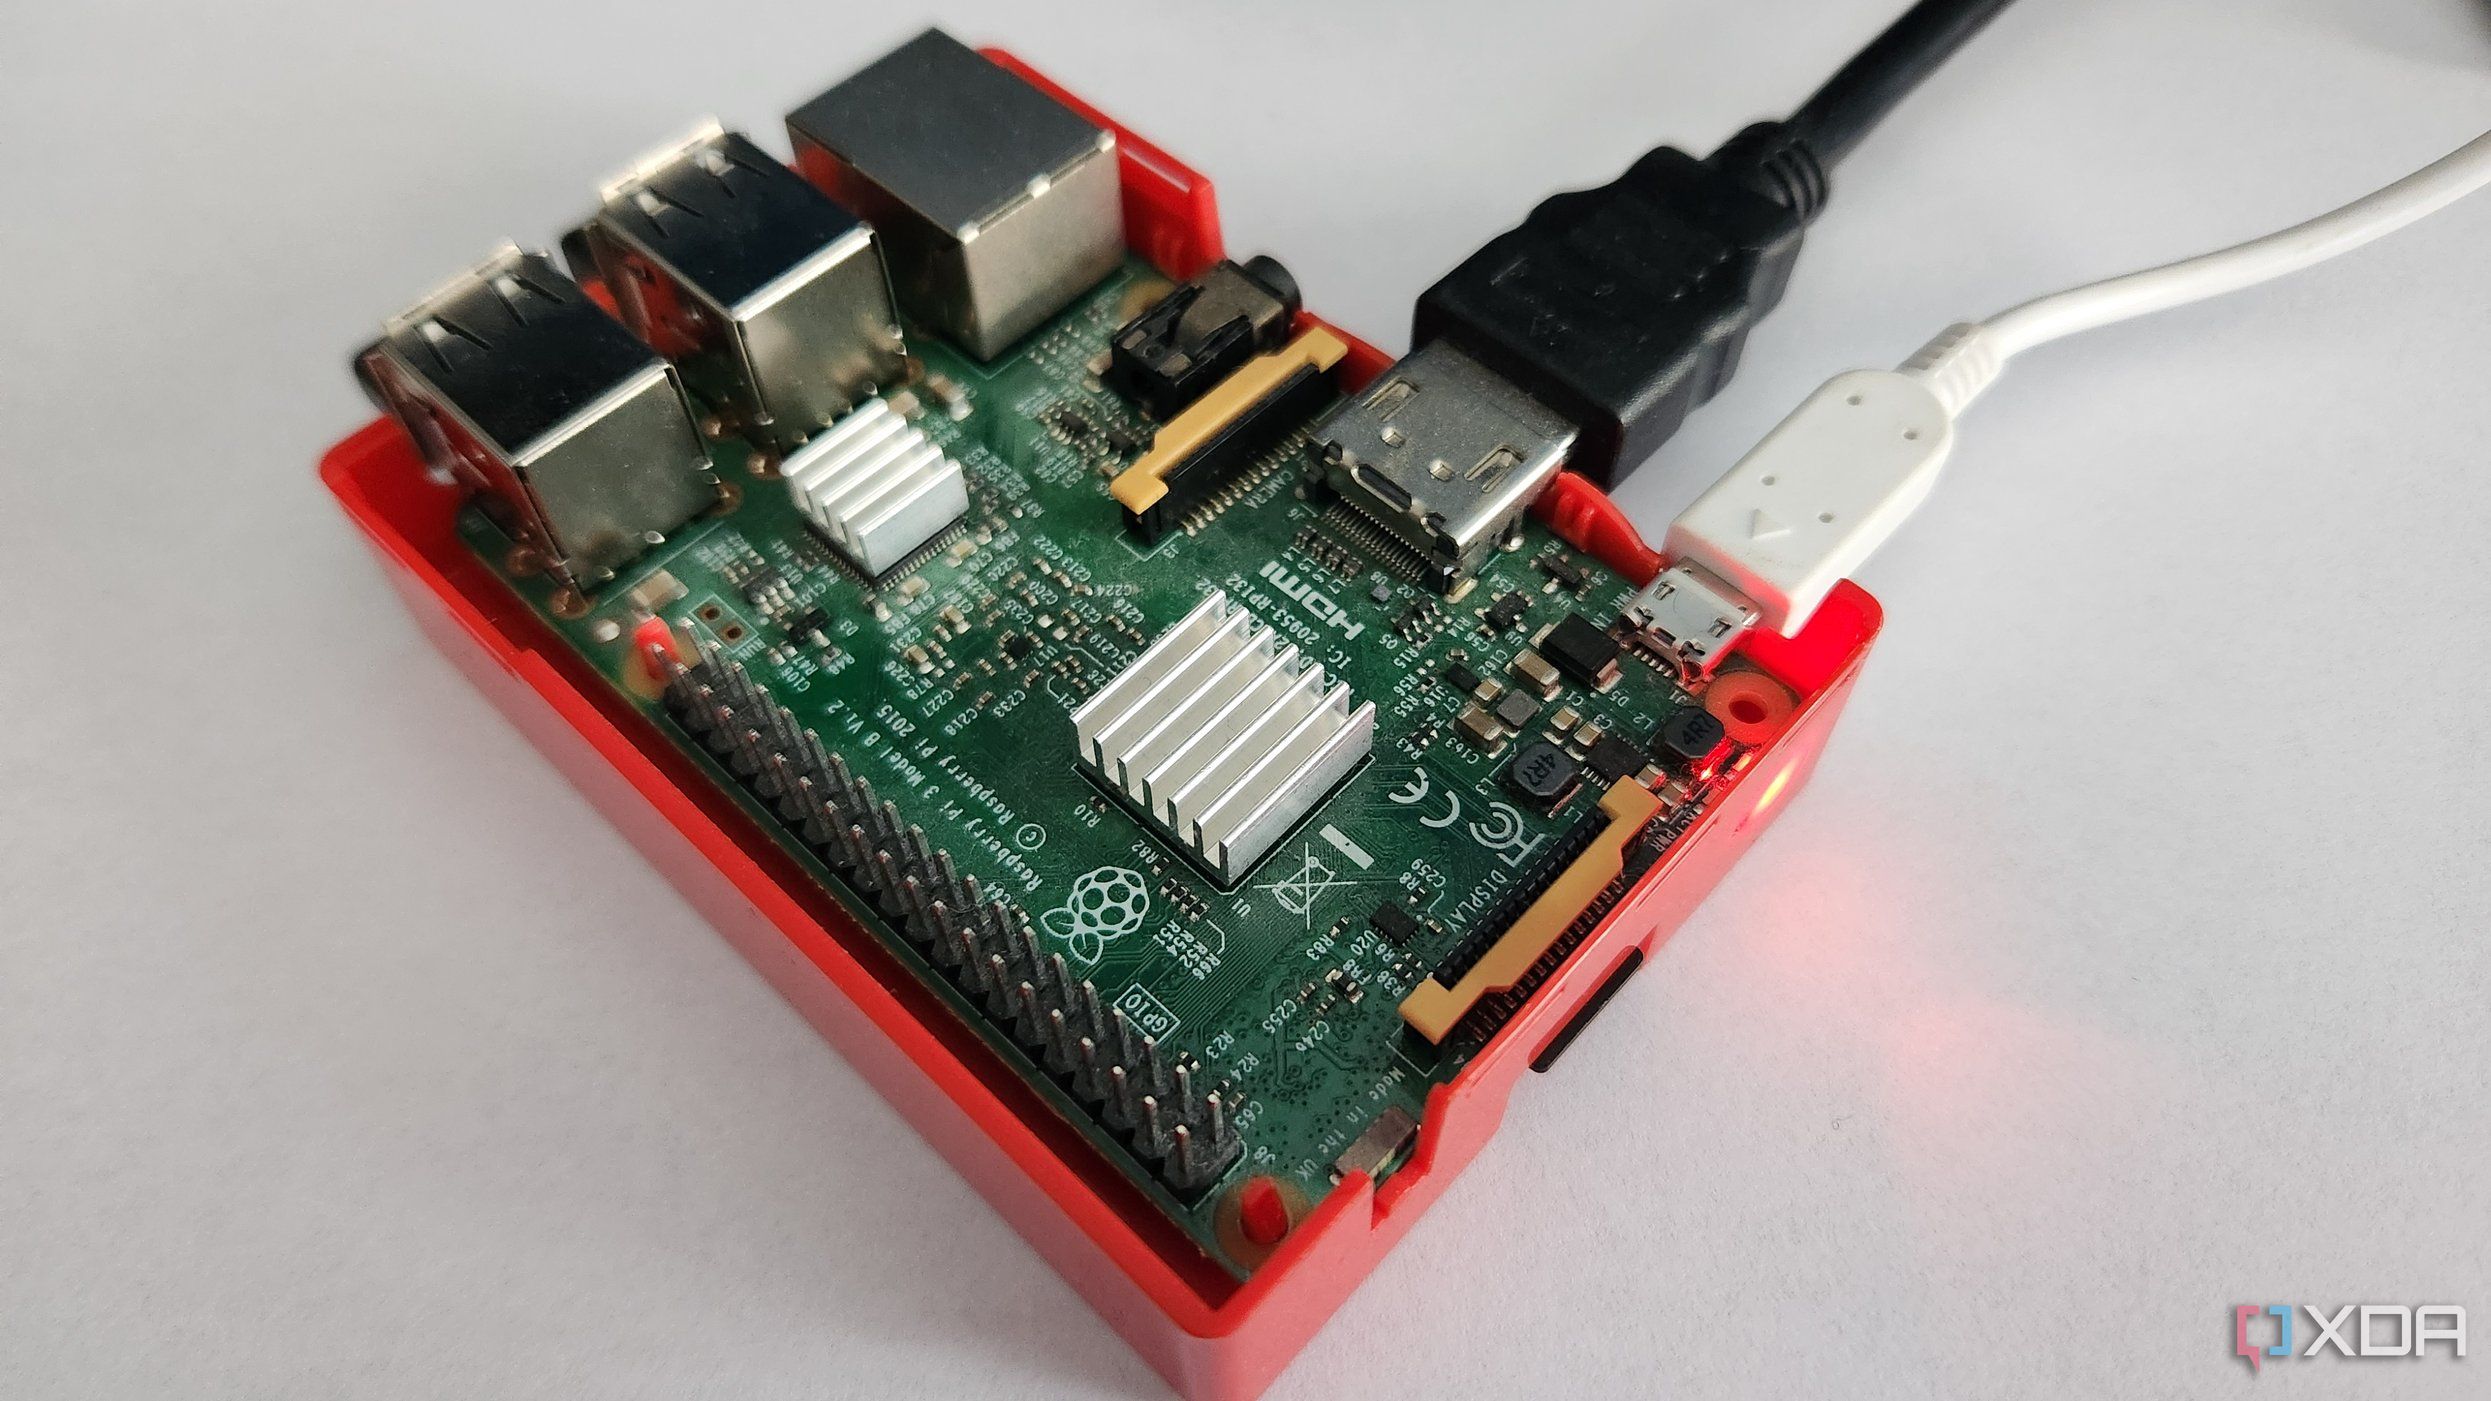
To get started with PiKVM, you need a Raspberry Pi 4B with 2GB of RAM. Lower models won’t cut it due to hardware limitations, and the software is so lightweight that you don't need more than 2GB of RAM. On the other hand, the Raspberry Pi 5 isn’t supported and offers nothing to justify the expense of the newer SBC. You’ll also need an HDMI-to-CSI bridge adapter, based on the TC358743 chip. I used a waveshare board and it worked perfectly. These handle the video input and pass it through to the Pi via the camera interface.
|
Raspberry Pi 4B |
Storage MicroSD card slot CPU Arm Cortex-a72 (quad-core, 1.8GHz) Memory 1GB, 2GB, 4GB, or 8GB of LPDDR4 Operating System Raspberry Pi (Official) Ports 2x USB-A 3.0, 2x USB-A 2.0, 40-pin GPIO, 2x micro-HDMI, 2-lane MIPI DSI display port, 2-lane MIPI CSI camera port, 4-pole stereo audio and composite port, microSD card slot, USB-C (for 5V power), Gigabit Ethernet GPU VideoCore VI |
|
waveshare HDMI-to-CSI Bridge |
|
|
USB-C power splitter |
|
|
USB-A to USB-A cable |
Make sure it's a male-to-male cable |
|
USB-C to USB-C cable |
Make sure it's a male-to-male cable |
|
HDMI cable |
|
|
Official Raspberry Pi 4 power supply |
You could also use an HDMI-to-USB capture device, but the developers note that many enthusiasts have run into incompatibility issues or other problems with such devices.
Other essential components include a reliable microSD card (I used a high-quality 128GB card), a USB-A to USB-A (male-male) cable for keyboard and mouse emulation, and a USB-C to USB-C cable (male-male) for connecting the Raspberry Pi. You’ll also need an official power supply for the Pi. A cooling solution also helps, as the CSI interface and video decoding can become warm under continuous load. Finally, I grabbed the latest PiKVM OS image from the project’s official site.
The full parts list can vary slightly depending on your preferred vendor, but the key components are the HDMI-CSI adapter, power supply splitter module, and a Raspberry Pi 4B.
Setting it up on the Raspberry Pi
Installing the OS and wiring everything up
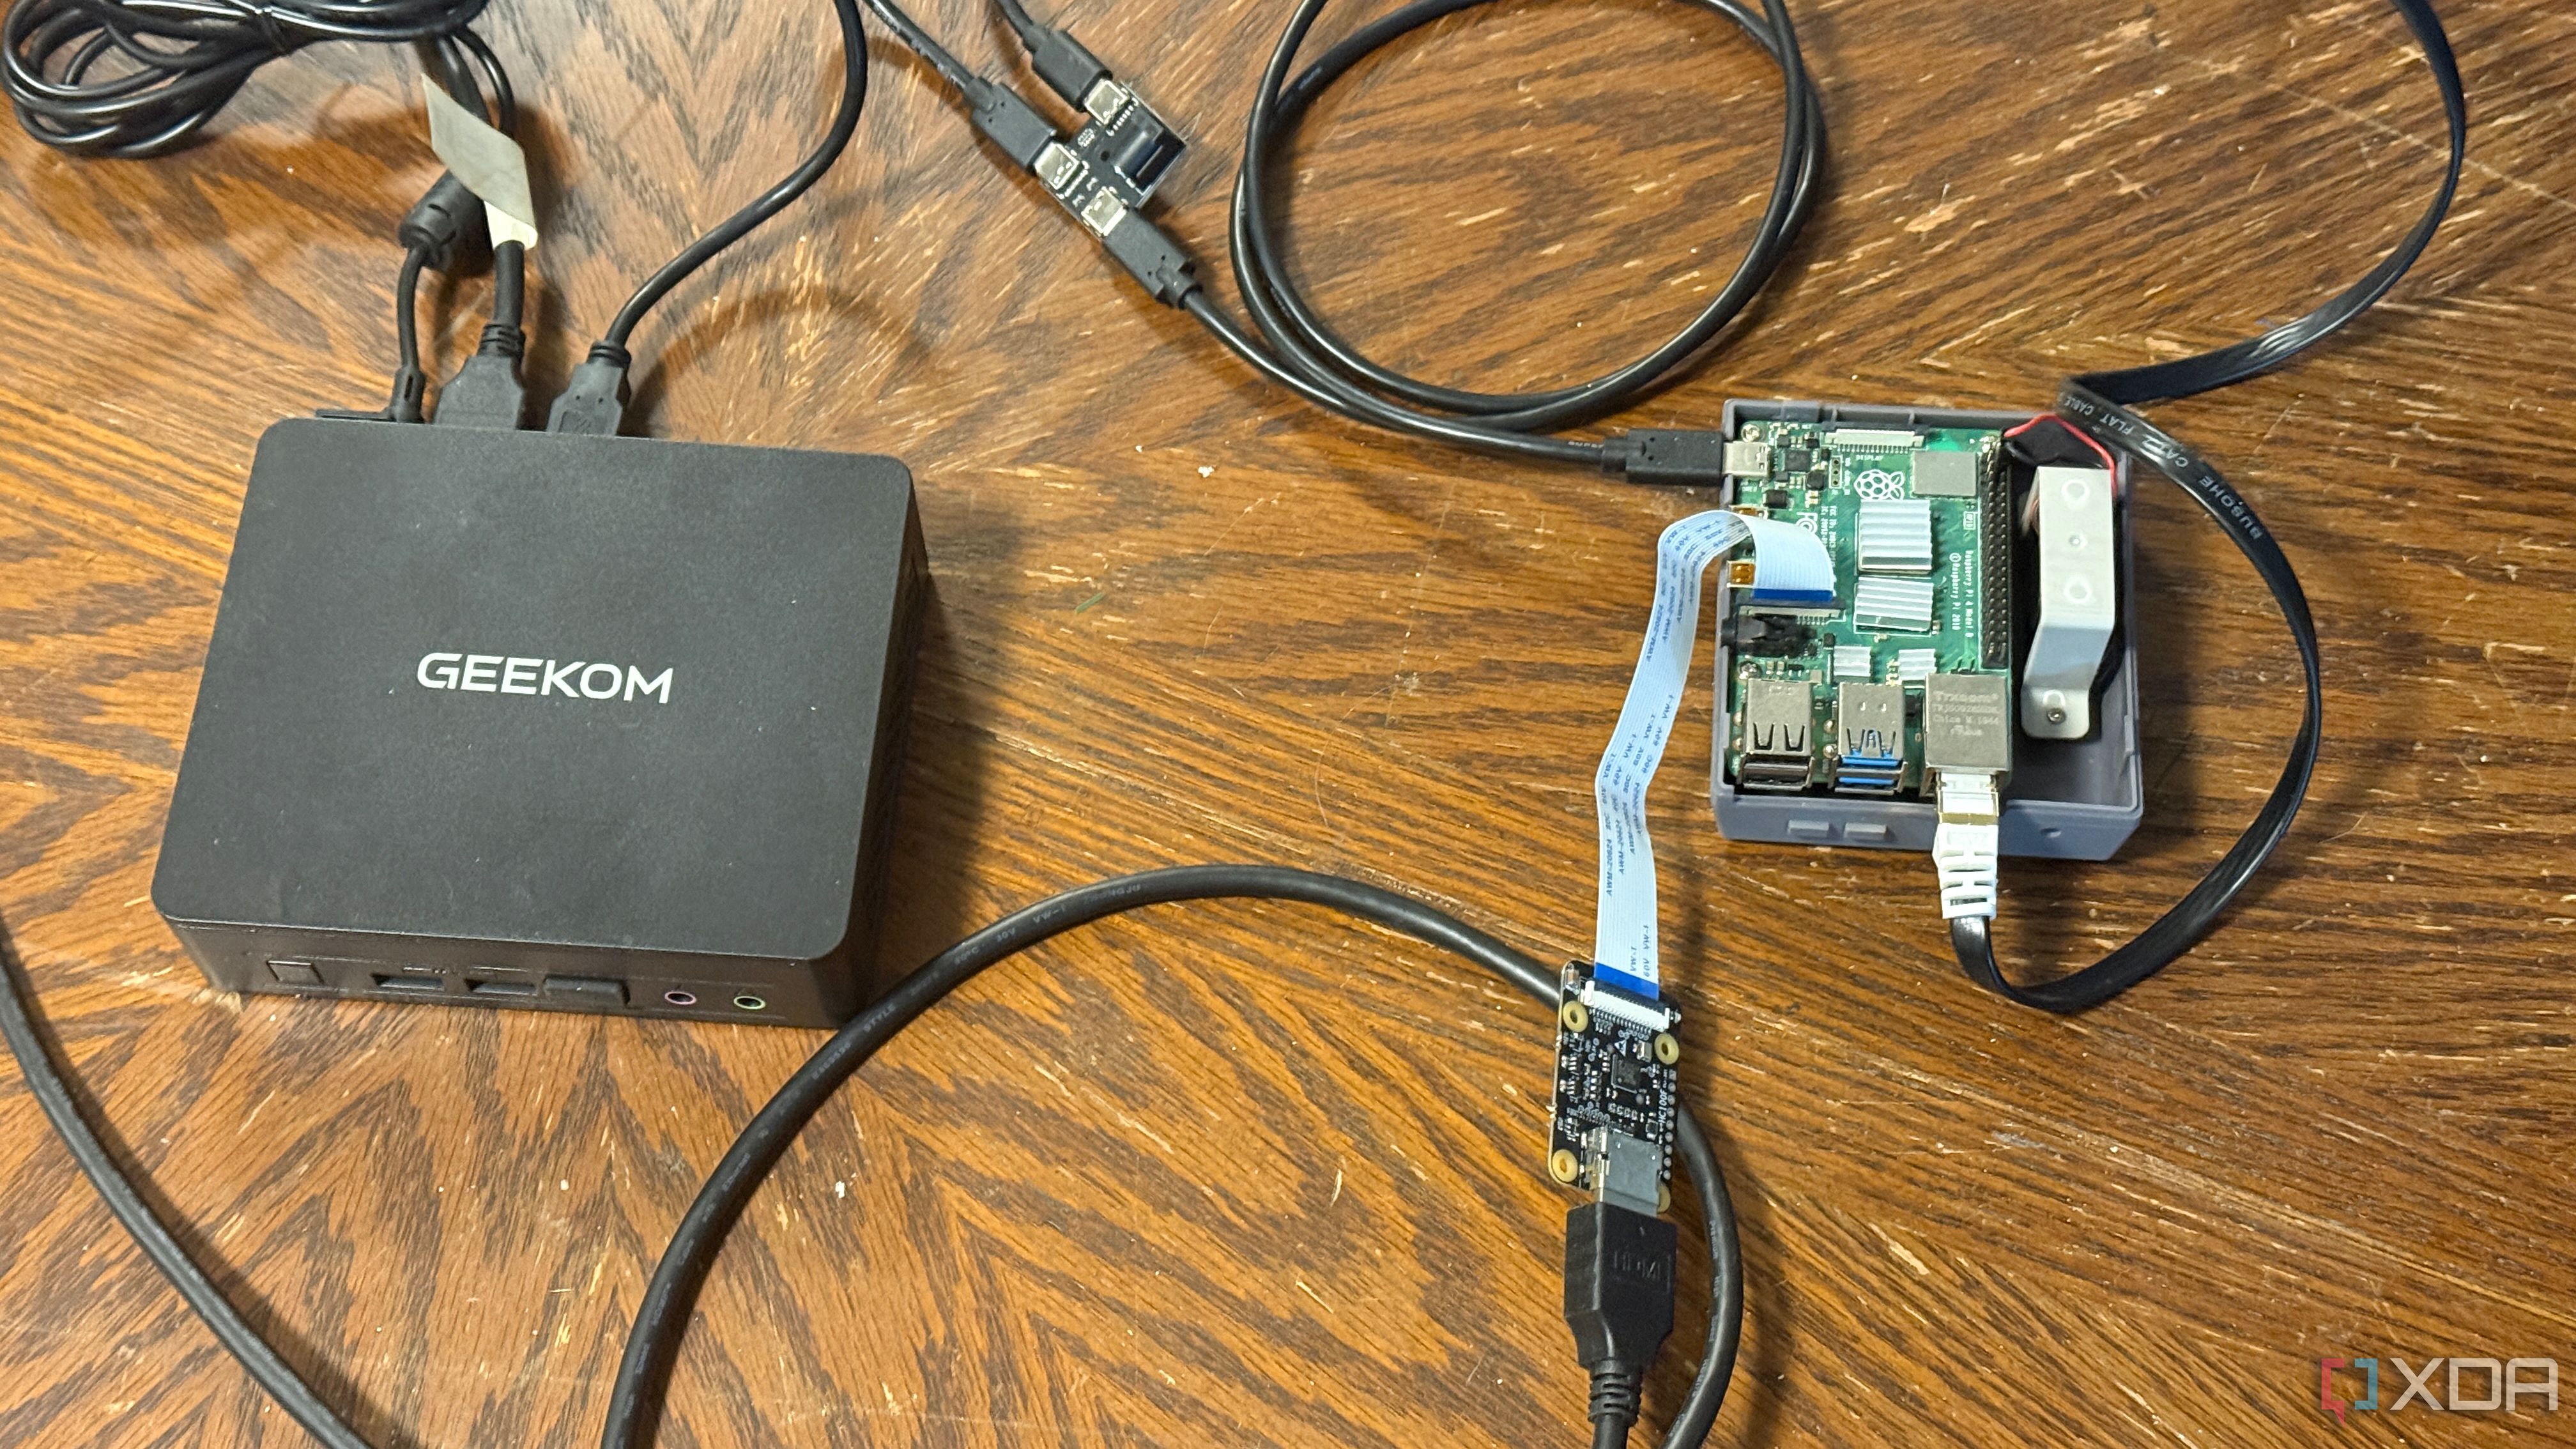
Once you have all the hardware, setting things up is straightforward. The PiKVM project provides a ready-to-flash image based on Arch Linux. I used Raspberry Pi Imager to write it to the SD card, inserted it into the Pi, and connected everything to my mini PC. Next, I powered on the PiKVM. The first boot takes a minute; after that, you can find the Pi on your local network using its hostname or IP address.
Connecting the HDMI input is easy if you're using a CSI bridge—just plug the cable into the source PC’s HDMI out and connect the ribbon cable to the Pi’s camera interface. Then, connect a USB-A to USB-A cable from the splitter to your PC. This acts as the emulated keyboard and mouse, allowing you to control the machine remotely.
After logging into the web interface, I had full access to the display, along with virtual keyboard and mouse input. There are also additional features, such as mounting ISO files over the network and sending power/reset signals if your motherboard supports them. In my setup, it took less than 30 minutes to go from hardware on the bench to full control over my PC.
Key use cases and reliability
Everyday benefits and unexpected problem-solving
I’ve used PiKVM to reconfigure BIOS options, test multiple OS images, and troubleshoot failed boot sequences. It’s especially helpful when experimenting with Linux distros or dual-boot setups, where I might break something and need to roll back. Instead of swapping cables or dragging out a monitor, I just log in from my laptop.
It’s also become a part of my home lab workflow. I can monitor boot sequences during system updates or capture error logs that occur before any OS-level logging begins. In headless systems, that kind of visibility is almost impossible to get without something like PiKVM.
Even outside of emergencies, I use it to quickly check system status, tweak fan curves in BIOS, or switch boot drives. I didn’t expect it to become something I rely on almost daily, but that’s exactly what happened.
Why I recommend building your own
There are plenty of ready-made remote tools, but PiKVM gives you low-level, always-on access that’s hard to match. With a Raspberry Pi 4B and some basic parts, you can replicate features generally found on expensive server boards. Whether you’re running a home lab, supporting friends and family remotely, or just love tinkering with hardware, this is one project worth building.


 English (US) ·