.png)
A few years ago, when the need for remote jobs increased, our small team faced the challenge of managing all its projects. I was responsible for assigning and keeping track of the team's projects. It was difficult, as I had to contact each team member to delegate tasks and monitor their progress.
After a while, I learned about project management tools and tried quite a few. However, ClickUp stands out. If you were like me some years back and had not heard of ClickUp, it's simply a software solution for managing projects. It's ideal for managing work, school, or personal projects.
Related
ClickUp is easy to use
I was drawn to ClickUp because of its short learning curve and user-friendly interface. After learning the basics of using the app, it didn't take long before I created our team's workspace and added my team members. I also created our team's spaces, folders, lists, and a few tasks.
Sometimes, I delegate tasks to coworkers. Other times, team members with relevant experience can take on these tasks, depending on availability. I also use the status feature to keep track of the progress on assigned tasks, which helps members update the status of tasks as soon as each milestone is achieved.
As a result, more experienced team members can monitor progress and offer constructive feedback to help the team achieve the desired results. I also find the time range feature very useful. With it, I could give team members a sense of urgency. This has further helped boost the team's productivity and, thankfully, made my role much easier.
How you can get started with ClickUp
Download ClickUp and sign up
If you are a project manager, a business owner, an employer, or even an employee, you could experience similar satisfaction as I did from learning to manage your projects with ClickUp.
Using ClickUp is pretty simple; I'll walk you through the process.
-
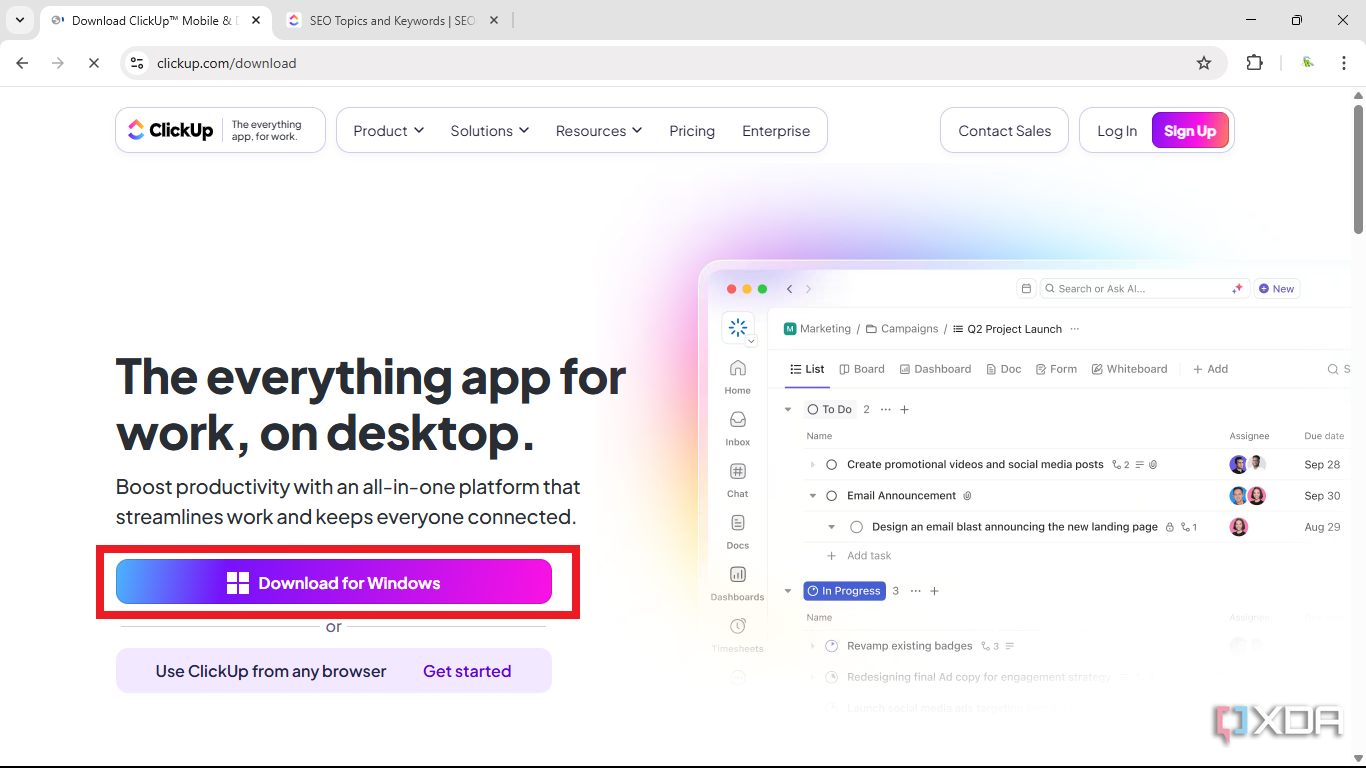
Go to www.clickup.com/download, where you'll see two options: Download for Windows or Use ClickUp from any browser. I'd recommend downloading the app for a better user experience.
- Open your ClickUp app. At the top right corner, click Sign Up -> Sign Up.
- Input the required details and click Play with ClickUp. An authentication code will be sent to your email. Input the code.
Customizing and setting up your team's ClickUp
Set up your team's work environment
-
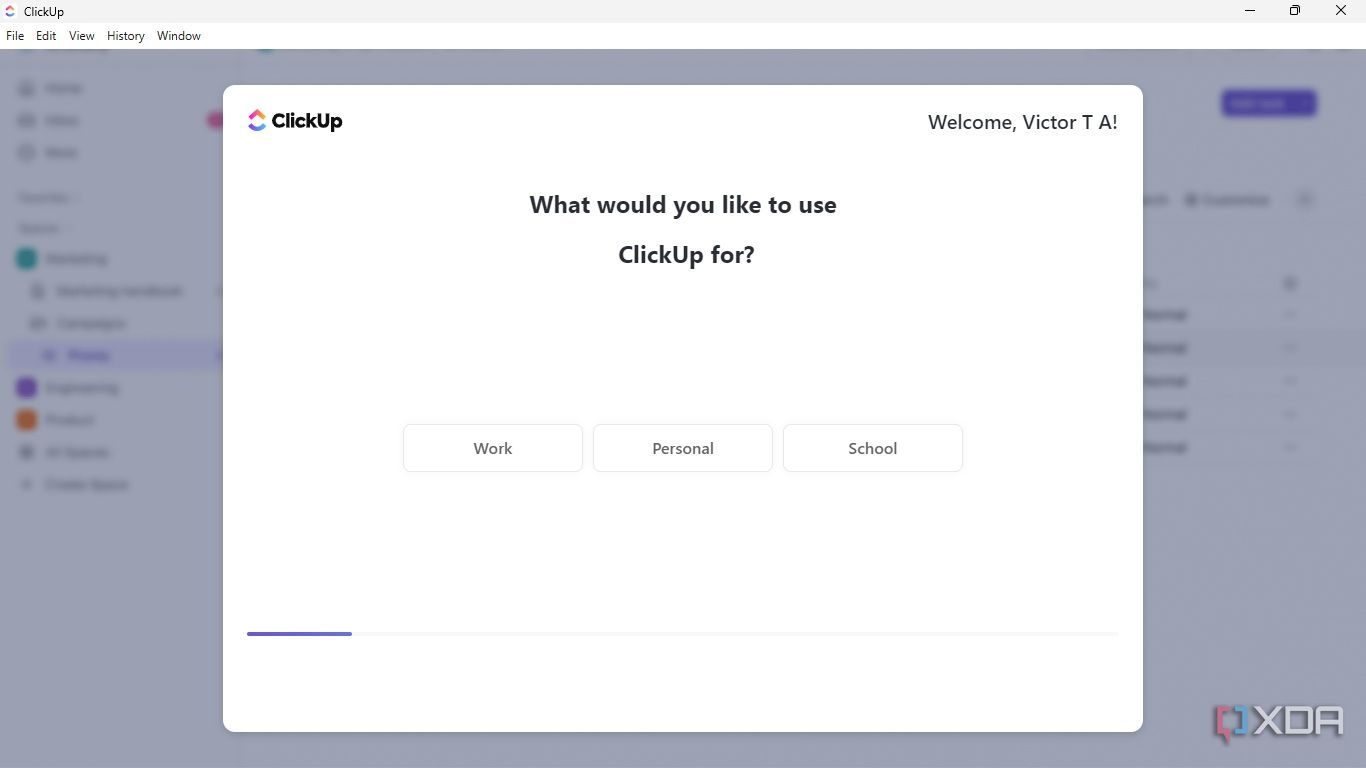
Log in through the app; you will be prompted to choose what type of project you want to use ClickUp for: Work, Personal, or School.
- Follow on-screen instructions until you are prompted to invite people (who are your team members) to your workspace.
- Input all your team members' emails and click Add.
- Click Invite.
-
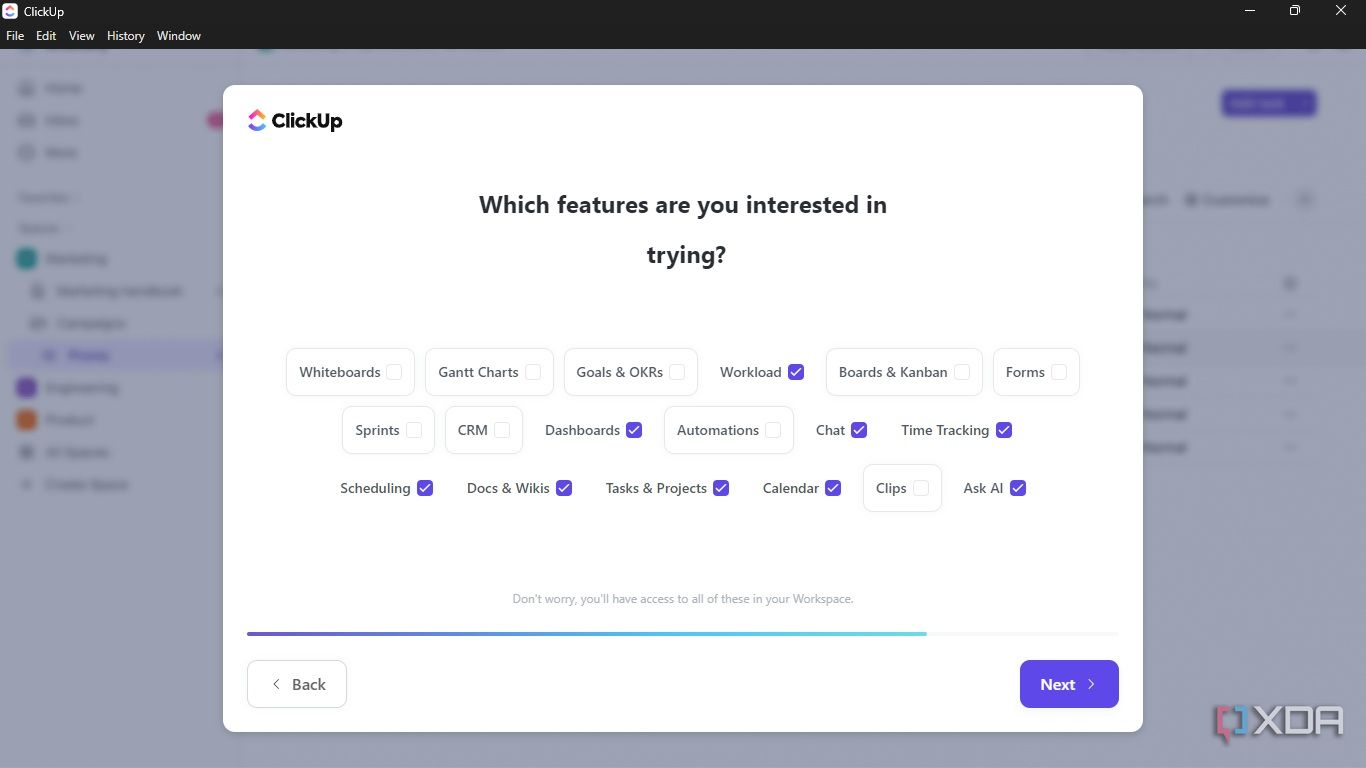
Choose the features you would like to use with your team members. For example, since I usually have multiple deadlines to meet, I included time tracking as a feature I want on my team's ClickUp.
- Lastly, choose a name for your workspace and click Finish.
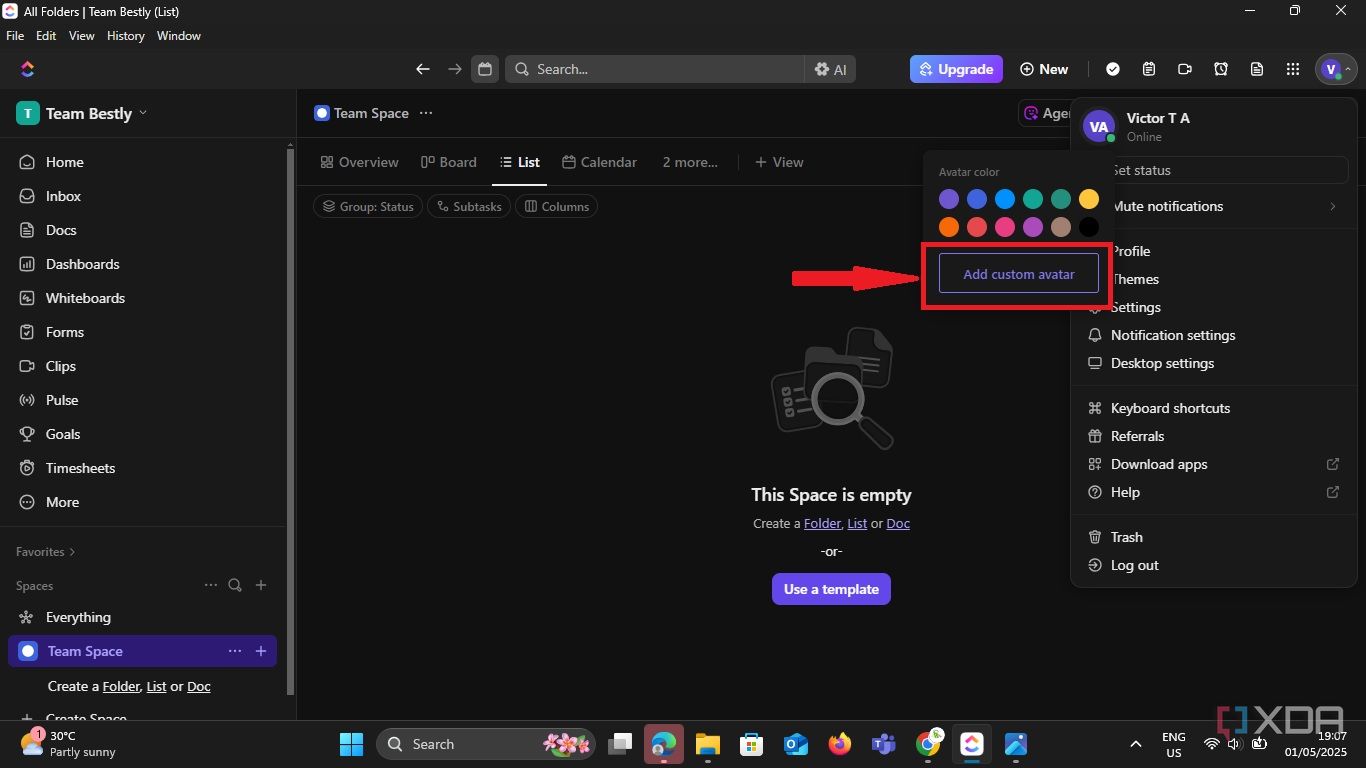
Voilà, your team setup is ready. What next? Take a moment to add your profile picture. Since creating an identity for yourself will enable your team members to identify you easily, do this:
- Go to the top right corner of your app and click the icon with a letter of your name.
-
Click Add Custom Avatar to add your profile picture.
Getting to know ClickUp
Before diving into managing projects with ClickUp, let's tour the ClickUp interface.
- Workspace: To fully understand a workspace, you need to see it as an actual workspace. It includes all aspects of your team's work environment, including folders, spaces, tasks, and projects. Therefore, if you manage different companies, you can have several workspaces.
- Space: Let's say your company has different branches or departments; you can separate them into various spaces. Inside these spaces, you can organize your projects with folders and lists.
- Folders: Your folder contains lists, and you can create specific tasks inside your lists.
In short, the ClickUp hierarchy is like this:
- Workspace
- Space
- Folders
- Lists
- Tasks
- Sub-tasks
Once you master the features in the ClickUp hierarchy, managing projects with ClickUp will be a breeze.
How to manage projects with ClickUp
Creating a space and defining your work stages
If you've followed this guide from the beginning, you should already have your team's workspace at this point. If that's the case, check the top left corner of your screen to ensure you are on your workspace.
Now, to create your space,
-
Click Create Space on the left sidebar.

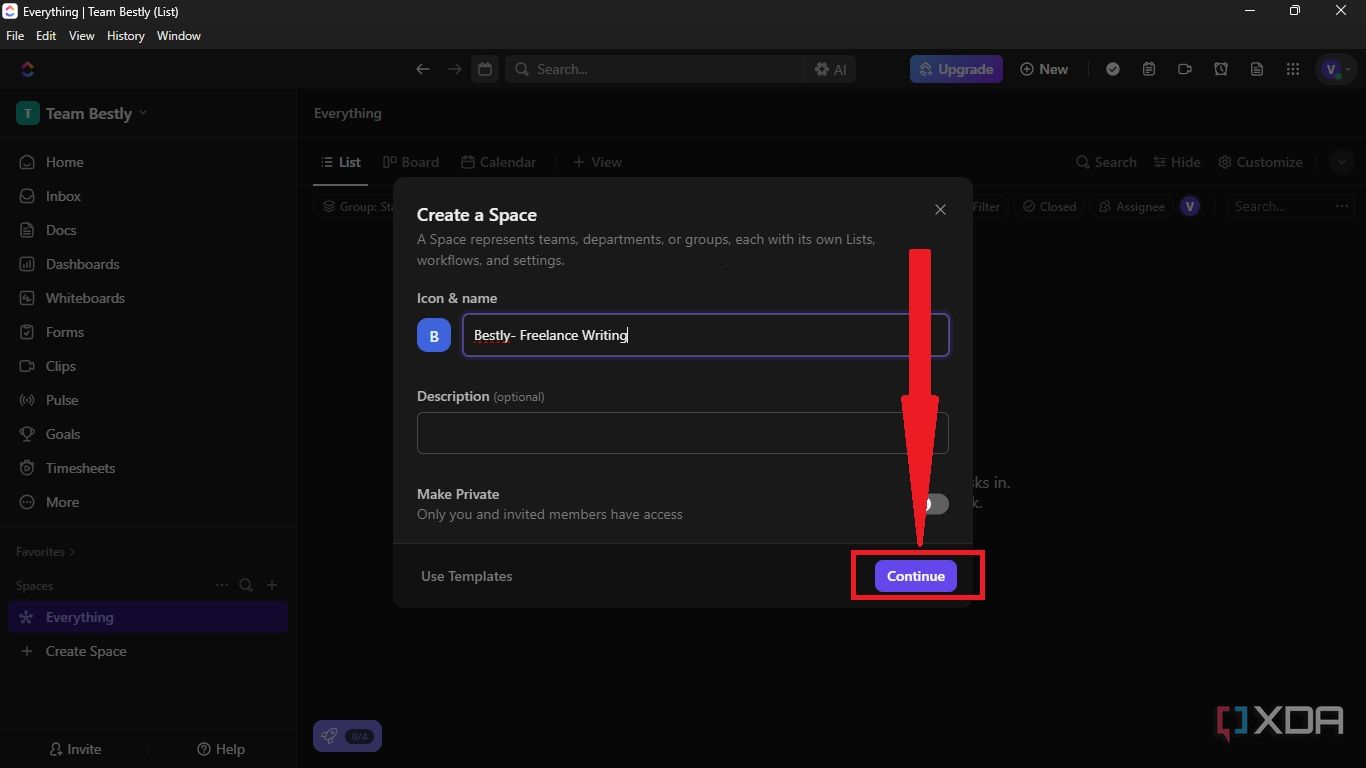
-
Input your space or department name, and click Continue. In this case, I chose "Freelance Writing."
-
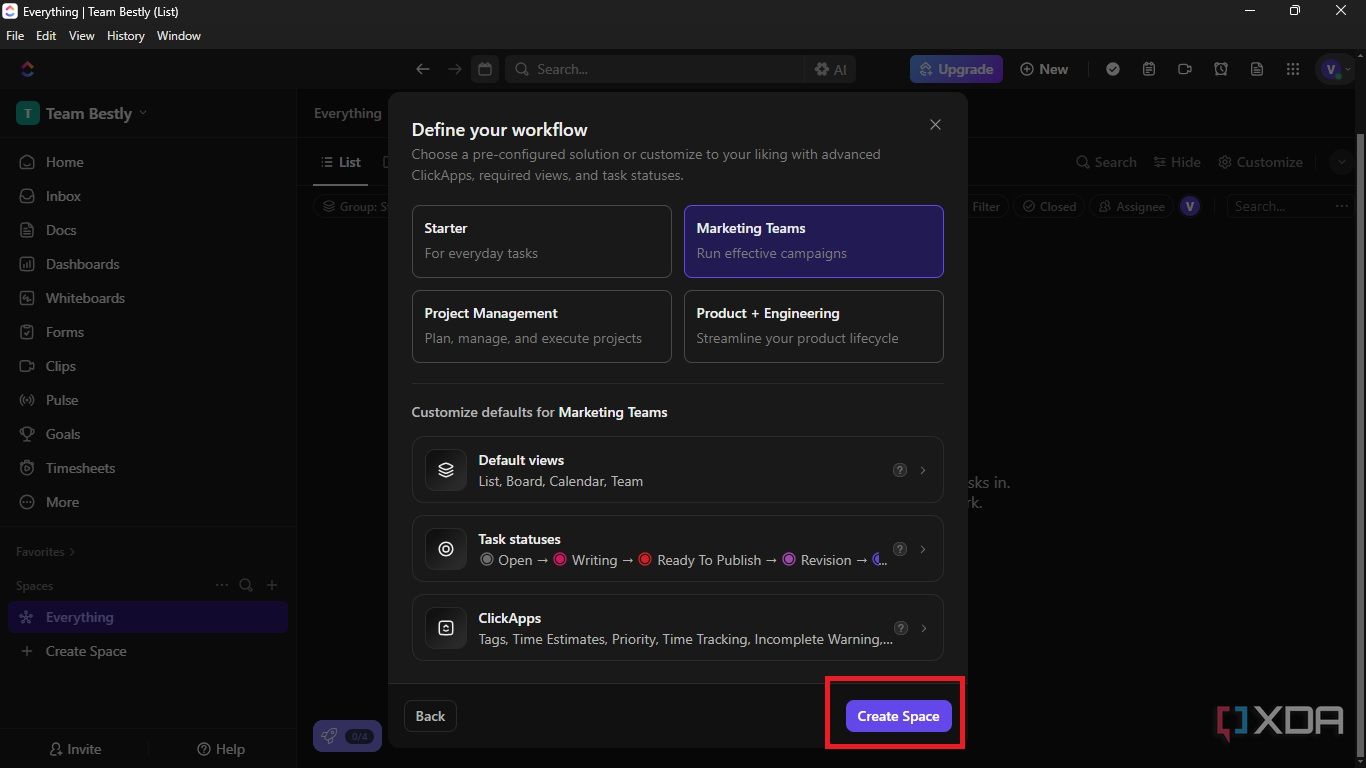
Next, choose the options that best apply to your team, and click Task Statuses. You may select any other option; however, I find task statuses easy to use.

-
Use the status template to choose the status list that suits the stages of your workflow. In this case, I chose Writing; you can view the default stages under Active.

-
You may also edit or delete a default stage or status if it does not align with your team's needs. Thereafter, click Apply Changes -> Save template & apply.
-
This will take you back to the Define Your Workflow page. Then, click Create Space.
You will need to create lists and tasks
Almost every workspace has something in common: they solve problems that are assigned to team members in the form of tasks. Since you cannot create your tasks on ClickUp without making lists, you should learn how to create lists.
To create your lists,
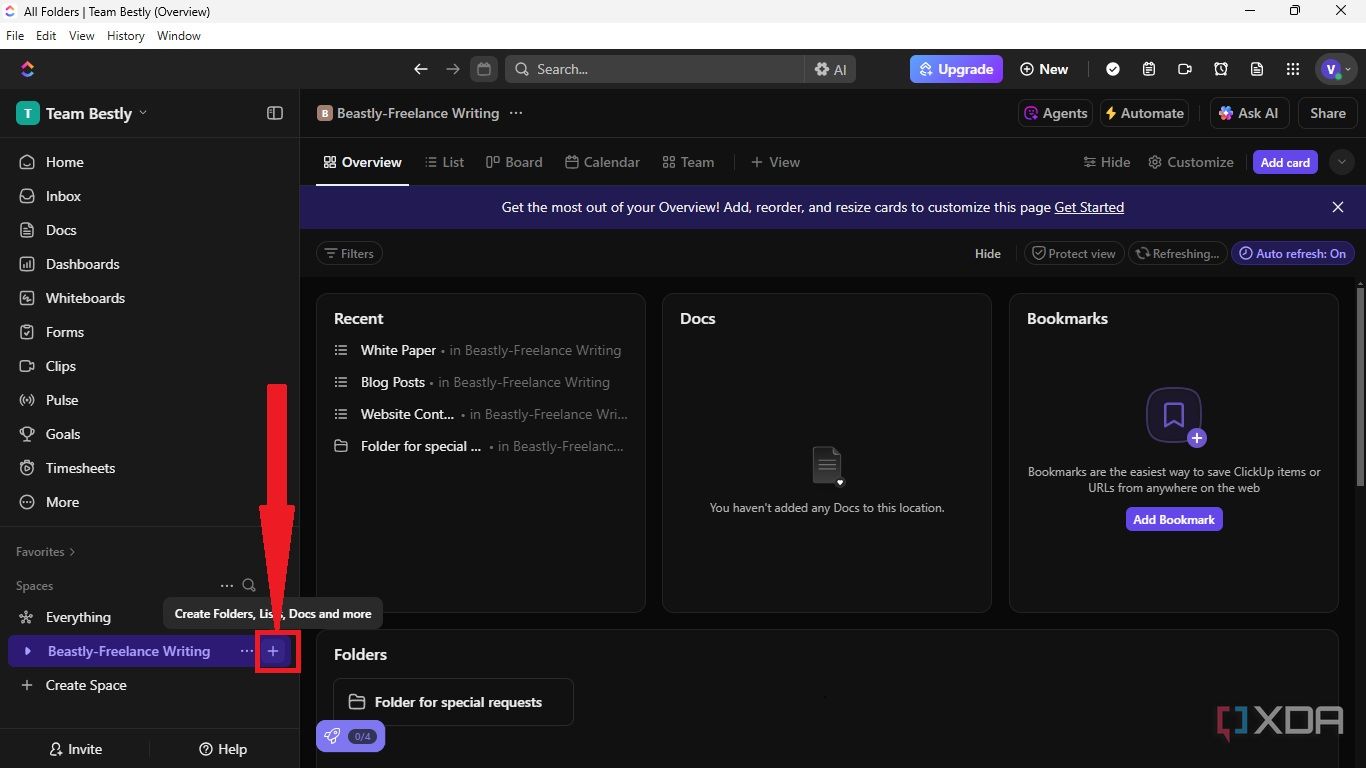
- Check the left sidebar to be sure you are in your space.
-
Click the + icon -> list.
-
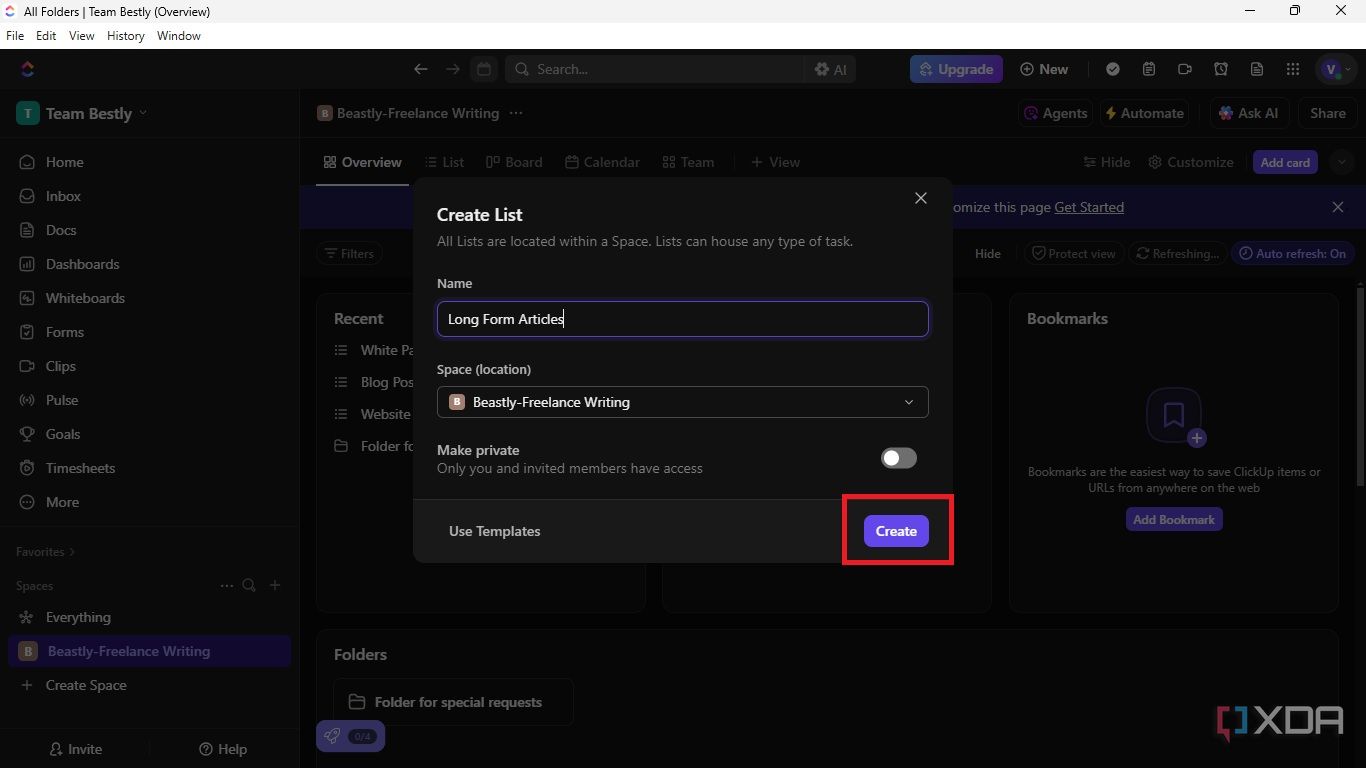
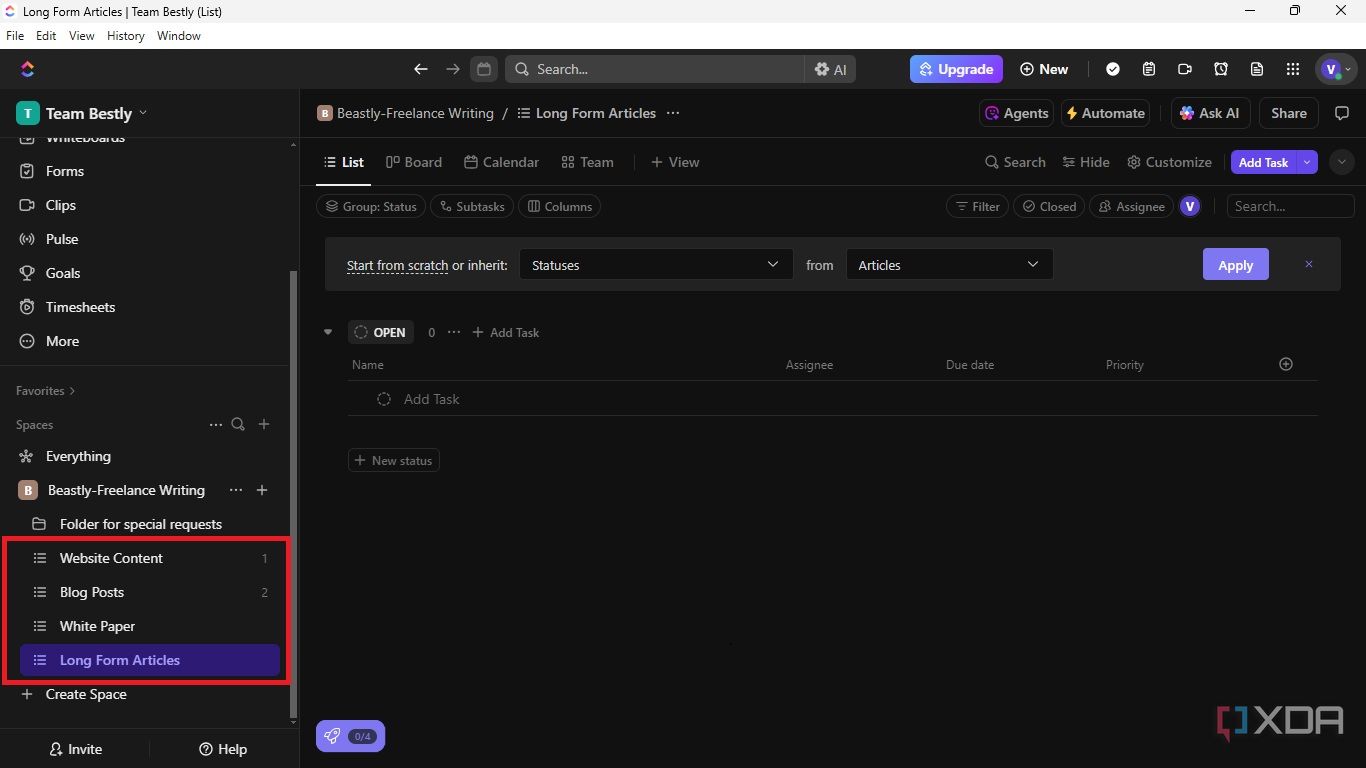
Type the name of your list in the text field and click Create.
-
Repeat the process to create all your lists.
Next, tasks are created and assigned to team members.
You need to see your lists as a home for tasks that team members will handle. Here is how to create ClickUp Tasks:
-
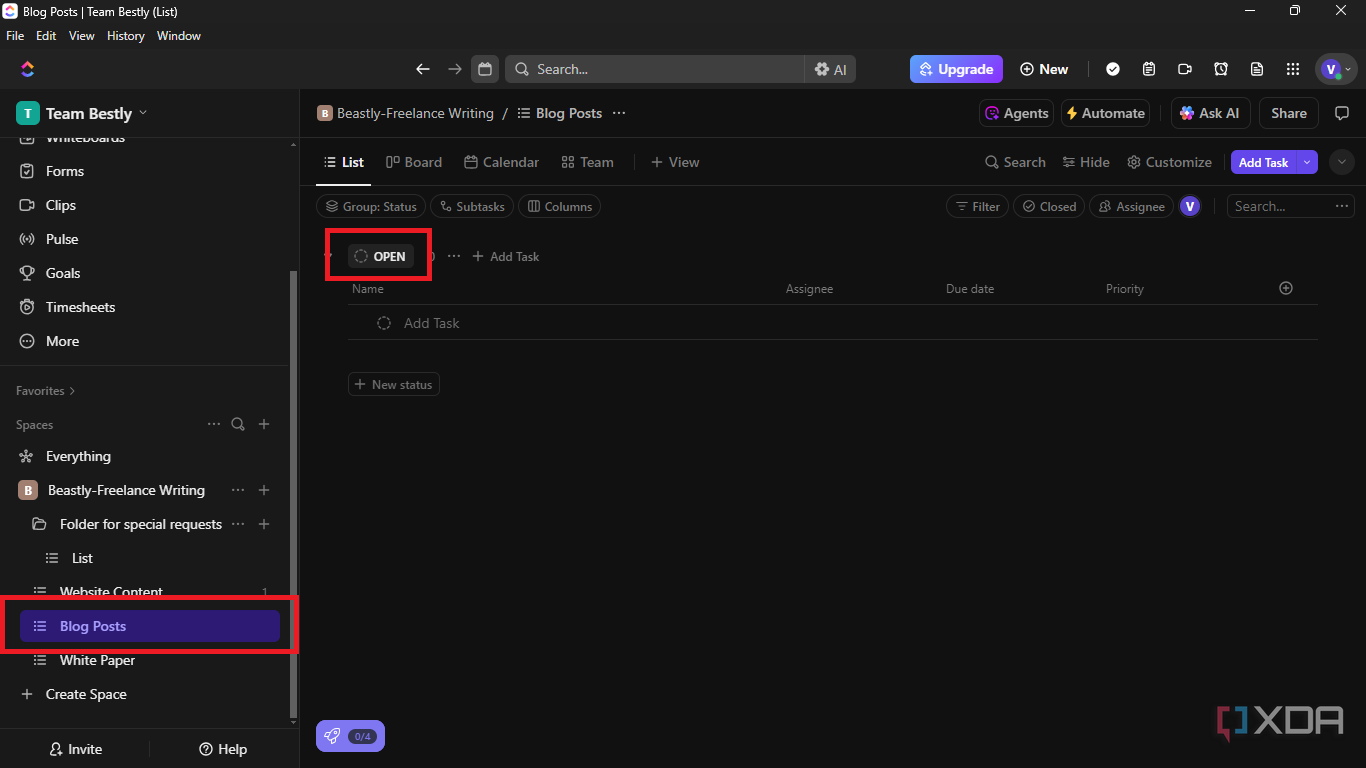
Click your list in the left sidebar.
-
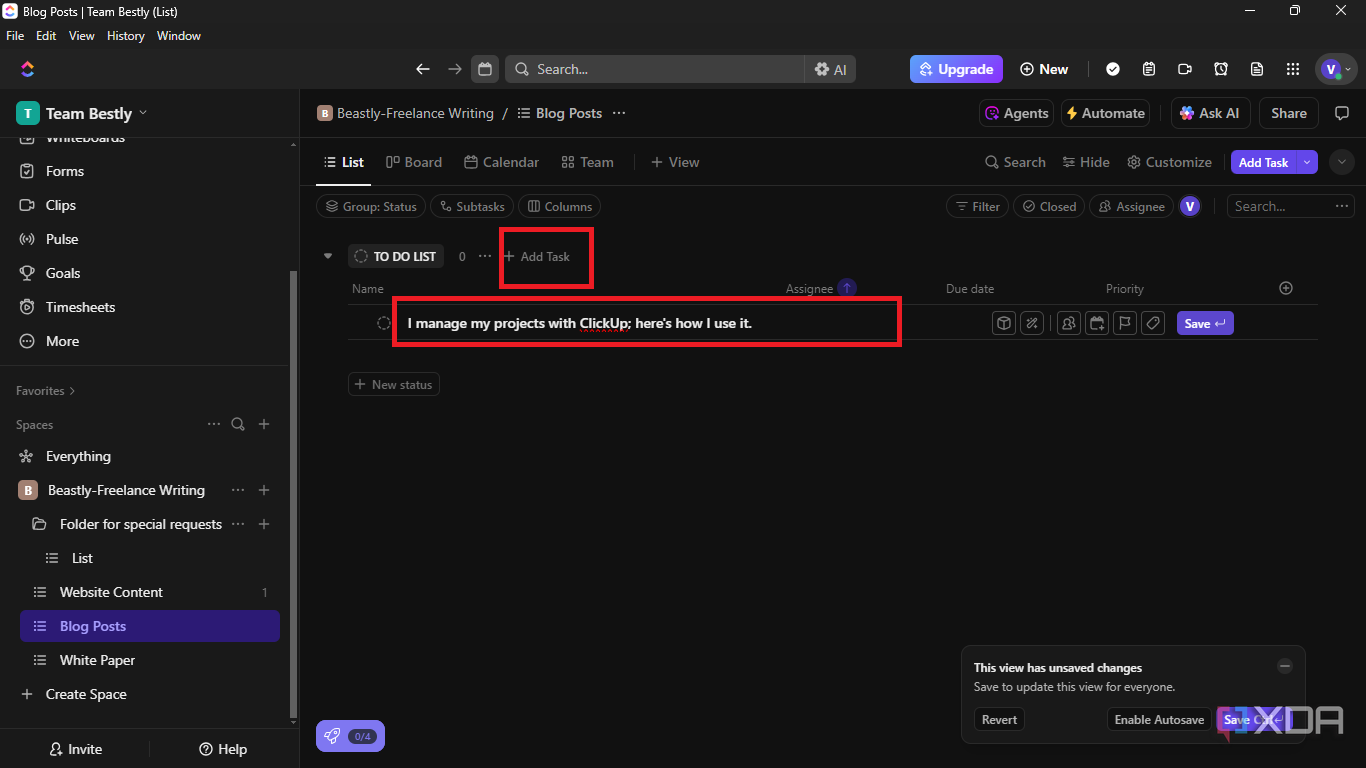
Edit the text field dubbed Open by default. You may edit it as "To Do List".

-
Click Add Task
-
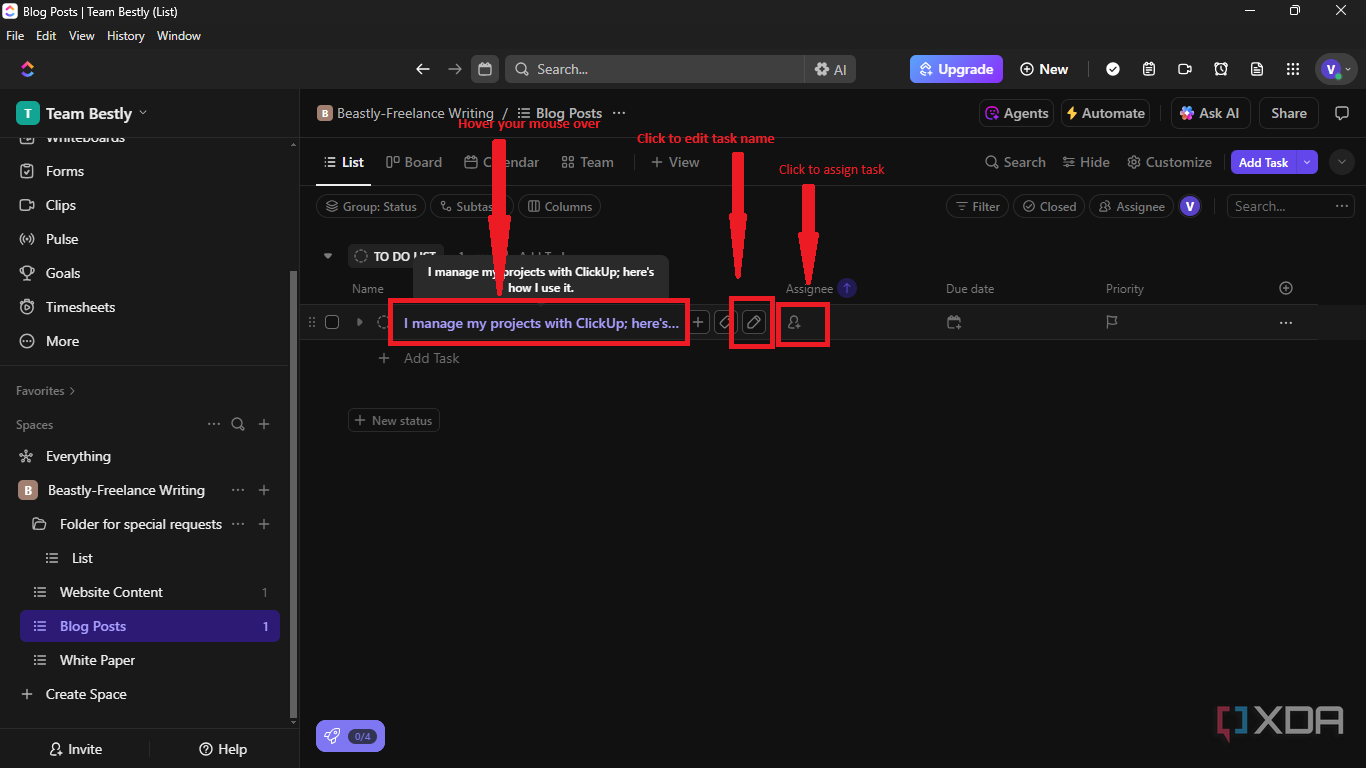
Hover your mouse over the task name to edit, assign, and customize as you deem fit.
-
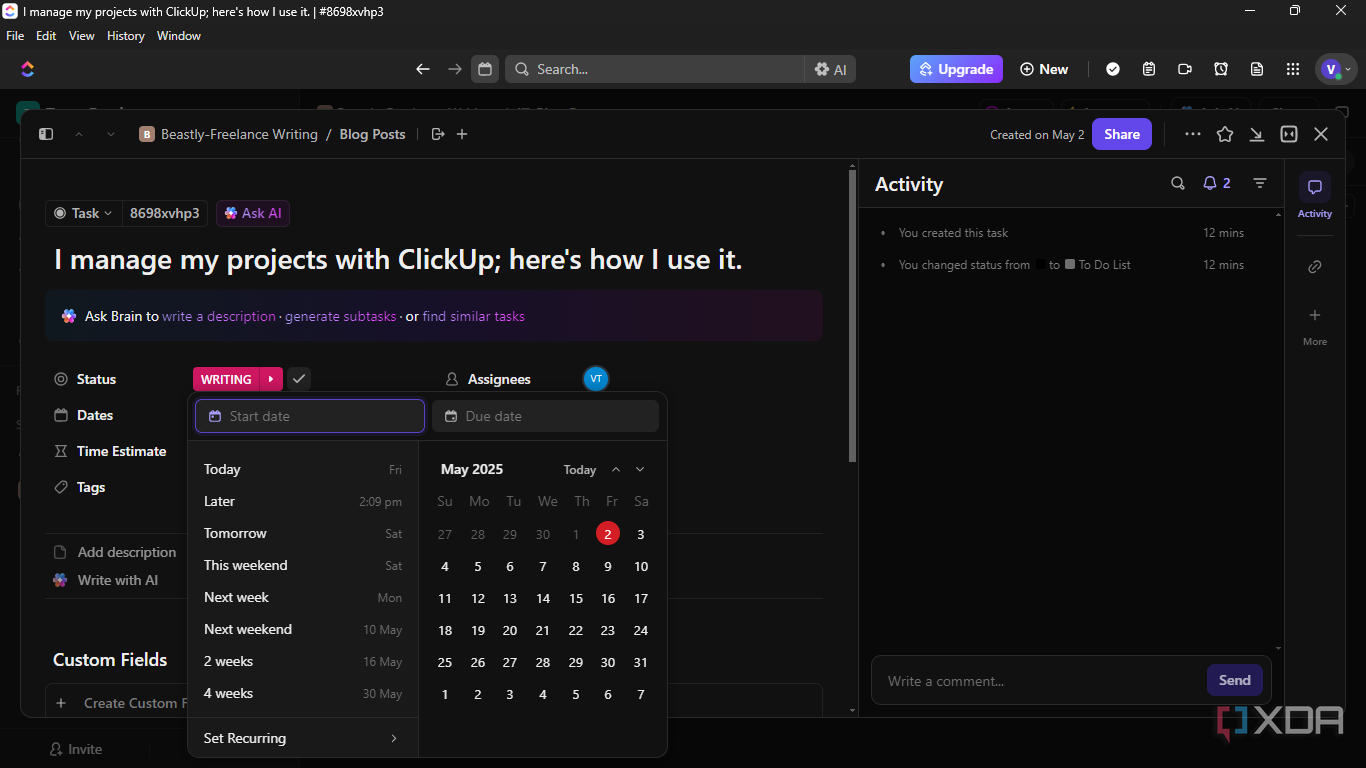
Click the Due date icon to add a Start date and a Due date.
-
Click the task name -> Status or the box next to it to add your task's status.

Simplify your tasks with ClickUp subtasks
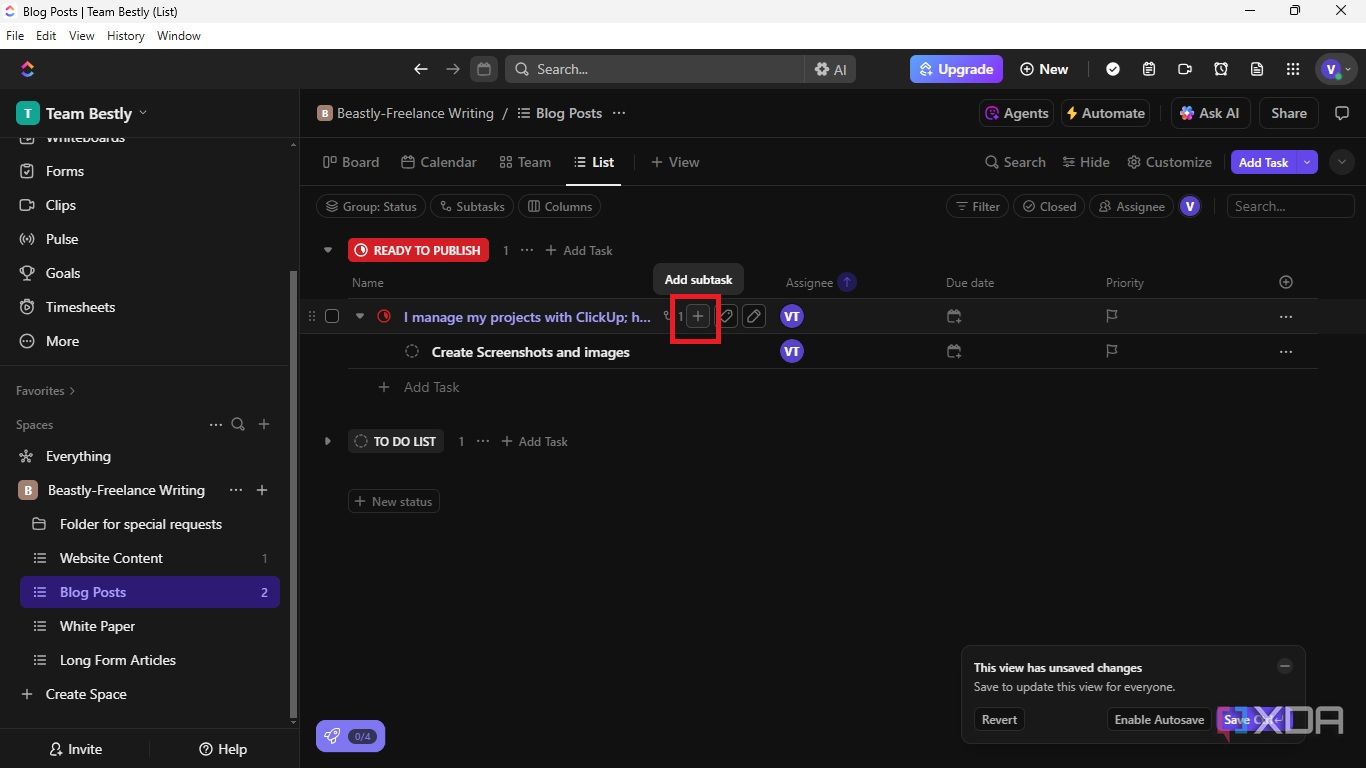
To further simplify your task, you may also create a subtask. To create a subtask, click the + icon, name your subtask in the text field, and assign a team member to handle it as shown below.
Each invited team member can access the team's ClickUp to claim tasks, check assigned tasks, and change task status as work progresses.
It was pretty easy; that was how we managed the team with ClickUp. One more thing: enable your notifications to know when changes are made to your tasks. Every change you or your team members make will also be automatically sent to everyone involved via email. So, if you are working in a fast-paced work environment, expect a lot of email notifications.

Related
7 ways to use Excel for excellent project management
If you're managing a small to medium-sized project, you may not need dedicated software to keep it on track. Check out how Excel can help you excel.
Don’t let ClickUp overwhelm you
While the ClickUp platform enables you to adapt its features to your business's specific needs, it can be overwhelming. The options available might be too much to handle all at once. Don't just jump into using ClickUp; try to understand how it functions and keep it simple initially. You can expand and use more features with time.
There are different project management tools; choosing the most ideal depends on your team's size, project type, and finances. However, if you're looking for an affordable tool with one of the most comprehensive project management features, ClickUp is probably worth trying.


 English (US) ·