.png)
I've been the typical foodie in the modern picture editing software buffet, as I love taking pictures. From Adobe Lightroom to GIMP and from Pixir to Fotor, I've tried quite a lot. But lately, as I have been getting into professional photography on the side, I think I am officially done sampling. I am pitching my tent with Capture One.
It seems that recent iterations of Capture One have garnered quite a user base and popularity. I didn't flinch for the longest time because, as far as I was concerned, Lightroom got me covered. But about two months ago, a trusted photographer and content creator made a long video dedicated to the reasons for his change to Capture One and shared some truly impressive results.
That got me to test the waters with Capture One, and I was quite impressed with what I saw. I still use Lightroom occasionally, but each time I do, I get more convinced that Capture One is the real deal.
Related
Capture One's impressive tethering capabilities
More control and flexibility
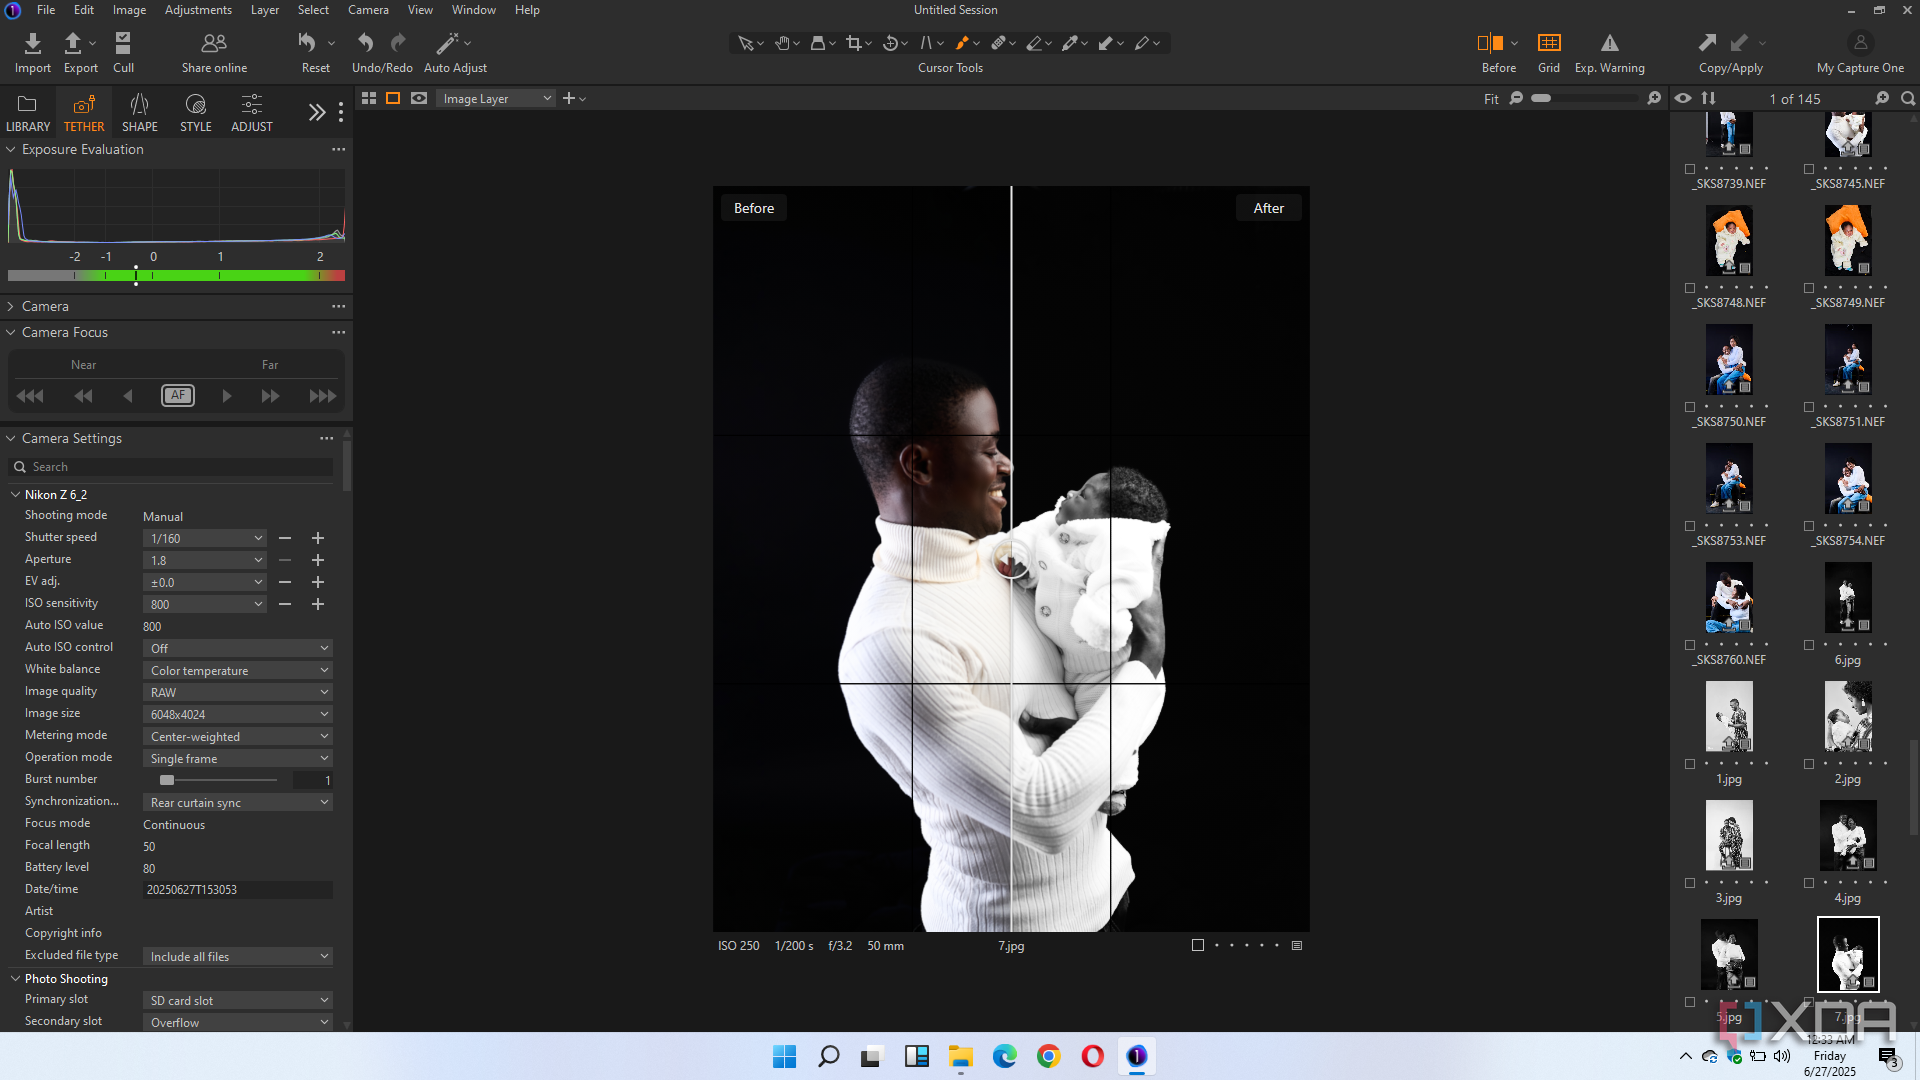
Tethering is an aspect where Capture One has an advantage over other photo-editing software. For clarity, tethering refers to connecting a camera with a tethering cable or via WI-fi so you can see your images in real time on a larger screen. This gives you more control over your creative process and helps you quickly adjust your shots. If you frequently shoot tethered, I'm convinced Capture One could be your ideal partner.
All the other apps I tried were nightmarish — too slow and impractical for professional workflow. Capture One is simply more stable and reliable compared with other photo-editing apps. File transfer is fast and reliable if you have a good tethering cable.
Beyond this, I also like the full access to the camera menu from my computer. The fact that I can set my camera on a tripod and adjust it from the laptop is nice, from white balance to autofocus, and even more subtle adjustments.
There is also this user-friendly and extensive naming system that Capture One offers, where you can name files according to a schema and save them in folders of your choice. For example, in a graduation shoot that includes many individuals, I create a capture folder for each individual with their surname, and the filename is automatically derived from the folder name. That greatly simplifies my work.
Flexibility and ease at your fingertips
This is quite subjective, but let's start with how Capture One processes colors that are natural and true to life. Before editing, I almost always preferred how Capture One handled its colors. I also love the way layers and masks work in Capture One. When applied to the background, people, or subject, edits involving masks and layers look realistic without making it all too obvious that masking was used.
The color tools in the adjustment layer are excellent. While it took a while to master, the effort was well worth it. Once you master the tools and know how to combine them, you will love the result. From the layers and mask tools to tone curves and from the color editor to style brushes, there is so much you can achieve.
I particularly love the color editor tool, which allows you to make specific adjustments to individual colors in your image. For example, you can simply select red, blue, green, or purple and work on their hue, saturation, or lightness. The skin tone tool also makes my work so much easier. The tool will literally save you tons of layers and masks you'd use to achieve the same result in Lightroom.
Also, if you have a particular look or feel that you'd like to replicate in a picture but are not sure how to go about it, the Match Look feature comes in handy. With this feature, you only need to drag and drop the reference picture. You can then apply the colors of the reference picture directly to your edit, save it as a preset, or simply apply it as a new layer. This has helped greatly with my versatility and the ease with which I get the desired result in my picture.
Impressive export options and quality
Make your workflow faster
There is something about exporting pictures via Capture One that always gets me. First, I believe that Capture One gives the highest quality of images in terms of color. Also, Capture One gives you many export options when you click to export an image. For example, you can export for web use (2048px), full size (which is the highest JPEG quality, Instagram optimized, TIFF, or PSD. I can select multiple variations of the export settings, and depending on the number of variants I select, Capture One exports each of the selected variants.
I find this very useful. For example, let's say you need different versions of an image, one for social media and another for large print. All you have to do is select the corresponding options on the export page and export various formats all at once. That has really helped the speed of my workflow.
Related
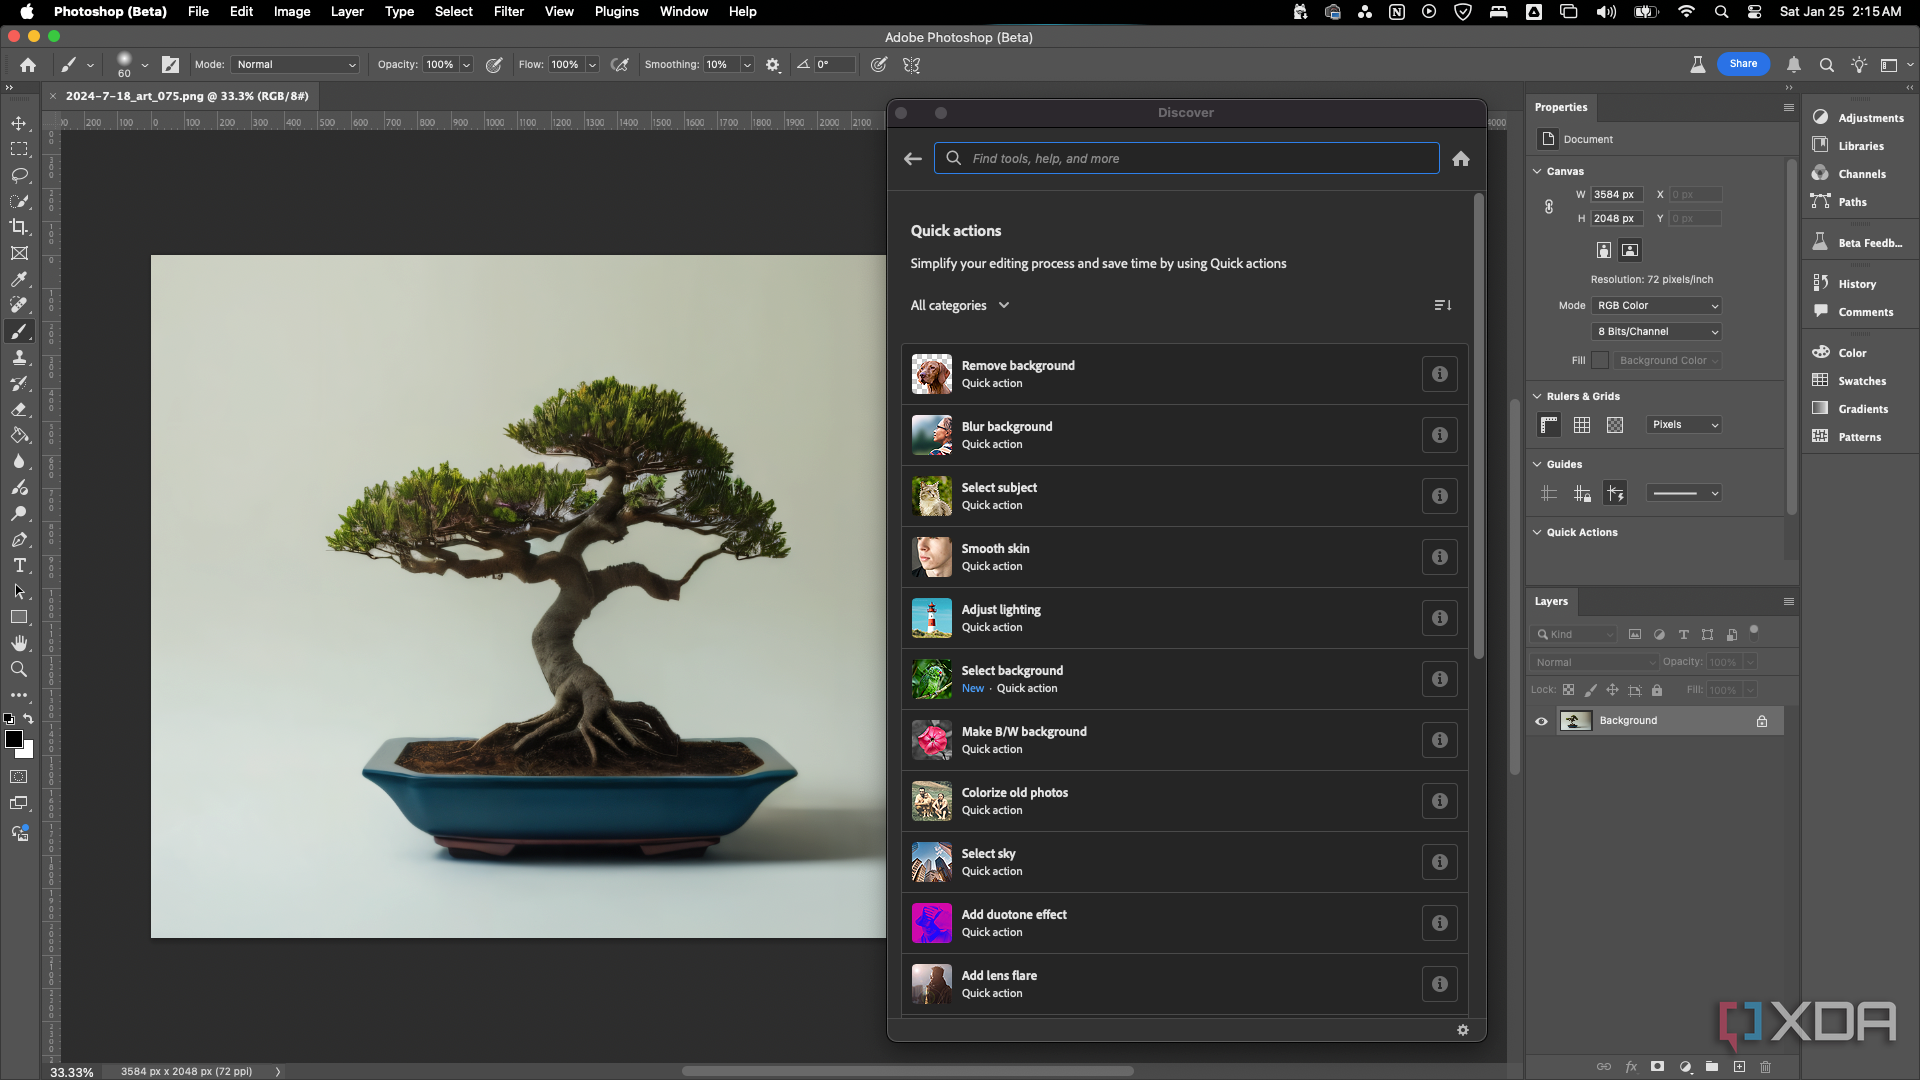
6 useful Photoshop Quick Actions conveniently grouped in one place
Quick Actions consolidate Photoshop’s powerful tools, letting you simplify background removal, blurring, and more
Capture One is not without issues
Of course, no software is flawless, and Capture One has limitations. I've seen some complain about it not being intuitive or user-friendly, and some have also complained about it not being practical when editing large batches of photos. However, its impressive tethering capabilities, ease of use, and the quality of pictures it churns out make up for some of its deficiencies.
What if Capture One doesn't feel like the right fit for you? You might as well try Adobe Lightroom or Darktable. However, if you are looking for an image editing tool to improve the quality of your work, I highly recommend Capture One. You might just discover, as I did, that it's just what you're looking for.

Related


 English (US) ·