.png)
I’ve always found Blender intimidating, at least for its primary purpose, which is 3D modeling. It does have a video editing window that I use from time to time, but creating shapes, moving lights, and rendering colors feels like trying to read a foreign language. Tutorials helped a bit with understanding the basics of modeling, but there’s so much information out there that it often takes an hour scrolling through videos and forums just to learn one tiny step.
After successfully pairing NotebookLM with Figma, I thought why not try it with Blender? Once my Blender notebook was set up, the learning curve didn’t feel like a wall anymore. I could ask questions and get explanations in plain language, as well as quick step-by-step guides. The end result wasn’t a masterpiece by any means, but the whole point was simply getting familiar with the process. For someone who usually freezes at the idea of using Blender, this method was shockingly effective.
Configuring NotebookLM for learning Blender
I started feeding my notebook
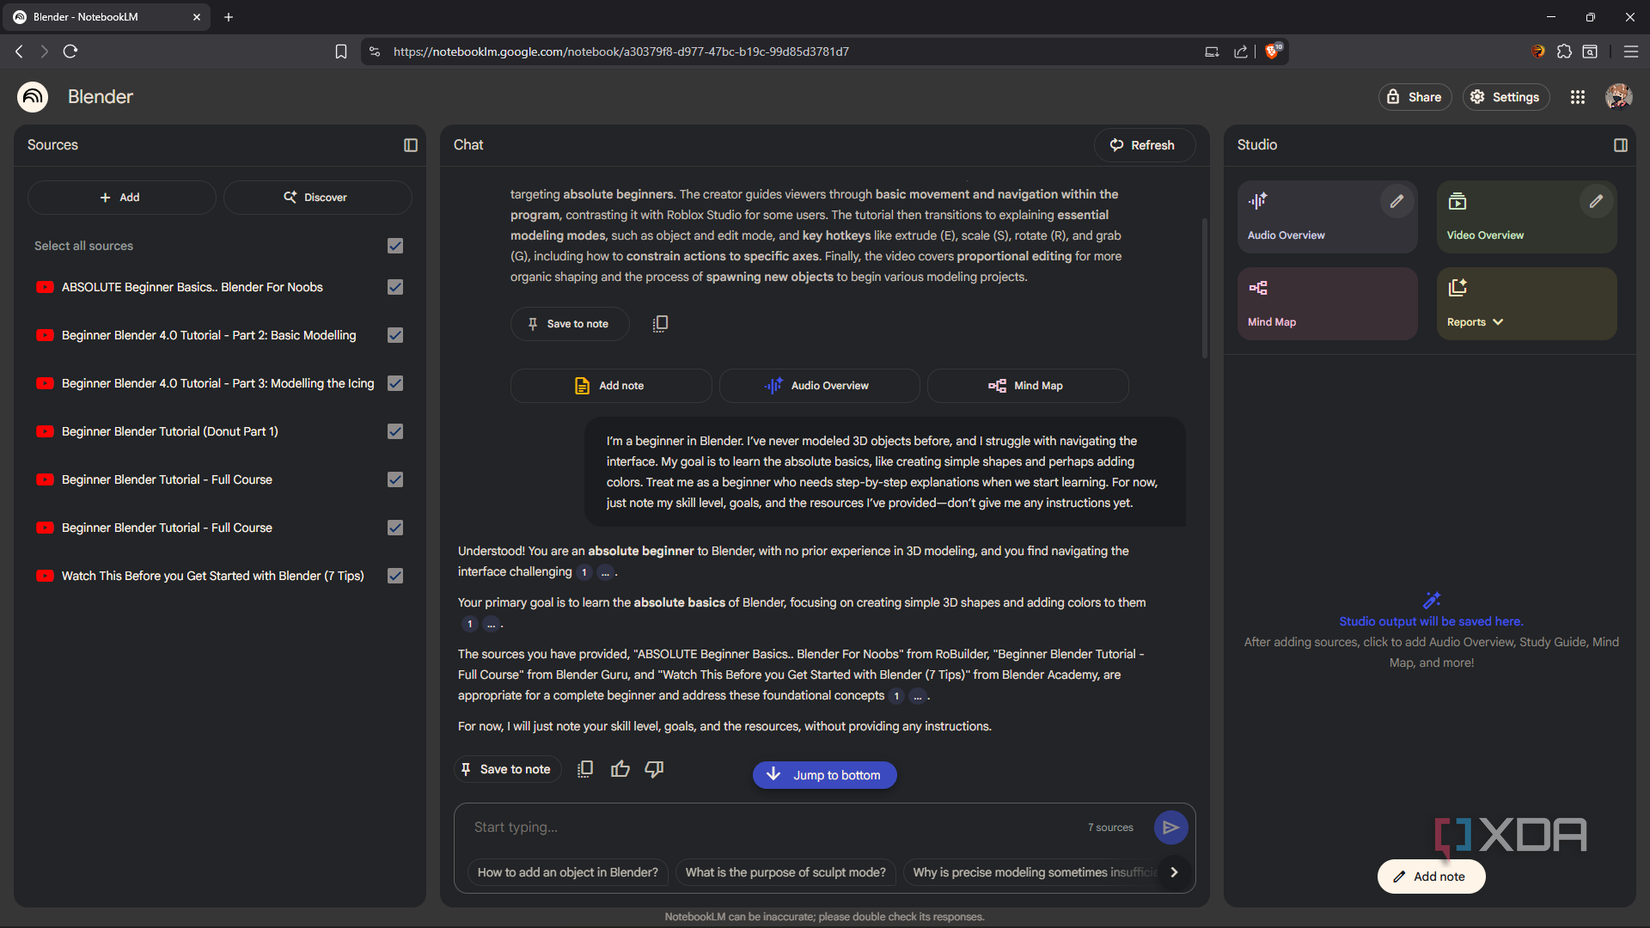
Before even opening Blender, I set up a dedicated notebook for it. The first step was feeding it my resources; I included YouTube tutorial transcripts. To stay focused on starting with the basics, I only included beginner-level modeling resources, so no rigging or animation stuff. The goal wasn’t to get answers or guidance yet; it was just to give NotebookLM enough context to understand Blender and the learning materials I intended to use.
Once my sources were loaded, I wrote a prompt to give NotebookLM my baseline knowledge and goals. If you’re trying this yourself, even with a tool other than Blender, you can use a prompt along the lines of:
I’m a beginner in Blender. I’ve never successfully modeled 3D objects before, and I struggle with navigating the interface. My goal is to learn the absolute basics, like creating simple shapes and perhaps adding materials. Treat me as a beginner who needs step-by-step explanations. For now, just note my skill level, goals, and the resources I’ve provided. Don’t give me any instructions yet.Surfacing the information I needed
Step-by-step
My goal was simple: create the classic beginner donut in Blender. I had already fed NotebookLM the best beginner donut tutorials I could find, so extracting the information wouldn’t be hard. The tricky part was crafting the right prompts with the right sources selected so that I didn’t end up getting yet another drawn-out tutorial that was overwhelming to follow.
As per my screenshots above, you can see that NotebookLM gave me only the essentials to get started with the UI, shortcuts, and functions. And of course, I also had to put this into practice, so I spent about 30 minutes just playing around with the Layout window in the app.
Then came the actual modeling part. I specifically asked NotebookLM to give me the essentials for getting a donut shape on my canvas in “no more than 10 short steps." That part of the prompt was truly what enabled me to get this done so quickly, because tutorials always take several detours before getting to the point. In under 10 minutes, I ended up with a smooth donut shape that at least didn’t look like a jagged object from a 90s video game.
Despite such a short and simplified guide, NotebookLM didn’t leave out any of the important steps, like applying Smooth Shading and adding a Subdivision Surface Modifier. The results of these essential tweaks may not be obvious to a beginner at first glance, so I might have missed them had NotebookLM done a sloppy job.
Iterating and troubleshooting
It was hit-and-miss
I didn’t want to stop at the torus shape and wanted to add things like texture and color. These techniques are a bit more complicated than making shapes, so my prompts and source selection had to get more specific (hiding some sources is a great NotebookLM trick to get more specific answers). For the icing on the donut, I selected the “Modeling the Icing” source, entered my prompt, and NotebookLM stepped up and gave me quick yet specific instructions again. I kept going down my list of sources this way to ensure all my bases were covered, and ended up with a semi-believable icing shape on top of my donut.
At one point, the bottom part of my donut peeked through the top icing part, and NotebookLM was able to act as a troubleshooter to help pinpoint the problem. But fixing the problem didn’t go quite as smoothly; I actually had to watch the video outside NotebookLM to learn how to properly fix it. So, it turns out not every set of instructions NotebookLM provides is very useful.
NotebookLM is a sufficient tutor
Just like a human tutor, you can gain valuable insights from the information they provide and the way that information is structured. But that’s only half of the battle: doing the work is still up to you. NotebookLM did a fantastic job introducing me to the basics of Blender and creating simple models. However, it started falling short when I ran into snags, and I had to figure out how to fix it myself. This didn’t taint my overall experience as I would have had to fix those errors without NotebookLM, anyway — I’m still impressed at how quickly and effectively it helped me lay the foundations of my design.


 English (US) ·