.png)

Sign in to your XDA account
Summary
- The Teams Shortcut Buttons are a remote worker's best friend - ensuring you're never caught speaking on mute again.
- Use three arcade buttons connected to an RP2040 Zero microcontroller that sends keyboard shortcuts to your computer when pressed.
- Requires affordable materials like LED arcade buttons, RP2040 Zero or Raspberry Pi Pico, male-to-male USB cable, soldering equipment, and circuit Python code.
One of the coolest aspects of Raspberry Pi projects is that you can make things that are convenient to you during work and play. For instance, if you work remotely, there's a good chance you've been called upon while your webcam is disabled, your microphone is muted, and you're halfway across the house. The rush back and the frantic cursor flailing to hit the unmute button feels like a rite of passage for anyone who works from home.
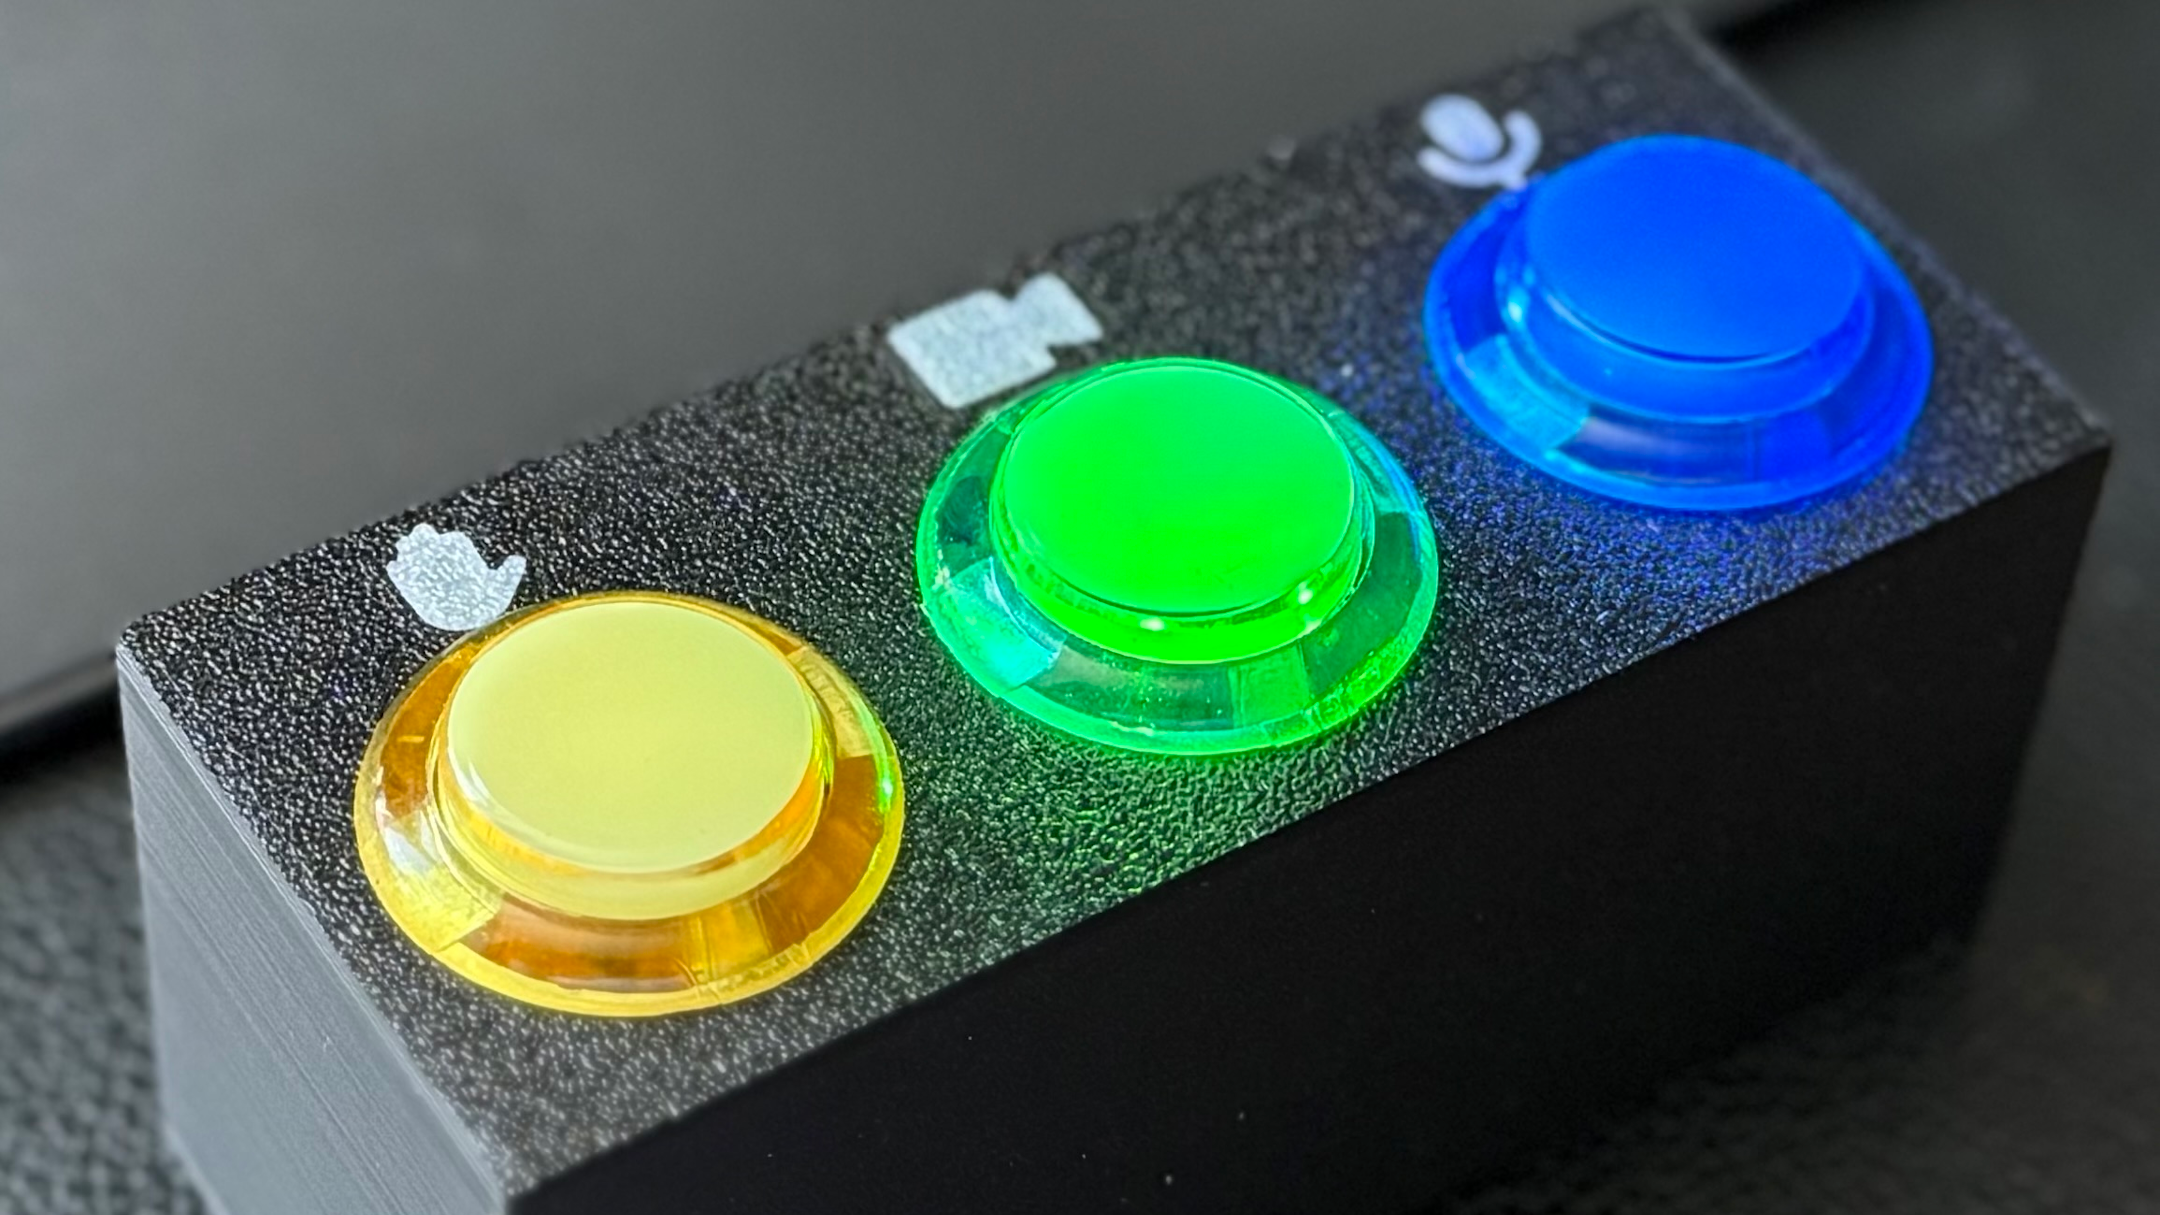
So, what if you made a set of physical buttons you could press instead of relying on the software-based ones? That's what one ingenious tinkerer thought up when they made the Teams Shortcut Buttons, an unofficial DIY way to ensure you'll never be caught speaking while muted again.

Related
The Teams Shortcut Buttons are a remote worker's best friend
In a post on the Raspberry Pi Pico subreddit, user TellinStories shared their simple yet elegant solution for controlling Microsoft Teams. The best part is that, because the buttons are tied to keyboard shortcuts, you can always change them to fit your remote calling app of choice:
The device is simple – three arcade buttons which are connected to an RP2040 Zero microcontroller. I chose the RP2040 because it is cheap, very small and I am already used to using Raspberry Pi Picos (which would also work well); other microcontrollers may also be suitable but I am not experienced in using them.
The microcontroller runs a simple programme (written in Circuit Python) that sends the keyboard shortcuts to your computer when a button is pressed, as if it were a keyboard. For example, if you press the microphone mute / unmute button then “CTRL+SHIFT+M” is sent to your computer which is the mute / unmute shortcut. Each button press toggles the LED built into the arcade button between on and off.
The bill of materials and equipment is very agreeable. You'll need three 24mm 5V LED arcade buttons, a spade connector wire, either an RP2040 Zero or a Raspberry Pi Pico, a male-to-male USB cable to connect it all together, a stripboard or protoboard, and your soldering stuff. Then, grab the code over on GitHub and check out the build instructions on Makerworld. You need to scroll down a bit on Makerworld to the "Documentation" section to grab the PDF to make the project.


 English (US) ·