.png)
While one of the most common self-hosted services is Jellyfin to roll your own streaming service, it's undeniable that some content is only available from streaming subscriptions. What's more, subscribing to the relevant service doesn't always guarantee you'll get the content you want, because of licensing and distribution agreements.
It's enough to drive anyone to buying DVDs again, but even then, some things are only available on specific region-locked services. And even if you're not streaming media, there are plenty of services that you might want to get around geoblocks on. When you're on holiday, for example, you check local news sites or check in on the news from another country once you've emigrated.
SmartDNS is not for bypassing copyright protections, and it doesn't keep your browsing data private like a VPN would.
That's where SmartDNS services come in. They replace your existing DNS servers and proxy your DNS requests so that it looks like your device is in another country. And with a little bit of time, you can have your own.
What is SniDust, and why would I want to use it?
SmartDNS helps you access streaming services not normally available in your area

Without DNS servers, we'd have difficulty browsing the internet or using online services. These could be hosted by your ISP, or maybe you're using a private DNS service, but either way, they work as a sort of phone book for the internet's resources. So, when you type xda-developers.com into your browser search field, it sets off a chain of events that results in your browser connecting to our servers and then downloading the content to display.
The problems start if the site you want to access has geoblocks up, where it won't let you connect from various parts of the world. This could be for security or for limiting the content you can access, but it's a pain, and that's where SmartDNS comes in.
It proxies your DNS requests so that the service thinks you're in the country it works in, but still sends the video stream to your normal IP address, which is different than a VPN. That means you're not restricted in bandwidth, which means it's easier to stream media, for example.
SniDust in action
Once installed, SniDust takes over DNS queries for the site or service you're trying to use. Say you're in the US (IP address - 1.2.3.4), but your VPS is in the UK (IP address - 8.6.7.4), where you want to connect. You connect your devices to the VPS IP address and browse as normal.
|
1.2.3.4 |
DNS Question (hulu.com) |
--> |
8.6.7.4 |
|
1.2.3.4 |
DNS Answer (hulu.com => 8.6.7.4) |
8.6.7.4 |
|
|
1.2.3.4 |
HTTP(S) Request hulu.com |
--> |
8.6.7.4 |
|
8.6.7.4 |
Proxified HTTP(S) Request hulu.com |
--> |
104.98.130.197 |
|
104.98.130.197 |
Video Stream |
--> |
8.6.7.4 |
|
8.6.7.4 |
Video Stream |
--> |
1.2.3.4 |
The end result is your computer getting the streamed content you requested, as if you were inside the UK. And if you add the VPS server as the DNS in your router, every device, including those like smart TVs that don't usually let you change the DNS server, can access the content from the other country.
Setting up SniDust for use
Time to set up a different type of DNS server
To get our SmartDNS server working, we'll need a few things. The first is a VPS or Root Server that we can install Docker on. We also need that VPS's IP address and our client's Public IP address (which will most likely be our router). This can also be a DynDNS domain if you have one set up.
Now it's time to get SniDust running:
-
SSH into our VPS and update all packages before we start:

-
Install some crucial security packages: apt install -y fail2ban ufw curl wget git htop
-
Set up some UFW firewall rules: ufw default deny incoming
ufw default allow outgoing
ufw allow 22/tcp # SSH
ufw allow 53/udp # DNS
ufw allow 80/tcp # HTTP
ufw allow 443/tcp # HTTPS
ufw --force enable -
If your server is running Ubuntu, it loves to take over port 53, so let's fix that nano /etc/systemd/resolved.conf
Add or change the following: [Resolve]
DNS=1.1.1.1 8.8.8.8
DNSStubListener=no Then reboot systemd systemctl restart systemd-resolved Verify with the following, which should return no results sudo lsof -i :53
-
Install Docker curl -fsSL https://get.docker.com -o get-docker.sh
sh get-docker.sh -
Start and enable Docker systemctl start docker
systemctl enable docker -
Install Docker compose apt install -y docker-compose-plugin
-
Docker is terrible and bypasses firewall rules by default so let's fix that too nano /etc/docker/daemon.json Add this and save the file {
"iptables": false,
"ip": "127.0.0.1"
} Restart Docker systemctl restart docker
Update UFW so Docker works with it sed -i 's/DEFAULT_FORWARD_POLICY="DROP"/DEFAULT_FORWARD_POLICY="ACCEPT"/g' /etc/default/ufw
ufw reload
-
Make a directory for SniDust mkdir -p /opt/snidust
cd /opt/snidust -
Make a dockerfile for SniDust nano docker-compose.yml
-
Change the following two placeholders when you create the Docker Compose file YOUR_CLIENT_IP: Your home/office public IP (from step 1) YOUR_VPS_IP: Your VPS public IP
version: '3.3'
services:snidust:
container_name: snidust
environment:
- TZ=America/New_York # Adjust to your timezone
- 'ALLOWED_CLIENTS=127.0.0.1, YOUR_CLIENT_IP' # Replace with your actual IP
- 'EXTERNAL_IP=YOUR_VPS_IP' # Replace with your VPS IP
- SPOOF_ALL_DOMAINS=false
- INSTALL_DEFAULT_DOMAINS=true
- DNSDIST_RATE_LIMIT_DISABLE=false
ports:
- 443:8443
- 80:8080
- 53:5300/udprestart: unless-stopped
image: 'ghcr.io/seji64/snidust:1.0.15'
- Bring the container up docker-compose up -d
-
Check the logs for expected behavior docker logs snidust
-
You should see something like: Webserver launched on 127.0.0.1:8083
Marking downstream 1.0.0.1:443 as 'up'
Marking downstream dns.google (8.8.8.8:853) as 'up'
Marking downstream dns.google (8.8.4.4:853) as 'up'
Marking downstream 1.1.1.1:443 as 'up'
Polled security status of version 1.7.1 at startup, no known issues reported: OK
Change your device DNS
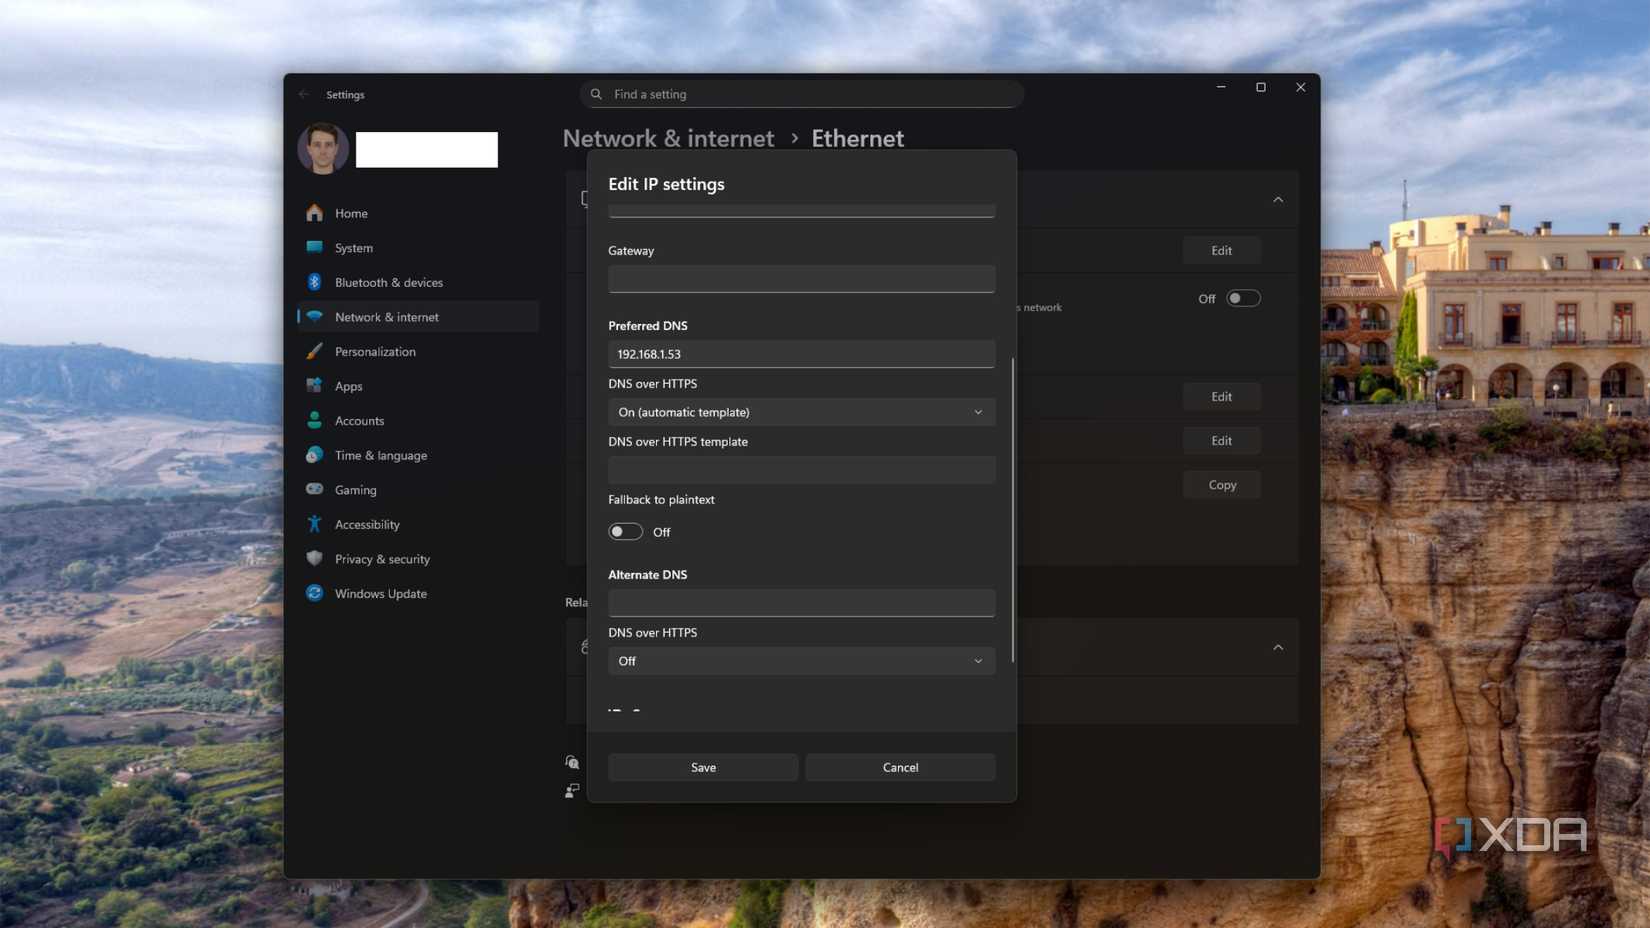
Now you have SniDust running, all you need to do is go into your device (or your router) and change the DNS server settings to use the IP address of your VPS.
SmartDNS proxies help you access your services when away from home
Now you've got a DNS server on a remote VPS that is set up to spoof DNS requests, but only if they match the services that the SniDust program is designed to work with. You can add more services if you want, or add encrypted DNS (by default, it uses Cloudflare and Google as upstream DNS), or even point to your own DNS server if you have one.


 English (US) ·