.png)
Google Docs has just quietly rolled out one of its most useful Gemini-powered features: built-in image generation.
This integration allows you to create custom visuals directly within your documents without switching between apps or navigating to external AI tools.
The technology behind this feature is Google's Gemini, which can transform text descriptions into detailed images. While similar to standalone AI image generators, having this capability built right into Google Docs makes it easier to create all kinds of content.
The image quality is solid (no surprise there) but the real win is being able to whip up visuals right inside the doc without breaking your flow.
Here's how to generate images in Google Docs.
1. Access the image generator
(Image: © Tom's Guide)
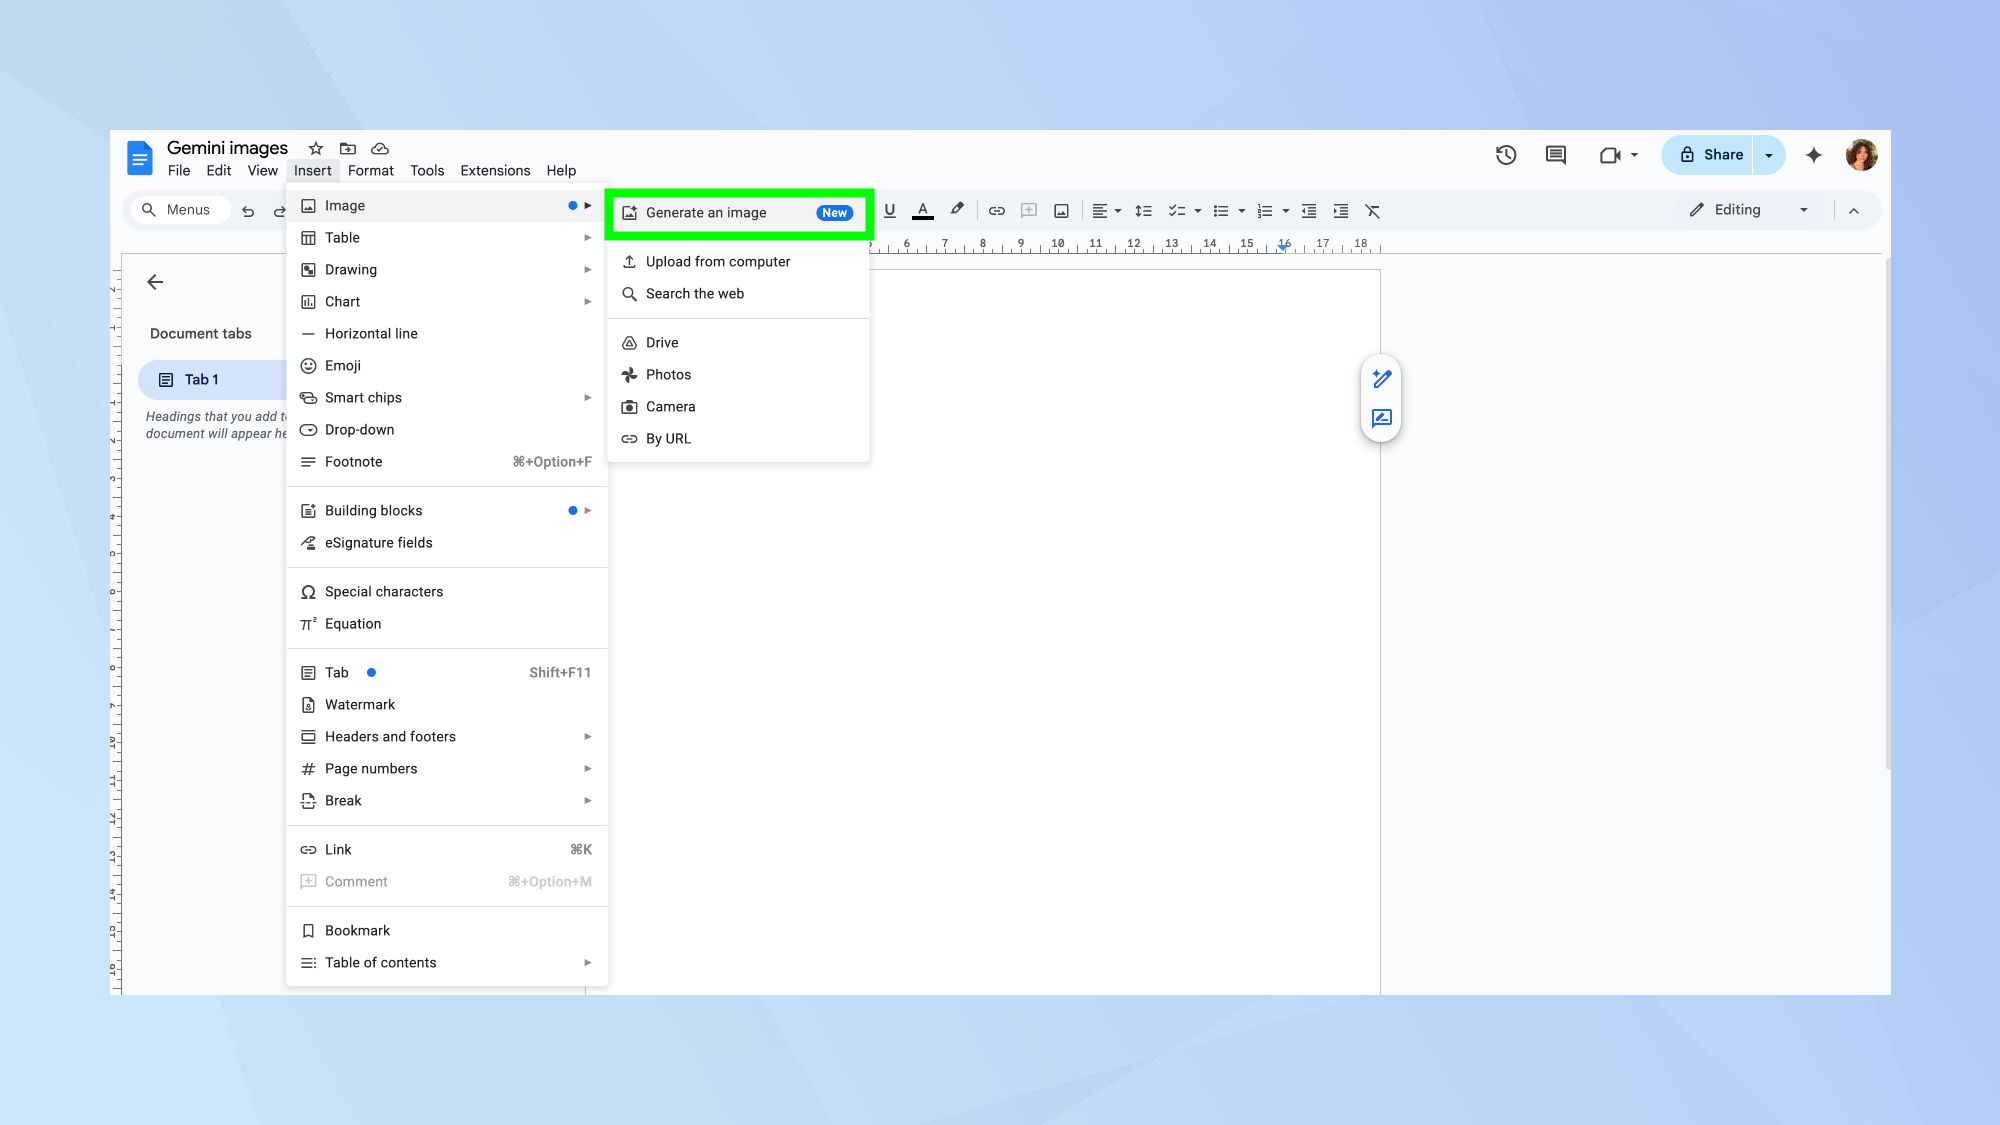
Open your Google Doc (new or existing) and position your cursor where you want the image.
Click Insert in the top menu, select Image, then choose Generate image from the dropdown options. This opens the Gemini image generation panel.
2: Craft your image description
(Image: © Tom's Guide)
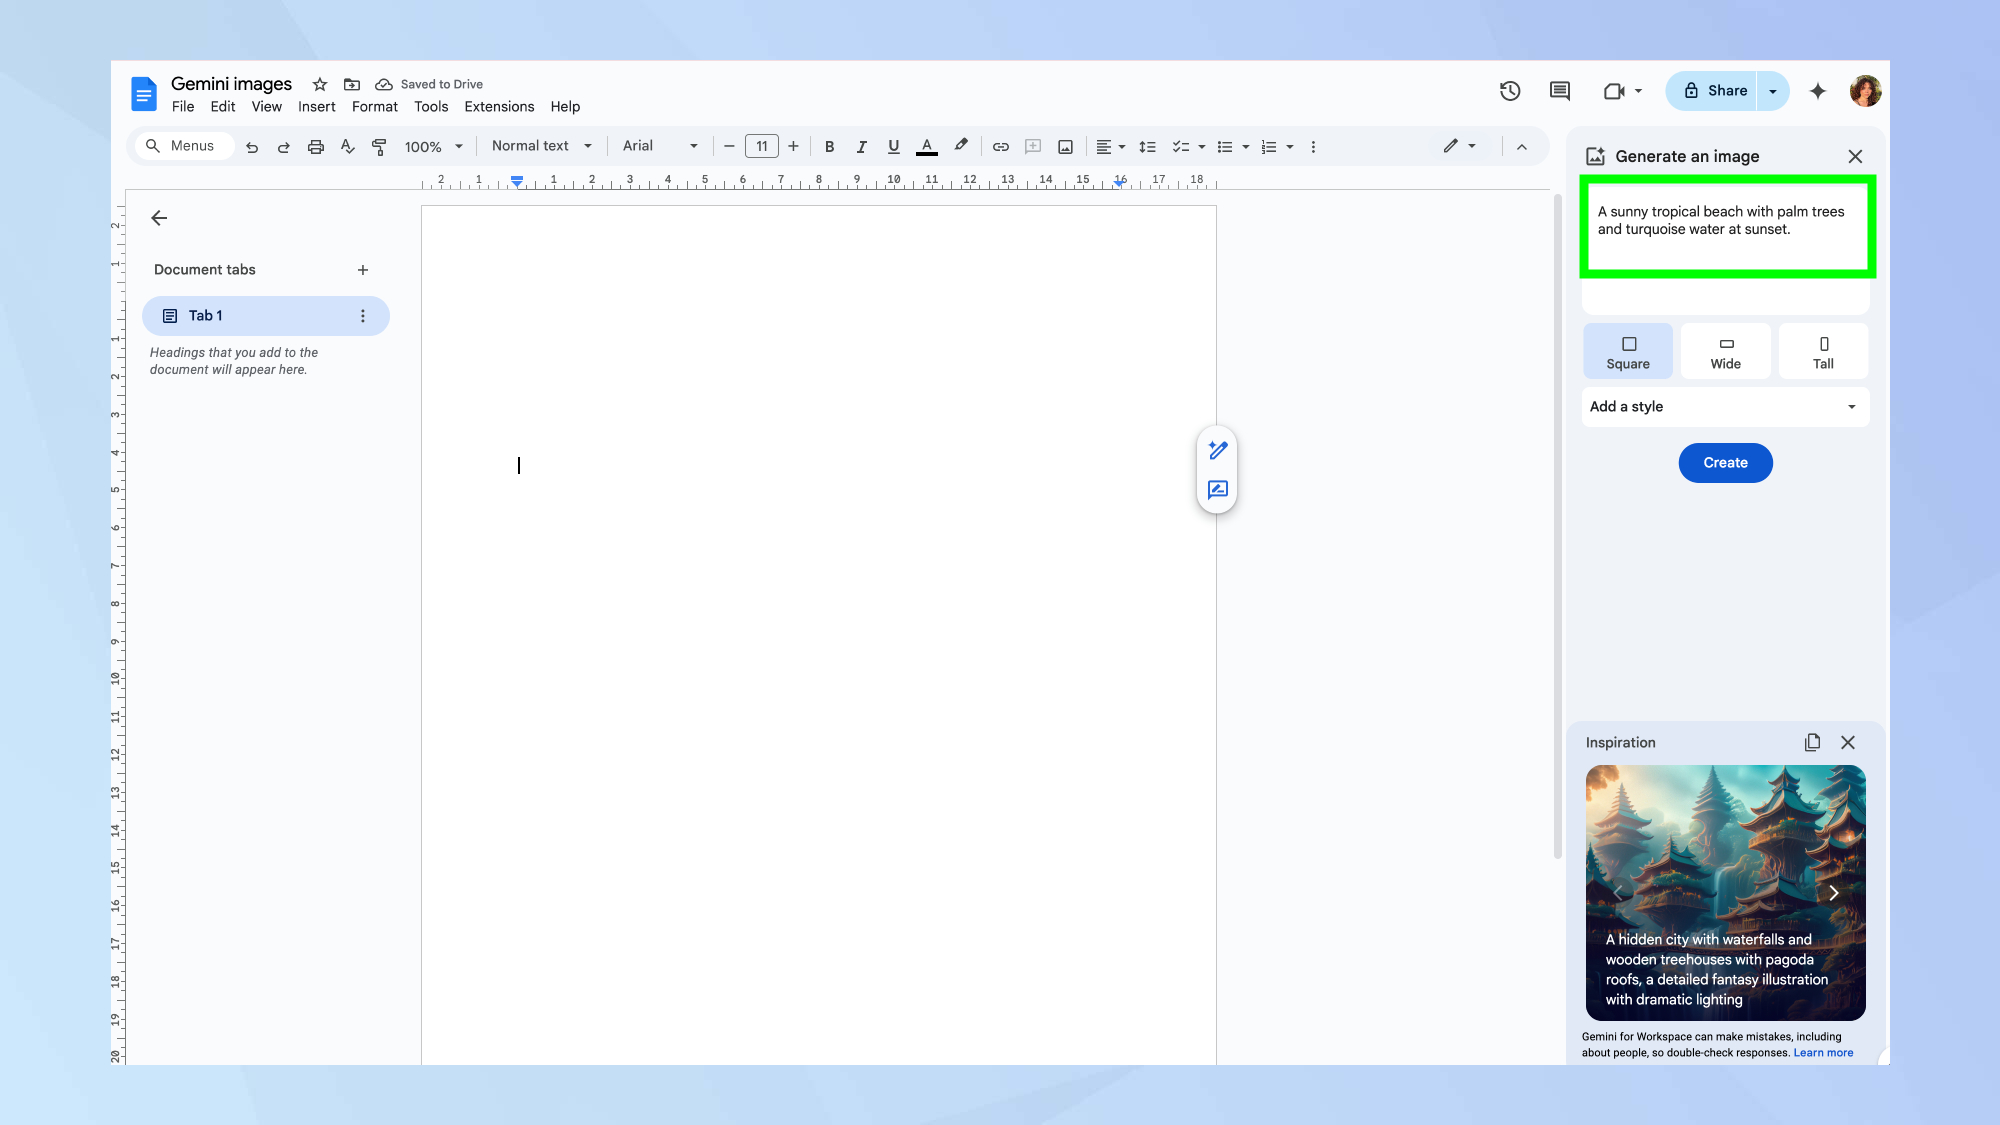
Type a detailed description in the prompt box. Be specific about subject matter, colors, lighting, style, and any other elements you want to see.
The clearer your prompt, the better your results will be. For example, instead of "beach scene", try something like "a sunny tropical beach with palm trees and turquoise water at sunset."
3. Customize the style and format

(Image: © Tom's Guide)
This step is optional. Before generating, you can customize your image settings using the options below the prompt box.
Click the drop-down arrow next to Add a style to select artistic styles like watercolor, photorealistic, or cartoon.
You can also choose between square, wide (landscape), or tall (portrait) formats based on what you're after.
4. Generate and select your image
(Image: © Tom's Guide)
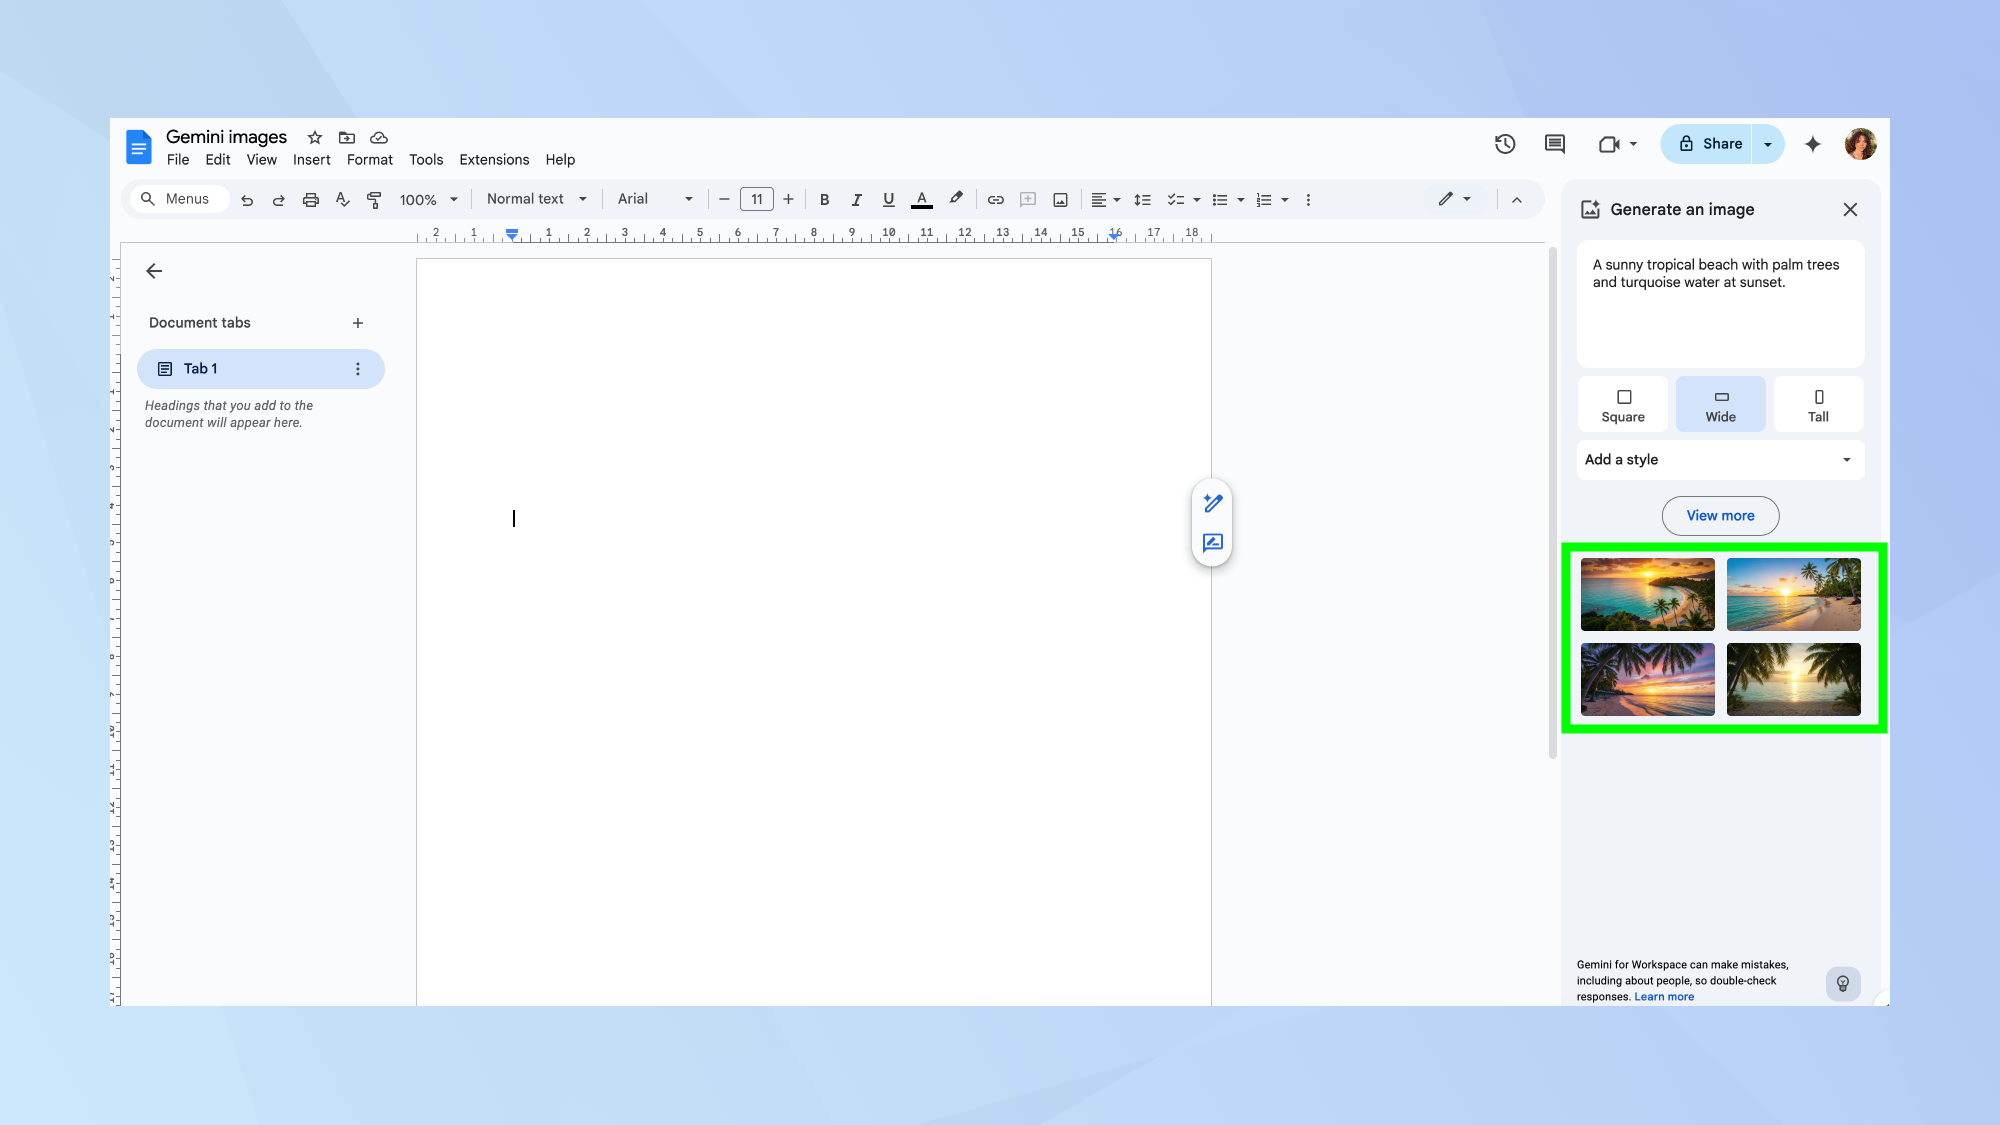
Click Create to generate your image. Gemini will produce four different variations based on your description.
Take a moment to review all options before making your selection. If none match your vision, click View more to generate additional variations.
5. Insert the image
(Image: © Tom's Guide)
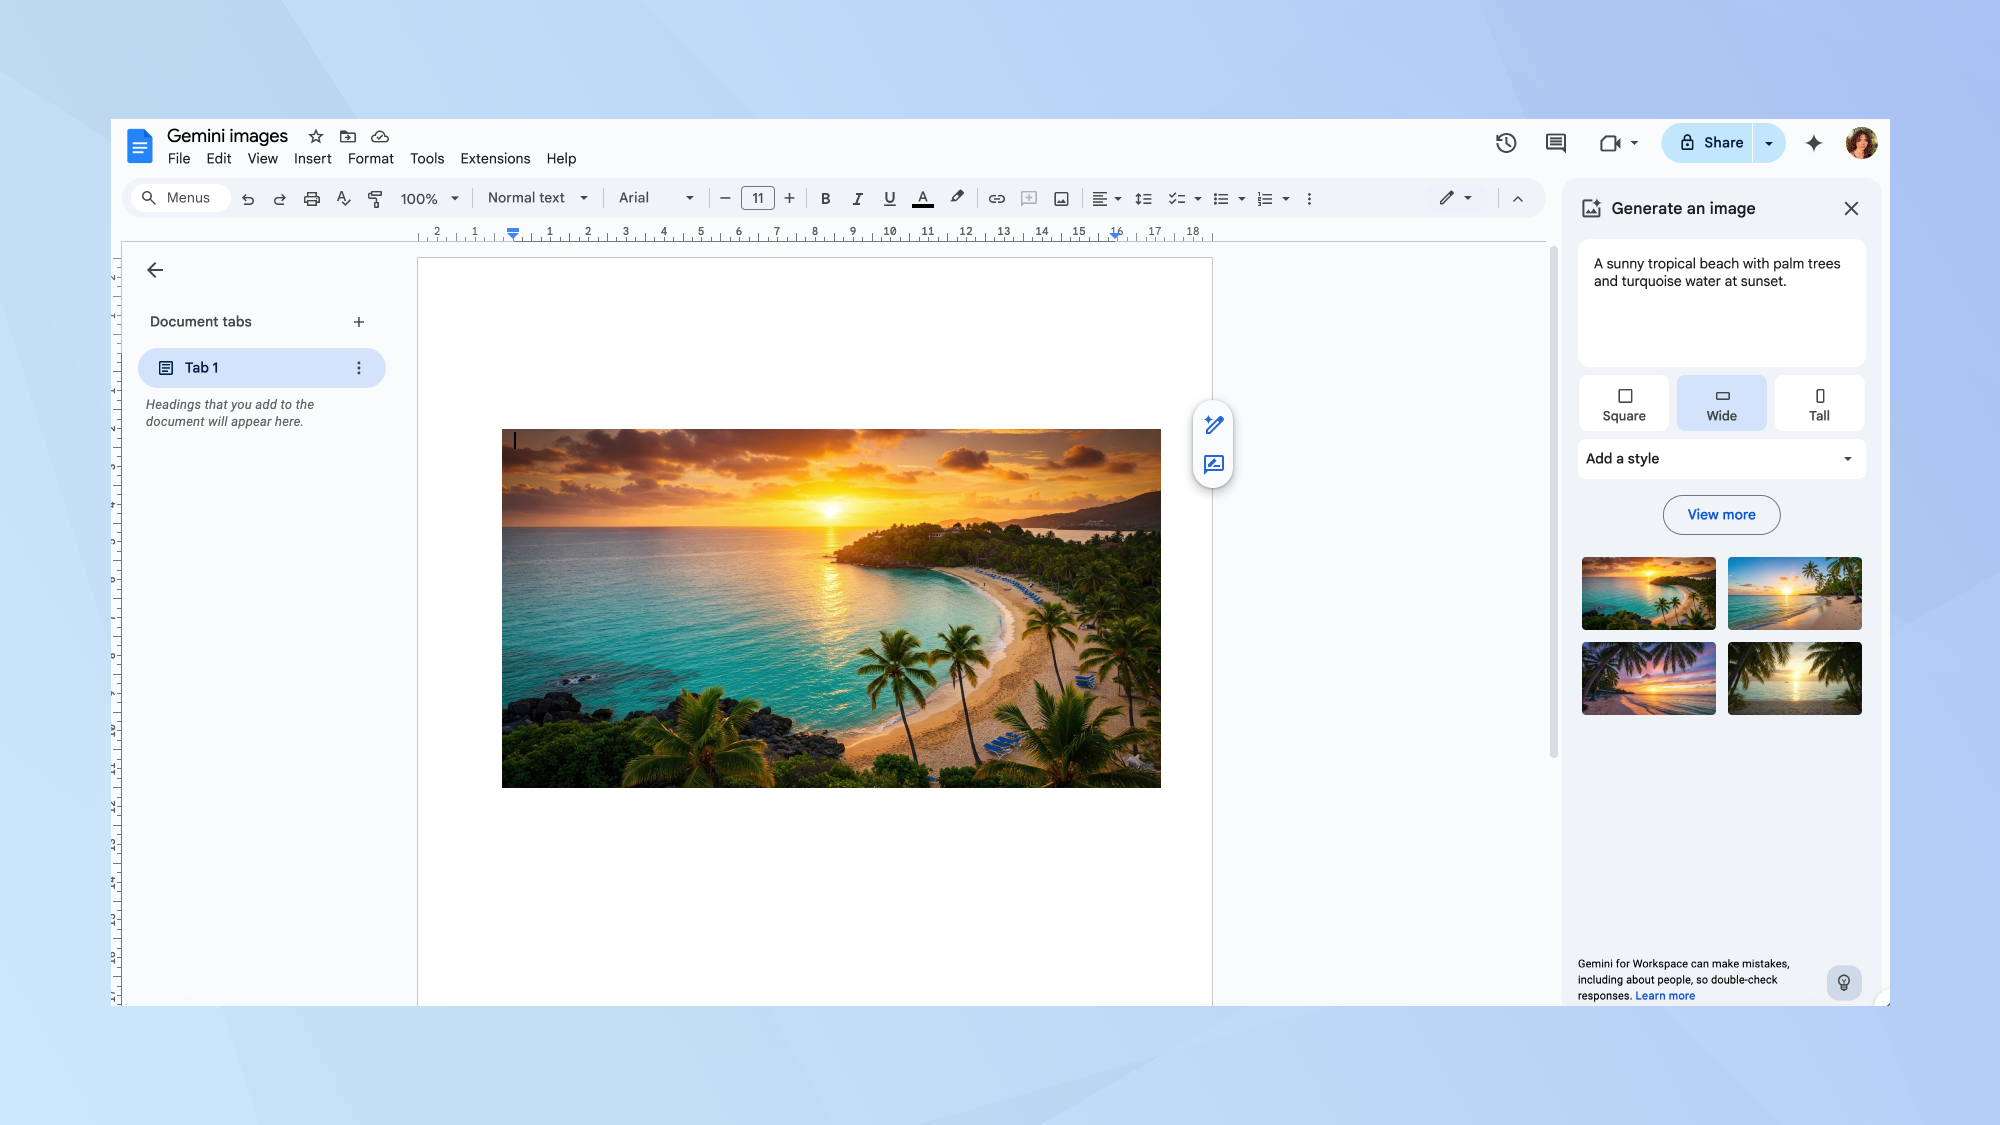
When you find an image you like, simply click on it.
The selected image will be automatically inserted into your Google Doc at your cursor position. You can then resize or reposition it as needed to fit your document layout.
And if you want to stop your browser draining your laptop battery, we've got you covered.
More from Tom's Guide
- Custom emojis are here — how to use Genmoji with Apple Intelligence
- How to identify poison ivy with AI — never get a rash again
- WearOS 6 is coming soon — here's 6 new features to try first
![]()
Back to Laptops
![]()
Show more


 English (US) ·