.png)

Sign in to your XDA account
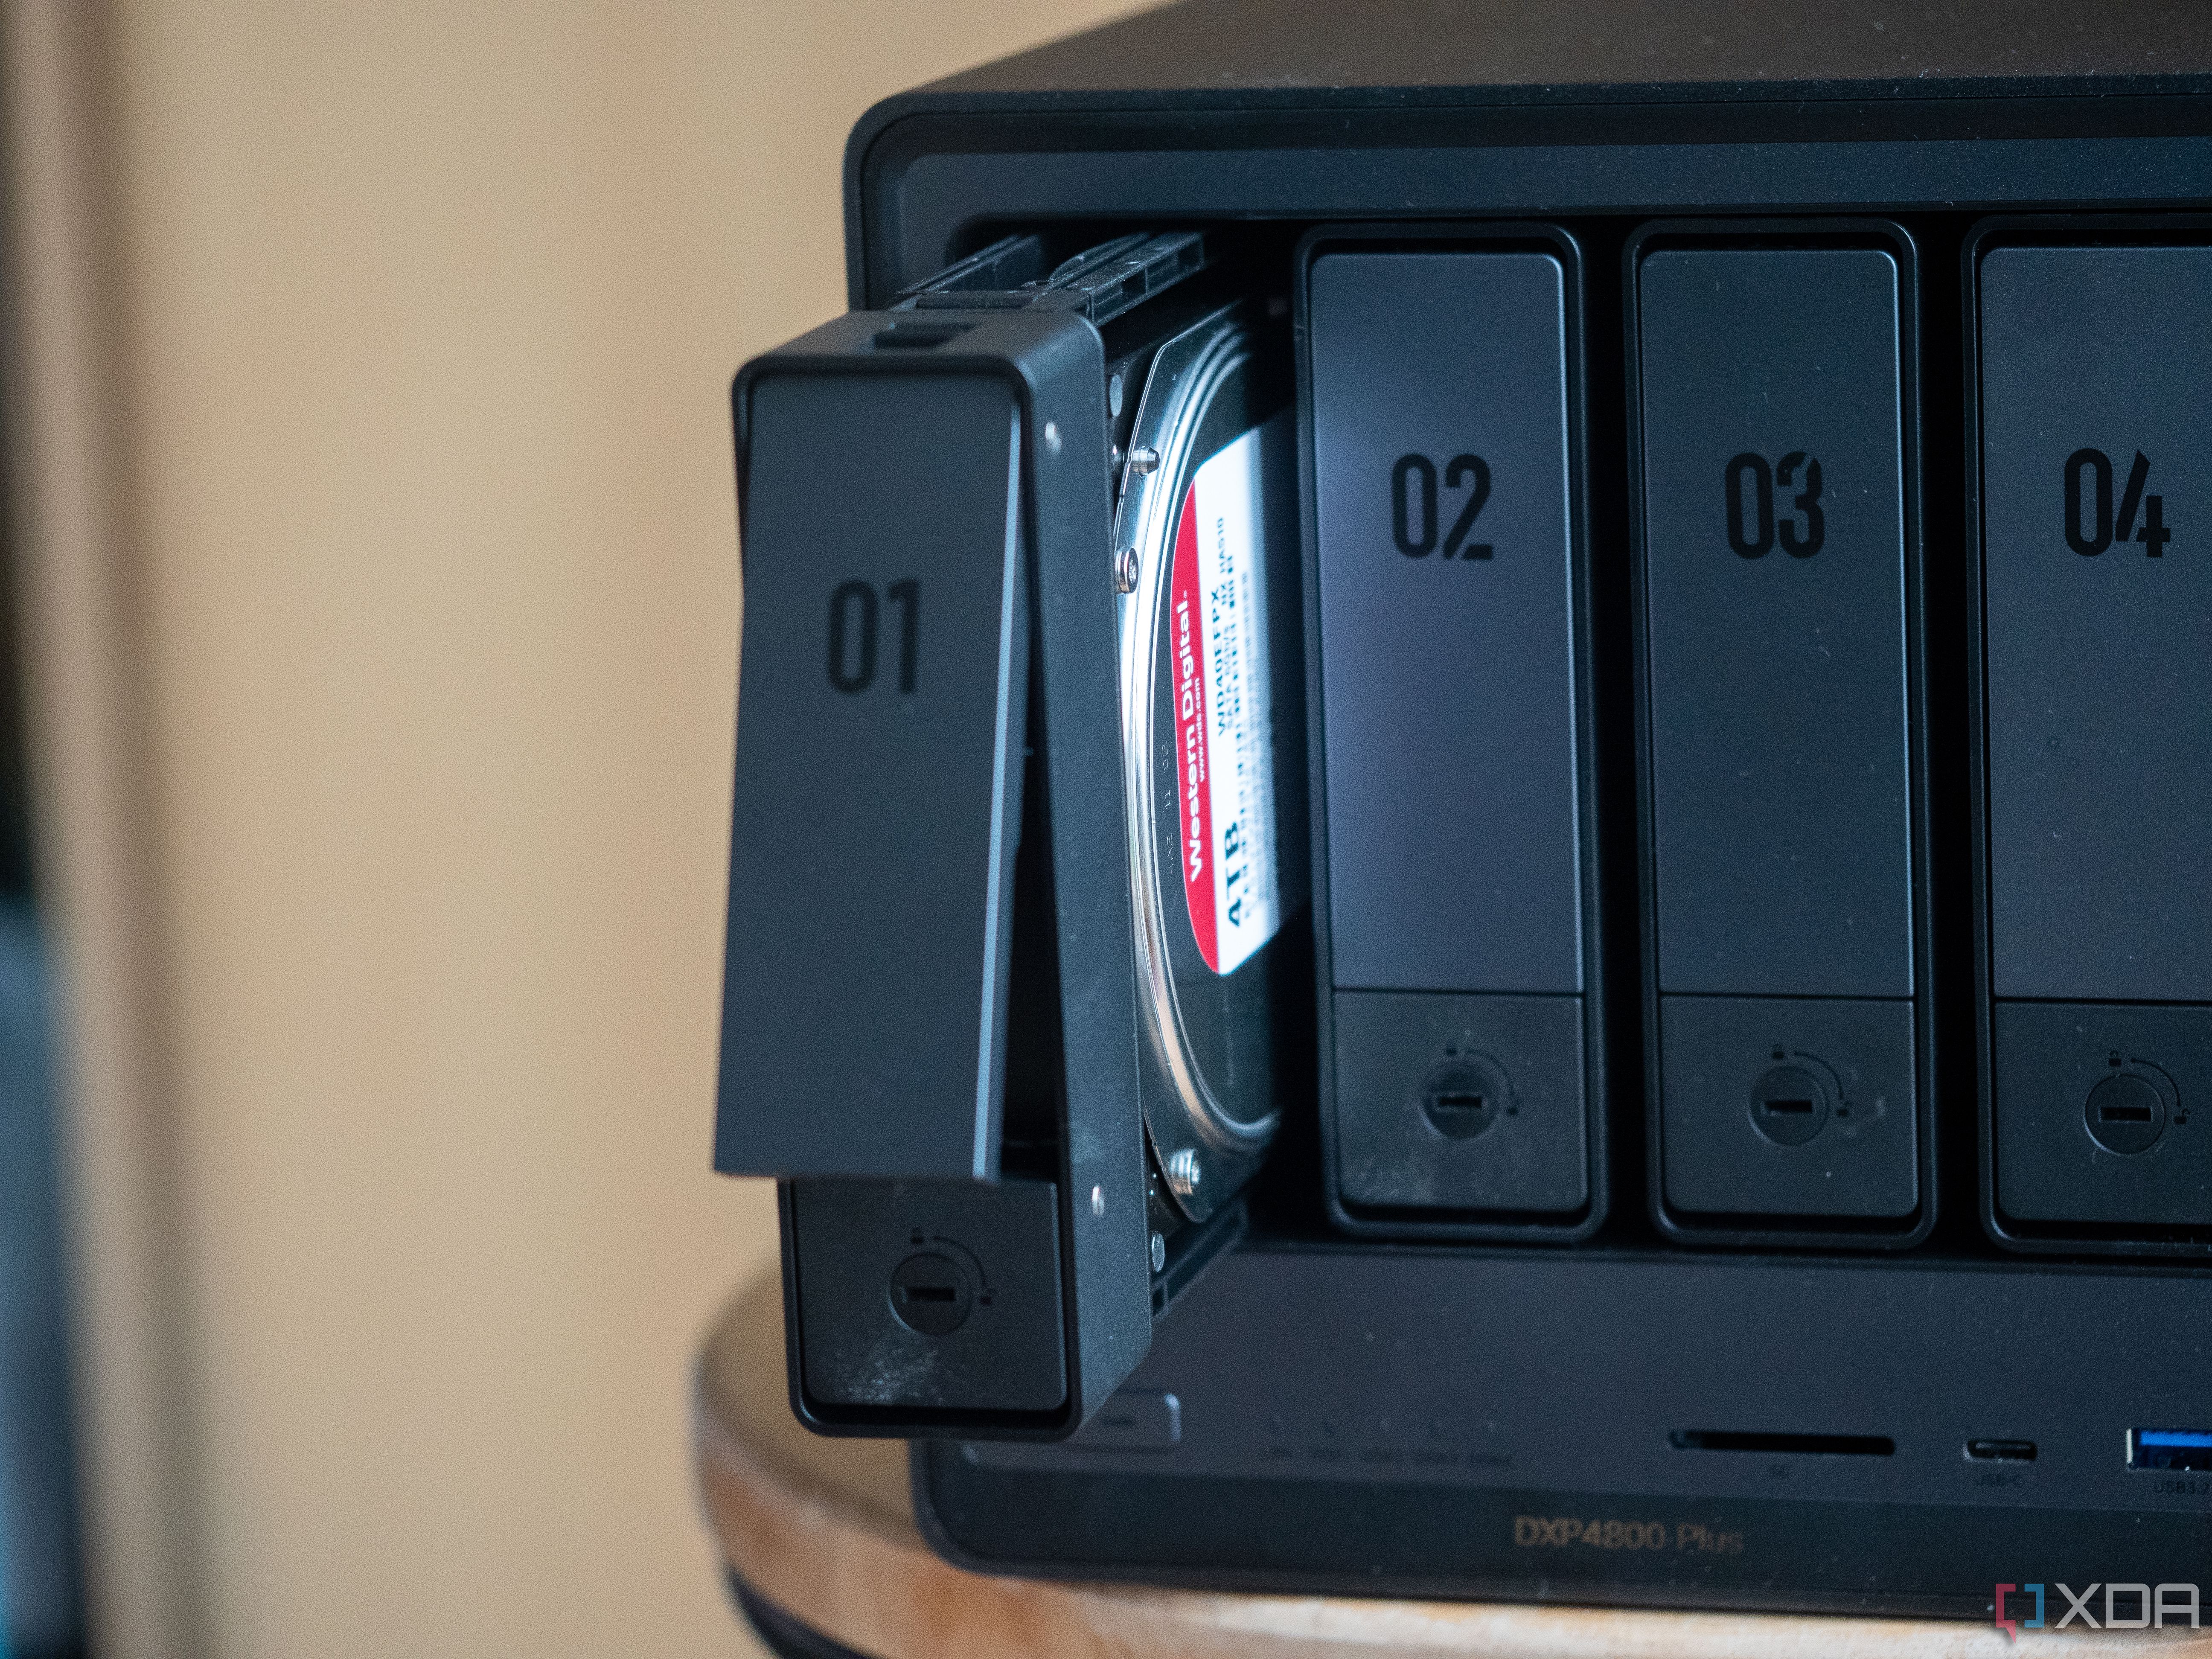
I've been using Proxmox a lot recently, deploying various different systems and containers across both of my machines in order to move some of my more essential systems away from my main server. However, one of my two Proxmox machines is the Ugreen DXP4800 Plus NAS, which also serves as my OPNsense machine. As a result, while it works perfectly for that purpose, I have been looking for a way to utilize the 12TB of storage that's still inside it. I've installed HexOS (based on TrueNAS) using those drives, and it works, though not effortlessly.
In a typical setup, you'd install your NAS operating system on your device of choice, and it would pick up the drives as usual and format them as a RAID array for normal usage. In Proxmox, it works a little bit differently. Everything is virtualized, meaning you could create virtual drives for your system, though you really shouldn't, and there's a much better way.
Virtualizing a NAS in Proxmox is possible
You just need to do it right
In most scenarios, there's nothing wrong with using virtual storage for your VMs and LXCs on your Proxmox machine. However, a NAS is different, especially one that uses ZFS. ZFS is a filesystem developed at Sun in the early 2000s, being developed and improved over the years as a part of the Unix-based OS known as Solaris. When Sun was acquired by Oracle, Oracle's ZFS became closed-source, though OpenZFS has since coordinated continued development of an open-source version of the filesystem. One of the reasons ZFS has become so pervasive in NAS systems is that it was designed for long-term data, with multiple checks built into the system to ensure that data integrity is maintained and that it can self-heal.
With that in mind, ZFS is certainly a filesystem with significantly more overhead than most "conventional" filesystems. All of those features designed to protect your data still have to run in the background, and other intrinsic features of ZFS, like the ARC cache, speed up reads by storing data in RAM for faster retrieval. If you create a virtual disk on a Proxmox server running a NAS, you're creating a nested ZFS environment. This means that you're essentially doubling up on ZFS features, with your virtual machine's own ZFS checking the integrity of data as it's written and looking for errors, and the host machine, Proxmox in this case, checking the overall storage container that your virtualized NAS is using. With nested ZFS, you're creating two copy-on-write layers, two ARC caches, two sets of checksums, and double the write-amplification. This costs RAM/IOPS and can accelerate wear on your SSD.
There is a way around this, and depending on your hardware, it may also be the most convenient. iXsystems (the developer of TrueNAS) specifically states that TrueNAS supports virtualization, writing an official blog post dispelling any fears you may have around it. With that said, a specific caveat is given regarding virtual storage drives that you may create and assign to a TrueNAS instance.
For TrueNAS and OpenZFS to offer absolute protection for your data, they should have direct access to a storage controller and the drives attached. Without direct access, there is a possibility of the hypervisor interfering with settings, reordering or reconfiguring drives, and introducing avenues for data corruption. Virtual data disks are not as reliable, and are particularly prone to operator mistakes such as accidental deletion or inadvertent use of hypervisor-based snapshot technology.
In this case, iXsystems specifically recommends passing through a physical device controlling your drives, such as a Host Bus Adapter, or HBA, which is a PCI adapter that you can easily give control of to your VM in Proxmox. With this, your VM will have sole ownership of your hard drives, preventing anything else, even Proxmox, from utilizing them while the VM is active. This is the best and preferred solution, with iXsystems saying, "The closer you can get TrueNAS to your storage hardware, the happier it is, and the better it can do its job of keeping your data safe."
At first, I opted to pass through my HDDs per disk. I don't have an HBA in my NAS, and I failed to notice my SATA controller was identified as a separate PCI device at first. In my case, at the very least, a per-disk passthrough was still the next best option. Instead of creating a virtual storage drive (or multiple), this hands the VM control of the drives for using them as if they were native drives, though with a virtualized layer that runs between Proxmox and TrueNAS to intercept and relay commands. From the perspective of the software, this almost looks the same as any other drive. Otherwise, in a situation where you genuinely can't pass through your SATA controller, and you built your own NAS, you could add an HBA that handles your drives for you, and that would be the best solution and the most optimal one, as advised by iXsystems. Aside from just running TrueNAS on bare metal, of course.
A per-disk passthrough is not the best configuration, though, and funnily enough, it was in my research for writing this article that I discovered I had overlooked the solution. I had thought I was limited by the hardware that I was working with, and I had read that SATA passthrough doesn't always work, so when I didn't see a SATA device in my PCI device list, I had just assumed that was one of those issues and didn't bother to look any further. It turned out that my SATA controller simply didn't expose a name to my system when using the command recommended by Proxmox to find your PCI devices, so I thought that it was a limitation of the hardware I was working with and left it at that.
When it comes to passing through individual disks, the biggest downside is that SMART tests can no longer run in TrueNAS, though they can still run in Proxmox. Plus, ZFS requires control of the hardware to work at its best, and this could raise problems in the future. I've since rectified that issue with a SATA passthrough, and I'll share both methods for passing through your disks.
Related
How to use an HDD passthrough on Proxmox - PCI method
The best method
There are two ways to pass through your HDDs on Proxmox, with the first being very easy and the second being a little bit cumbersome, even if it's similarly easy. We'll go through the better option first, which passes through your entire SATA controller to TrueNAS. This gives full control of it, meaning all drives that are using it will be handed to TrueNAS. In my case, I want to use all of my SATA drives in TrueNAS, but you may have some drives plugged into a SATA port that you want to use in Proxmox. If that is the case, then you won't be able to use this option, and you should skip to the per-disk method.
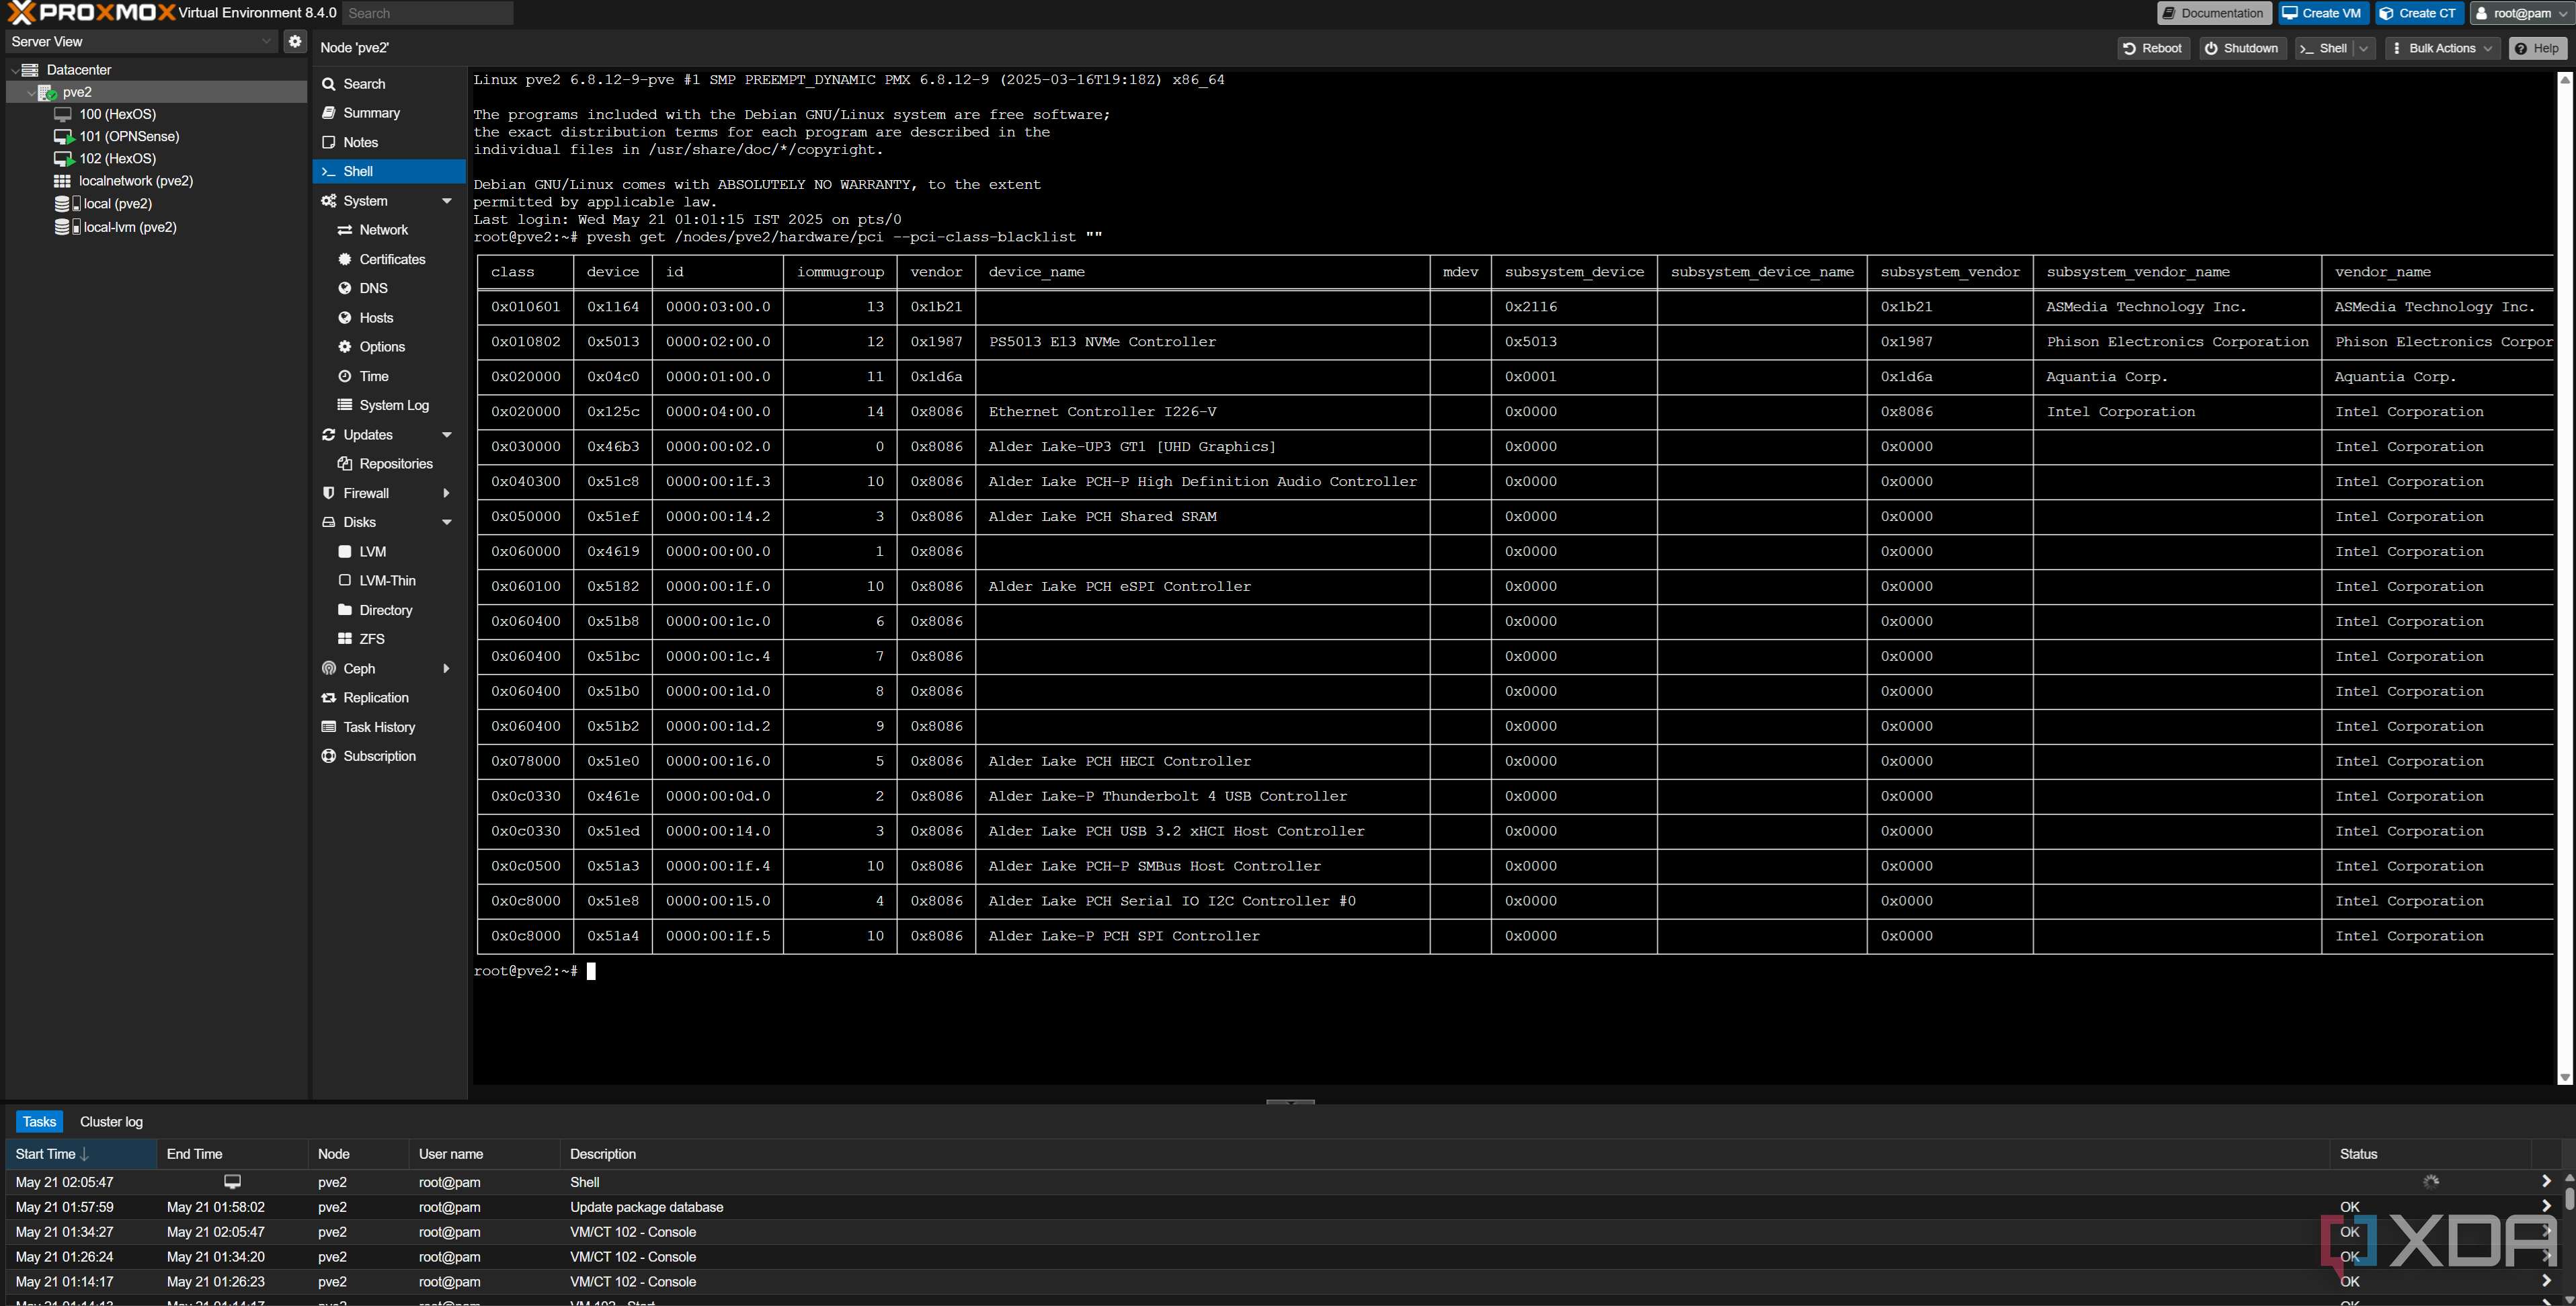
First and foremost, we'll need to check a few things. The first requires ensuring that IOMMU is enabled, and the second requires looking for the identifier of your PCI device. The command you'll want to use is the following:
pvesh get /nodes//hardware/pci --pci-class-blacklist ""However, if nothing immediately stands out, don't stop yet. This is where I faltered and assumed that I couldn't do an "ideal" HDD passthrough. This next command, which I found entirely by accident on the Proxmox community forums, helped me identify my SATA controller.
lspci -nnkThis provided me with an actual name, along with the truncated ID of the PCI device that I could pass through to my VM.
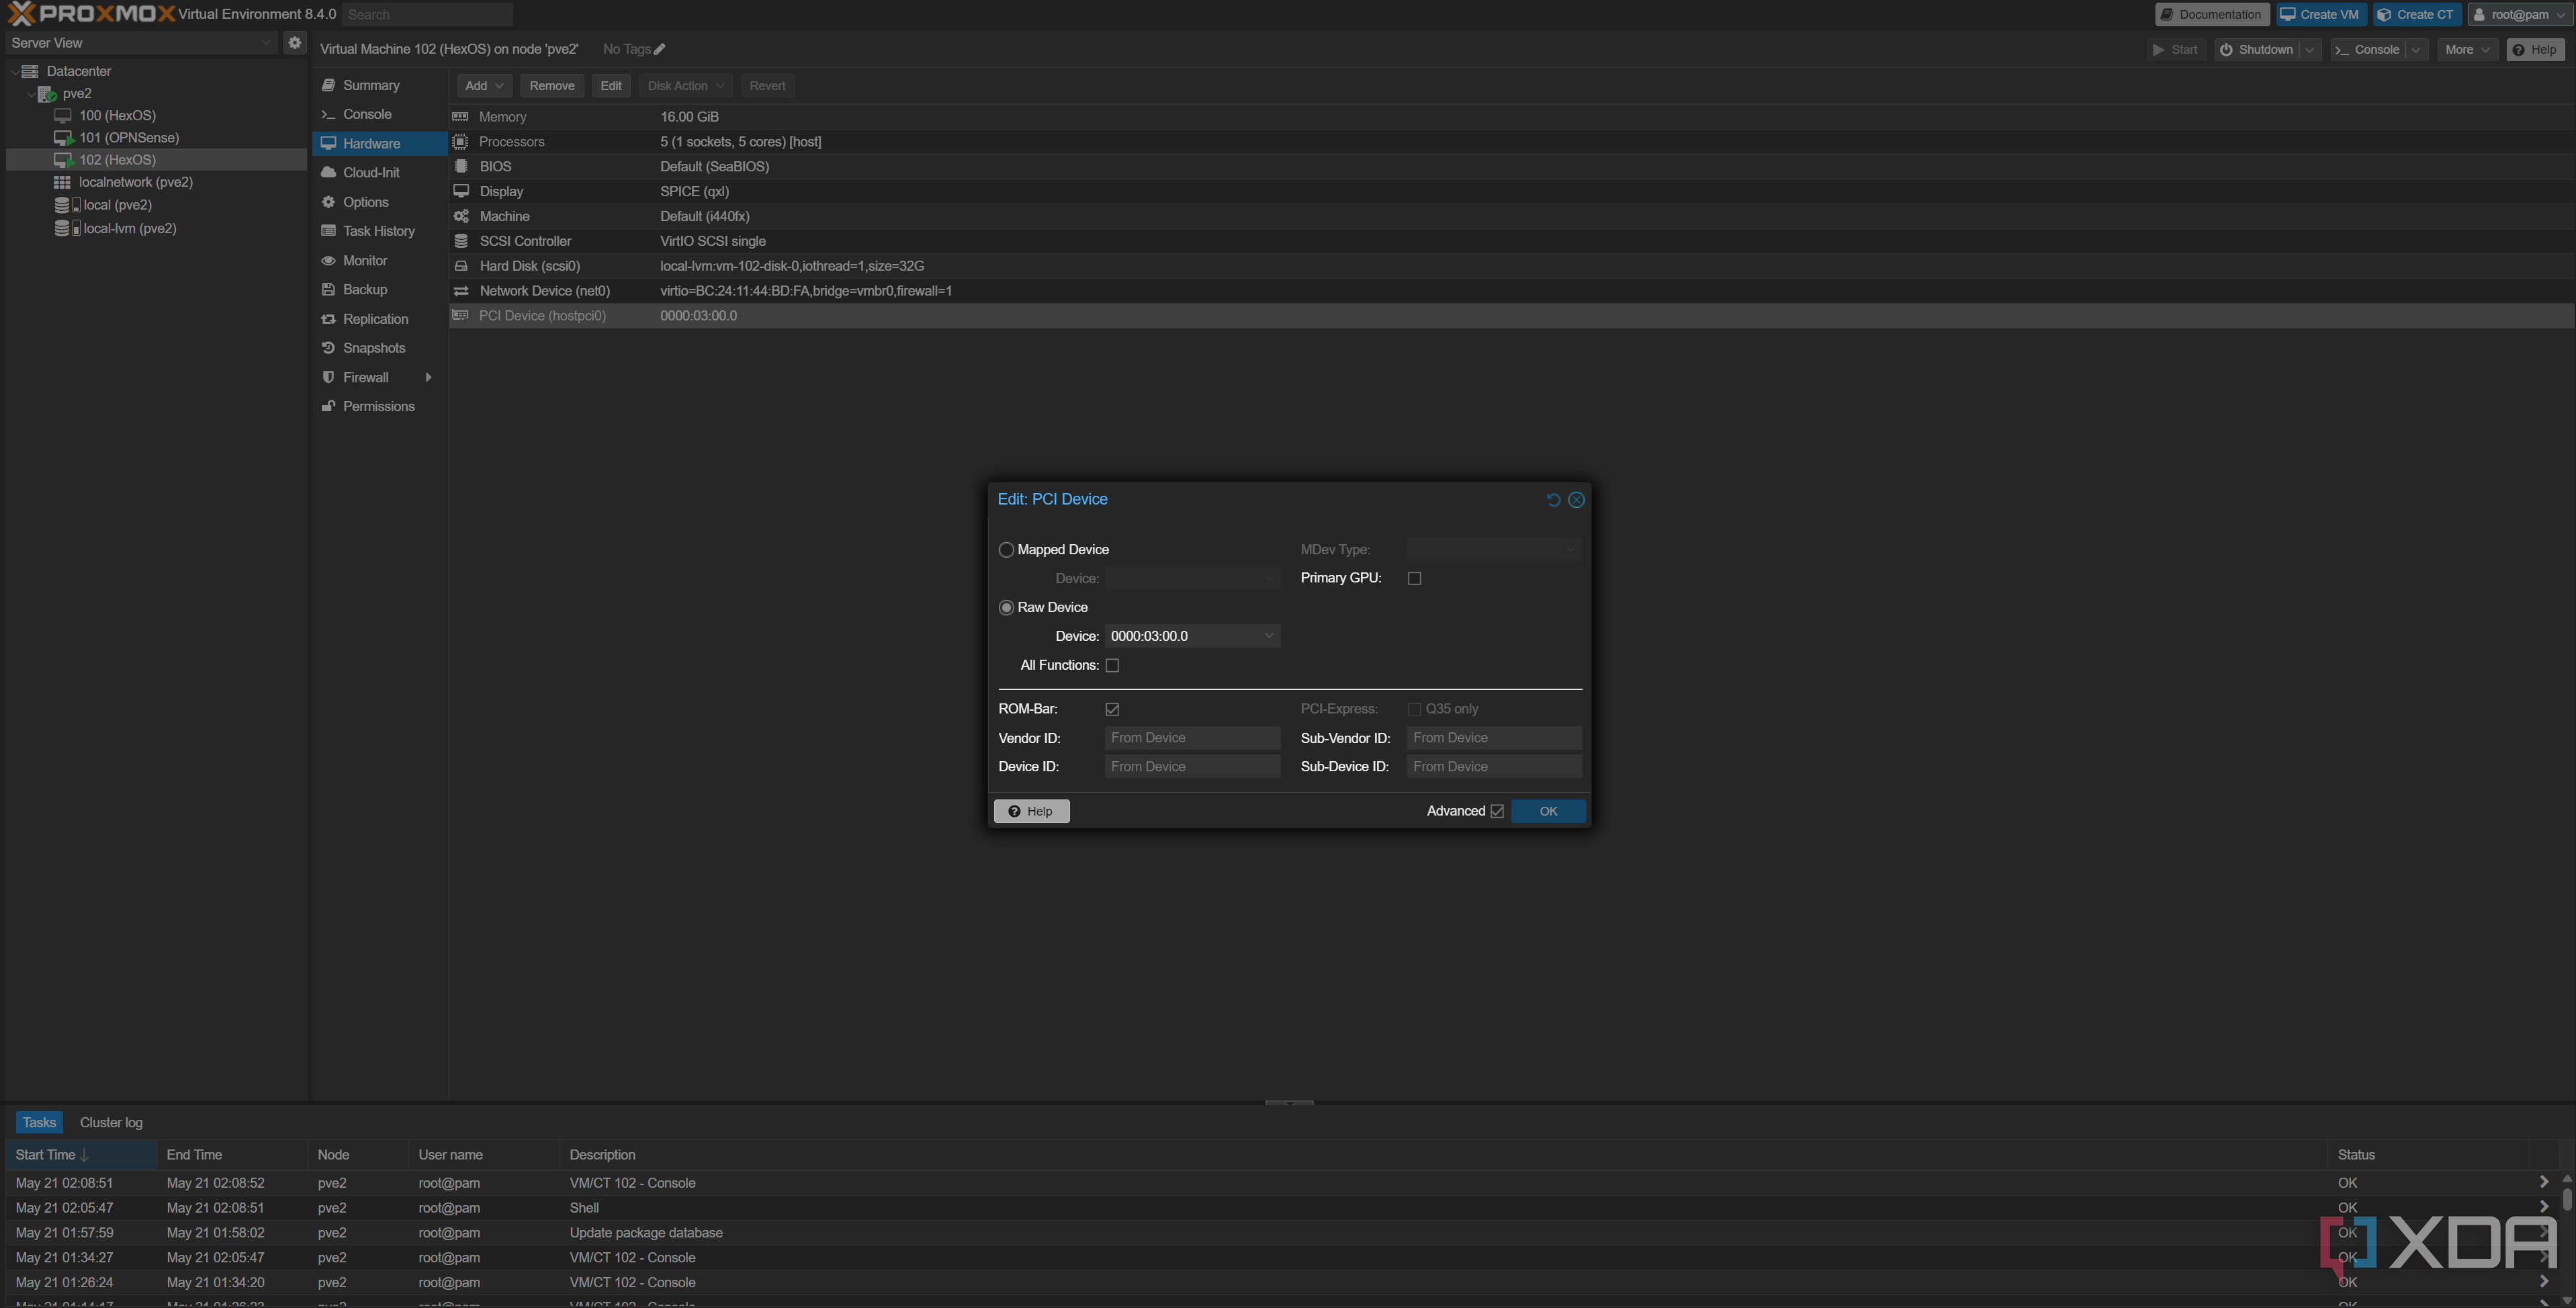
From here, it's simple. Go to your VM, go to Hardware, click Add, and select PCI device. Choose Raw device and select the ID of your SATA controller to pass through. Be very careful with this. If your SATA controller also controls the boot device, it's possible that your Proxmox environment will fail to boot, as this kind of passthrough gives total control of the hardware device to the VM. I can no longer access my SATA devices in Proxmox, as the VM is given exclusive access to them. If you use an HBA, you would pass this through instead of your SATA controller.
Now, TrueNAS can see and control the drives, run SMART tests, and treat them as if they were completely native HDDs... because, well, they are. This kind of passthrough directly connects the SATA controller to the VM, which is also why Proxmox can no longer use it. There's no virtual adapter, and from the perspective of TrueNAS, there's no difference to running it on bare metal.
Don't do what I did either; if a simple hardware passthrough is an option, go with it first. It was a nightmare to migrate my ZFS pool from my initial per-disk passthrough to a native solution like this, and required manually importing the ZFS pool with zpool, modifying mount points with the zfs command, and disabling a readonly flag that was enabled as a result of the apparent change in system. I spent a lot of time in the TrueNAS shell fixing that particular issue.
How to use an HDD passthrough on Proxmox - Per-disk method
Less ideal, but still works
The other way to go about it is to pass through your individual disks to the Proxmox VM, though, as already mentioned, this comes with downsides. ZFS wants to directly control the hardware and can't with this method, and there's still a virtualized layer that runs between Proxmox and the VM, even if the VM still essentially has complete control of it.
When it comes to setting up a per-disk passthrough, there isn't an easy way in the UI to pass your HDDs through on Proxmox like you can with other devices. You'll need to use the command line, and you'll also need to identify your hard drives by their IDs. This is so they can be consistently referenced in software, rather than by mount points. Mount points may change from reboot to reboot, but an ID won't. The same goes for a passthrough on any device; for example, to pass through my Zigbee dongle on my Home Assistant OS VM, I also needed to identify the ID of my USB device and pass that through, rather than the USB port itself. This means if the USB is moved to another port, then the device will still be passed through.
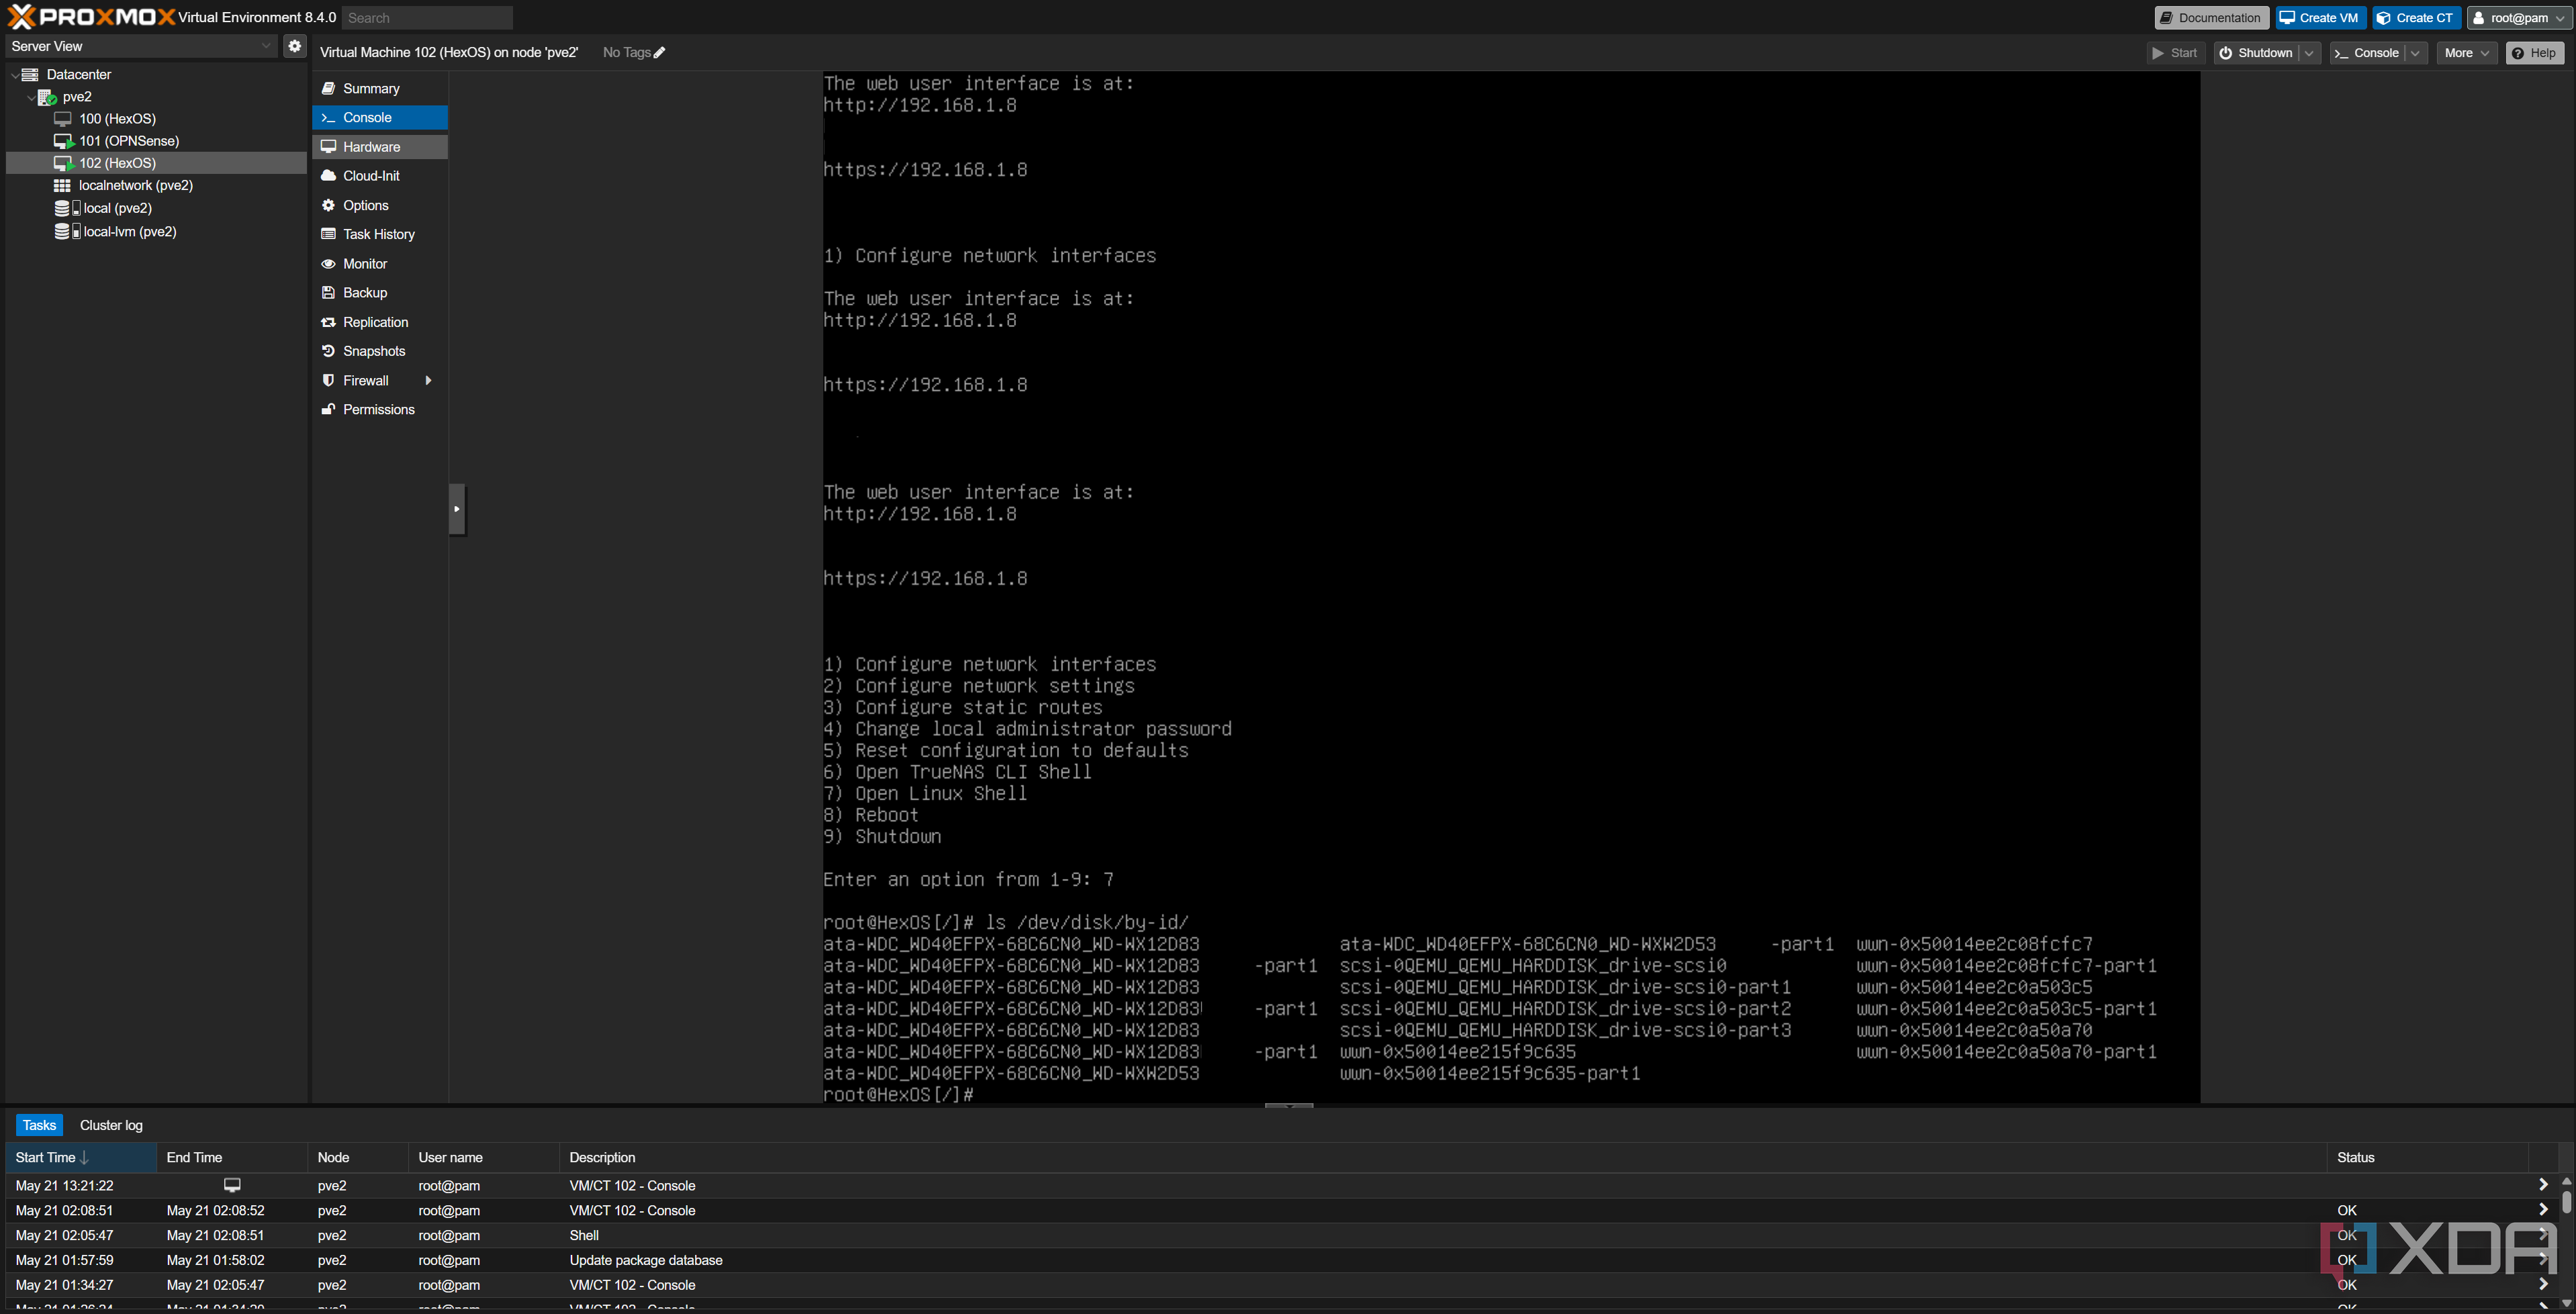
First, we need to list our drives and find them. We can do that in the Proxmox shell with the following command. My image above shows the command being run in a VM as I have already passed through my HDDs, but make sure you run it in your Proxmox host's shell, and not a VM.
ls /dev/disk/by-id/This will list all of your drives by their ID, which is separate from the order they are discovered and represented in the form of sda, sdb, sdc, etc. Theoretically, what you now have as sda could be sdc on your next boot, and that's why it's safer to use IDs rather than specific filesystem references. Make sure to use the right IDs for the right drives you want to pass to the VM, and save them externally temporarily.
Next, we'll need to run the command to manually add our drives as SCSI drives. This will create a virtual adapter that runs between the host machine and the VM, but still gives the VM almost complete access to it. As already mentioned, it won't have a hardware-level access, so SMART tests and the like won't work, but most things should. ZFS does need full access to the drive to function at its best, but many users have used TrueNAS in this way with a virtual adapter for their drives without issue.
To add the drives, we'll need to run the following commands after shutting down the VM. These commands assume that scsi0 is the virtual boot drive. The VM number can also be found beside the name in the Proxmox host.
qm set -scsi1 /dev/disk/by-id/qm set -scsi2 /dev/disk/by-id/
qm set -scsi3 /dev/disk/by-id/
qm set -scsi4 /dev/disk/by-id/
This tells Proxmox to boot the virtual machine with a reference to four SCSI drives, and those SCSI drives can be mounted at those specific IDs. If you have more than four drives, you can increment the SCSI number accordingly. If you have fewer, just add as many as you need.
You should now have working drives in your virtualized NAS environment
The convenience of Proxmox can't be understated
That's it! Your drives will now be detected by your VM when you boot it up, and it'll be able to discover attributes such as storage available and used. If you can't give your VM direct access to an actual controller, then passing through individual disks is certainly not the best way of doing it, but it works in a pinch. I highly recommend passing through an HBA or SATA controller instead if you can.
With that said, either of these options gives you the ability to use your HDDs in your NAS environment. You get all of the benefits of Proxmox flexibility while still being able to host a NAS. In my case, because my Ugreen NAS is also my OPNsense router and firewall, I essentially have a massive amount of storage connected to my router, which is designed to stay on at all times.
Building a NAS using Proxmox can be done, but only do it in situations where you need to use Proxmox for a specific reason. TrueNAS has its own virtualization capabilities, so if you just want to run basic VMs, TrueNAS on bare metal might be a better option. Otherwise, you can pass through your drives the right way, and it'll be more or less the same as a bare metal installation.


 English (US) ·