.png)
As an old companion in my tinkering journey, my Raspberry Pi 5 had to bear the brunt of my DIY experiments, which have ranged from all-in-one productivity hubs to Docker containers running Windows. However, few projects can beat the synergy between Home Assistant and Raspberry Pi. The former is hands-down the best utility for managing the smart home devices and IoT paraphernalia in my apartment, while the latter’s low-energy consumption makes it an economical option for running services that require 24/7 uptime.
I began my descent into the Home Assistant rabbit hole with my Raspberry Pi and still use the SBC for managing my battalion of smart devices. But after months of using my pint-sized board as a HASS hub, I’ve learned a couple of useful lessons – stuff that I wish I'd known when I first started working with my Raspberry Pi-based Home Assistant server.
4 There’s more than one way to deploy HASS
Each method has its pros and cons
Flashing Home Assistant as an operating system using the Raspberry Pi Imager is one of the most common ways to set up a smart home management station, and it’s precisely the method I used when I first experimented with HASS. But just like every other utility in the self-hosting ecosystem, that’s far from the only option at your disposal.
While the HAOS version delivers top-tier performance, there are times when you might want to use your Raspberry Pi for other projects. That’s where you can go for a supervised Home Assistant setup, where the underlying operating system remains accessible even after you’ve installed HASS. If you’re on a particularly low-power device, Home Assistant Core may be the better option, provided you’re fine with losing access to the Add-ons Store.
3 A high-end RPi can double as a reliable HASS server
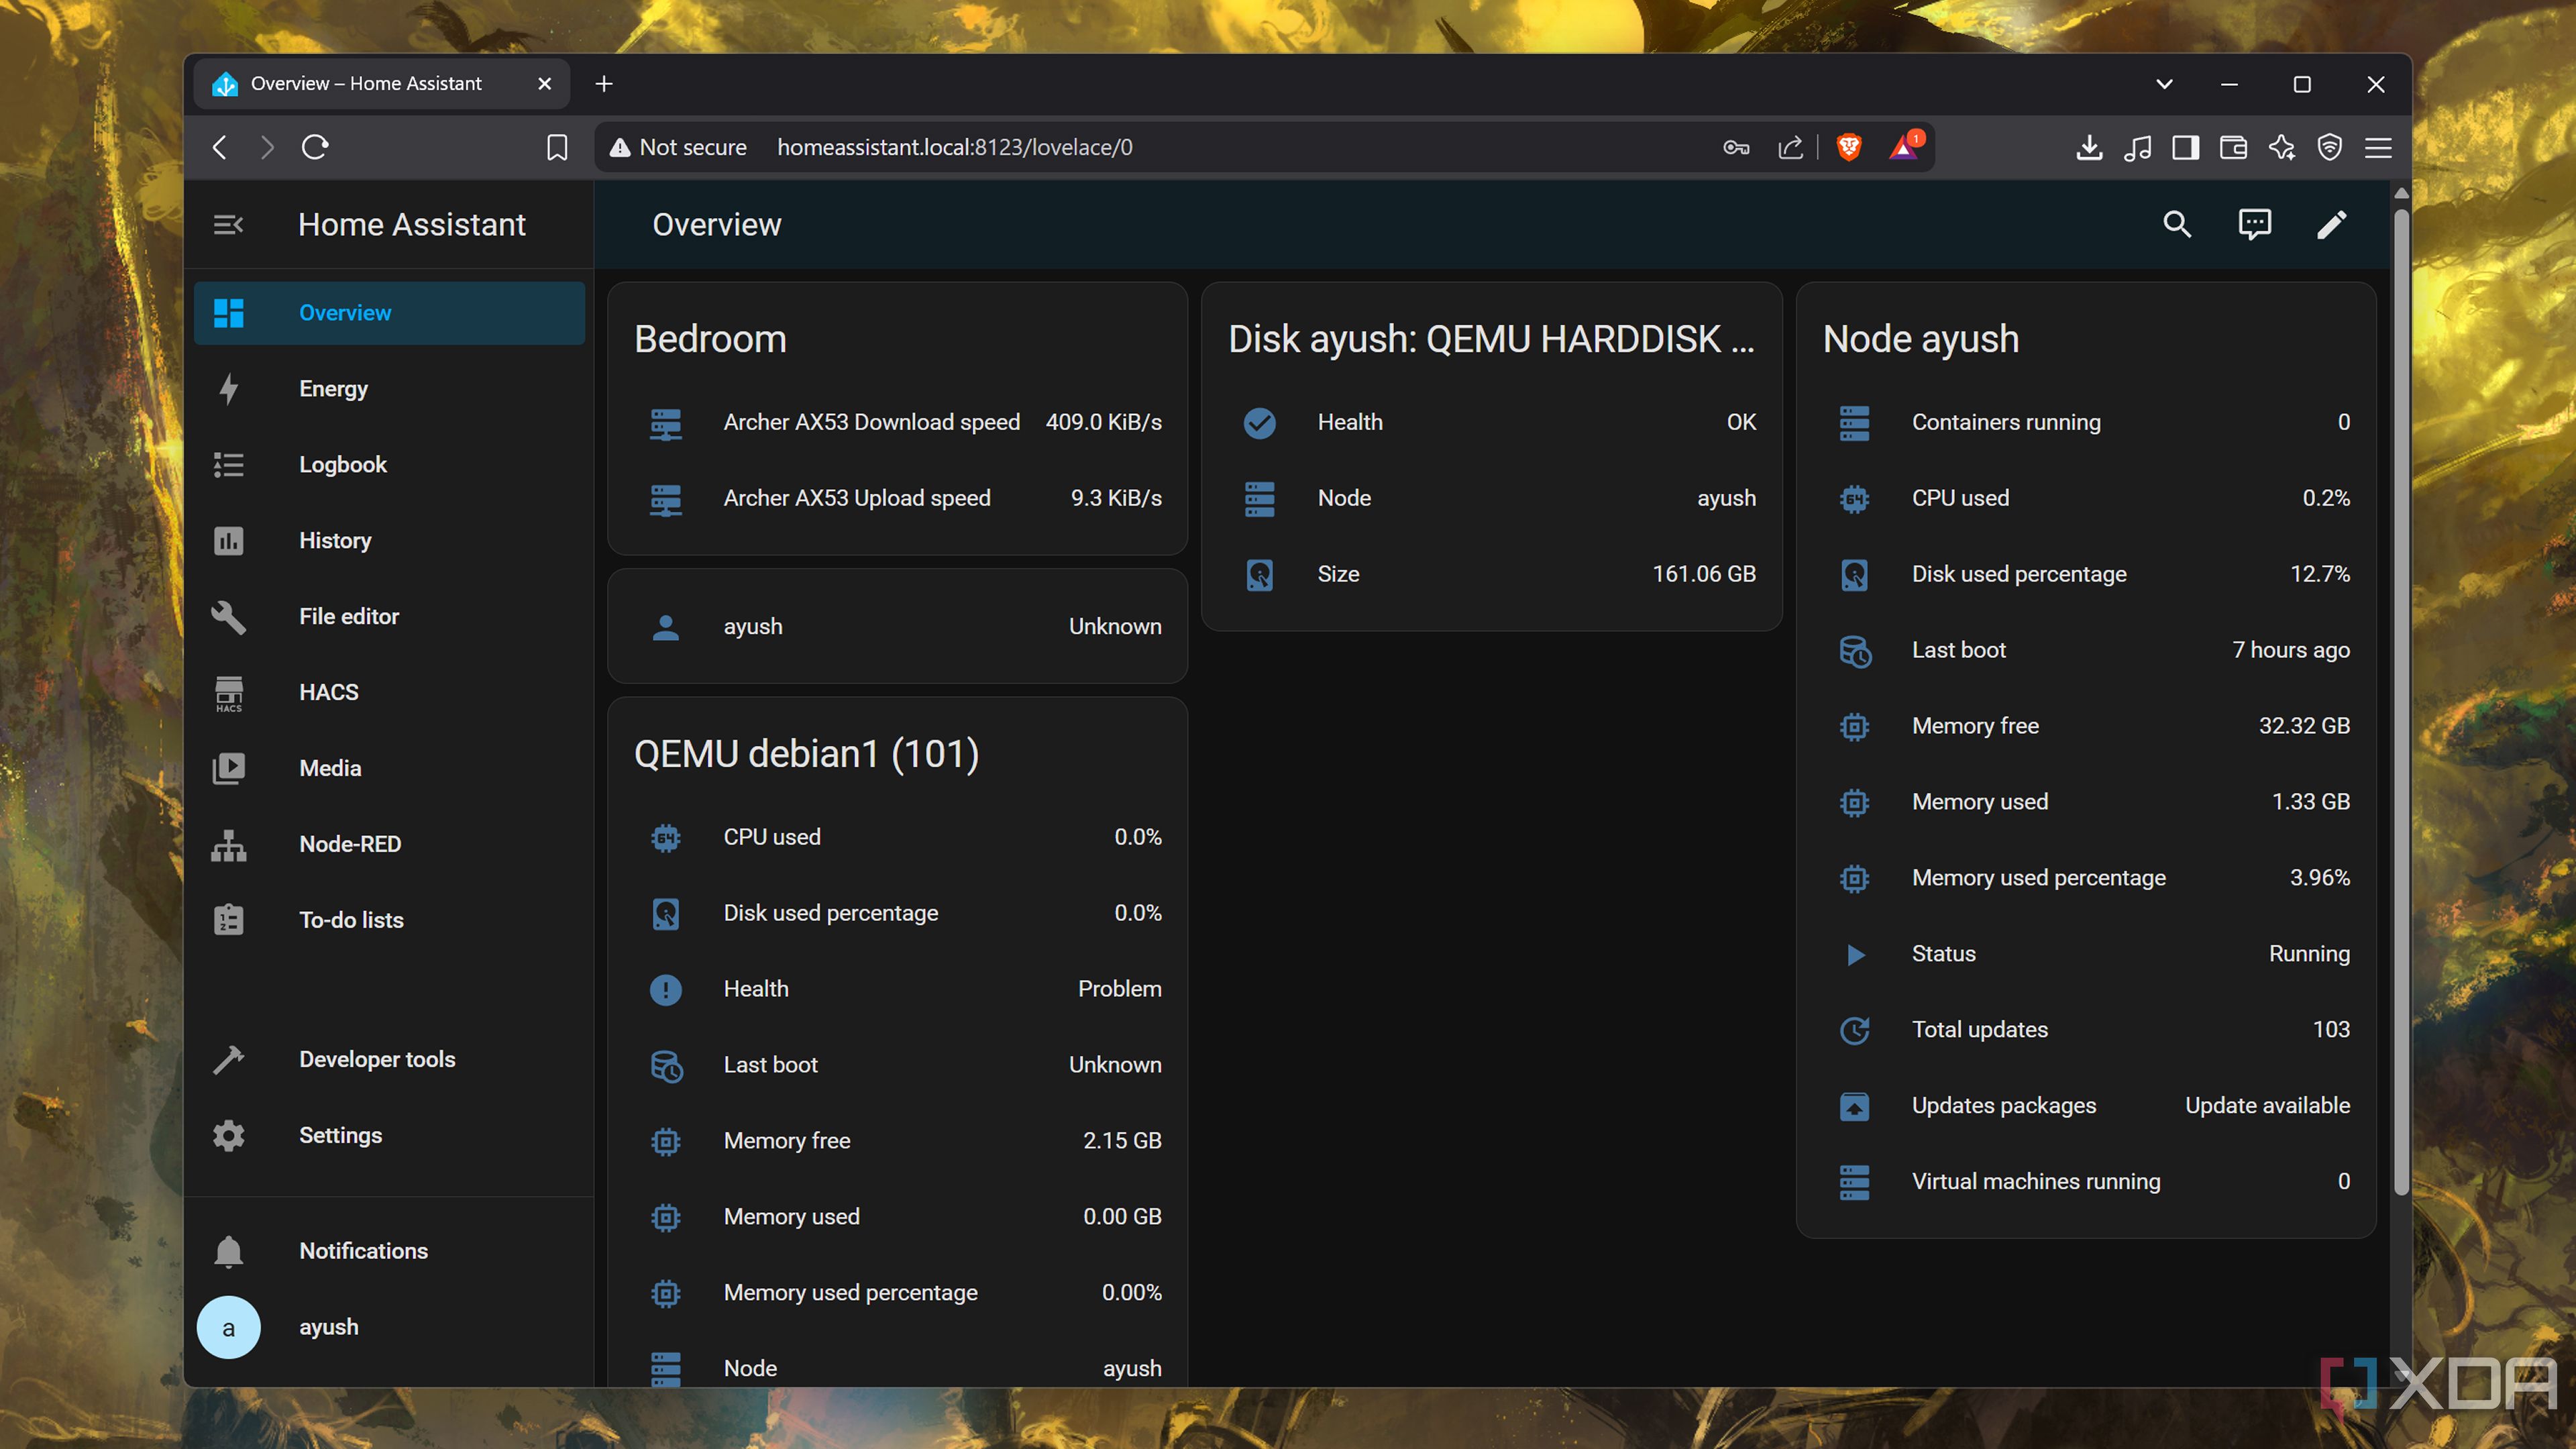
Considering that even the top-of-the-line Raspberry Pi can’t outperform an N100 system, I was a bit apprehensive about using a board from the uber-popular SBC family for the Home Assistant hub. However, my worries were proven wrong when my Raspberry Pi 5 (8GB) delivered a responsive experience even after I’d connected my entire battalion of smart devices to the HASS server.
Of course, the 8GB memory was a major reason I didn’t encounter any performance hiccups. While I do like the thought experiment of forcing my Raspberry Pi Zero to run Home Assistant, I’d never practically set it up, because the 512MB RAM and single-core processor on the SBC would bottleneck the rest of the setup.
2 SSDs are better for storing the HASS database
Especially for write-intensive workloads
Thanks to their affordable prices and easy-to-swap design, microSD cards are the de facto storage units for most Raspberry Pi projects. However, Home Assistant is one instance where you’d want to pick an SSD over a microSD card, even if the card is graded Class-A. By default, Home Assistant tends to record every minor change inside a database, which is great for troubleshooting and data analysis but terrible for the microSD card’s health.
That’s because microSD cards aren’t designed for write-intensive tasks and are known to fail under heavy workloads. You could technically disable Home Assistant’s recorder facility, but I wouldn’t recommend doing so. The only other options are to configure an external device or your Raspberry Pi’s memory to store the data. Considering that low-capacity SSDs are fairly inexpensive, I recommend going with the first option if you don’t want to replace your microSD card every few months.
1 Add-ons and integrations are your best friends
Throw in HACS for an even more impressive smart home
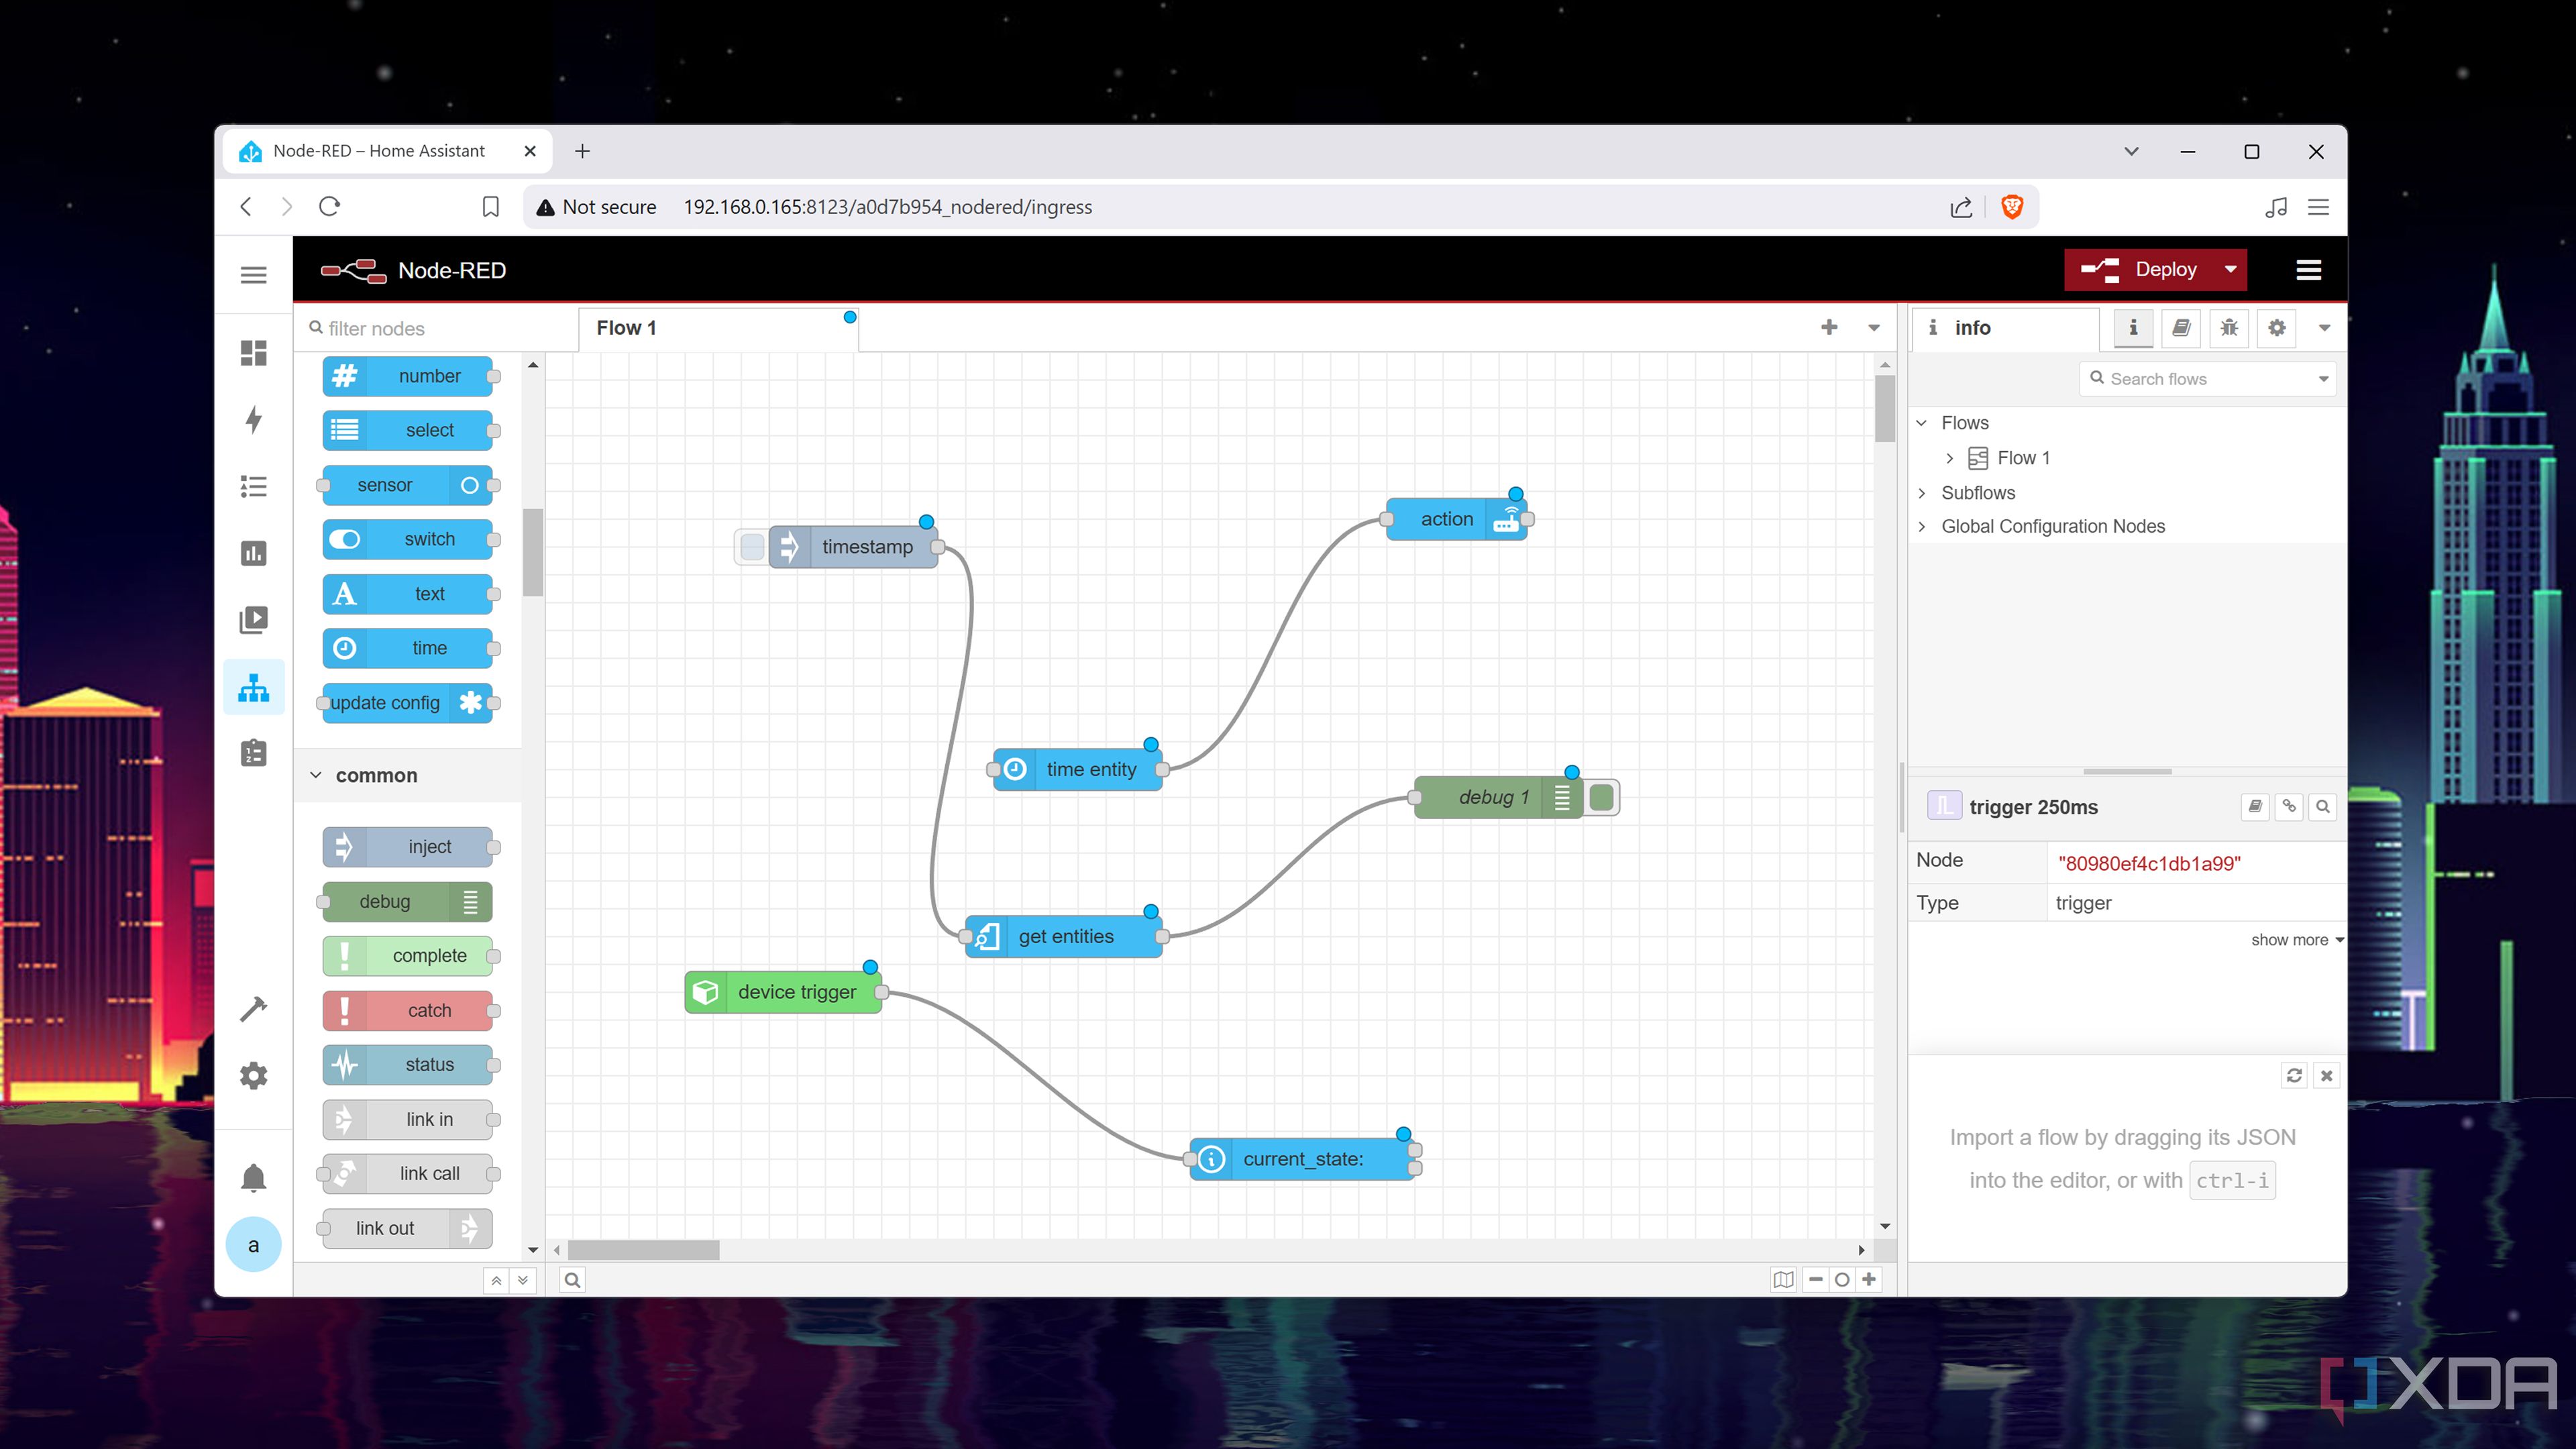
Once you’ve added your smart home devices to the Raspberry Pi-based Home Assistant server, I recommend perusing the Add-ons Store. While some of the plugins may seem a tad too complicated, you can pull off some wacky stuff with them, including an automation-heavy Node-RED instance and a voice-controlled HASS server.
In case your smart gizmos and IoT devices aren’t accessible in the dashboard, you’ll want to configure them inside the Integrations tab. Heck, the Integrations tab might reveal some extra devices that you previously thought were impossible to connect to your tiny Home Assistant hub. That’s precisely how I figured out I could connect other microcontrollers besides ESP32 to the smart home management platform.
If you’re looking for even wackier things to pair with your HASS instance, I recommend installing the Home Assistant Community Store. Trust me, few things are as gratifying as controlling your entire home lab from the Home Assistant interface.
Related
I control my Proxmox home lab from Home Assistant, here's how
A stylish and (low-key) unhinged method for managing Proxmox VMs and containers
Name a better duo than Raspberry Pi and Home Assistant for smart homes
Since I often engage my Raspberry Pi in other projects, I’ve scheduled regular backups to ensure I don’t lose my precious HASS add-ons, integrations, and automation stack due to a botched experiment. Speaking of experiments, there are some truly wacky automations you could pull off with your RPi Home Assistant server, especially once you pair it with the all-powerful Node-RED add-on.
Related
How I use Node-RED and Home Assistant together for the ultimate smart home
With the right setup, Node-RED and Home Assistant can make for a killer smart home combo


 English (US) ·