.png)

Ayush Pande is a PC hardware and gaming writer. When he's not working on a new article, you can find him with his head stuck inside a PC or tinkering with a server operating system. Besides computing, his interests include spending hours in long RPGs, yelling at his friends in co-op games, and practicing guitar.
Whether you’re planning to put together a custom NAS or just want to buy a pre-built storage server, it’s a good idea to thoroughly research your components. The same goes for the operating system, as NAS-centric distributions tend to have entirely different sets of perks and quirks. If you’re a seasoned home labber, you’ll know that picking the right file system for your NAS is just as essential as the OS and hardware – potentially even more than components, as you can swap those out later.
ZFS is one of the most popular options, as it’s reliable enough for beginners while offering a boatload of features for hardcore data hoarders. After all, it’s armed with terrific self-healing provisions, delivers solid performance in RAID workloads, and supports snapshots for efficient backups. Unfortunately, it’s to make grave mistakes when working with ZFS pools, which can snowball into unrecoverable errors on your NAS.
4 Going for low memory setups
Start with 8GB RAM, then add 1GB per 1TB of disk space
ZFS’ memory hogging tendencies are its biggest disadvantage compared to BTRFS and rival file systems – to the point where you’ll run into major stability and performance issues if your system doesn’t meet the minimum RAM requirements. Between its tendency to store metadata in the memory, scrub tasks, and RAM caches, ZFS requires a bare minimum of 8GB memory, which is the same amount you’ll need for a typical Windows 11 installation.
But the real problem begins once you go for huge storage pools, where you’ll have to slot even more memory into your NAS. As a general rule of thumb, you should go for at least 8GB of RAM and keep adding 1GB for every terabyte of effective storage. For folks going for L2ARC caches, you’ll want another 1GB of memory for every 50GB of your cache.
3 Not using snapshots or scrub tasks
You’ll want to set up automated schedules for these tasks
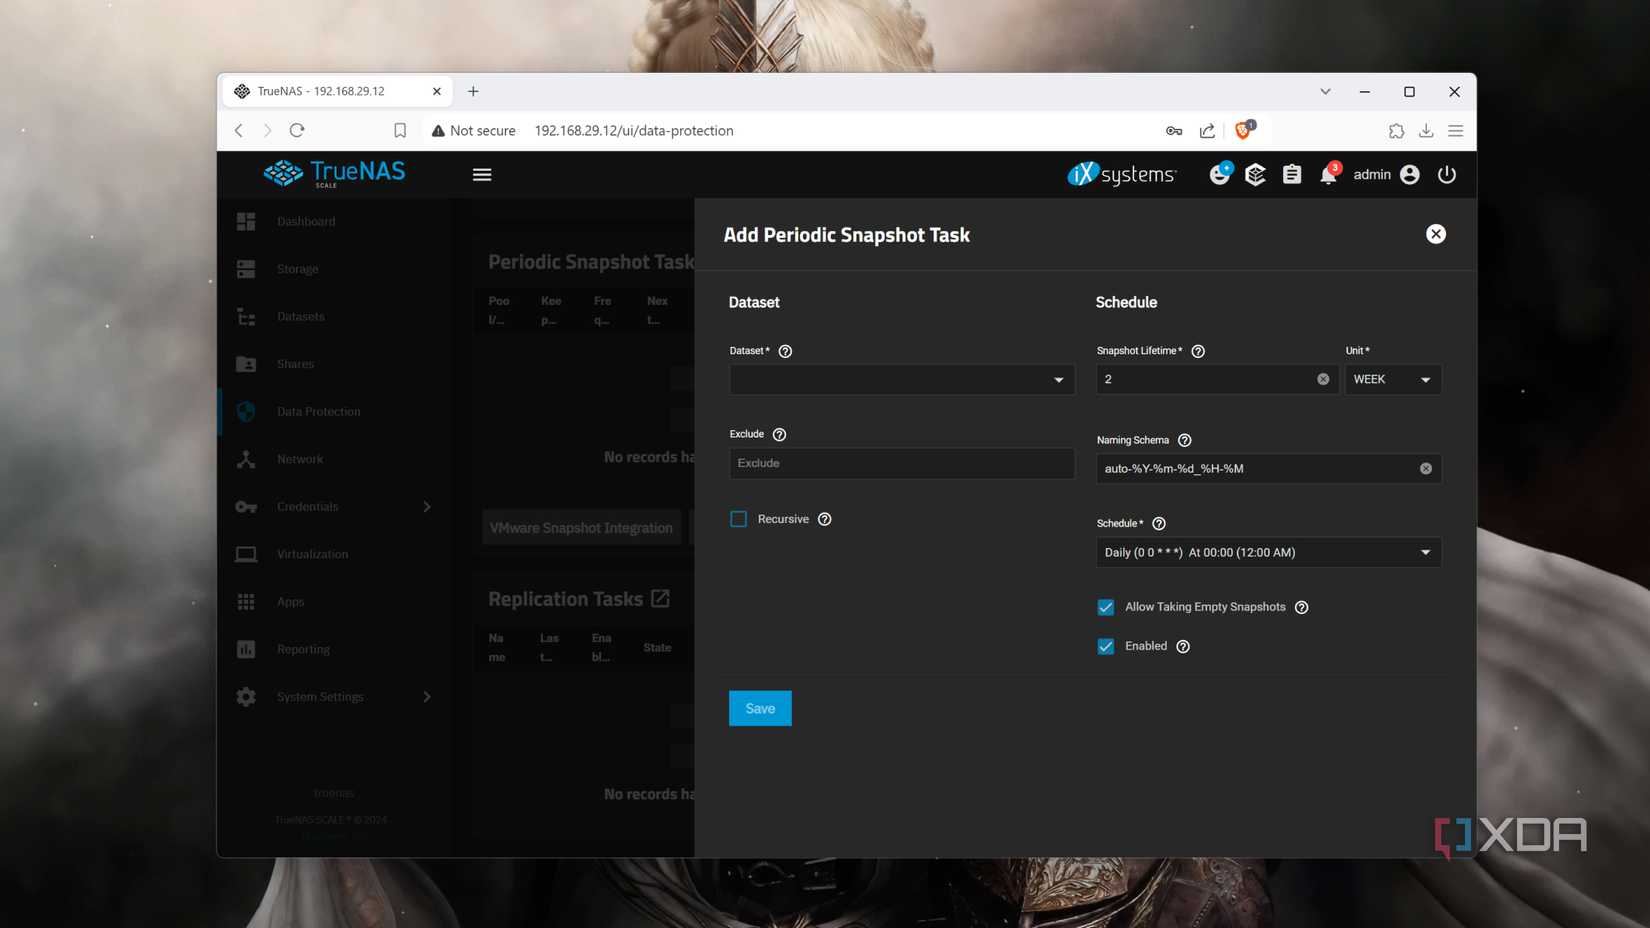
ZFS has numerous NAS-centric utilities baked into it, with snapshots and scrub tasks being the more important ones. For the uninitiated, snapshots can capture the state of your NAS at a specific point in time. Similar to checkpoints in games, you can use your snapshots to reload your storage pools to their previous states. Since they consume less storage than conventional backups, they’re an effective tool to recover from accidental modifications. Meanwhile, scrub tasks check your ZFS pools for bad blocks and silent corruption. If you’ve got redundant drives in your setup, scrub tasks can even attempt to correct these errors.
Depending on your OS and ZFS configuration, these utilities may not be enabled by default. If you’re on a barebones CLI server, you can use the zfs snapshot pool-name/dataset-name@snapshot-id command to create manual snapshots, while zfs scrub pool-name will let you run scrub tasks. But ideally, you’ll want to automate these tasks, and that’s where cron jobs come in handy.
2 Using improper RAID configurations
Do your research before committing to a RAID setup
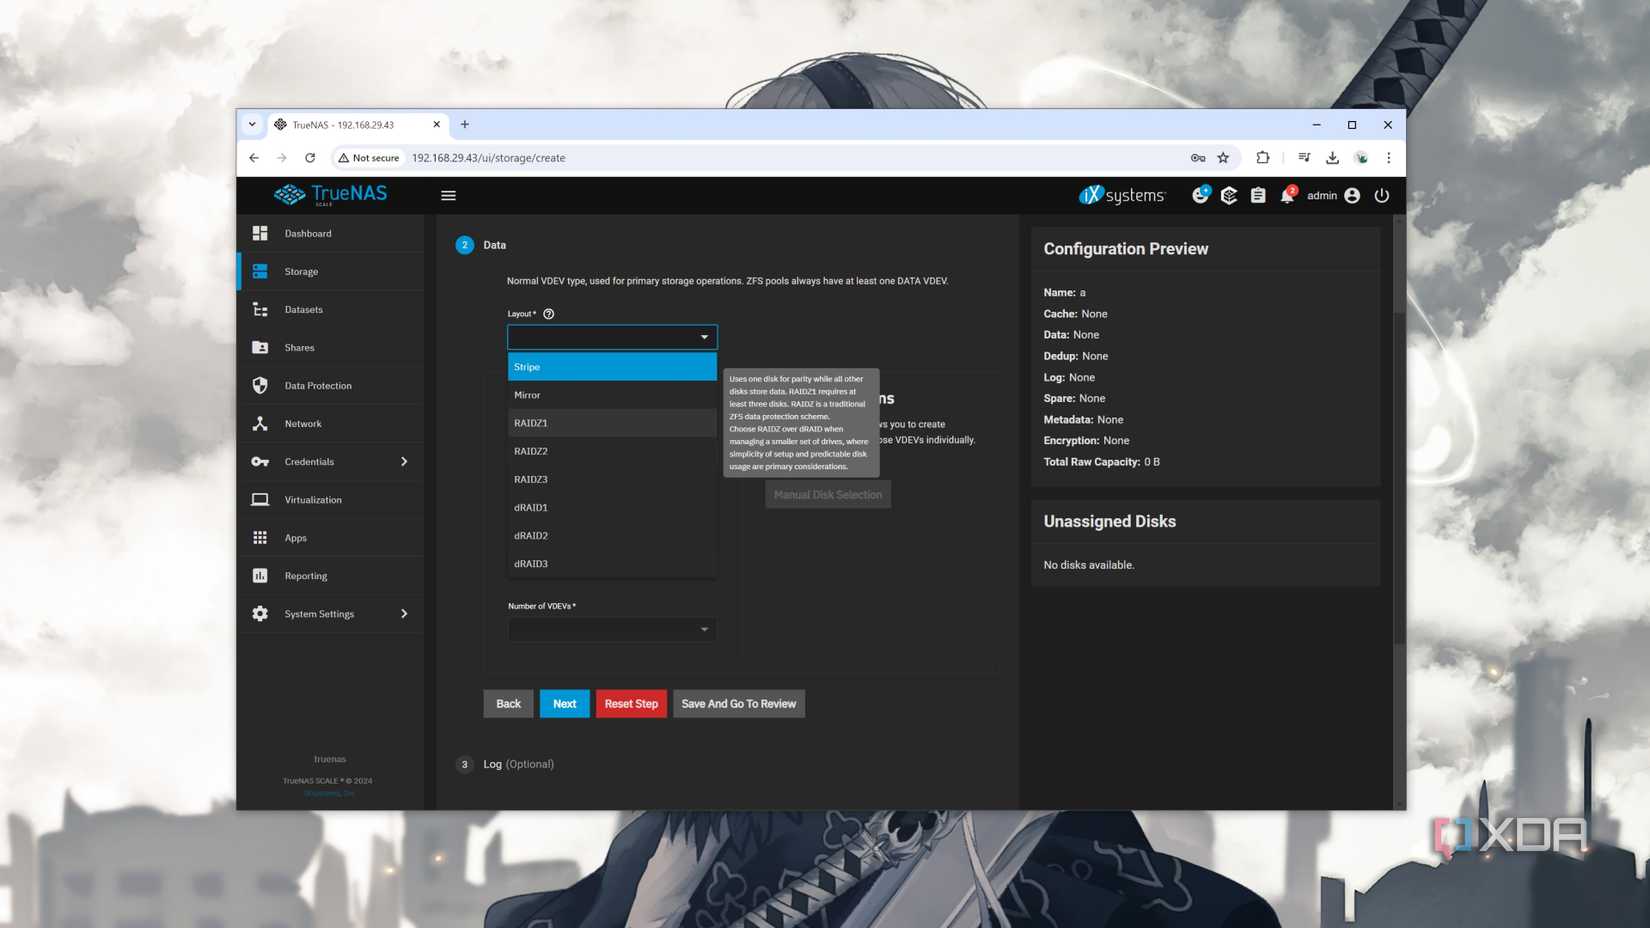
If you’ve dabbled in home servers before, you may have heard about the Redundant Array of Independent (or Inexpensive, depending on who you ask) Disks facility. RAID is a neat way to leverage the additional drives in your NAS, allowing you to bolster your ZFS pools’ performance, add mirrored HDDs to the mix, or bring extra reliability using parity disks (or even all three at higher levels).
Unfortunately, the higher you go up the RAID level hierarchy, the more drives you’ll need to incorporate into your setup. While it’s still possible to switch RAID levels, you’re bound to encounter issues if you end up downsizing your striped, mirrored, or parity-powered pools. As such, I recommend doing your thorough research before diving into the RAID rabbit hole, or you might get stuck with long migration times at best – and data loss and irrecoverable storage pools at worst.
1 Forgetting to assign a disk controller to a NAS-centric VM
Pass the SATA controller/HBA card to your virtual machine

This tip is for home labbers who prefer virtualizing their storage servers using virtual machines. Simply passing the drives to your virtualization platform may seem like a hassle-free way in the beginning. But since ZFS operations require full control over your drives, you’re bound to end up with errors in your storage pool sooner or later.
As such, you’ll want to pass the entire storage controller to your NAS virtual machine instead of just the disks. That way, your ZFS-powered VM has direct hardware-level access to your storage drives. Alternatively, if you rely on HBA devices or storage expansion cards, you’ll want to enable PCI passthrough for them. Trust me, an hour spent on PCI passthrough is a lot better than all the time you’ll have to spend debugging ZFS errors if you don’t pass the disk controller to your virtualized NAS server.
Some more ZFS tips to level up your NAS game
Besides these common mistakes, there are other pitfalls you should avoid when setting up ZFS pools. Mixing drives of different capacities and transfer speeds in RAID pools is a terrible idea, especially if you try to go for a cursed RAID setup involving HDDs and SSDs. Besides snapshots, you’ll also want to create automated backups (ideally in a 3-2-1 configuration) to avoid losing your files to irrecoverable data corruption. For folks who are as paranoid as I am, using ECC memory can protect your data from the scourge of bit rot.


 English (US) ·