.png)
Playing old PC games with an emulator on a PC seems wrong to me. While I understand playing Commodore 64 games in an emulator like VICE, booting an operating system and then running DOSBox on a desktop or laptop feels like wearing two coats on a hot day. There is a direct lineage from the classic IBM PC to the modern systems, so why is an MS-DOS emulator required?
To minimize this messing around, and in the absence of a power-hungry 1990s PC, I’ve turned to my original Raspberry Pi Model B, which has been sitting in a drawer gathering dust. Instead of using DOSBox, I’ve switched to Faux86, a bare-metal 8086 emulator that runs on the Raspberry Pi without Linux.
It’s like having DOSBox, but faster

Faux86 and its successor, Faux86-remake, emulate classic Intel processors, meaning you can run software intended for late 1980s and 1990s PCs. Think original Windows, Windows 3.1 … really, any version before Windows XP.
Both versions run from the Pi’s SD card. They support classic PC displays (CGA, EGA, and VGA) and audio (PC speaker, Soundblaster, and Adlib). USB keyboard and mouse input is possible via the Pi, with emulated input into the MS-DOS environment. (When I tried this out, I found that typing too quickly caused some repetition and errors.)
So, what is a “bare metal” emulator? Essentially, it means the emulator runs directly on the Raspberry Pi, instead of relying on an operating system. I’ve run countless projects on the Pi, and almost all of them rely on a Linux distro — typically Raspberry Pi OS — either as part of the installation image or for installation. This is the case running DOSBox on the Raspberry Pi.
Bare metal emulation is quicker, and you can expect slightly better performance, too, with the Pi’s hardware resources dedicated to the emulator rather than shared with another operating system.
Which Raspberry Pi model is best for this?
Choose your Pi
I used a Raspberry Pi 3B, but Faux86 should run on all models up to and including Raspberry Pi 4. (Incidentally, I spent a few years thinking this particular Pi was dead, but it seems a combination of bad PSU and shoddy microSD card had prevented it from booting. This changed when I tried a reliable power supply and a fresh microSD card.)
Faux86 should also run on the Raspberry Pi Zero, but is not believed to run reliably on Raspberry Pi 5 boards. As far as SD cards go, I always use branded microSD cards with the Raspberry Pi, following a mishap with a cheap eBay knock-off. As a rule, the better the rating, the better the performance, and after formatting the microSD card with the FAT file system, it’s ready to copy the Faux86 files to.
Related
Installing Faux86 onto the Raspberry Pi’s SD card
Just copy and paste
I probably shouldn’t have been surprised by how quick this process is. Because Faux86 does not require a Linux disk image, I simply extracted the files from the downloaded ZIP file and copied them to the SD card. This is far quicker than waiting around for tools like Raspberry Pi Imager and Etcher.
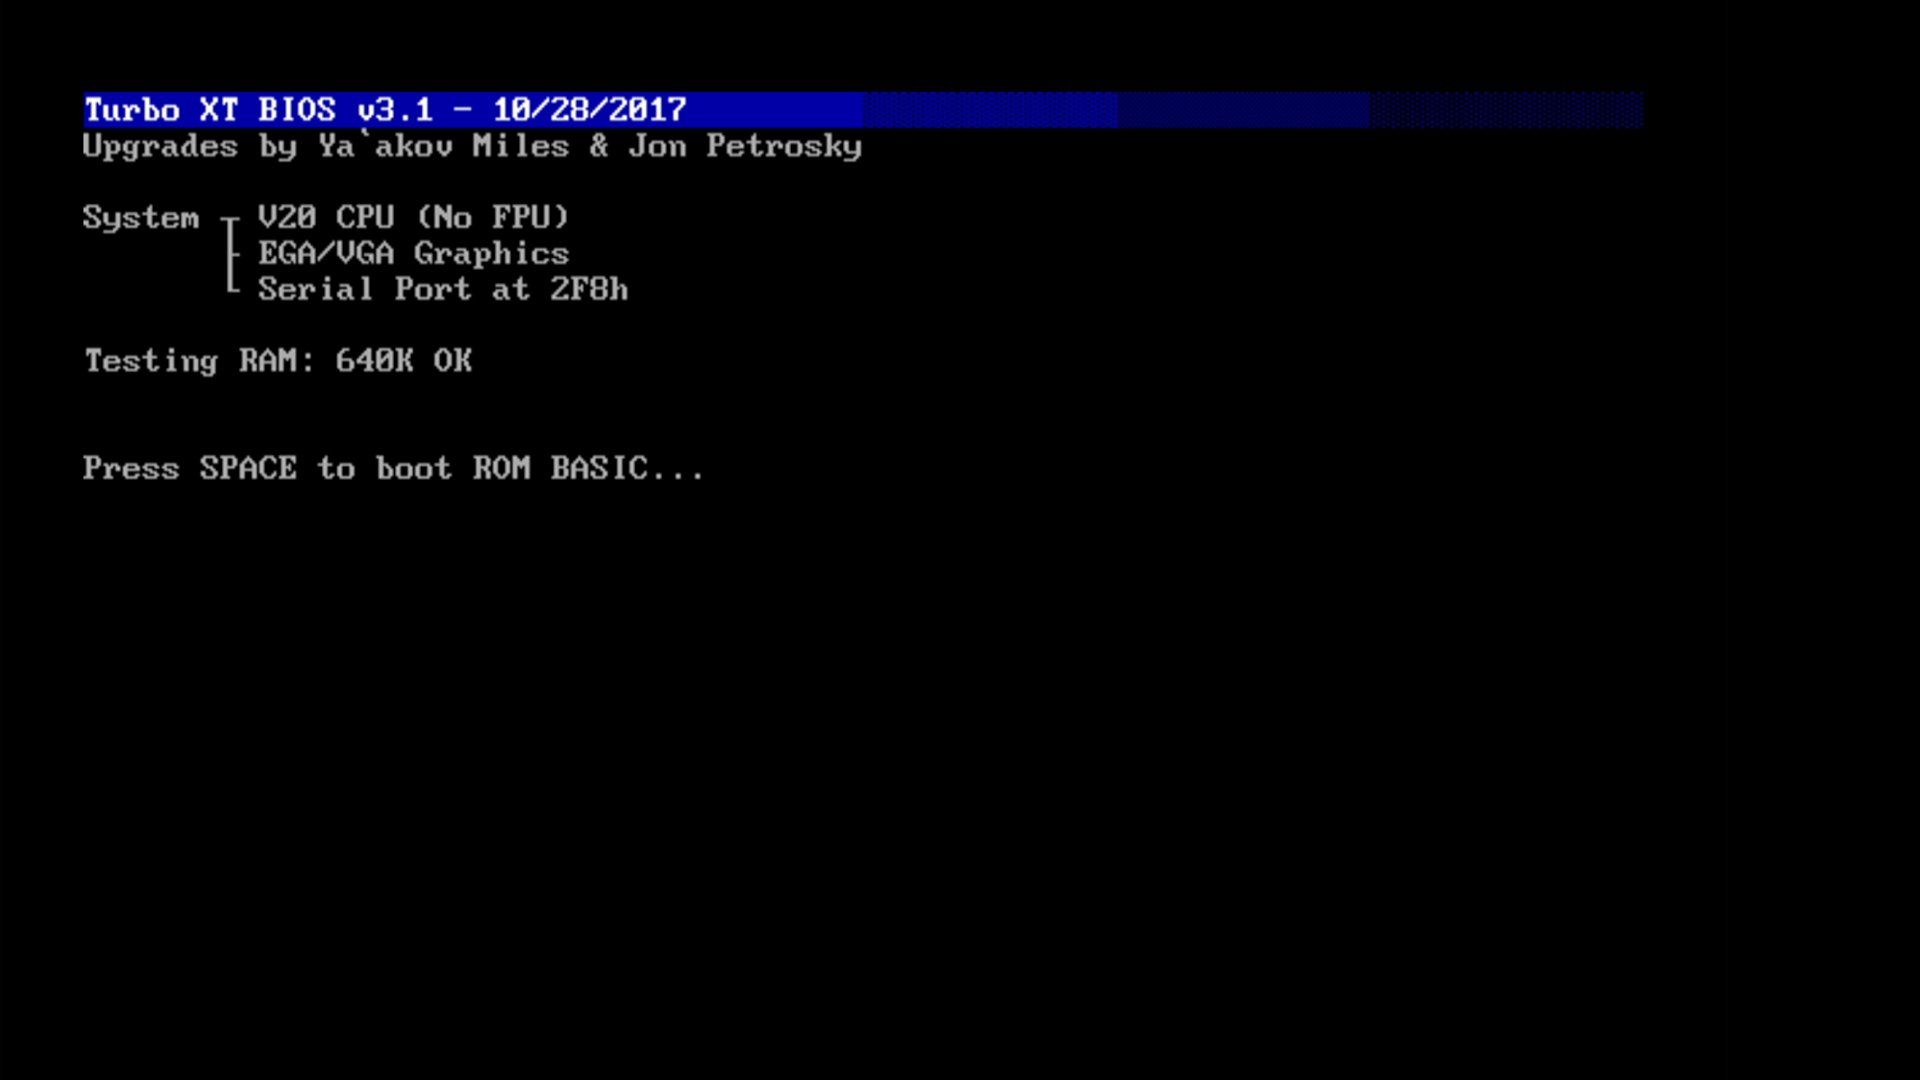
Once copied across, I ejected the card from my PC and booted the Raspberry Pi straight into what looks like MS-DOS. While some of the displayed text confirms that it’s not a real 1990s PC, it certainly feels close enough. Faux86 uses the MS-DOS 6.22 version, released in 1994, and the final iteration to support 8086, 8088, and 286 processors.
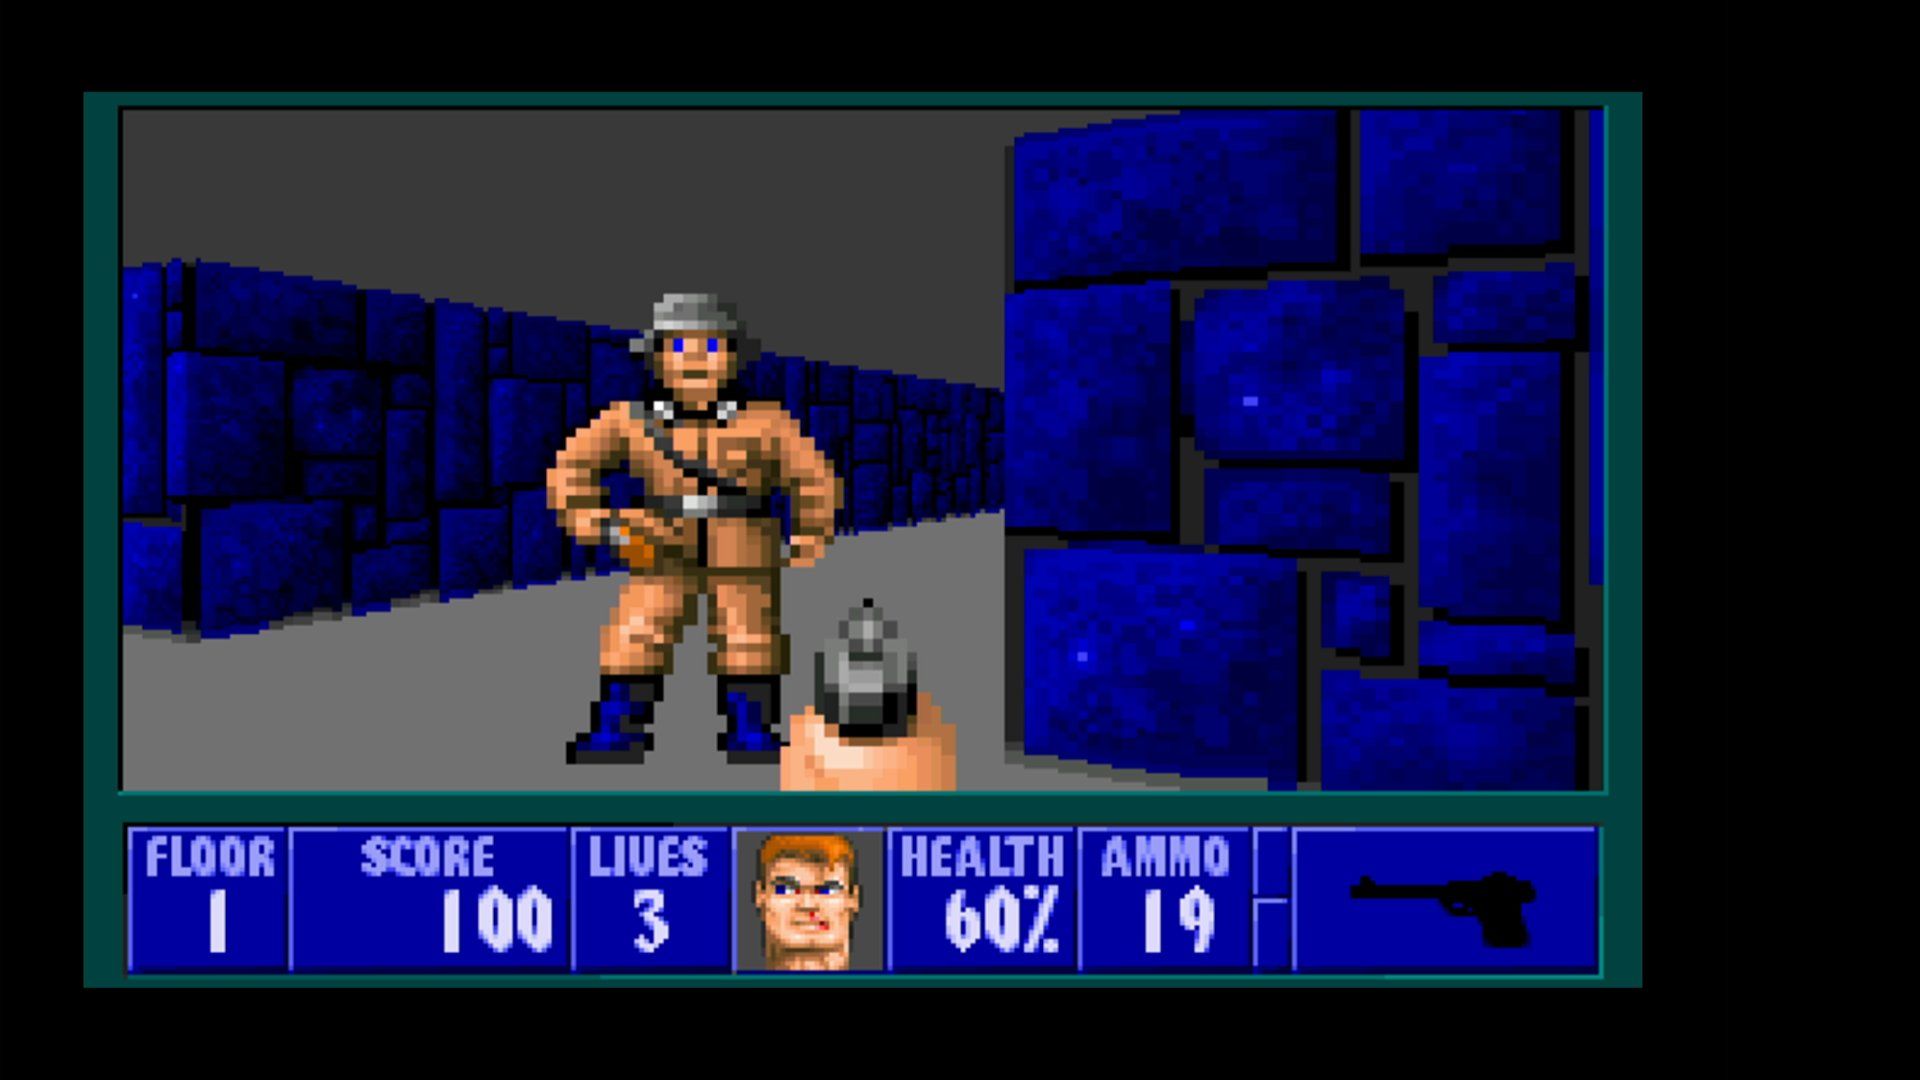
This gives me a massive selection of 1980s and 1990s PC software to play with on the Raspberry Pi. Both versions of Faux86 have different methods available for adding a disk to the A: or D: drive for installation. Floppy drives, hard disk drives, and optical drives can be added, or you can start off as I did, playing the pre-installed Wolfenstein 3D on Faux86-remake.
However, it’s important to avoid breaching any licenses. I stick to games I own, either with the original media or bought from GOG.com. (ROMs can be extracted from GOG downloads, but it’s easier to find them elsewhere for use with Faux86.) There’s no shortage of retro PC games to play in DOSBox either.
How can I turn this Raspberry Pi into a classic DOS PC?
An old-style monitor and a case
I’ve spent a lot of time with DOSBox on the Raspberry Pi before now, but using Faux86 is definitely a better way to enjoy classic PC gaming. But the Pi does just look like a tiny motherboard in a case, and the flat high-definition LCD doesn’t do the old games justice.
So, I’m considering a couple of options. Outputting the video to a CRT display using the TRRS output’s RGB support is probably my priority. If I were using a Raspberry Pi Zero for this (which I still might, long-term), some composite connector solder points are available (as illustrated in this Raspberry Pi Forum thread).
But it could also do with a better-looking case. I don’t have a 3D printer, but I have used 3D printing services, so I’m considering hiring a printer to produce this Retro Desktop PC Raspberry Pi case. My alternative is to use an old PC case and secure the Pi to a 3.5-inch bay. As genuine old beige cases are hard to find, this might prove expensive.
It just makes retro PC gaming easy
I’ve been using DOSBox for years, across Windows, Android, and Linux. But running MS-DOS software this effortlessly on a dedicated computer is just a far better solution. There might be other alternatives to DOSBox, but short of sourcing a 30-year-old PC and putting up with the noise, this is the best one I’ve found.
Mini computers and SBCs are ideal for classic computer projects. Think Faux86 is interesting? That’s nothing — you can buy or build a 2.4-inch-tall Raspberry Pi Pico-powered mini Macintosh.


 English (US) ·