.png)
Dipping my feet in the self-hosting trend is great. But when a browser pops the "not secure" error, I worry about running my humble stack over HTTP, even though it's on my local network. Since I share some of them with my family, it's hard to discourage them from clicking on suspicious links while my apps run on plain HTTP. I tried enabling HTTPS with self-signed certificates for my self-hosted apps and services, but I kept hitting the wall.
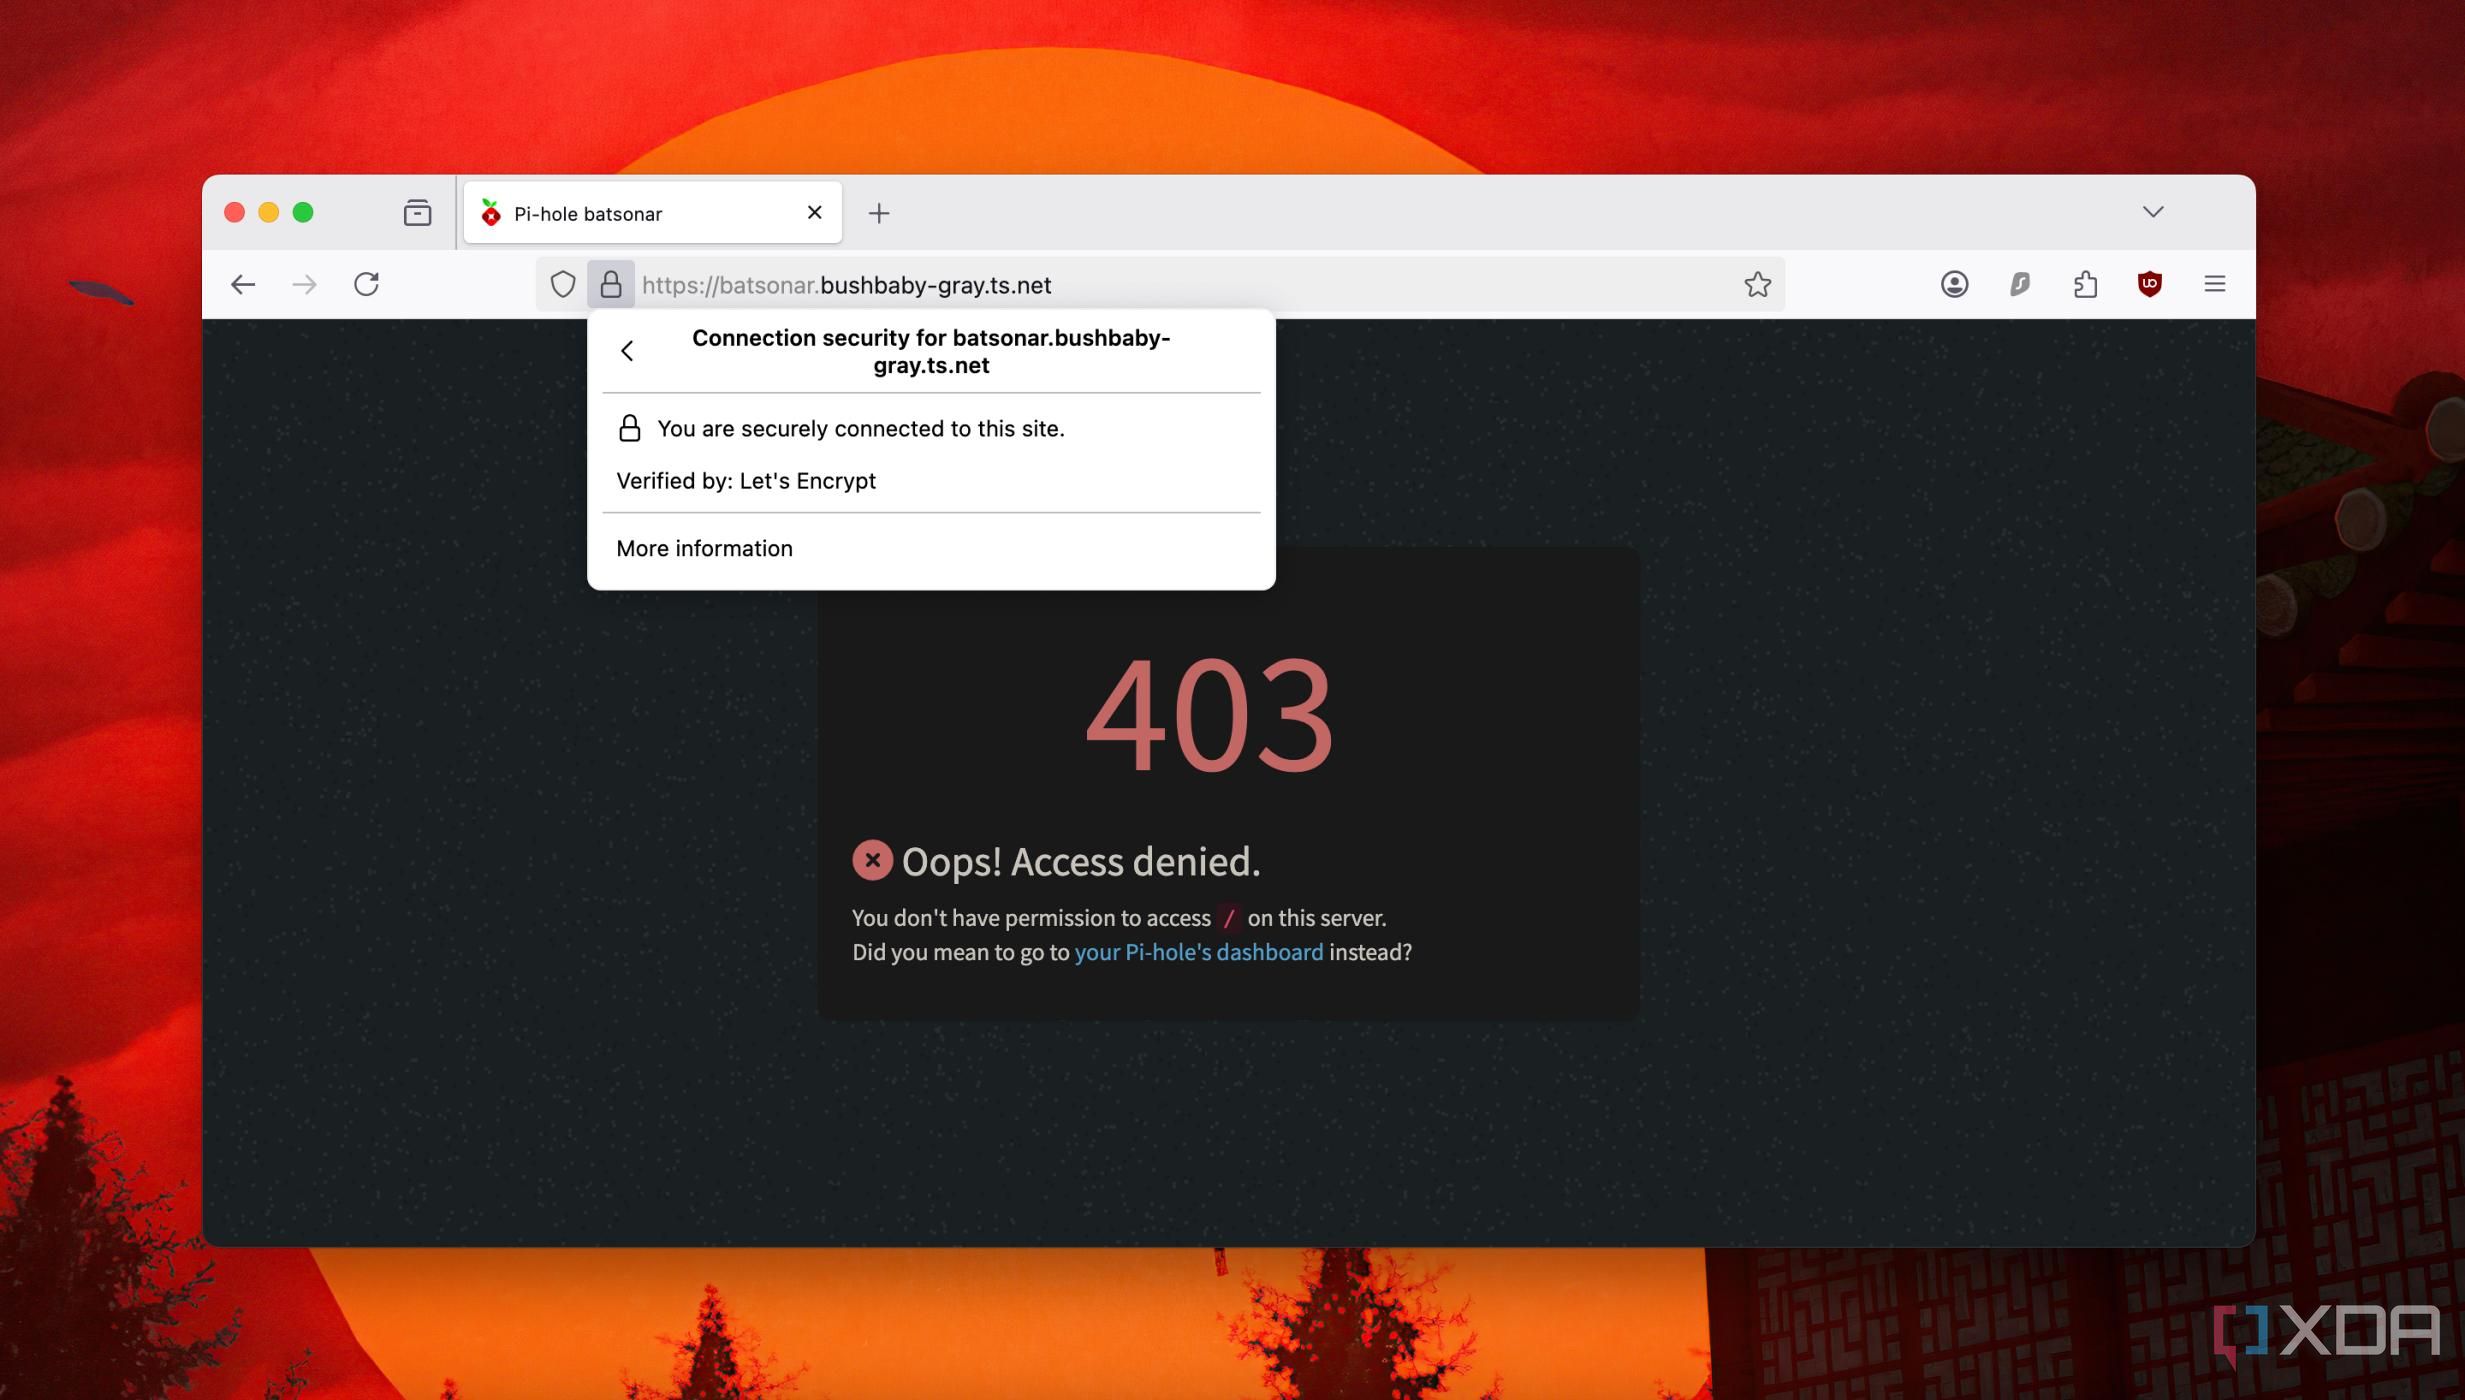
I discovered that Tailscale can help me use HTTPS for my apps and services to make them appear trustworthy and secure. However, these certificates only work when connecting remotely or locally through the Tailscale service and come with a validity of 90 days. That said, I don't spend on domains to configure NextCloud or Jellyfin to access them from anywhere. I use them with HTTPS over Tailscale instead. Here's how you can grab free TLS certificates from Tailscale for the apps and services on your local network.
Related
Is Tailscale the safest way to access your home network remotely?
Tailscale is easy to set up, but is that trading off your security?
Here's what you'll need to start
Ready your home lab
Generating a free TLS certificate with Tailscale is quick; you only need some command-line skills. We assume your home lab machine runs at least Debian (Bookworm) or Ubuntu to follow this guide. With either of them, you'll be able to find the Tailscale package for your Linux distribution.
Before you begin, here's what you need:
- A computer, Pi, NAS, or server with Debian or Ubuntu
- A Tailscale account
- A computer, a server, or a NAS linked to the Tailscale account
- Access to Terminal or Command Line interface
- Root user privileges
If you use an SBC, like a Raspberry Pi, Tailscale can generate TLS certificates and secure your self-hosted apps.
Switch on the essential options in Tailscale
Turn on those settings
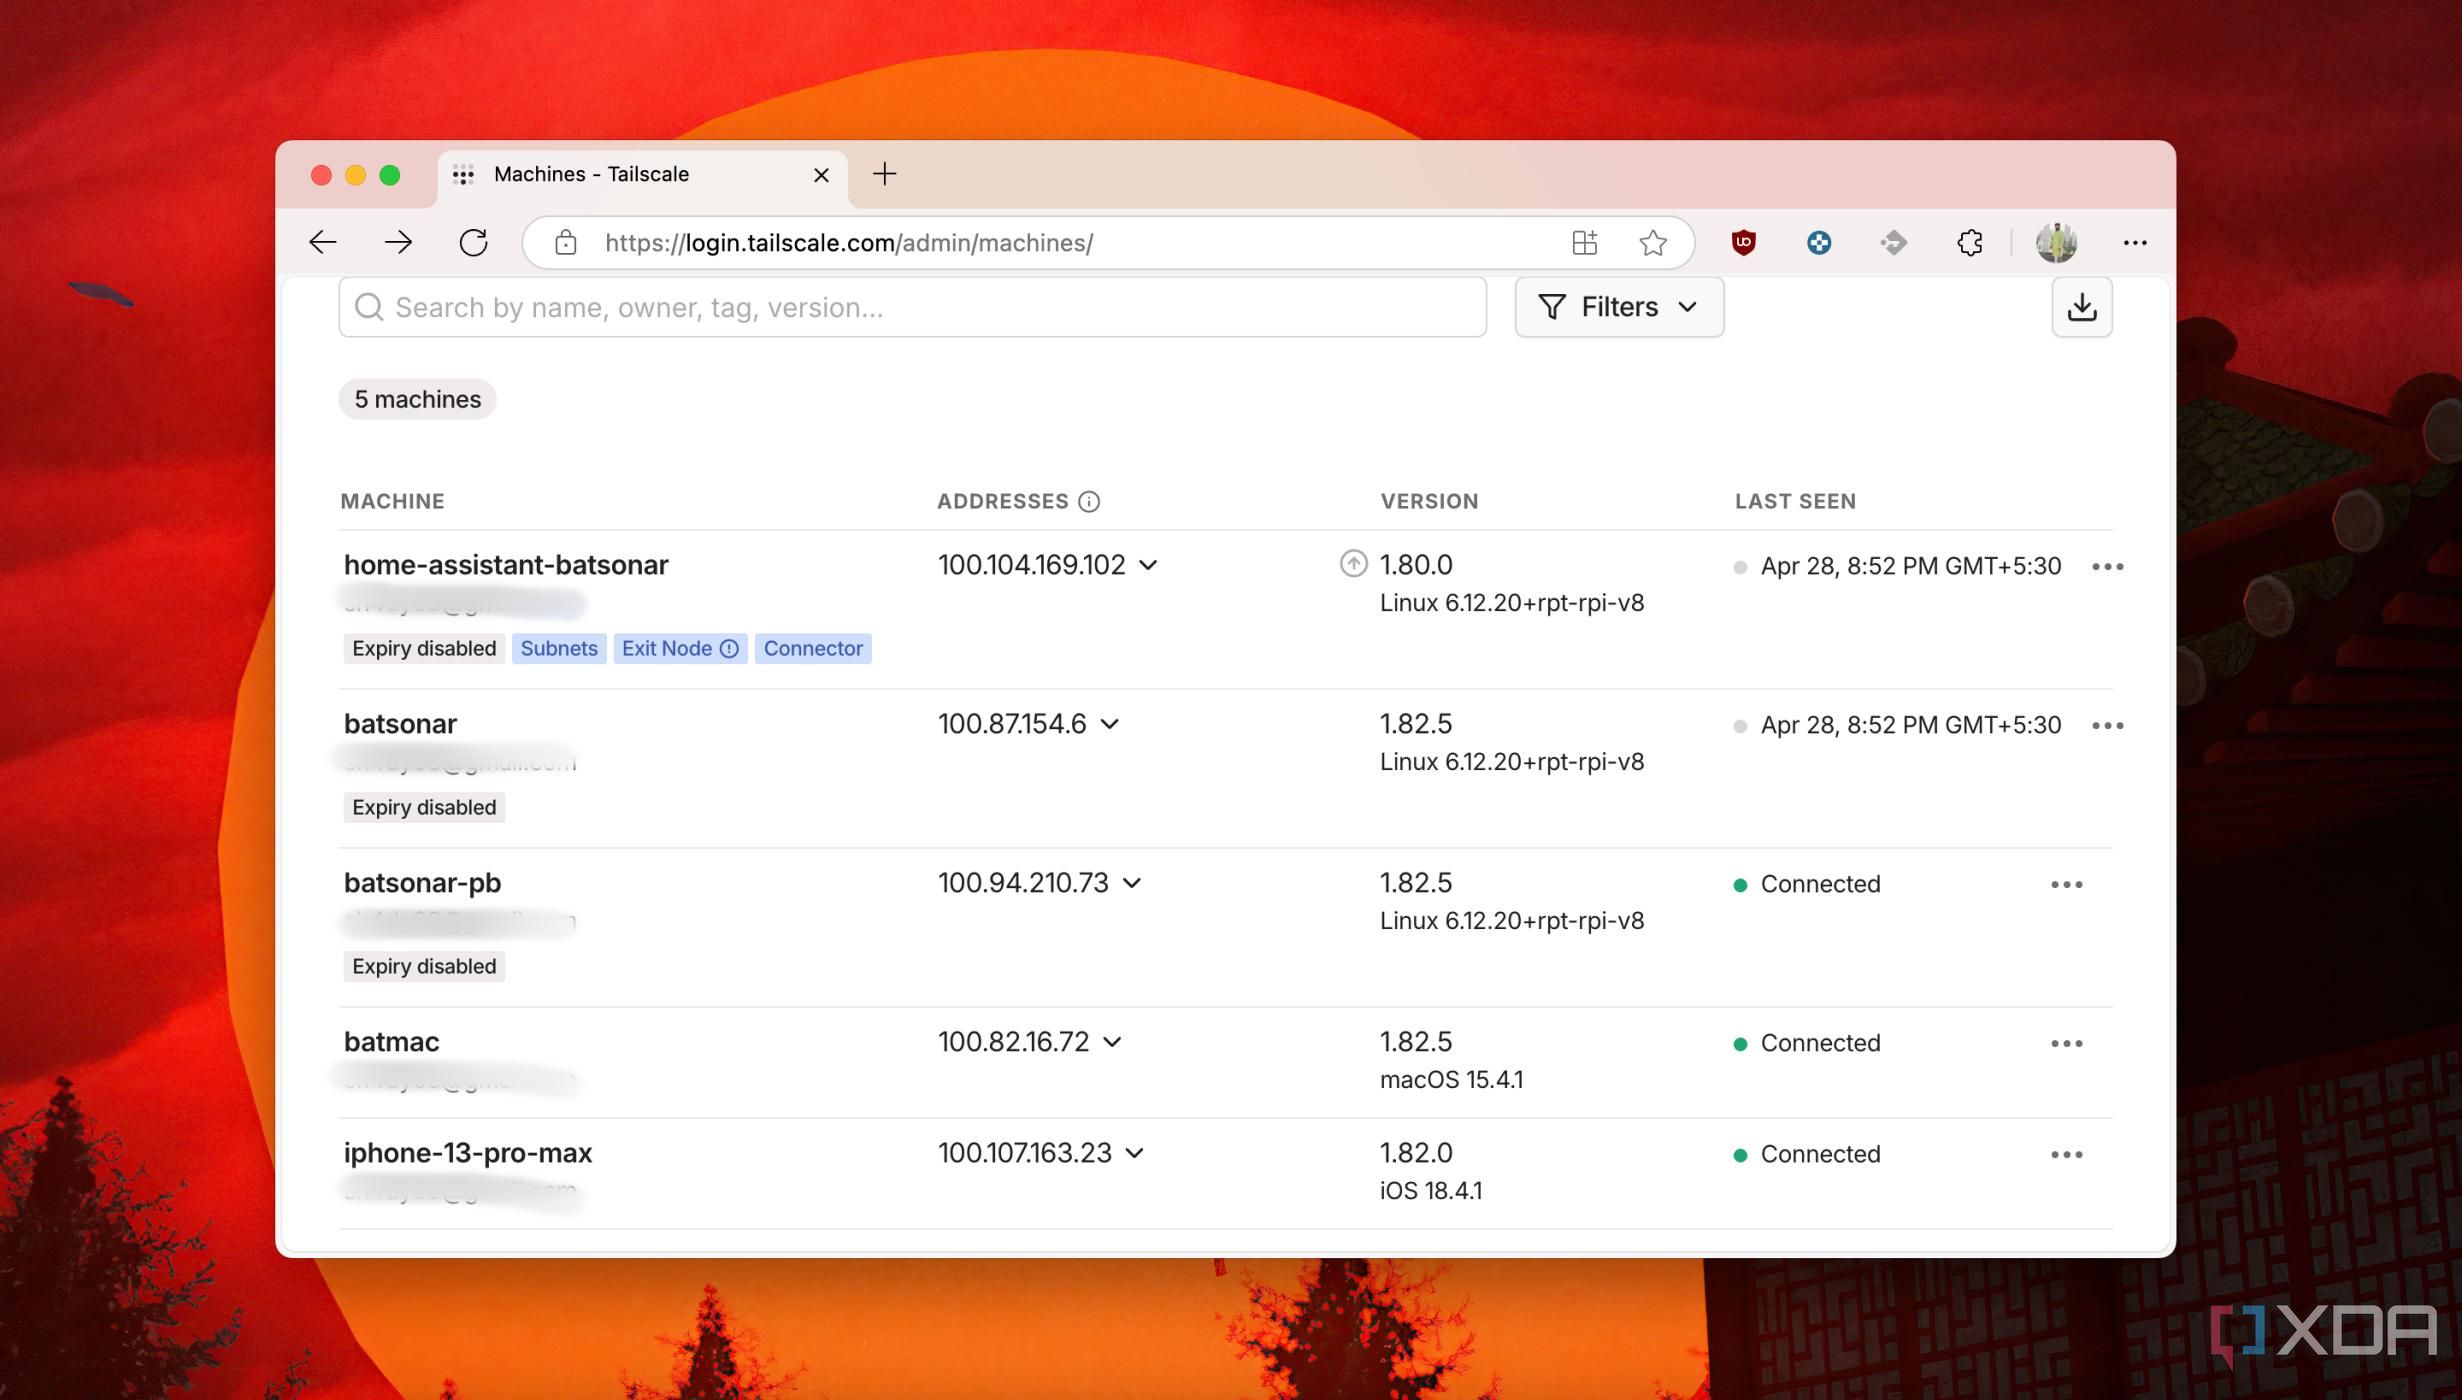
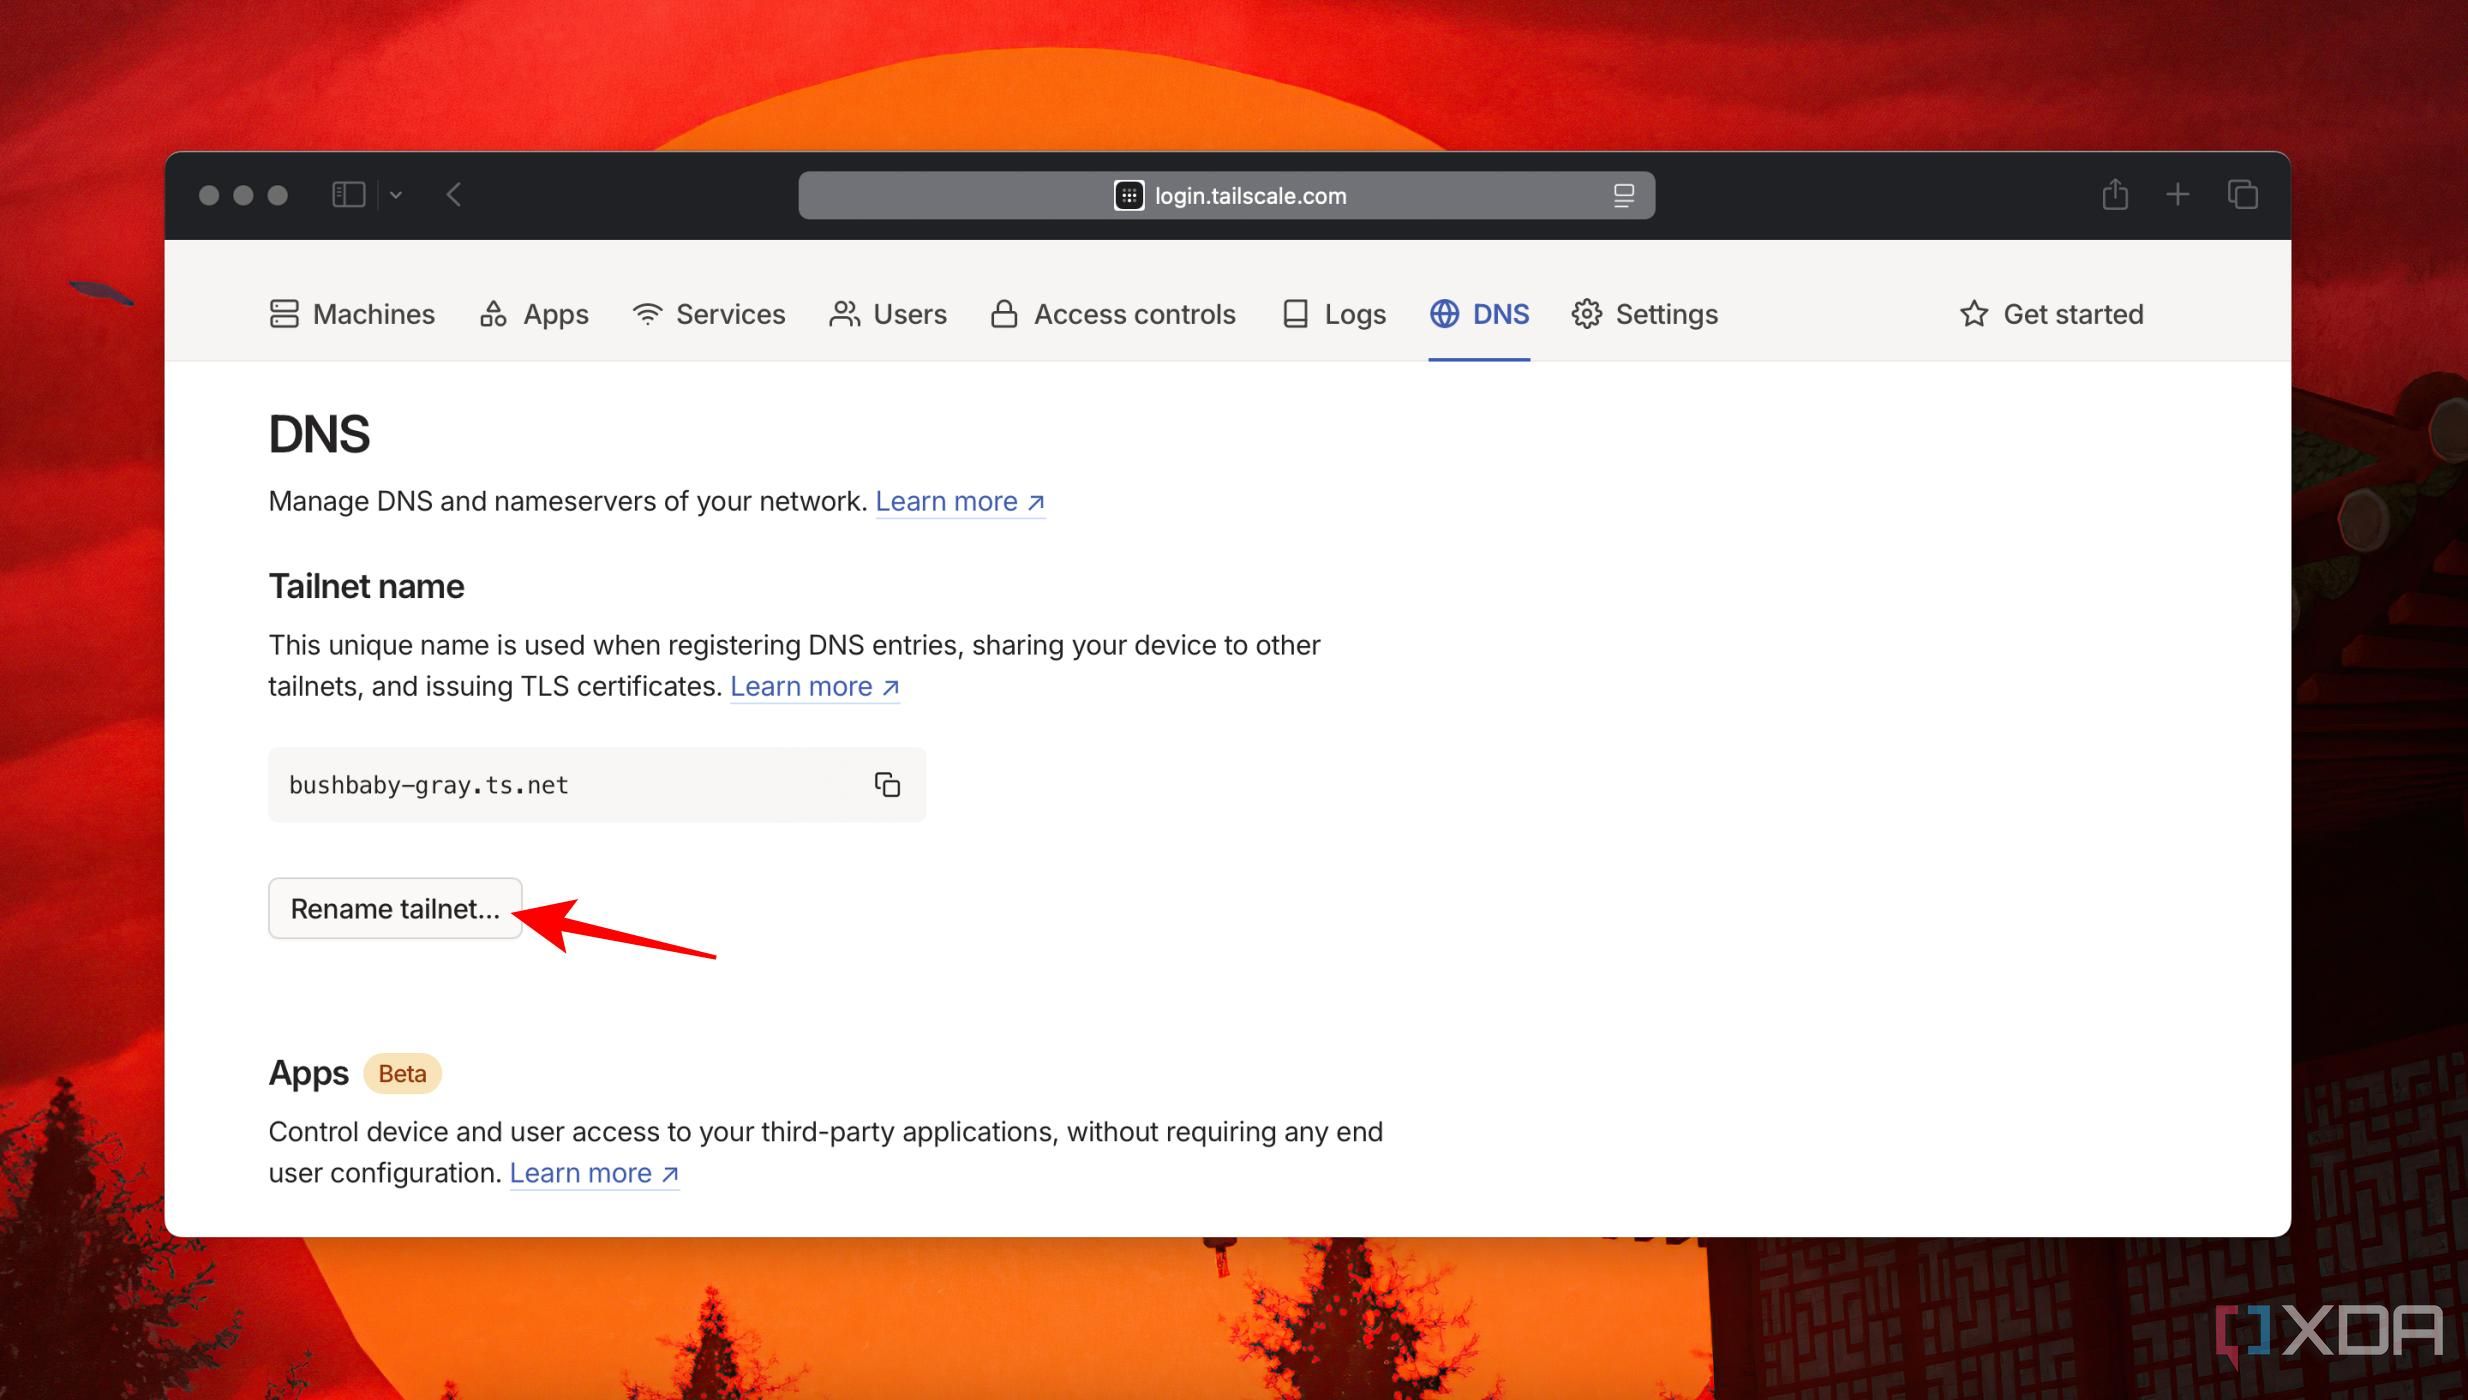
Tailscale shoulders quite a few things by giving you a ts.net domain name (sort of) and tailnet name while letting you pick a cool machine name. Tailnet is your private, custom, and secure network name that is unique to your account. The Tailscale account includes a domain name(ts.net), a tailnet name, and a machine name. So a typical Tailscale domain name looks like this:
machine-name.tailnet-name.ts.netOn the Tailscale dashboard, you can head to the DNS section to click on Rename Tailnet button to set an easy-to-remember name.
Next, head to the Machines section of your Tailscale dashboard, click the ellipses next to the machine name, and choose Edit Machine Name to assign a custom name.
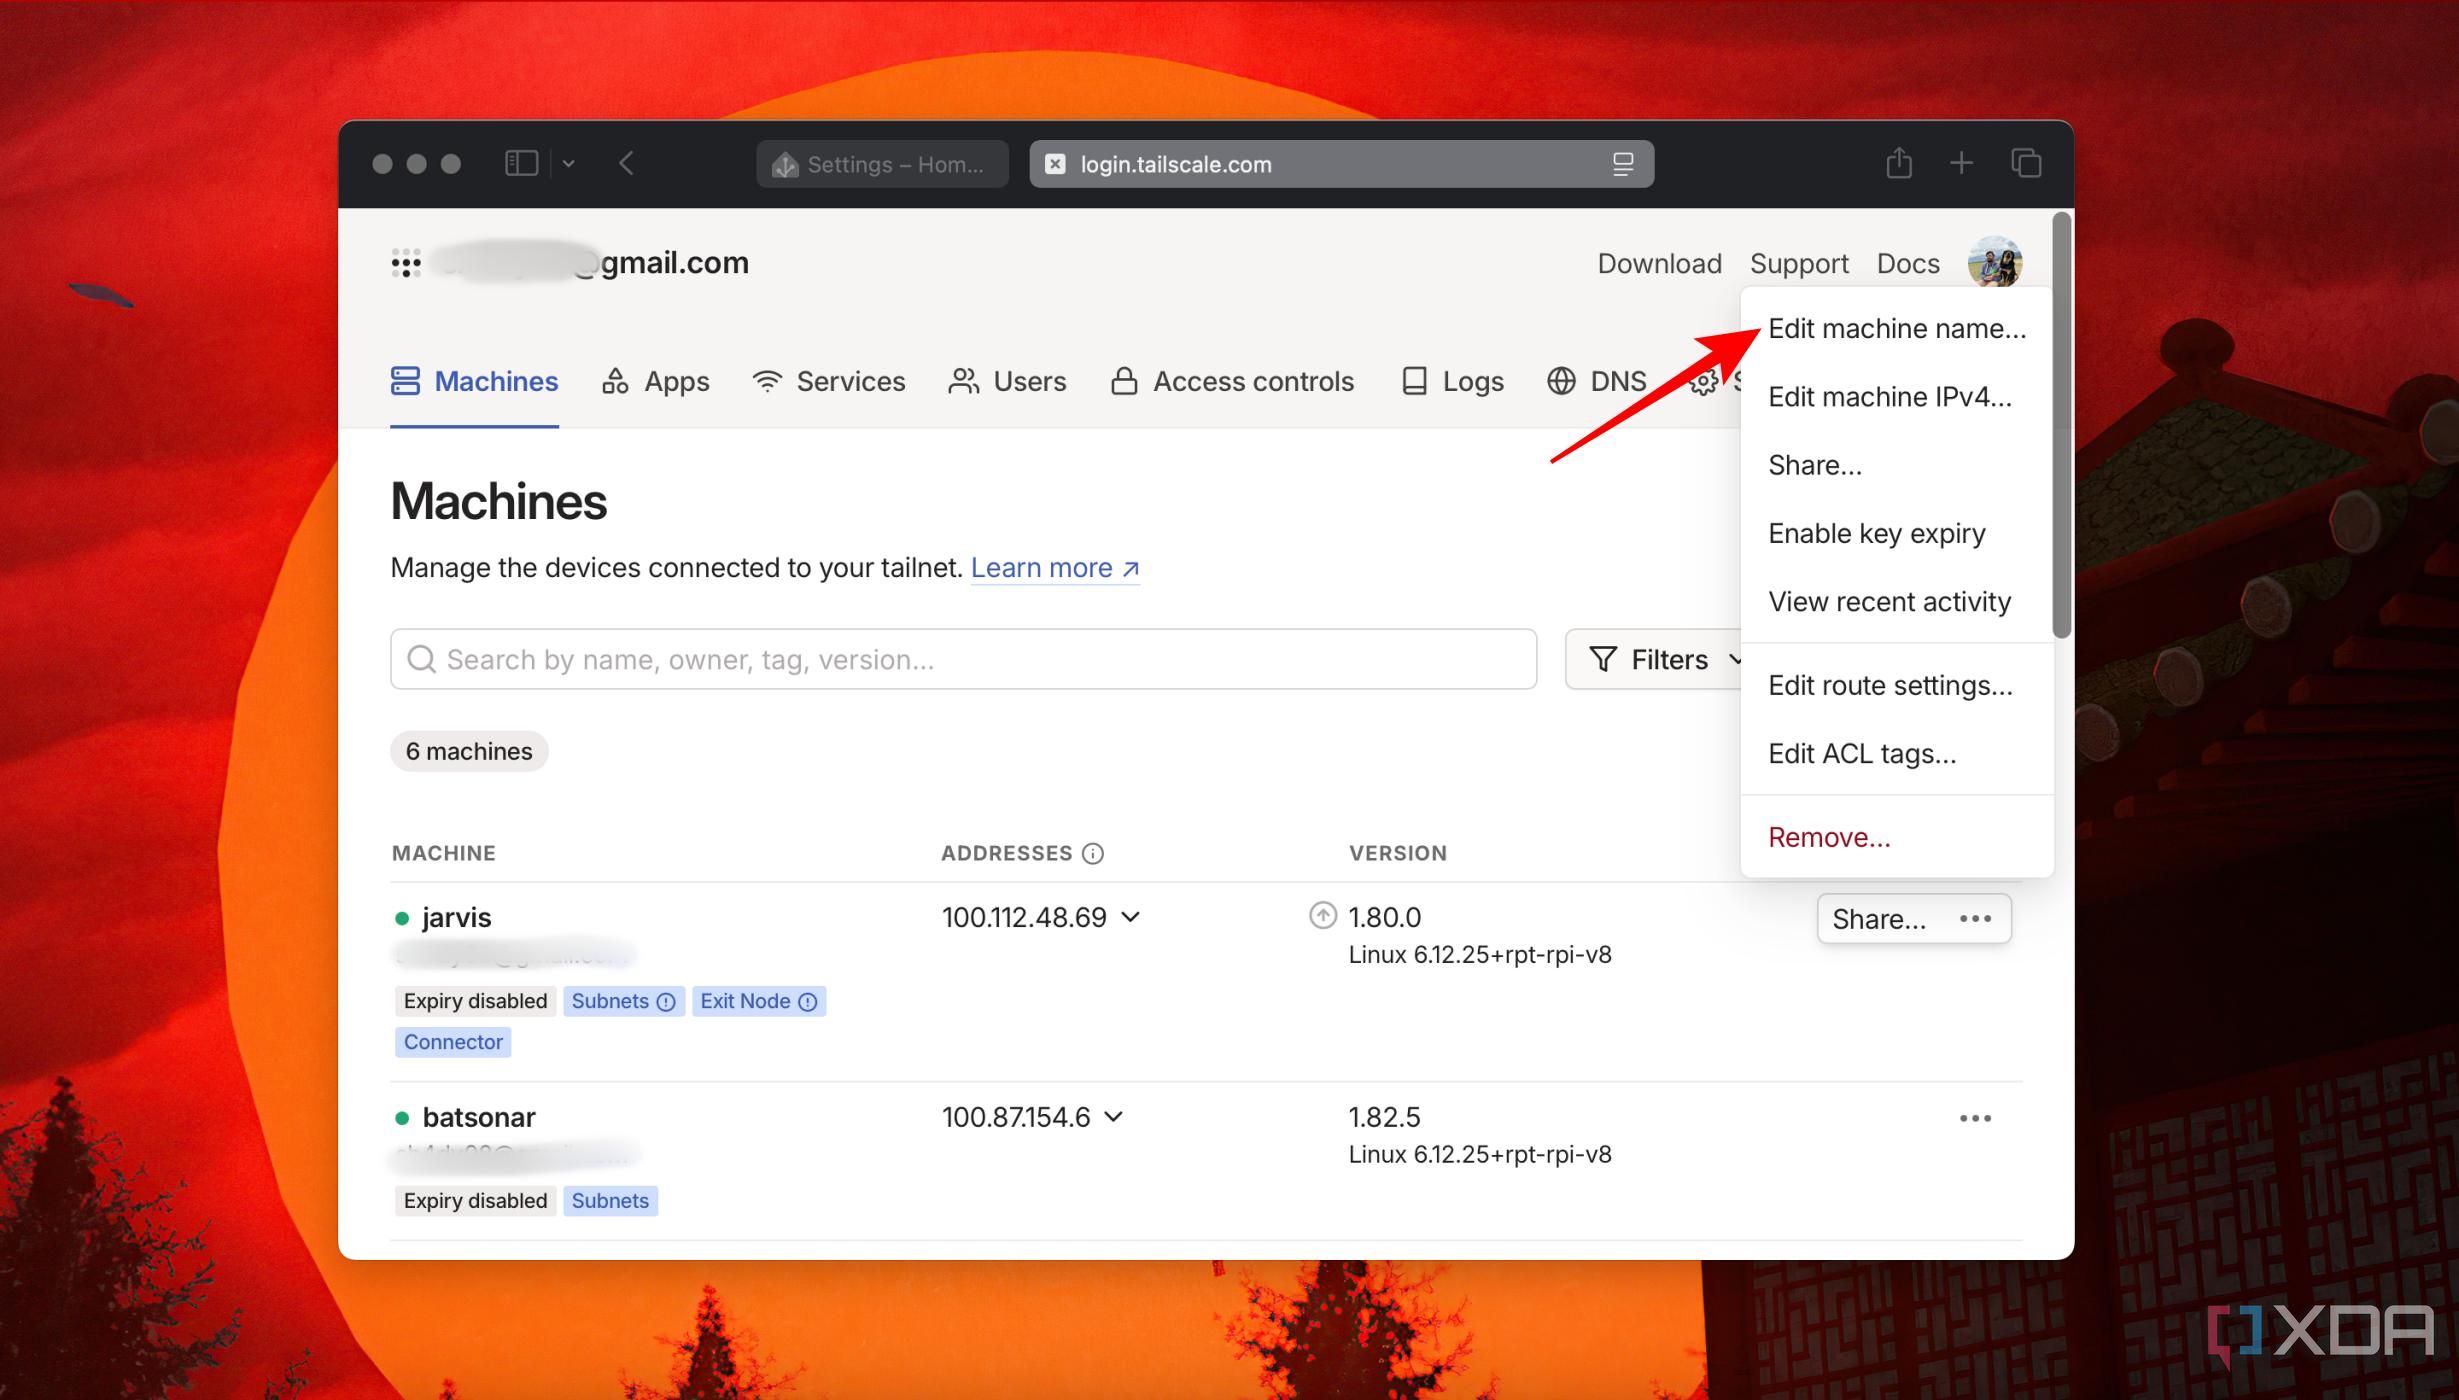
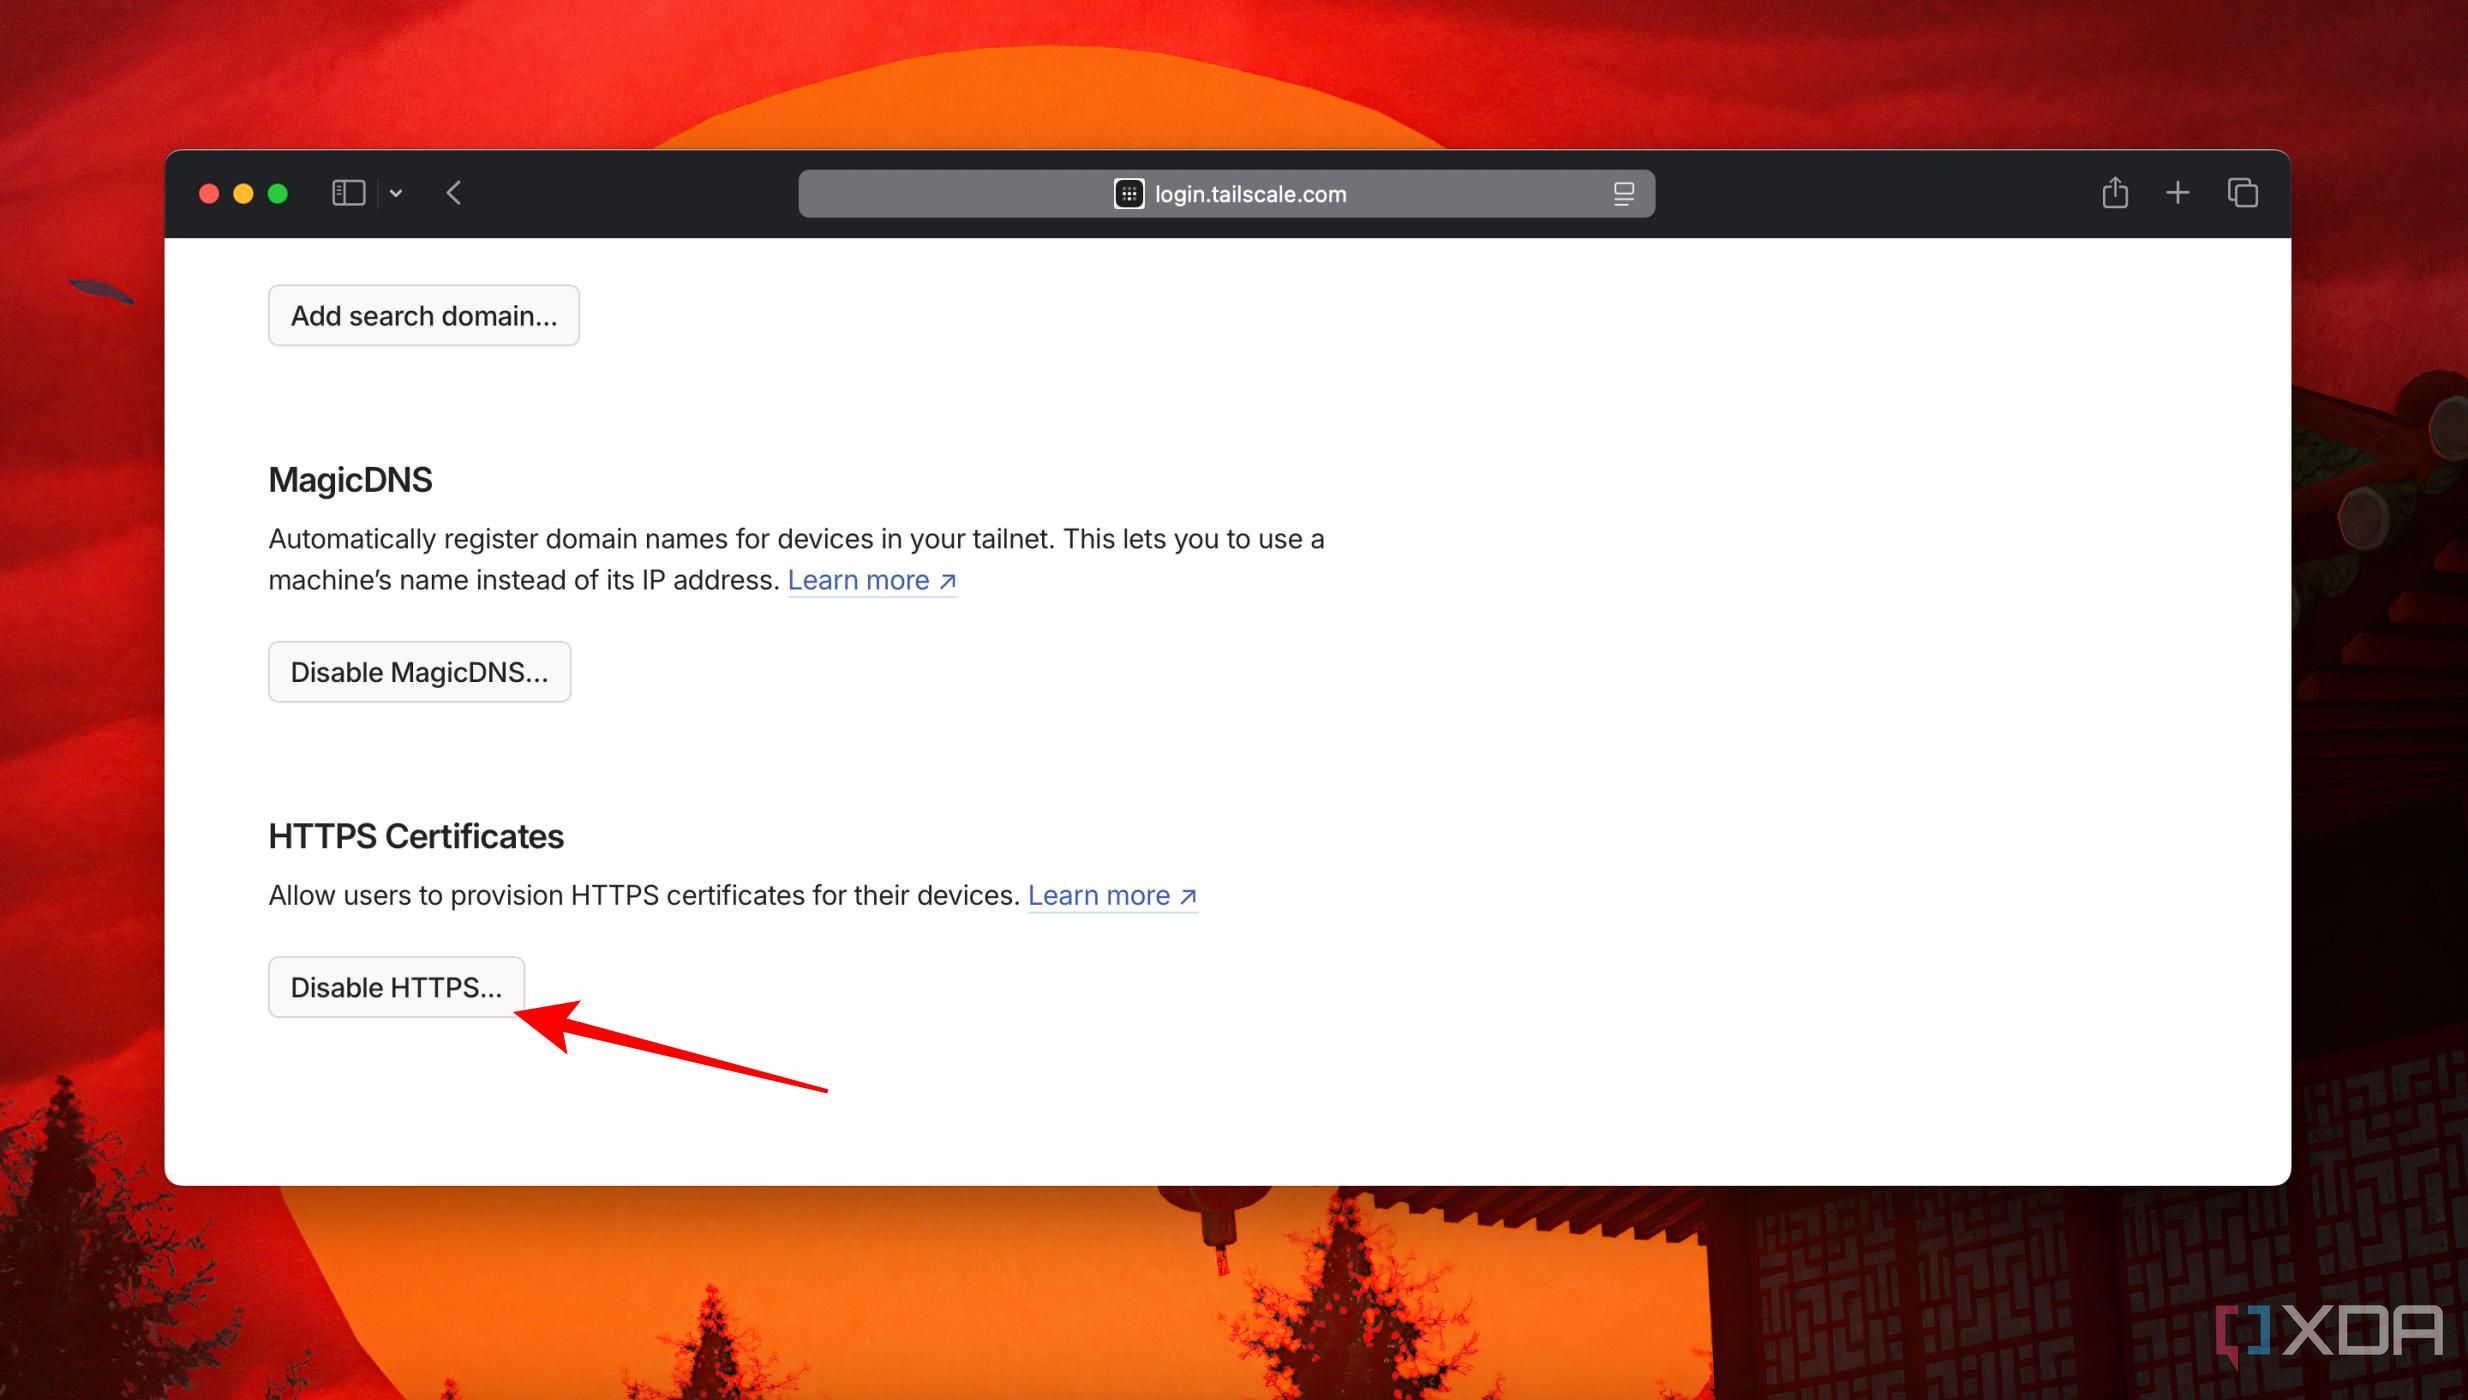
To generate SSL certificates for that machine name in Tailscale, you'll need to enable the HTTPS option from the Tailscale dashboard. In the Tailscale dashboard, head to the DNS tab. Scroll down and click on the Enable HTTPS button.
Generate TLS certificates with Tailscale using the command line
Hardly takes a few seconds
When you set an easy-to-remember Tailscale domain name, it also helps to create the TLS quickly. Tailscale uses
You'll need to use the command line or Terminal app on your computer, server, or NAS that runs Debian or Ubuntu. Ensure you run the following command using root privileges to avoid a permission error.
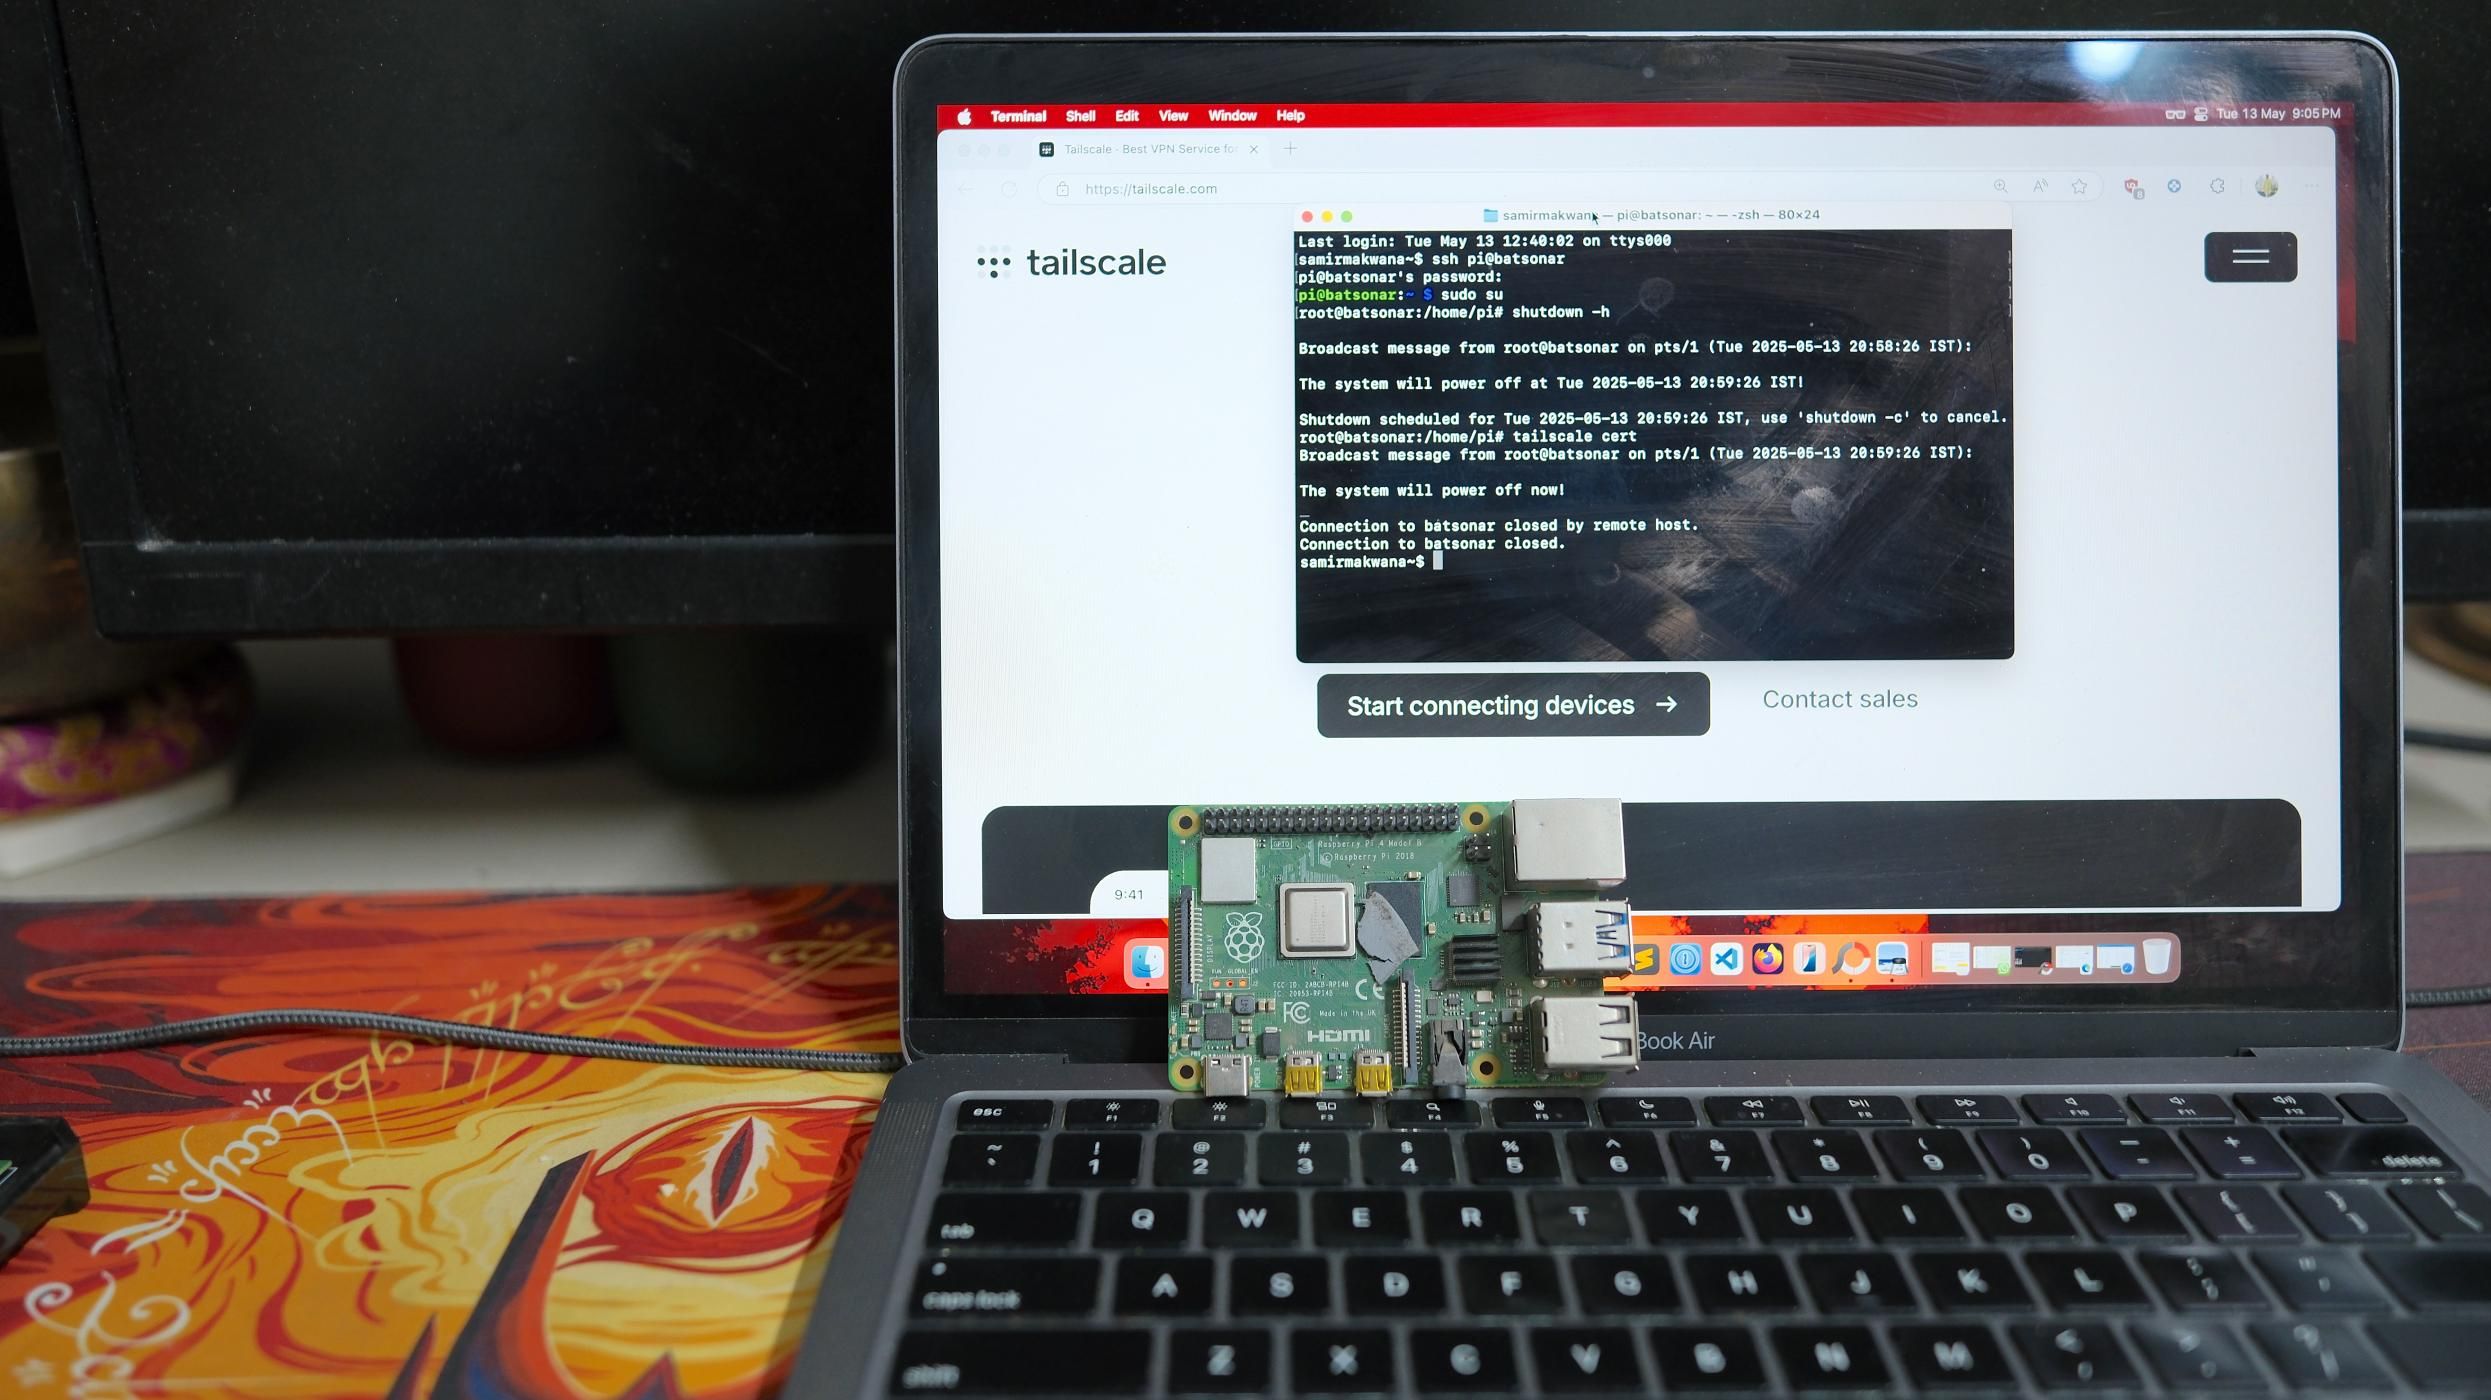
In the Terminal, ensure that Tailscale is running.
tailscale upRun the command to make Tailscale generate a certificate using your fun machine name.
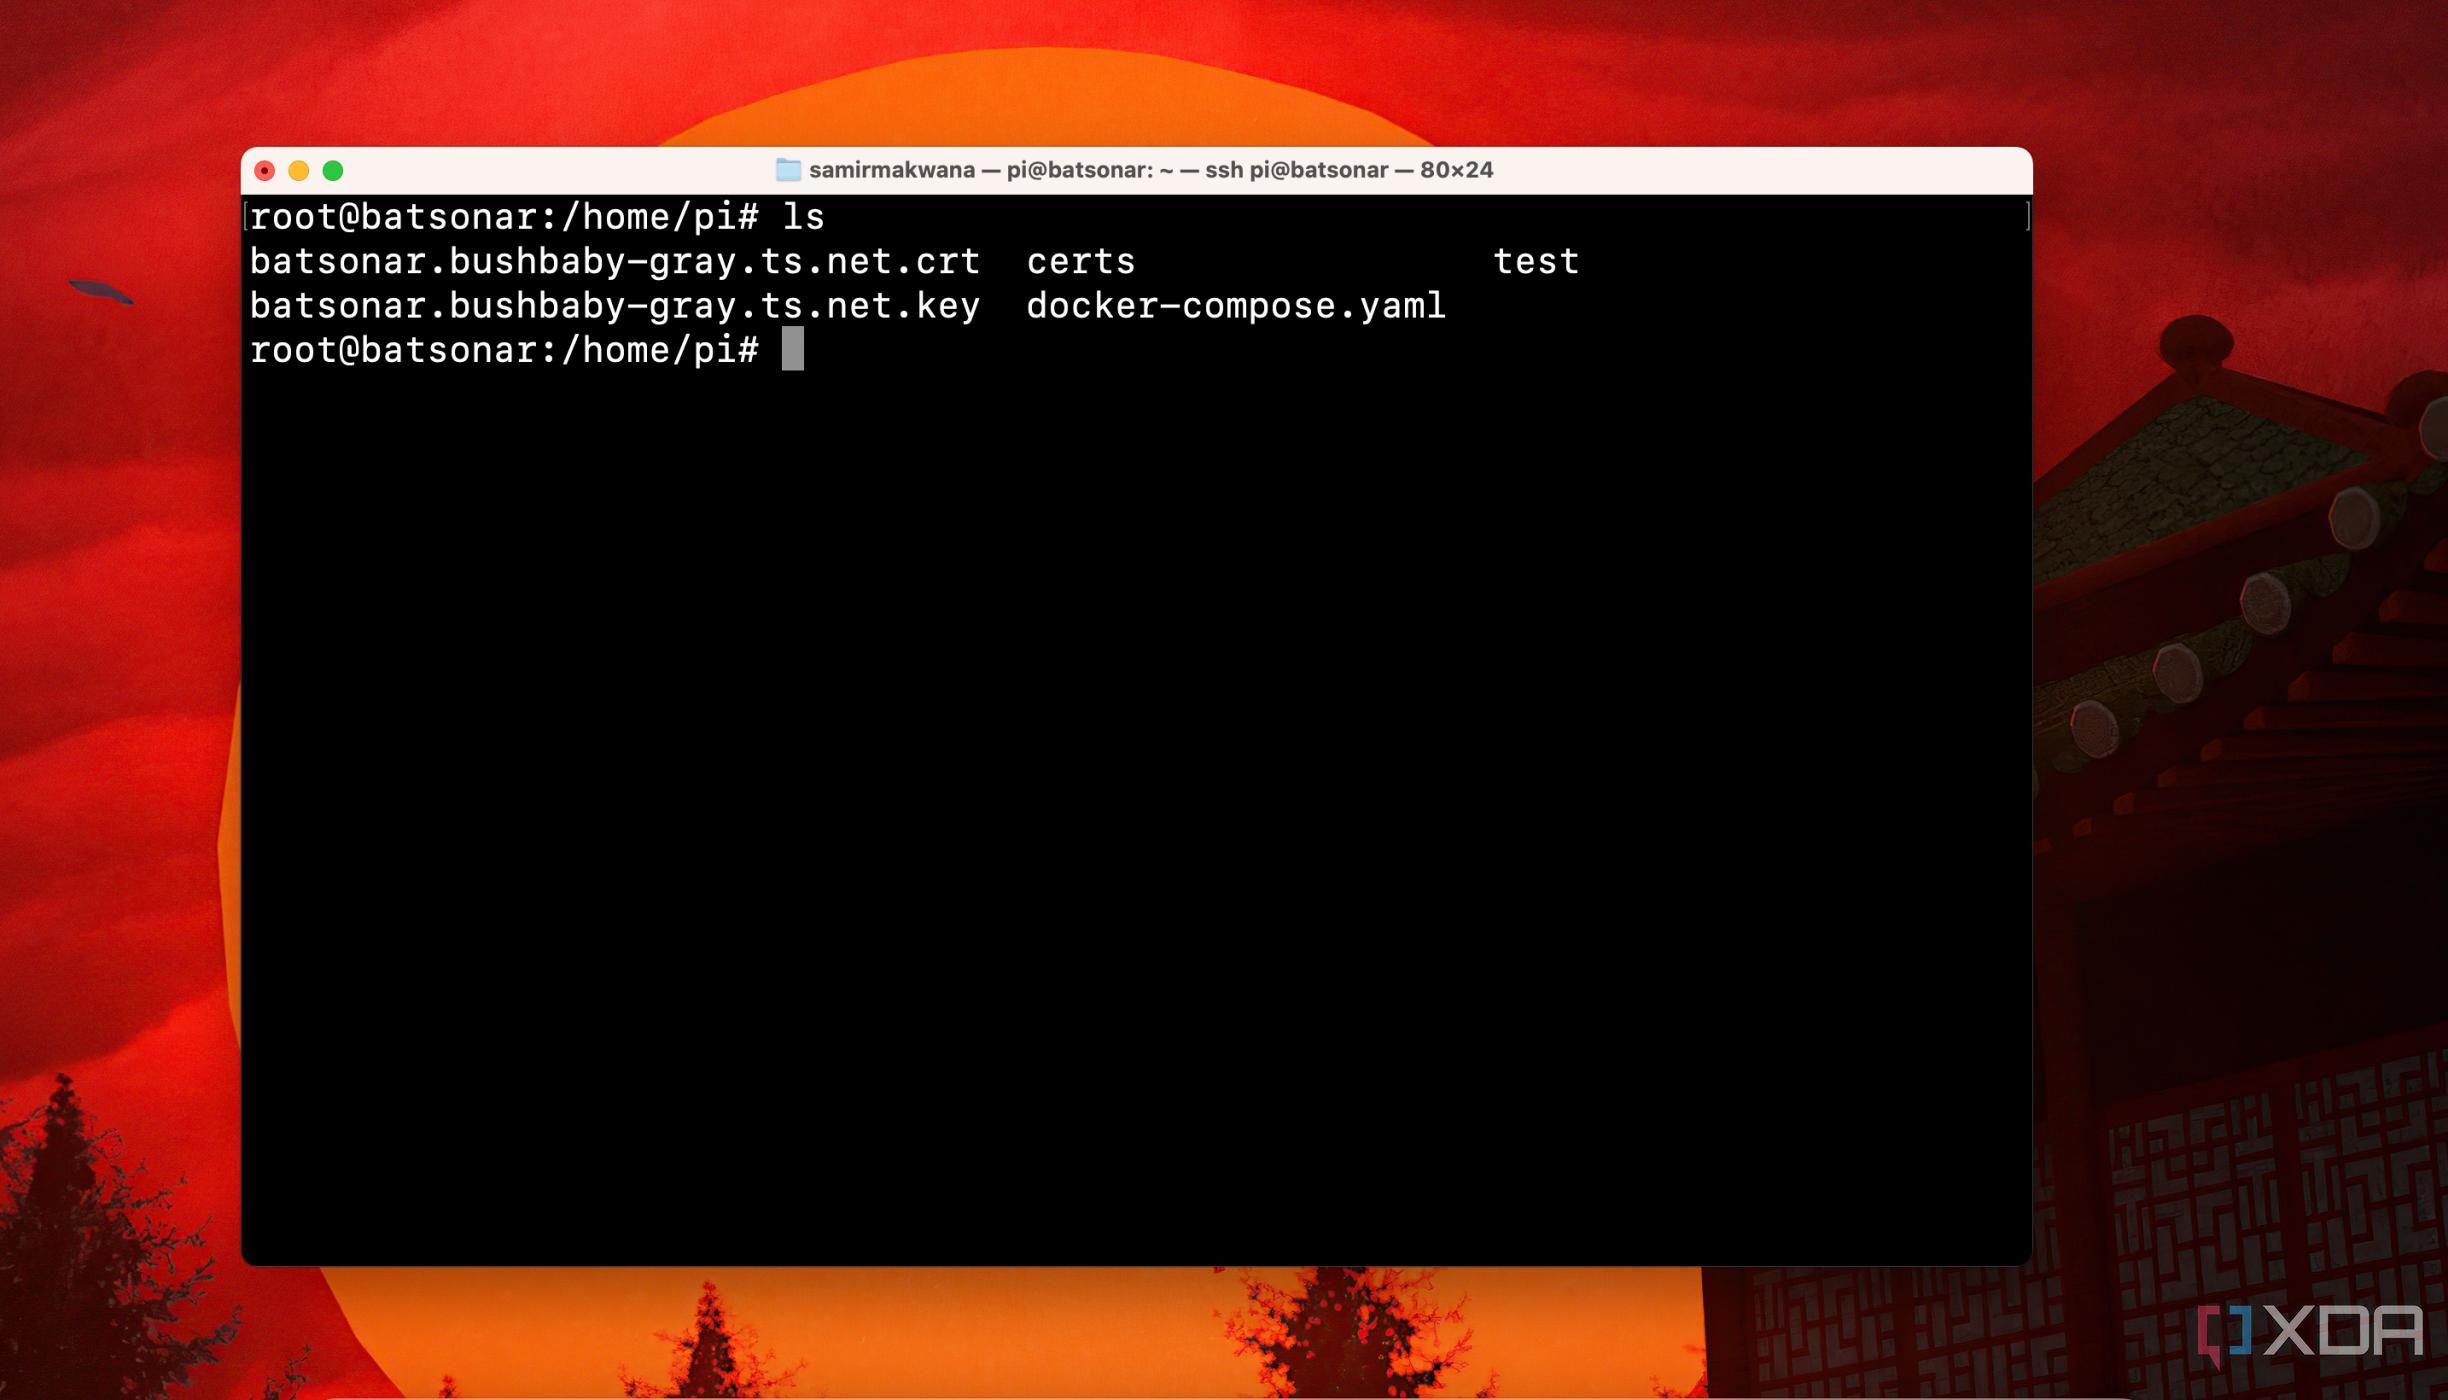
sudo tailscale cert machine-name.tailnet-name.ts.netTailscale nudges Let's Encrypt to request a certificate for your machine on the ts.net domain name using the Magic DNS. It will output two files ending with .crt and .key in the folder. If you get a 'timeout' error, inspect your machine's connectivity with the Tailscale network.
H2 - Moving the certificates to the trusted store of the operating system
Add the certificates to the operating system
After procuring the certificates, you must install or move them to your Linux distribution's trust store. Well, the Tailscale script doesn't do that for you. Here's what you need to do:
Using Terminal, navigate to the folder where both certificate files (.crt and .key) are stored and run the following command:
sudo cp .crt /etc/ssl/certsThat'll copy the .crt file to the CA certificate store location, typically /etc/ssl/certs in Debian and Ubuntu. Next, copy the .key file:
sudo cp .key /etc/ssl/privateNext, you can use their paths in Nginx Reverse Proxy to wrap your service with the new TLS certificates. If you're testing HTTPS with any app or service, restart the particular app or service and clear the browser cache before running it again.
What can you expect from these Tailscale certificates
Not a magic wand
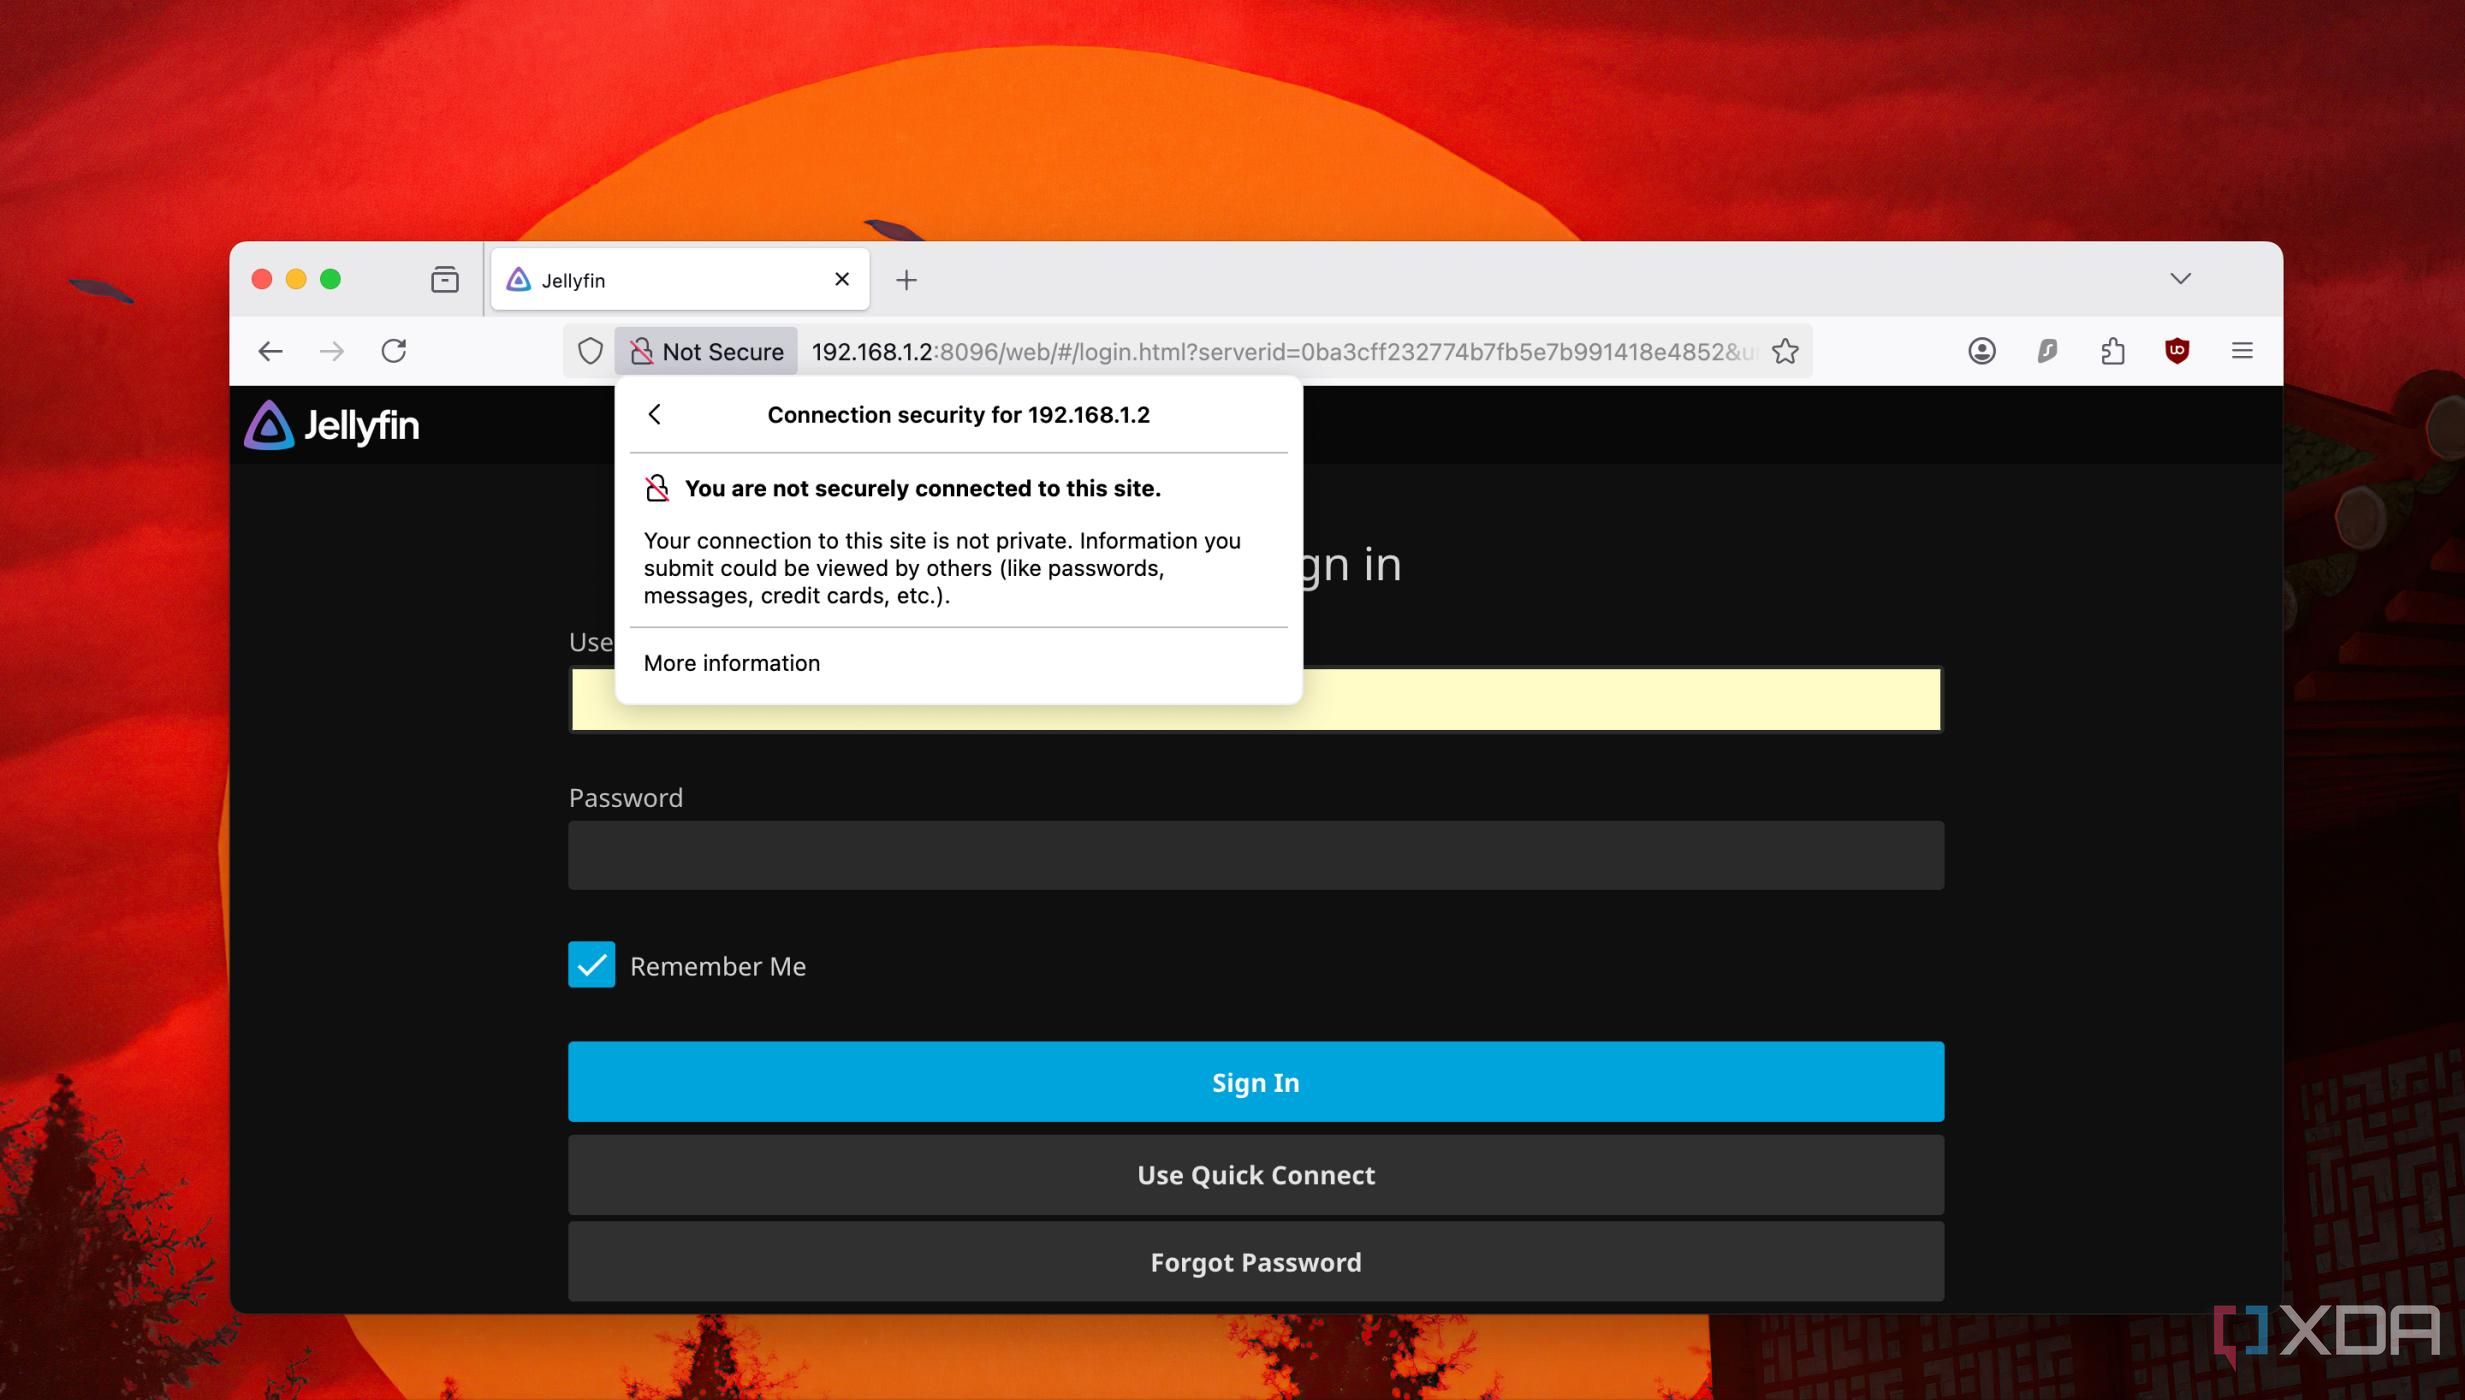
If configured correctly, you won't see a browser throwing a 'connection not secure' error. However, not all apps or services will support these certificates by default. You'll need to work on those files further to create specific certificate bundles. For example, Jellyfin requires a TLS certificate bundled in a binary format (PKCS#12) and won't accept regular ones.
Use TsDProxy to securely expose your apps and services in Docker containers over Tailscale.
These certificates are suitable for running apps and services on your local network using Tailscale. Setting up a reverse proxy with Nginx or Caddy can easily handle the HTTPS duties on your home lab machine.

Related
4 reasons Twingate might be the best Tailscale alternative you're not using
Twingate tenders granular device checks and authentication permissions with speed speck better than Tailscale.
Enable HTTPS for your self-hosted apps and services
Do you need TLS certificates to enable HTTPS for apps that run on the local network? Sure, I'd recommend that. Several devices on your LAN might be unsafe and can be compromised to intercept messages. So, enabling HTTPS makes the app or service more trustworthy and secure when you want to access things remotely or share them with others. Also, you can self-host specific apps that need HTTPS without spending on a custom domain. While HTTPS encapsulates encryption to protect sensitive data, it's not an ultimate shield. You still need to employ basic security practices, like using a stronger password or a password manager for everything, even your social media accounts.


 English (US) ·