.png)
Artificial intelligence may not have changed the world as many manufacturers had planned, but it still has its neat uses. Adobe Photoshop’s AI features, for instance, are surprisingly useful regardless of whether you’re a casual user or an image-editing maestro. If you’re a student or someone who deals with large chunks of text, the all-powerful NotebookLM can serve as a reliable research assistant.
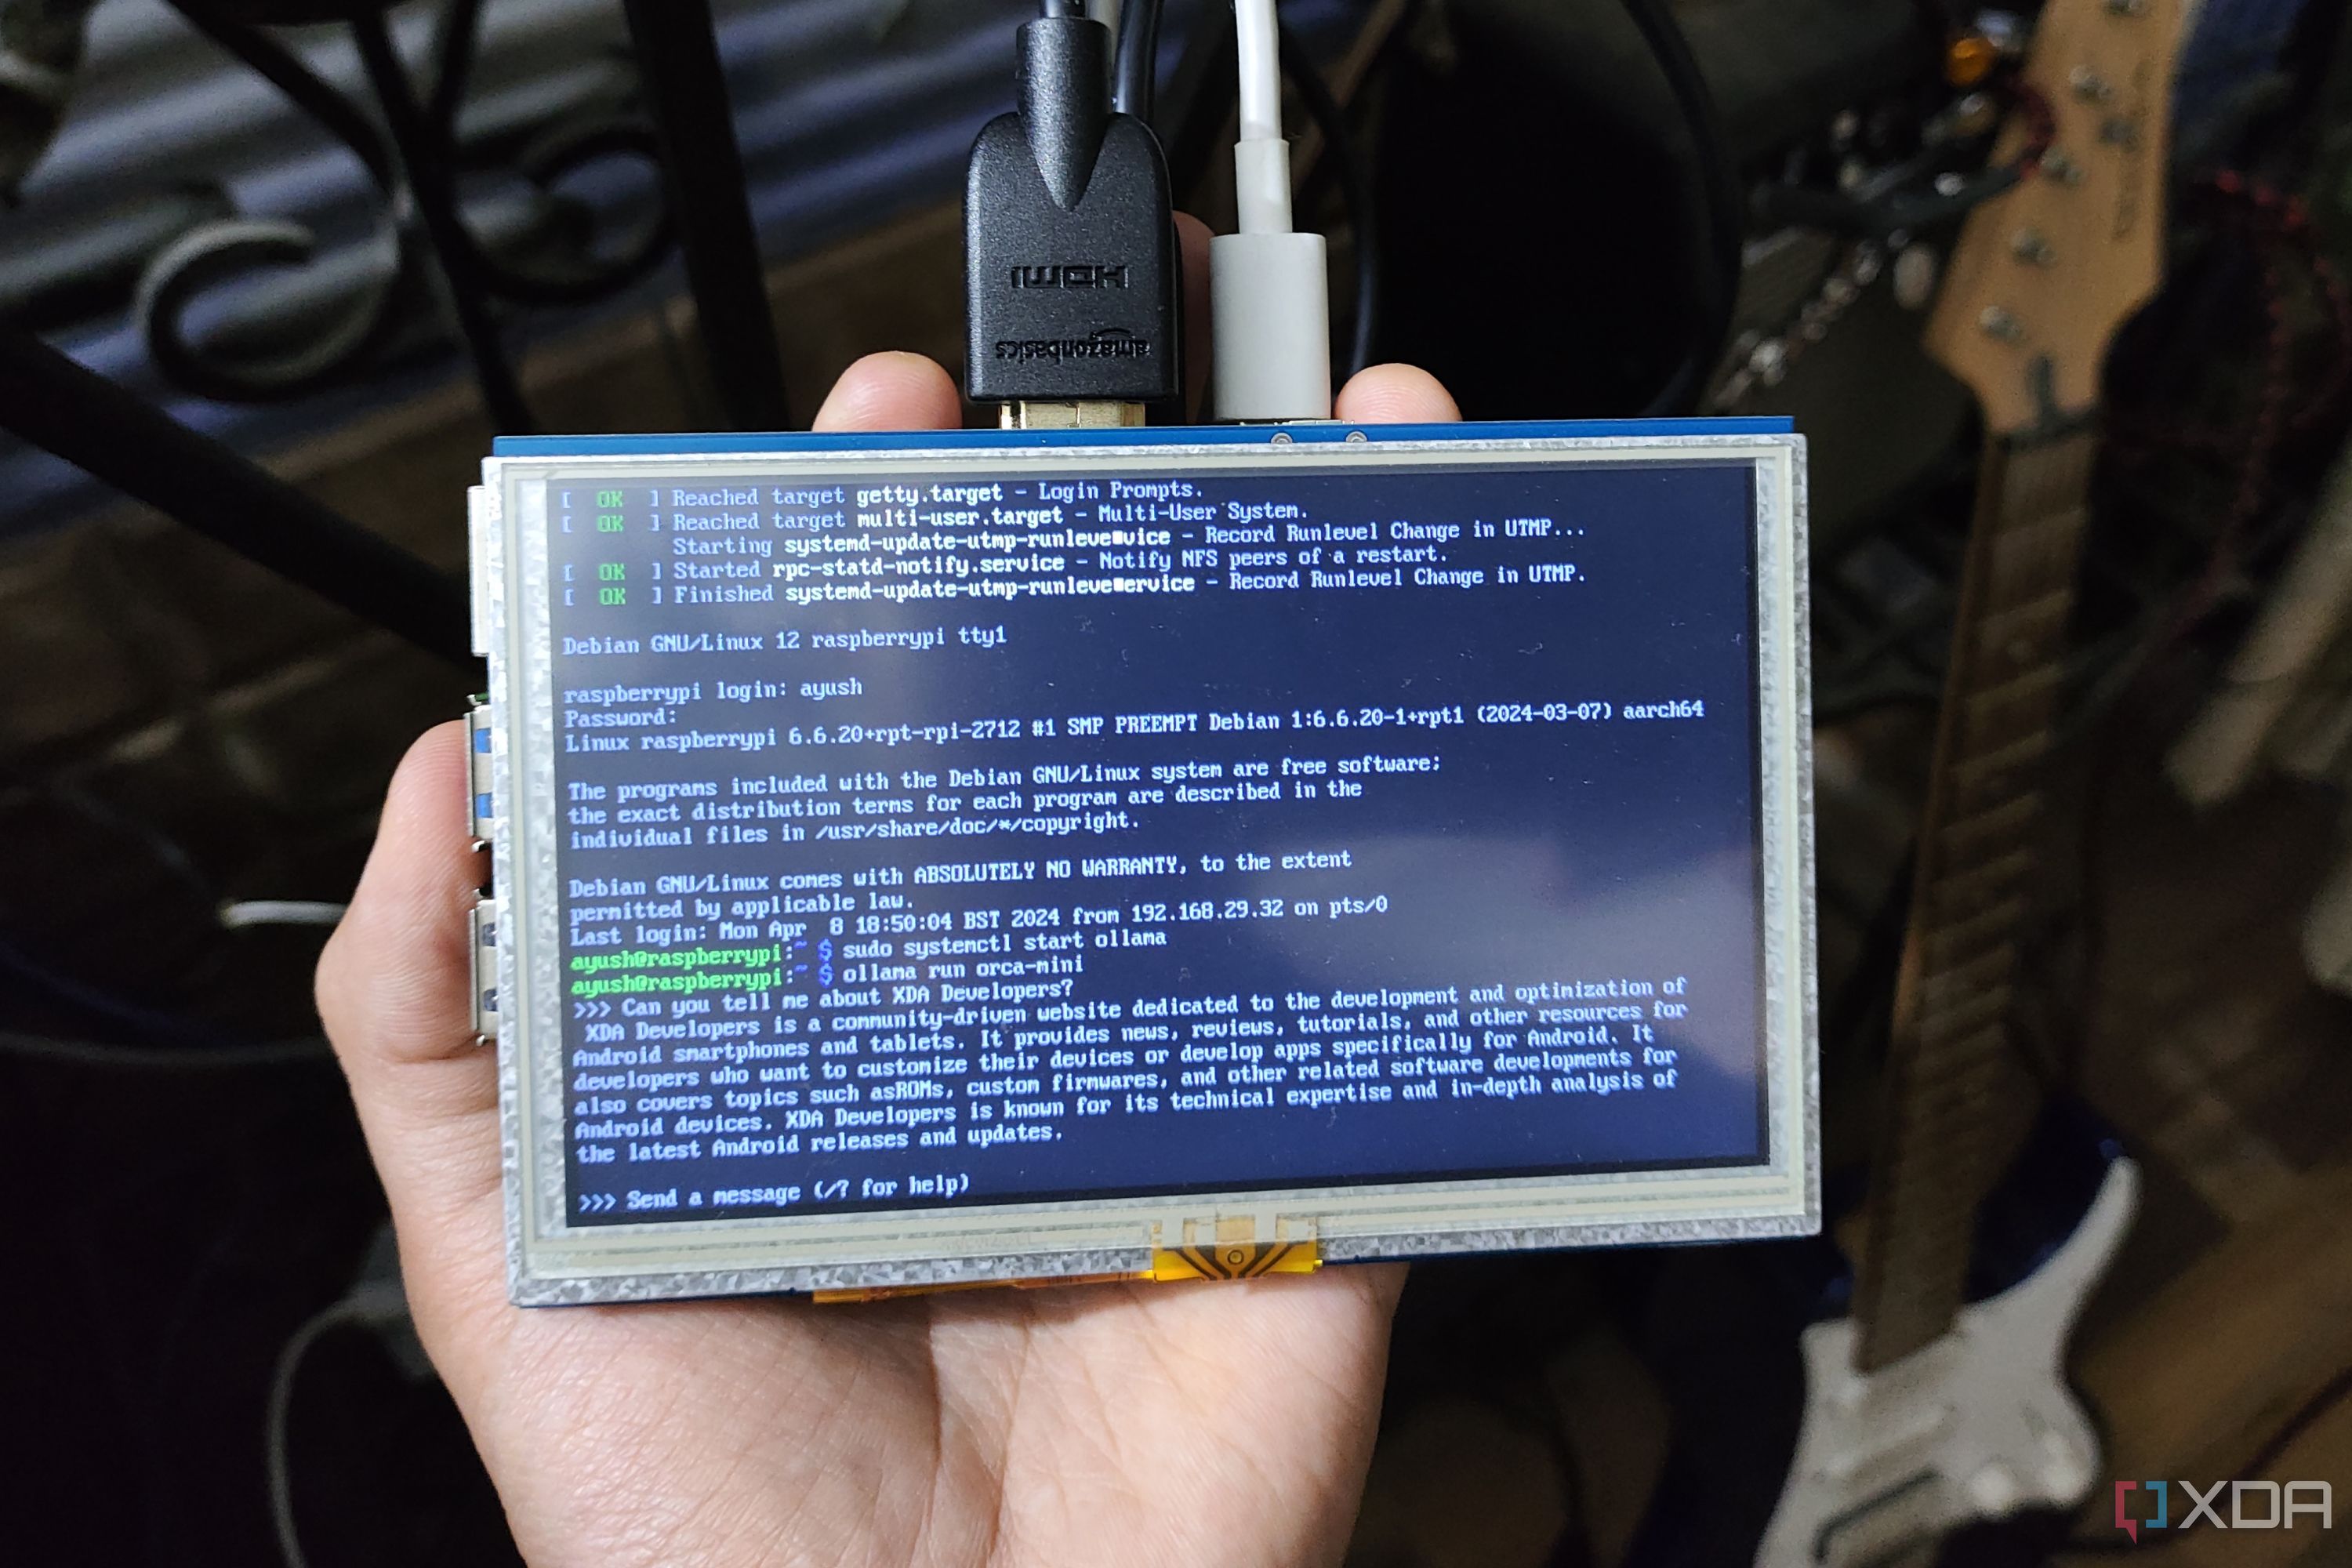
Then there's the dynamic duo of Home Assistant and Ollama, which can boost your smart home’s intellect once you start using the two apps in tandem. I recently configured an Ollama-based LLM to work with my Home Assistant, and now it’s hard to return to a vanilla HAOS setup. The best part? Both utilities are completely self-hosted, so the AI-powered Home Assistant instance won’t feed my queries to greedy corporations.
Related
4 things I learned by turning a Raspberry Pi into a dedicated Home Assistant hub
I've been using my Raspberry Pi as a Home Assistant hub for months, and here are some lessons I learned along the way
Picking the right machine for Ollama
Modify the environment variable if you use a separate rig for Ollama
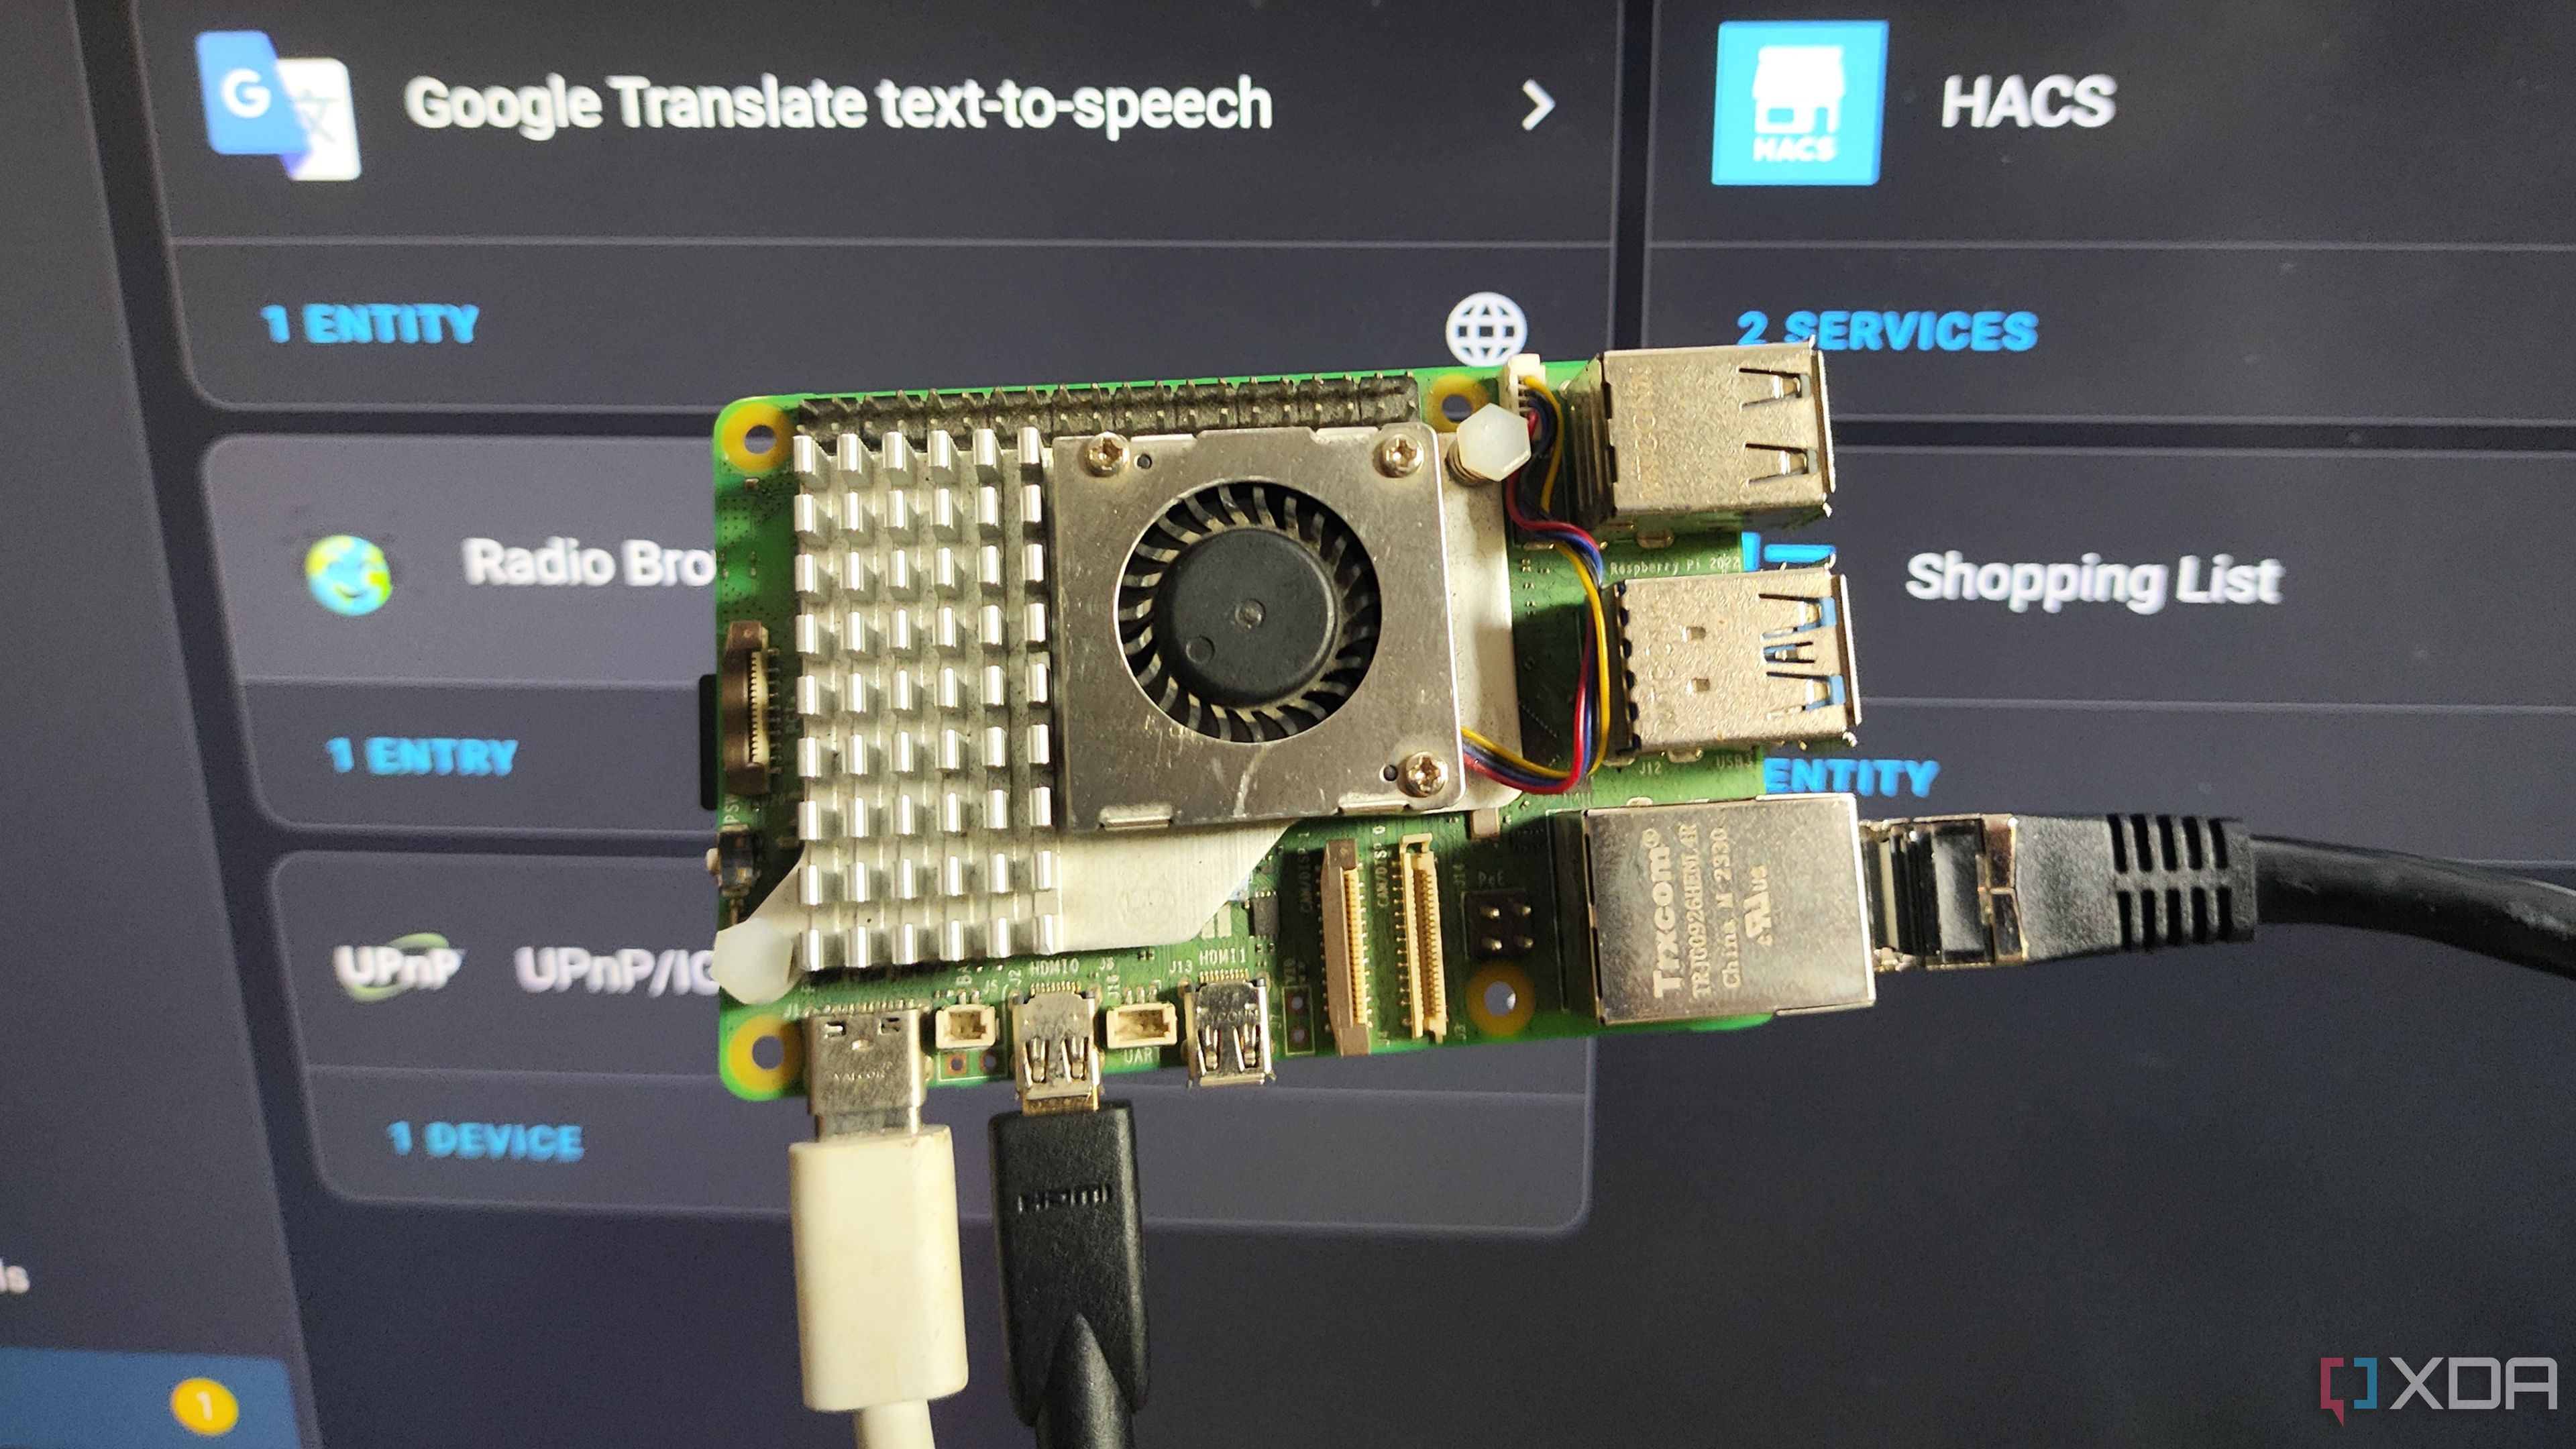
Similar to modern games, self-hosted LLMs require a lot of firepower on the GPU, VRAM, and memory fronts. Considering that Raspberry PIs, NUCs, and other weak devices are the most popular devices for hosting Home Assistant, running high-end LLMs with bazillion parameters is out of the question. That is, if you’re planning to run both HASS and Ollama on the same machine.
In case your HASS host doesn’t have the horsepower to run LLMs at decent speeds, you can set up Ollama on another, more powerful rig and use its API to harness the text generation model in your Home Assistant machine. While I began my Home Assistant journey on a Raspberry Pi 5, I’ve since migrated to an Intel N100 system, and offloading the LLM processing tasks to a separate GTX 1080 rig makes it easier to experiment with different models.
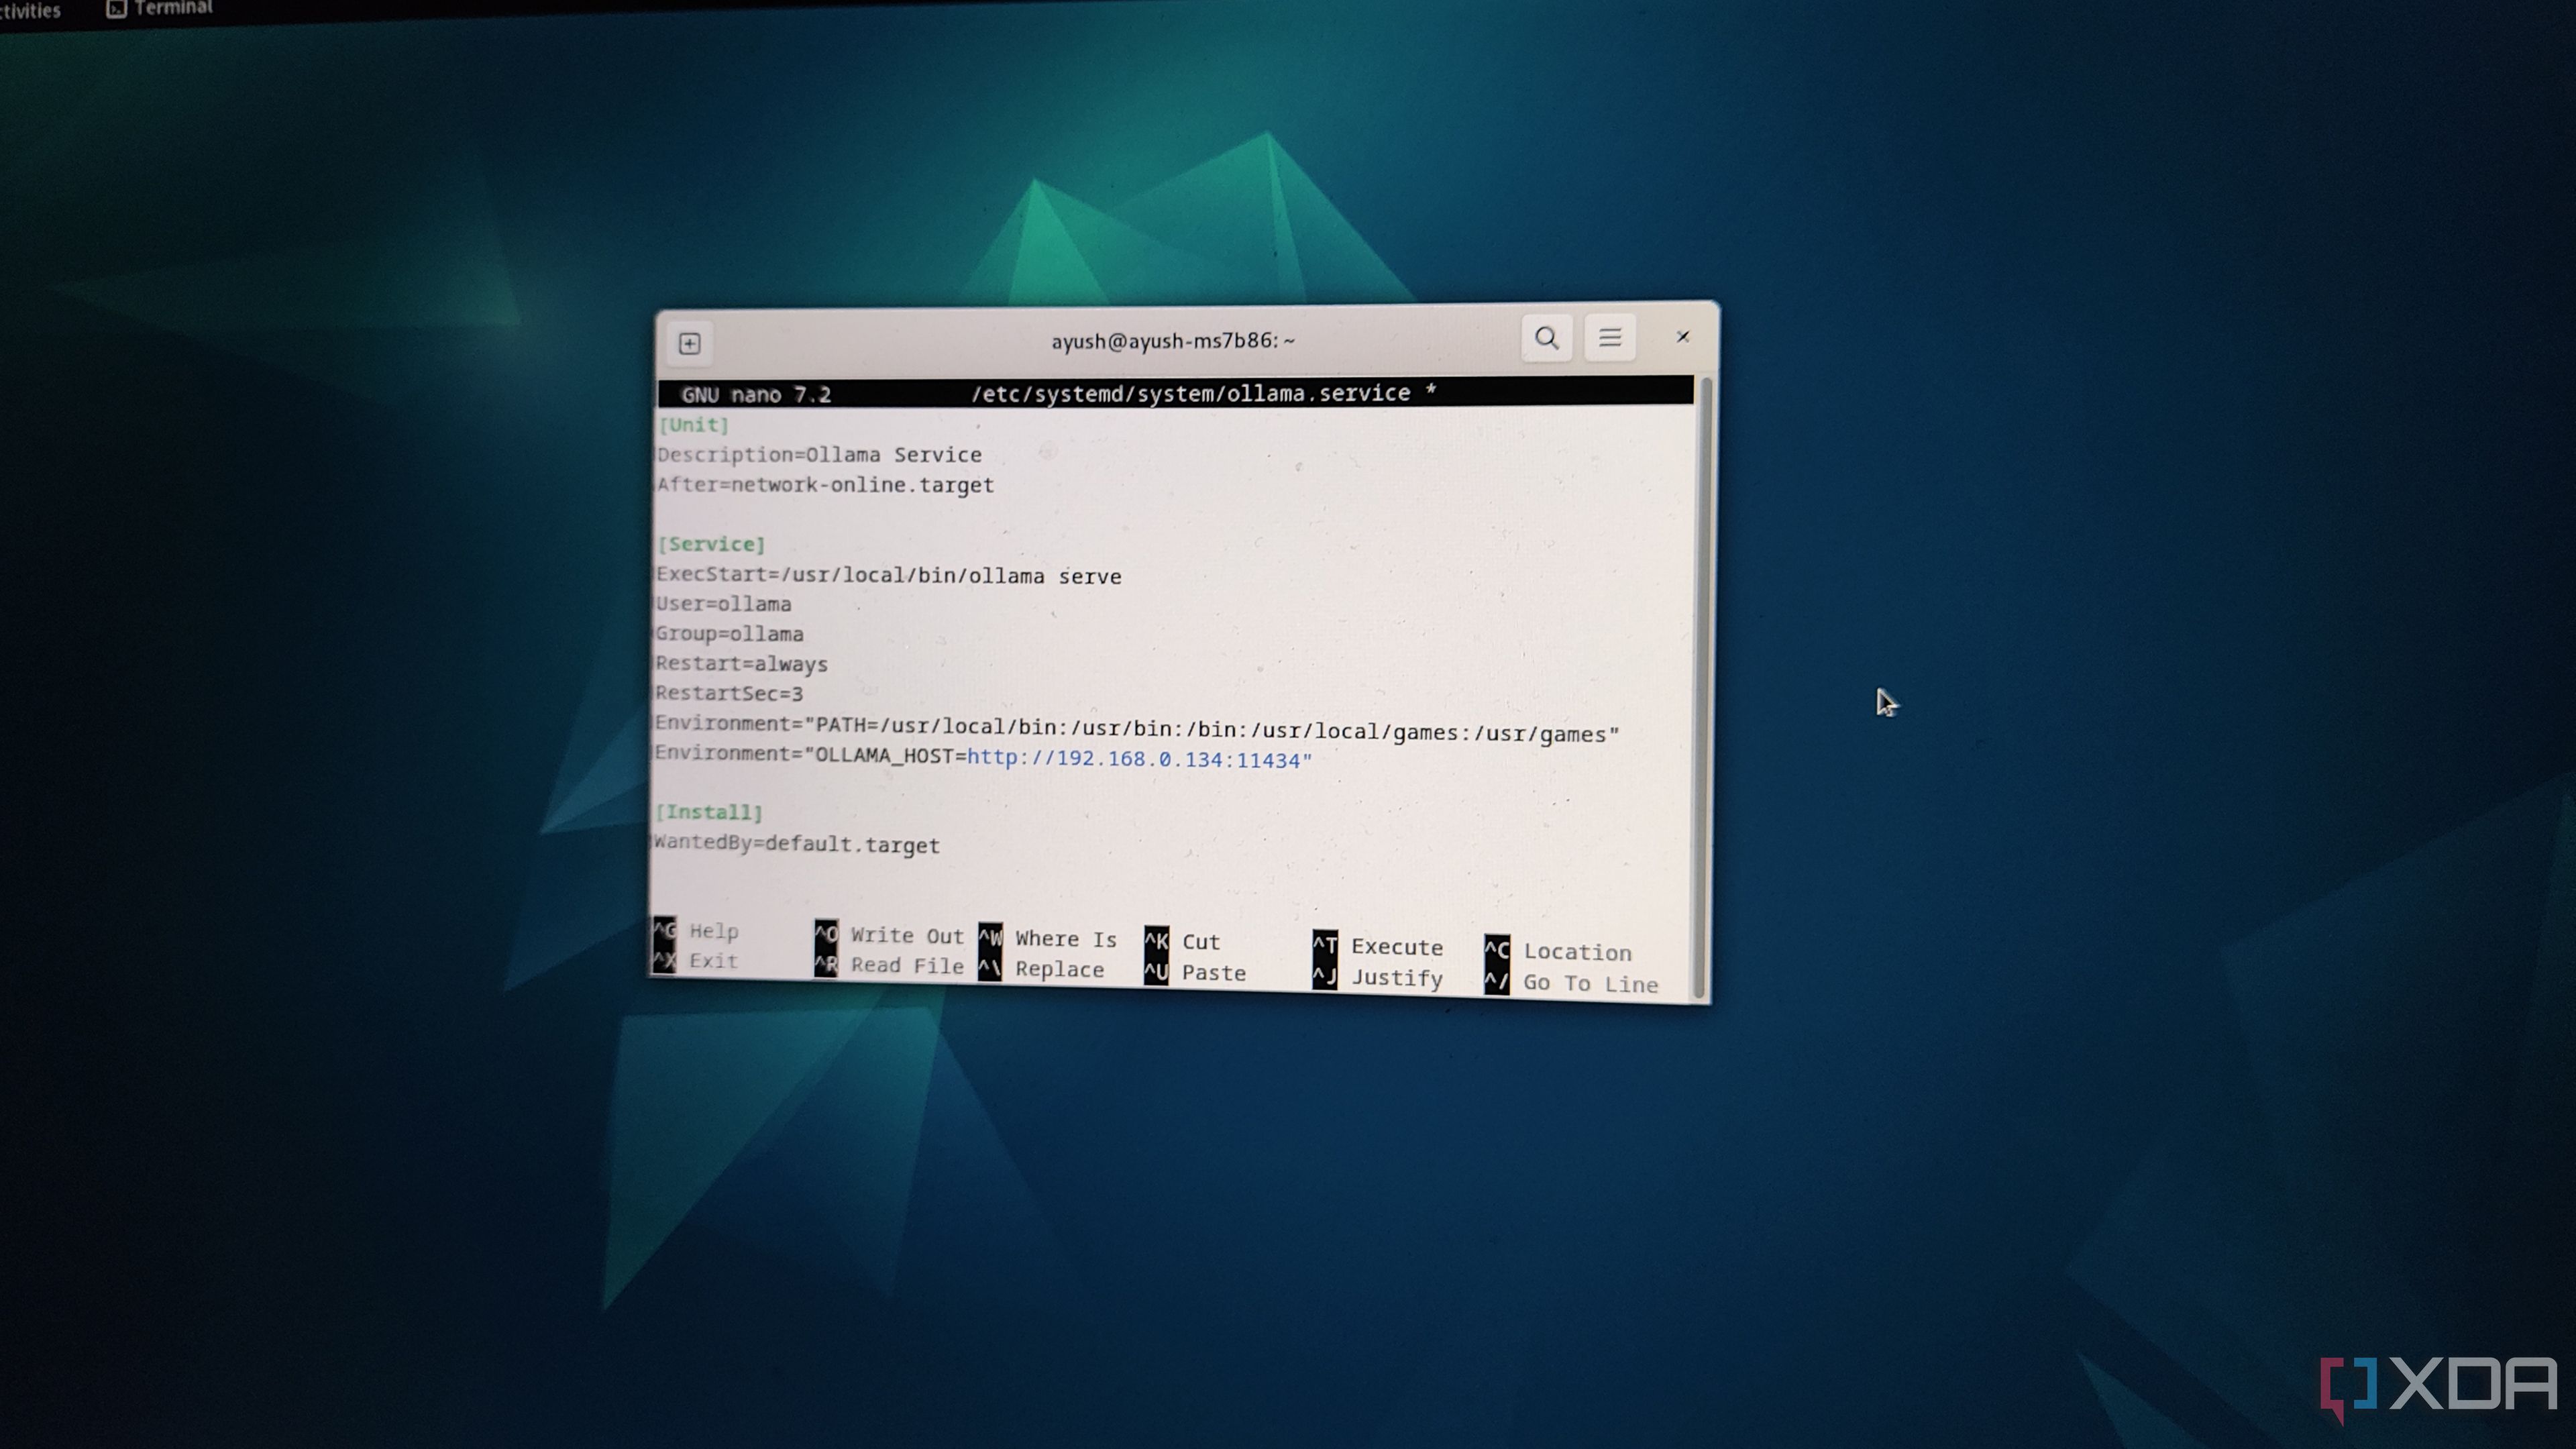
Unless you’re running Ollama and Home Assistant on the same machine, you’ll have to modify a config line to ensure that the LLM platform’s API is accessible inside HASS. All you have to do is open the ollama.service config file using the sudo nano /etc/systemd/system/ollama.service command inside the terminal, add Environment=”OLLAMA_HOST=IP_Address_of_server:11434” under the [Service] header, and press Ctrl+X, Y, and Enter to exit the file. After that, simply run the sudo systemctl daemon-reload and sudo systemctl restart ollama commands to reload Ollama with the new parameters.
Be sure to replace the IP_Address_of_server string with the actual IP address of the machine running the Ollama instance.
Choosing the right LLM
Small models are better for SBCs and mini-PCs
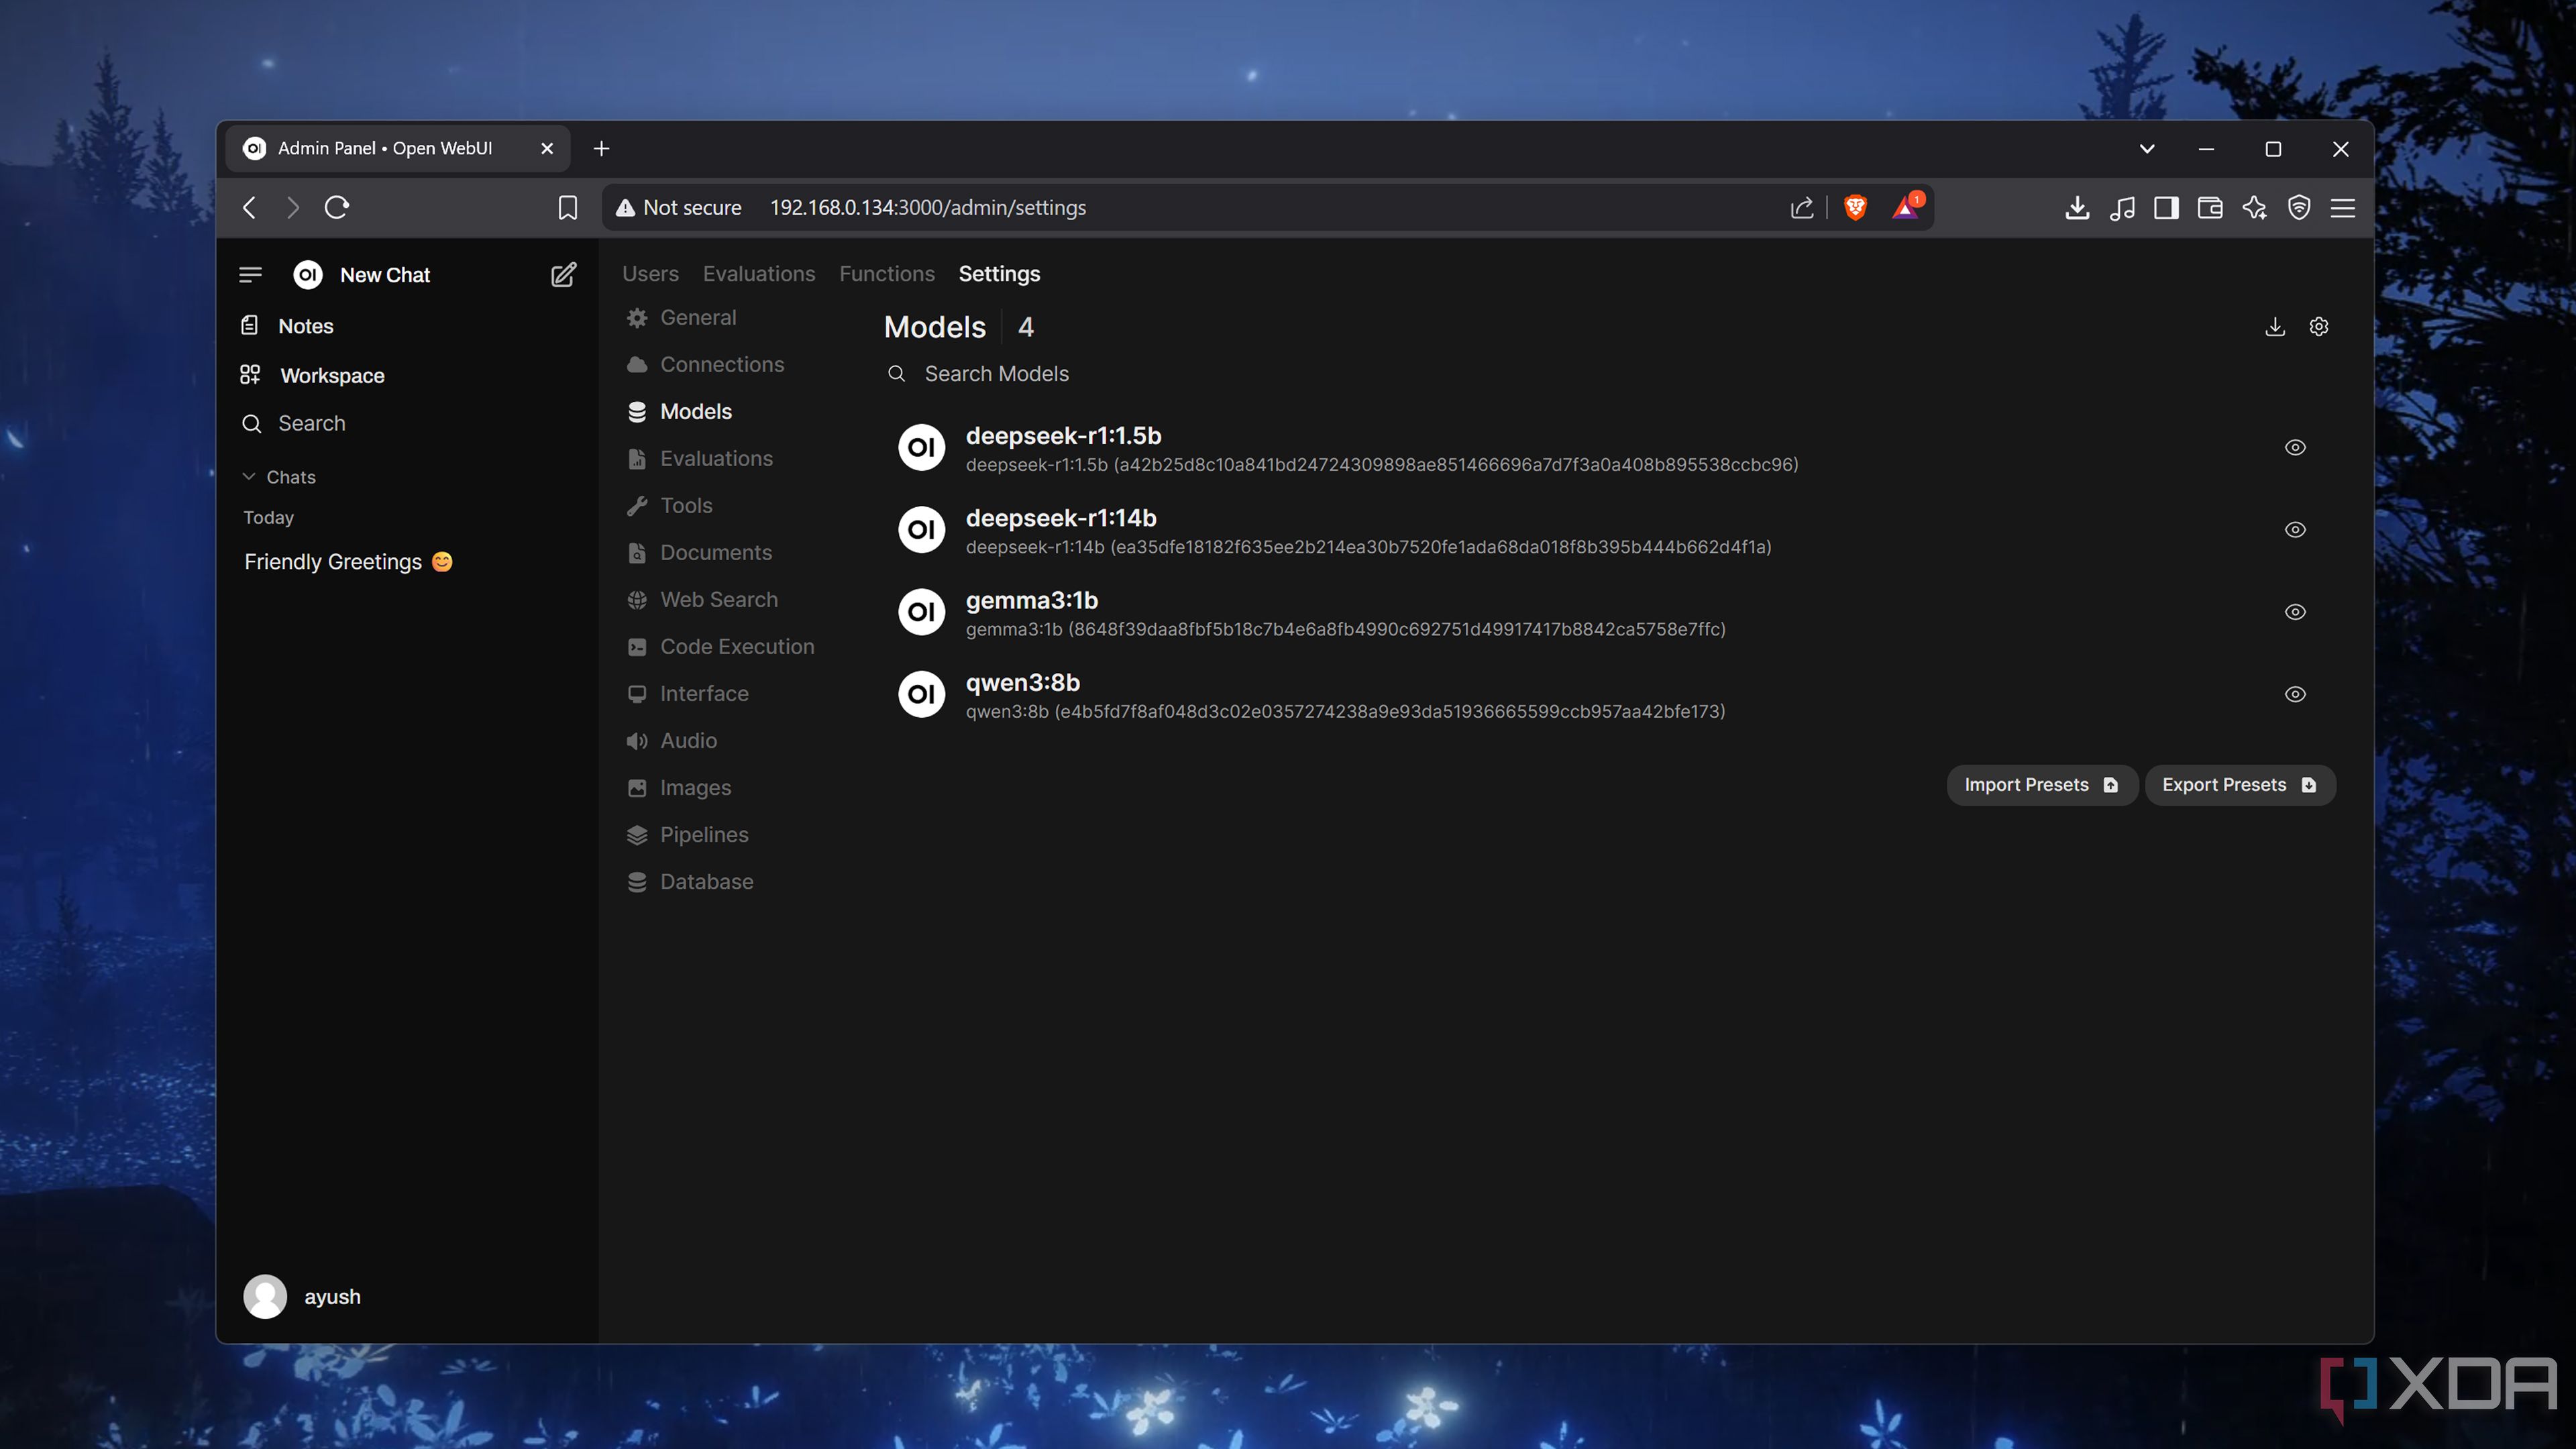
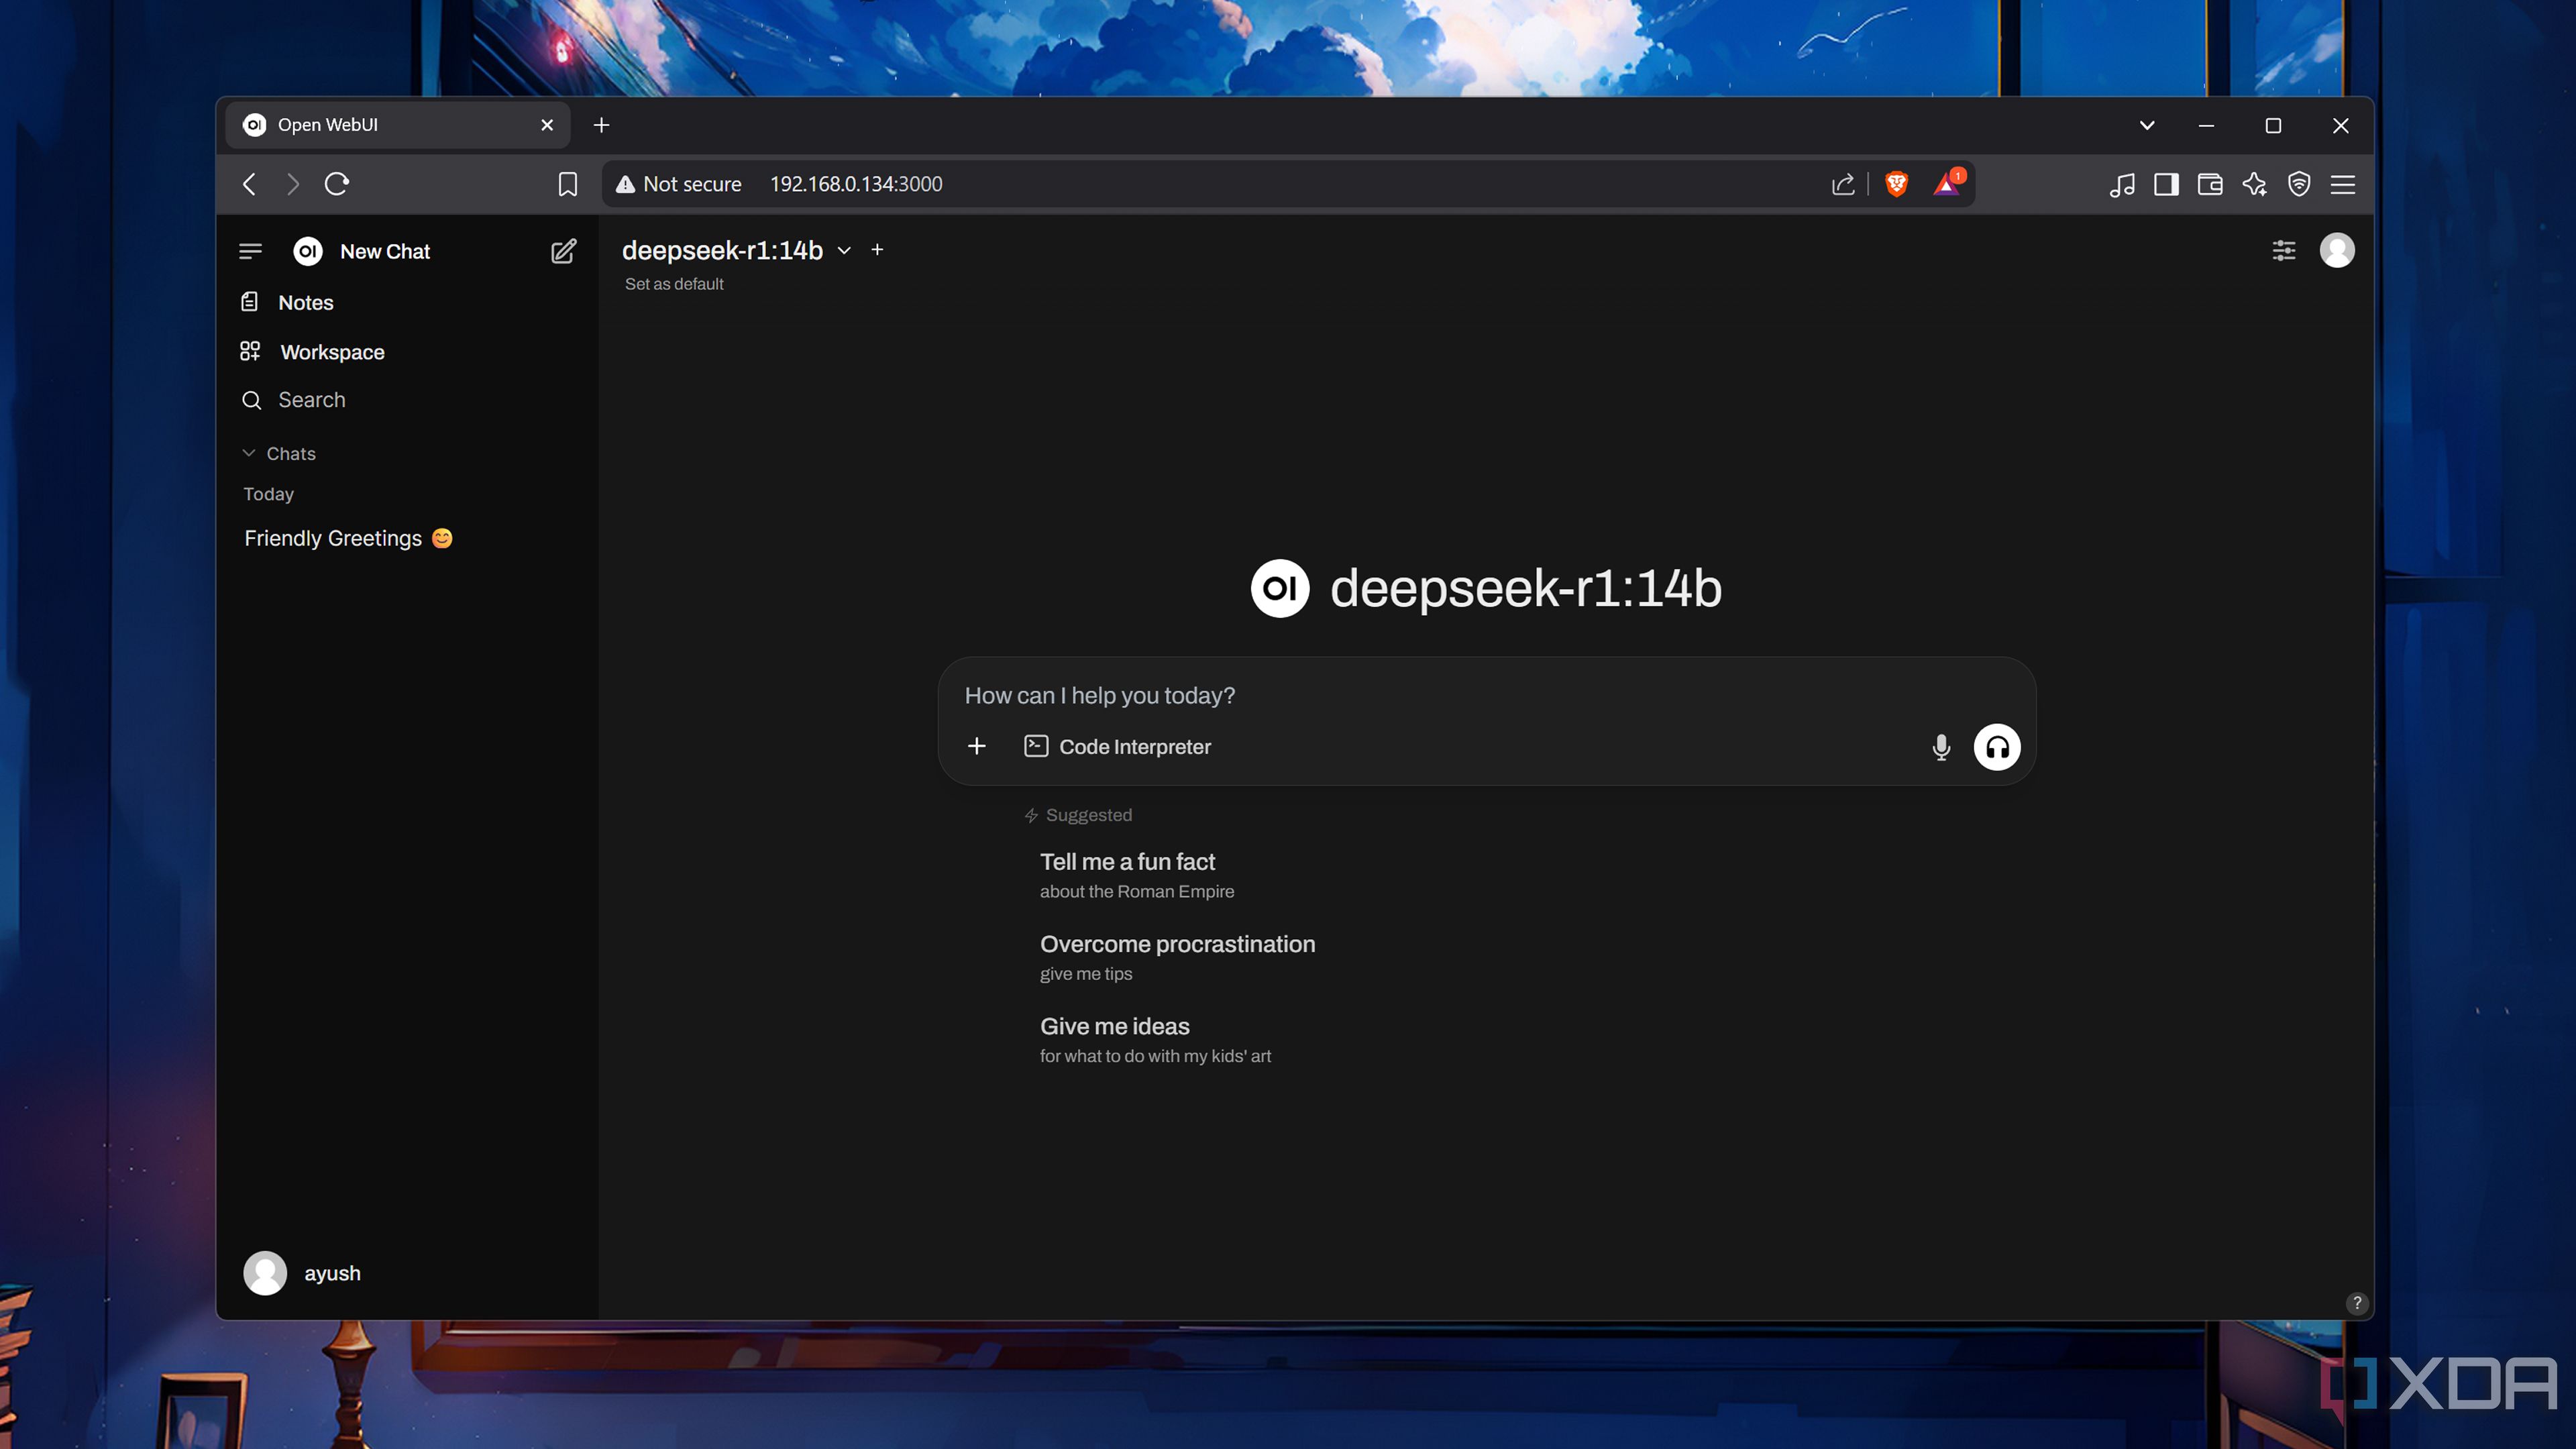
Regardless of your HASS and Ollama setup, you’ll have to pick an LLM. That’s a lot easier said than done because Ollama houses dozens of AI models, each bringing its own logical reasoning and processing capabilities to the table. You’ll also want to be mindful of the parameter count of your model, which is the number preceding “b.”
If you’re running HASS and Ollama on the same, low-power system, you’ll want to go for something as simple as Qwen 3 (1.7b), Gemma 3 (4b), or DeepSeek R1 (7b). Heck, even a Raspberry Pi 5 can deliver passable results for controlling your home lab once you arm it with one of the 0.6b or 1.5b models.
Personally, I’m using a Qwen 3 (8b) that runs on my GTX 1080, as the LLM provides the perfect combo of functionality and performance. Depending on your system specs, you can tinker with several models before honing in on the one that suits your needs.
Linking Ollama with Home Assistant
It's actually pretty simple
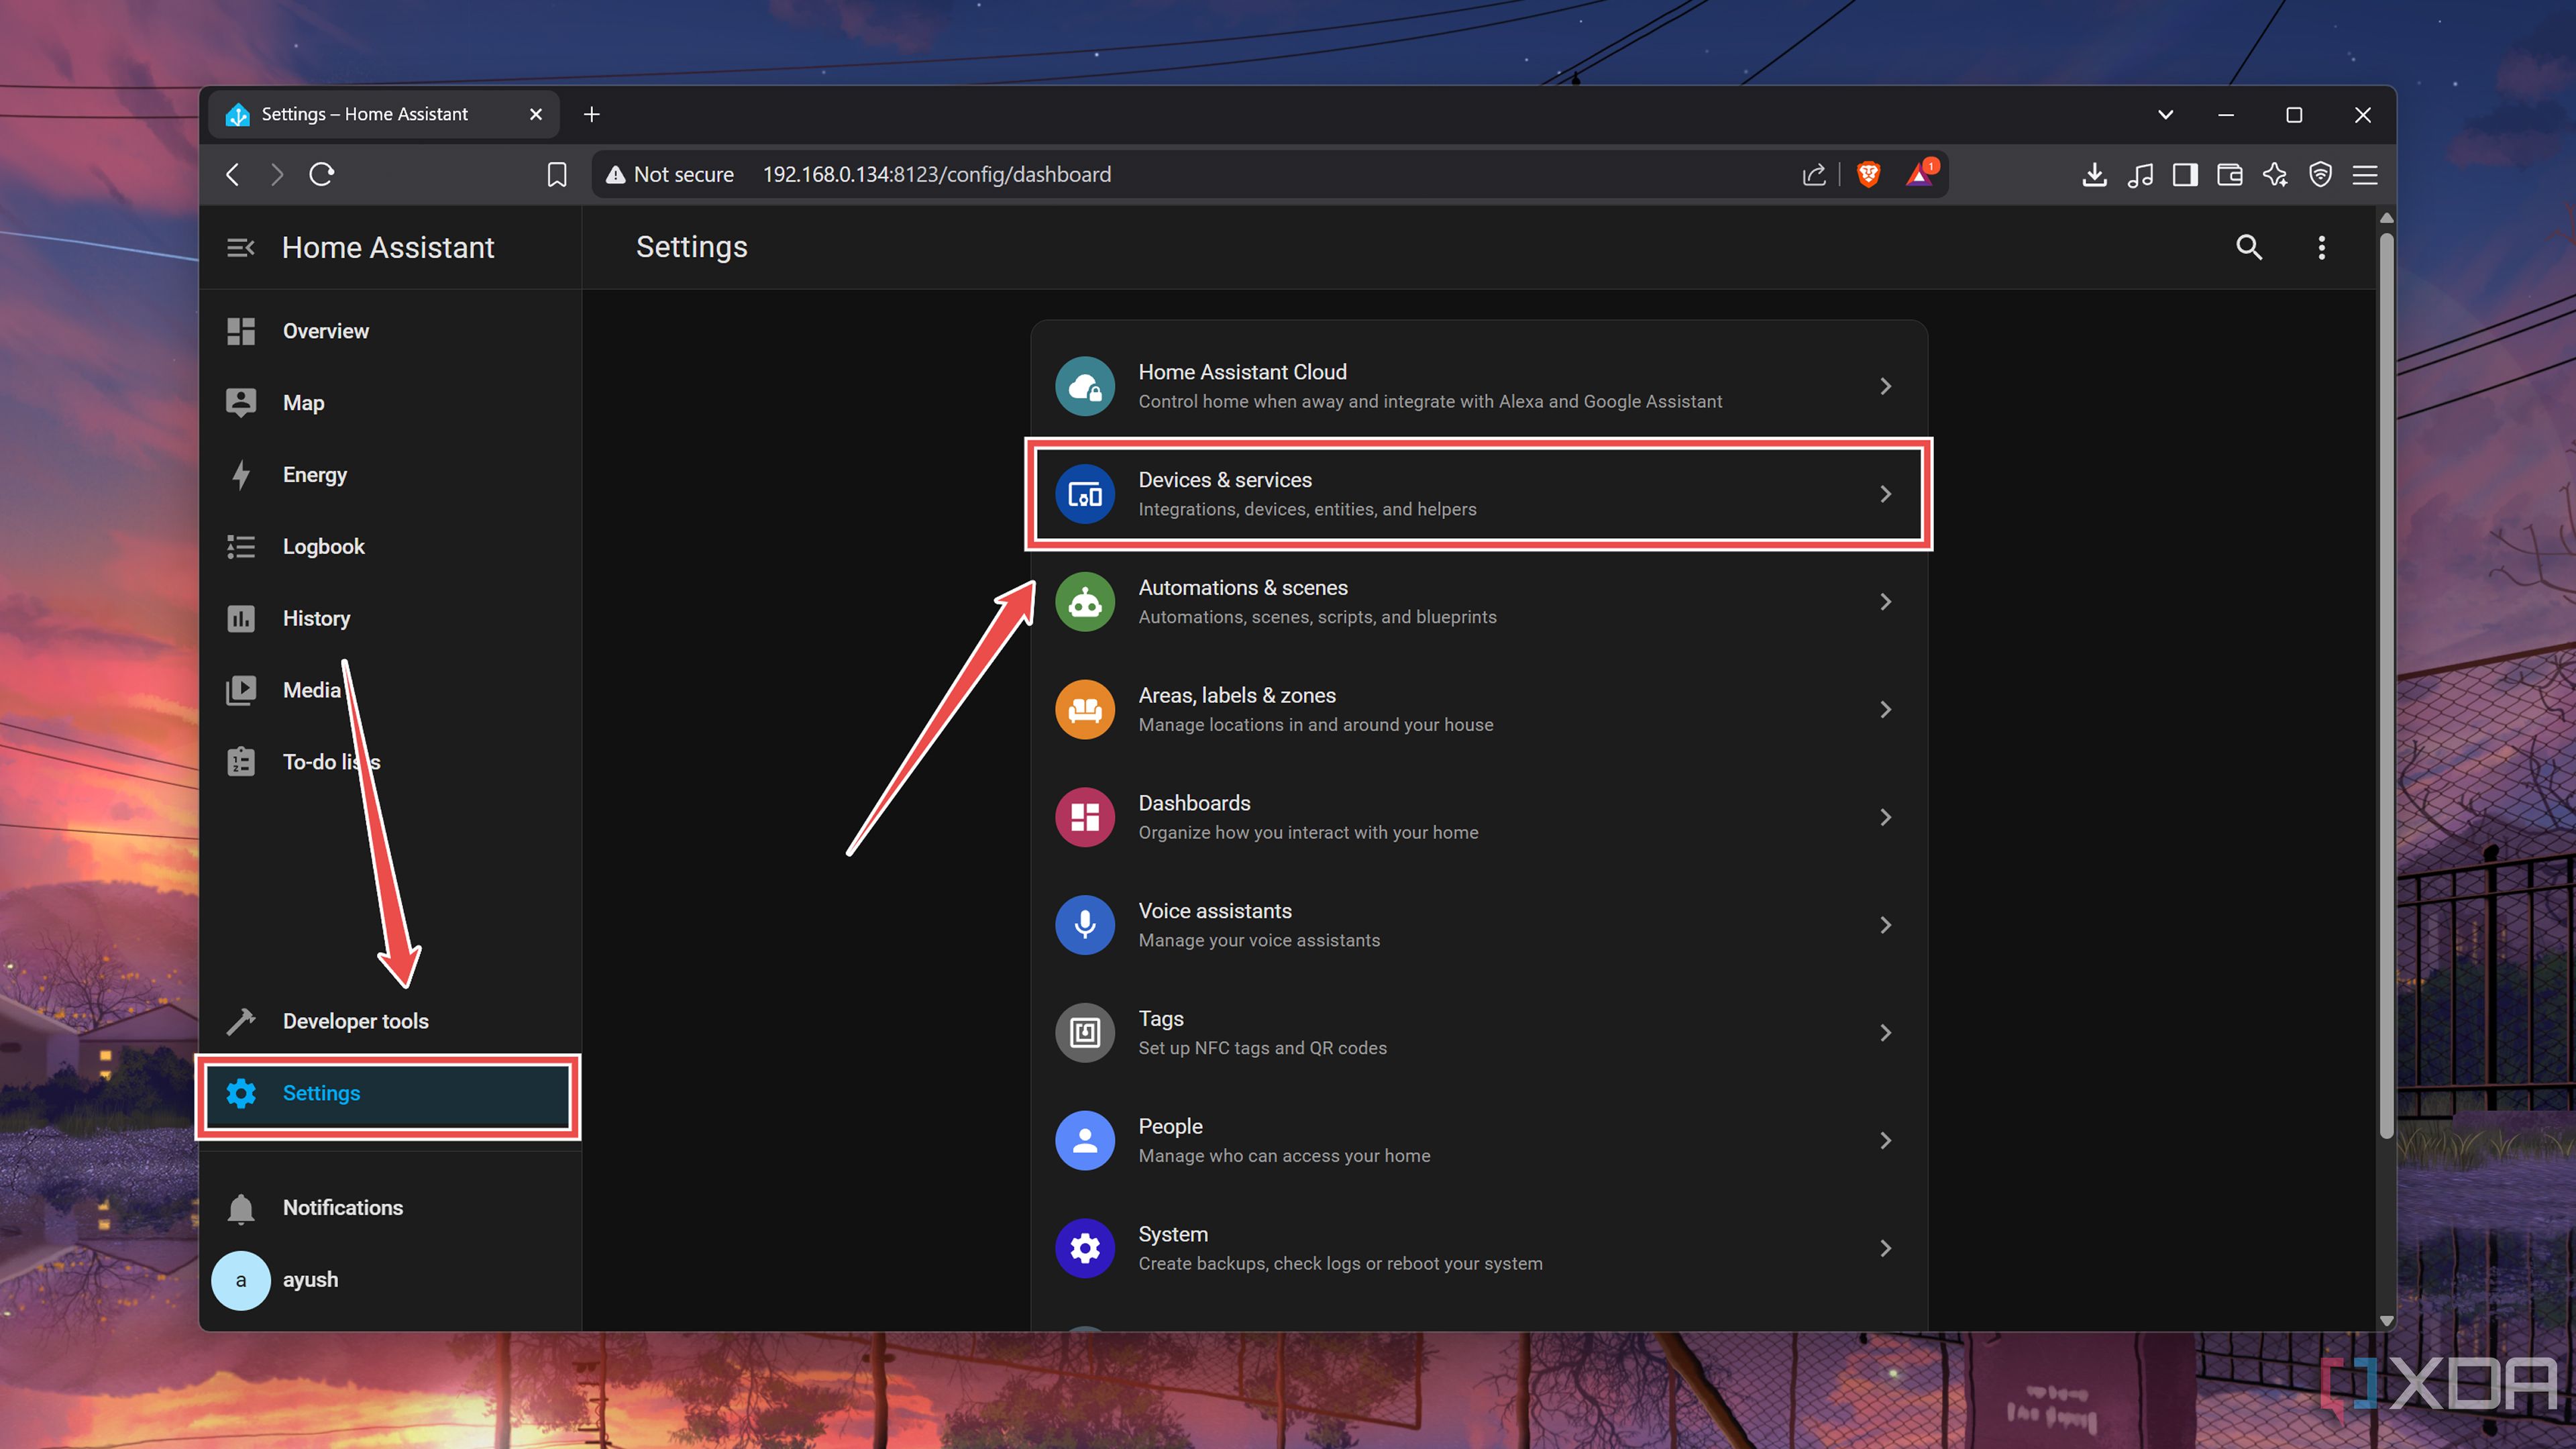
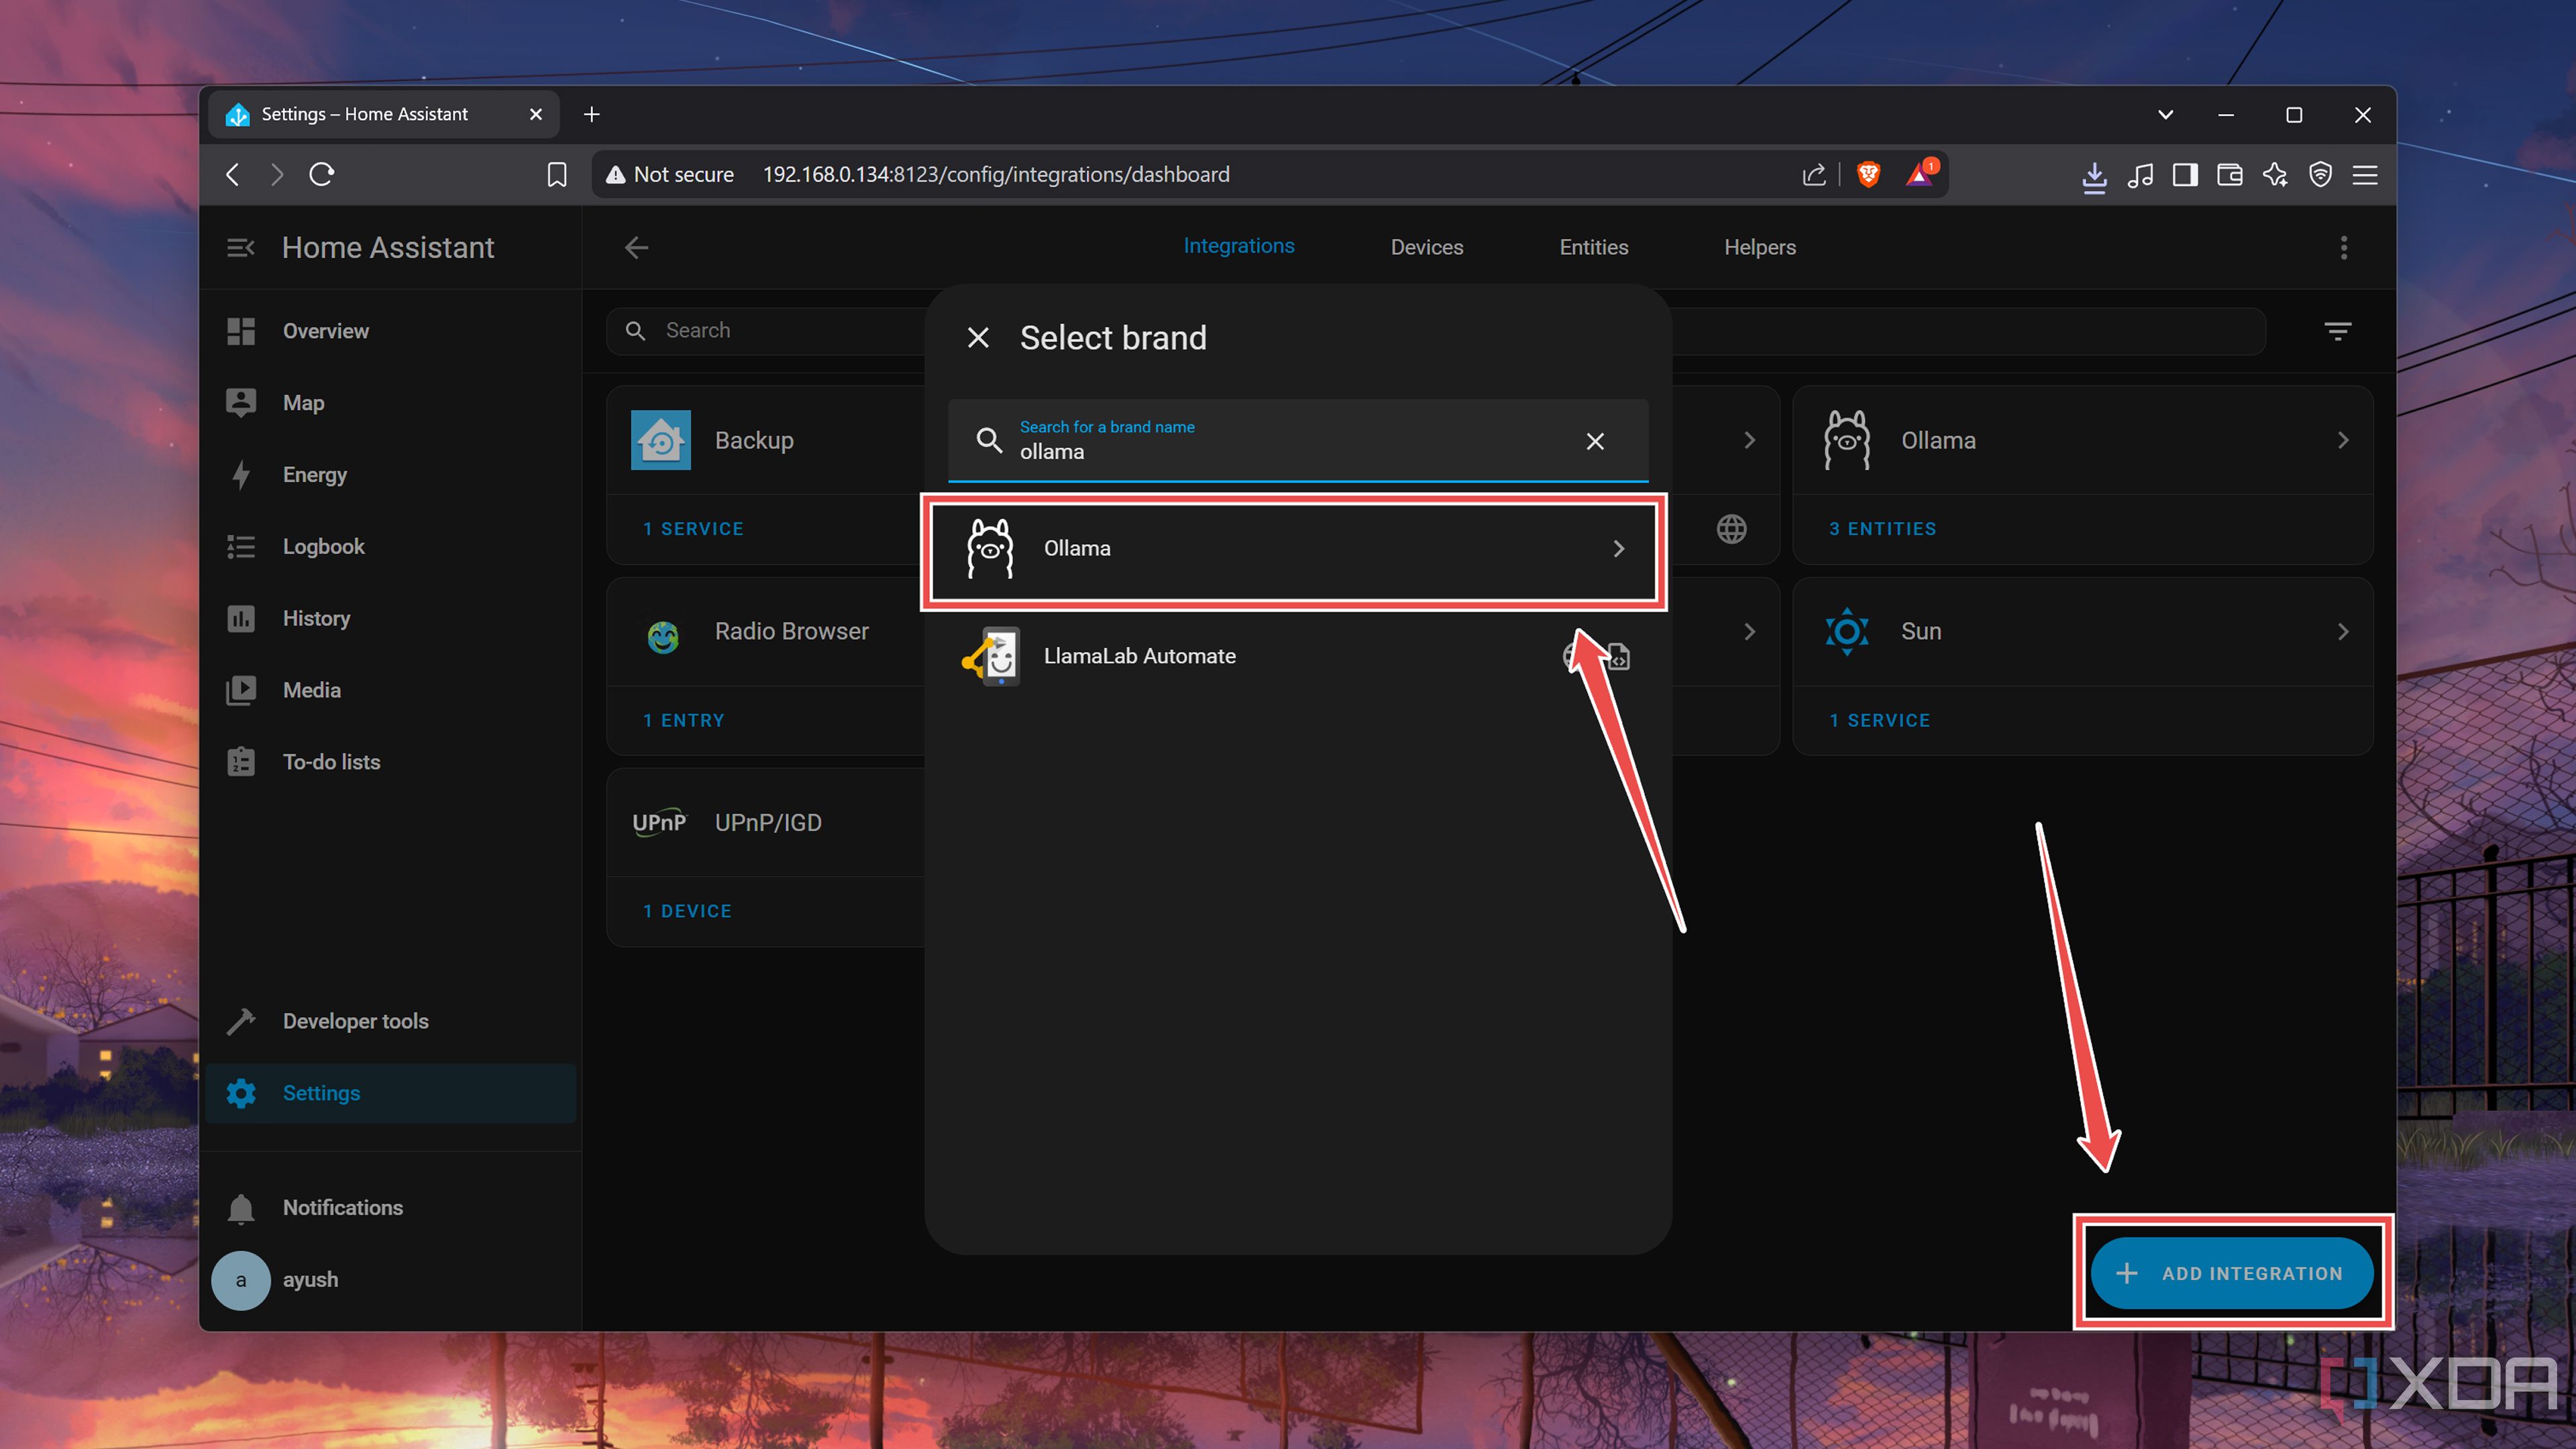
Once you’ve outfitted Ollama with your ideal LLM, it’s time to connect the self-hosted AI platform with your Home Assistant server. Unlike your typical external service, Ollama doesn’t require an add-on. Instead, HASS has a dedicated integration for Ollama, so you can follow along regardless of whether you’re running a bare-metal Home Assistant, supervised HAOS, or a containerized HA Core setup. All you have to do is:
-
Head to the Devices & services tab within the Settings page.
-
Press the Add integration button and search for Ollama.
-
For an external Ollama server, you can paste the IP address followed by a colon (:) and the port number (typically 11434) associated with the tool.
Meanwhile, if you’re running Ollama on the same machine as HASS, you can simply enter the http://localhost:11434 string.

-
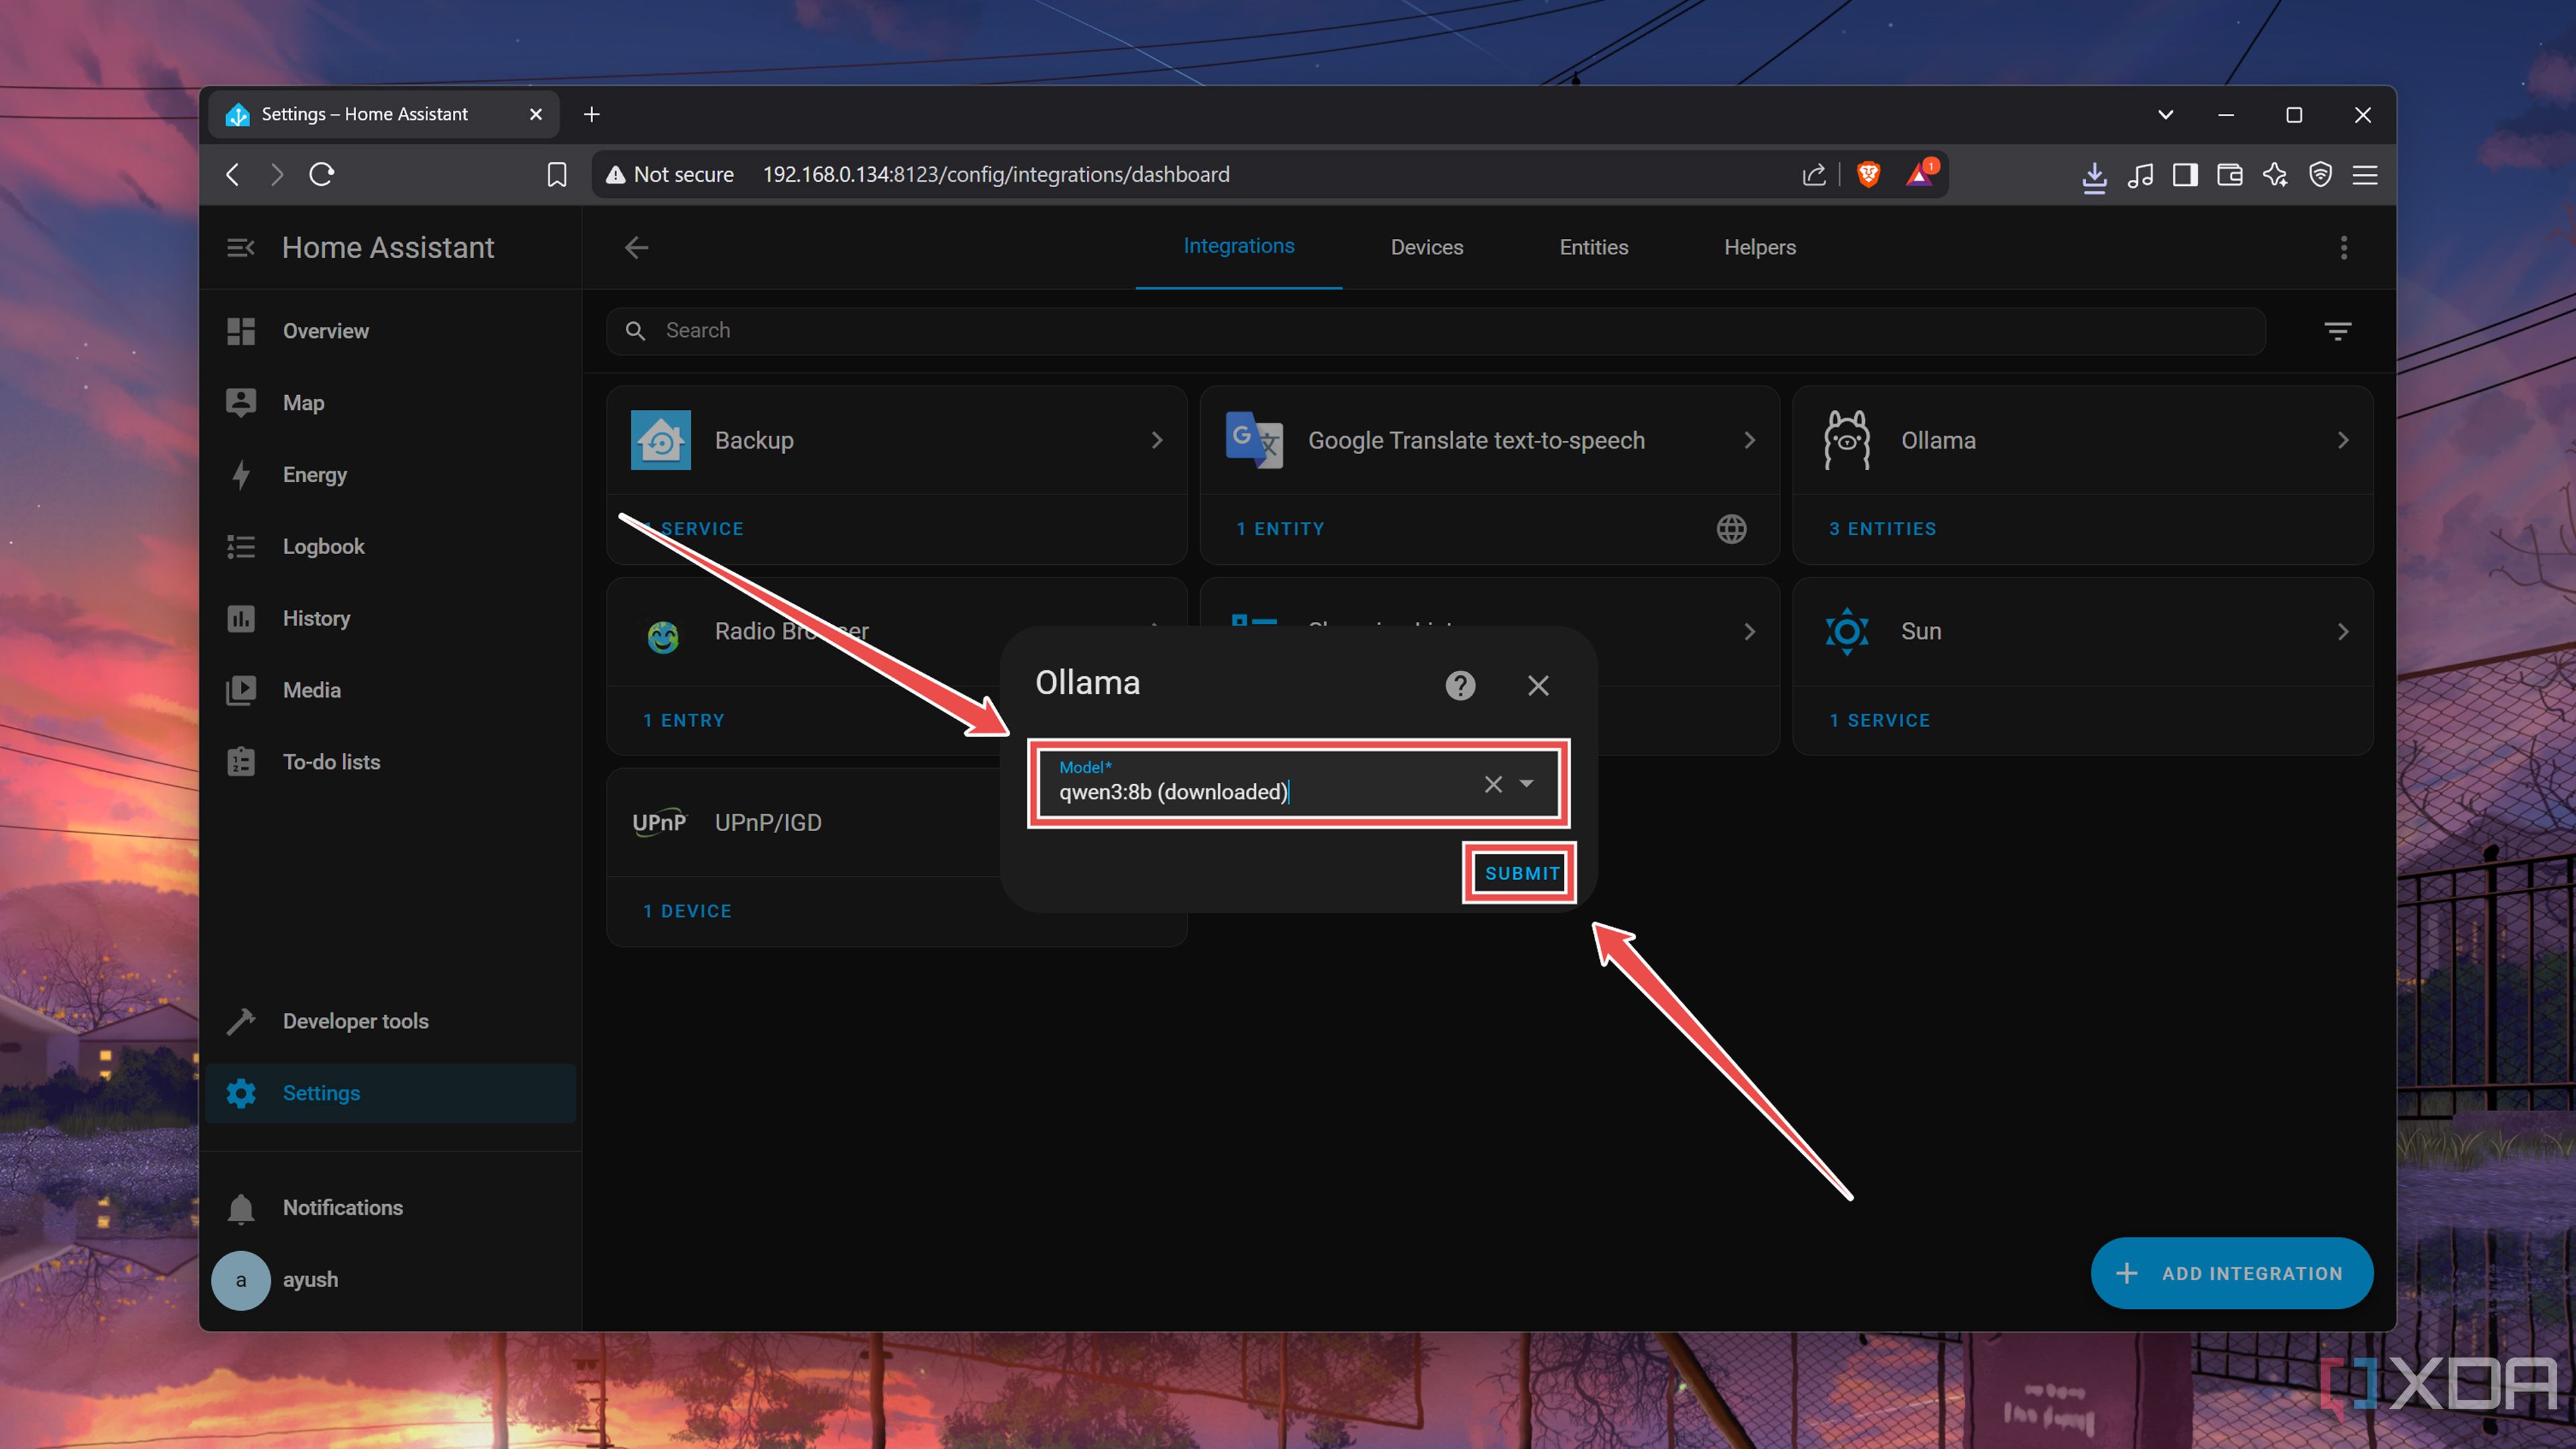
Choose your preferred Model, click on Submit, and press the Finish button.
-
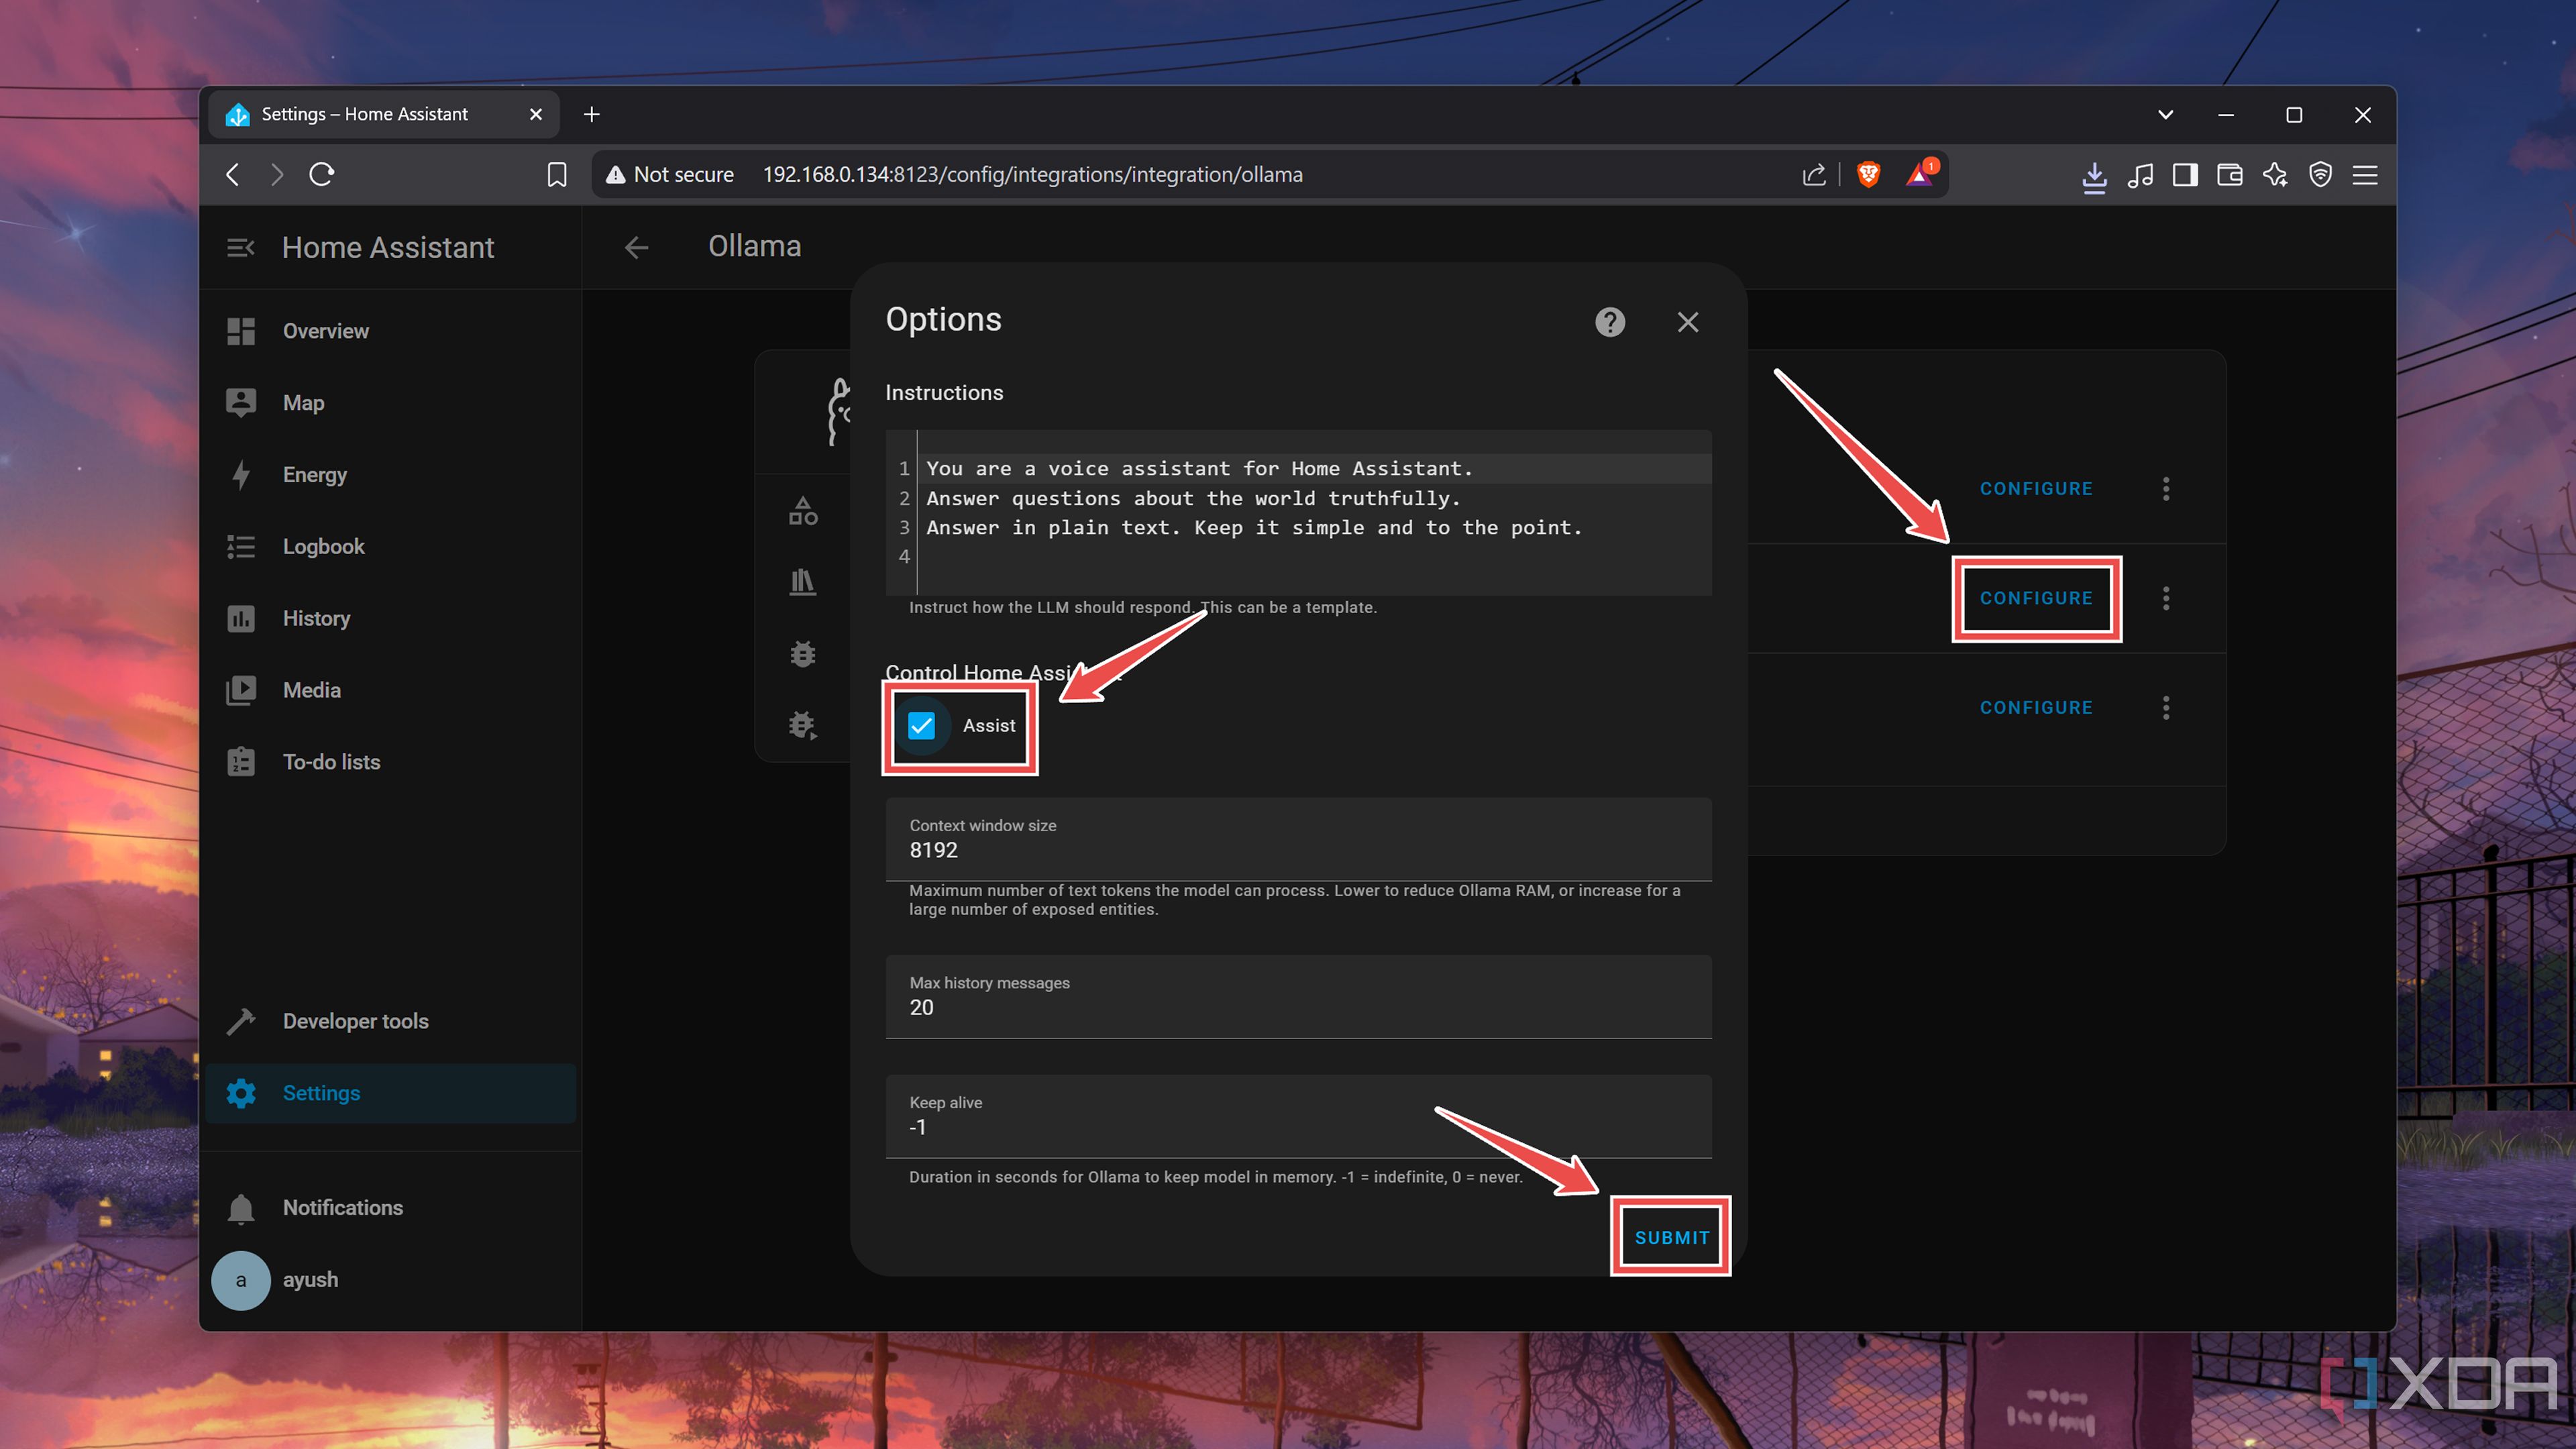
Once Home Assistant loads the Ollama integration, you’ll want to press the Configure button and enable the Assist checkbox under the Control home assistant header.
Build a smarter Home Assistant with Ollama
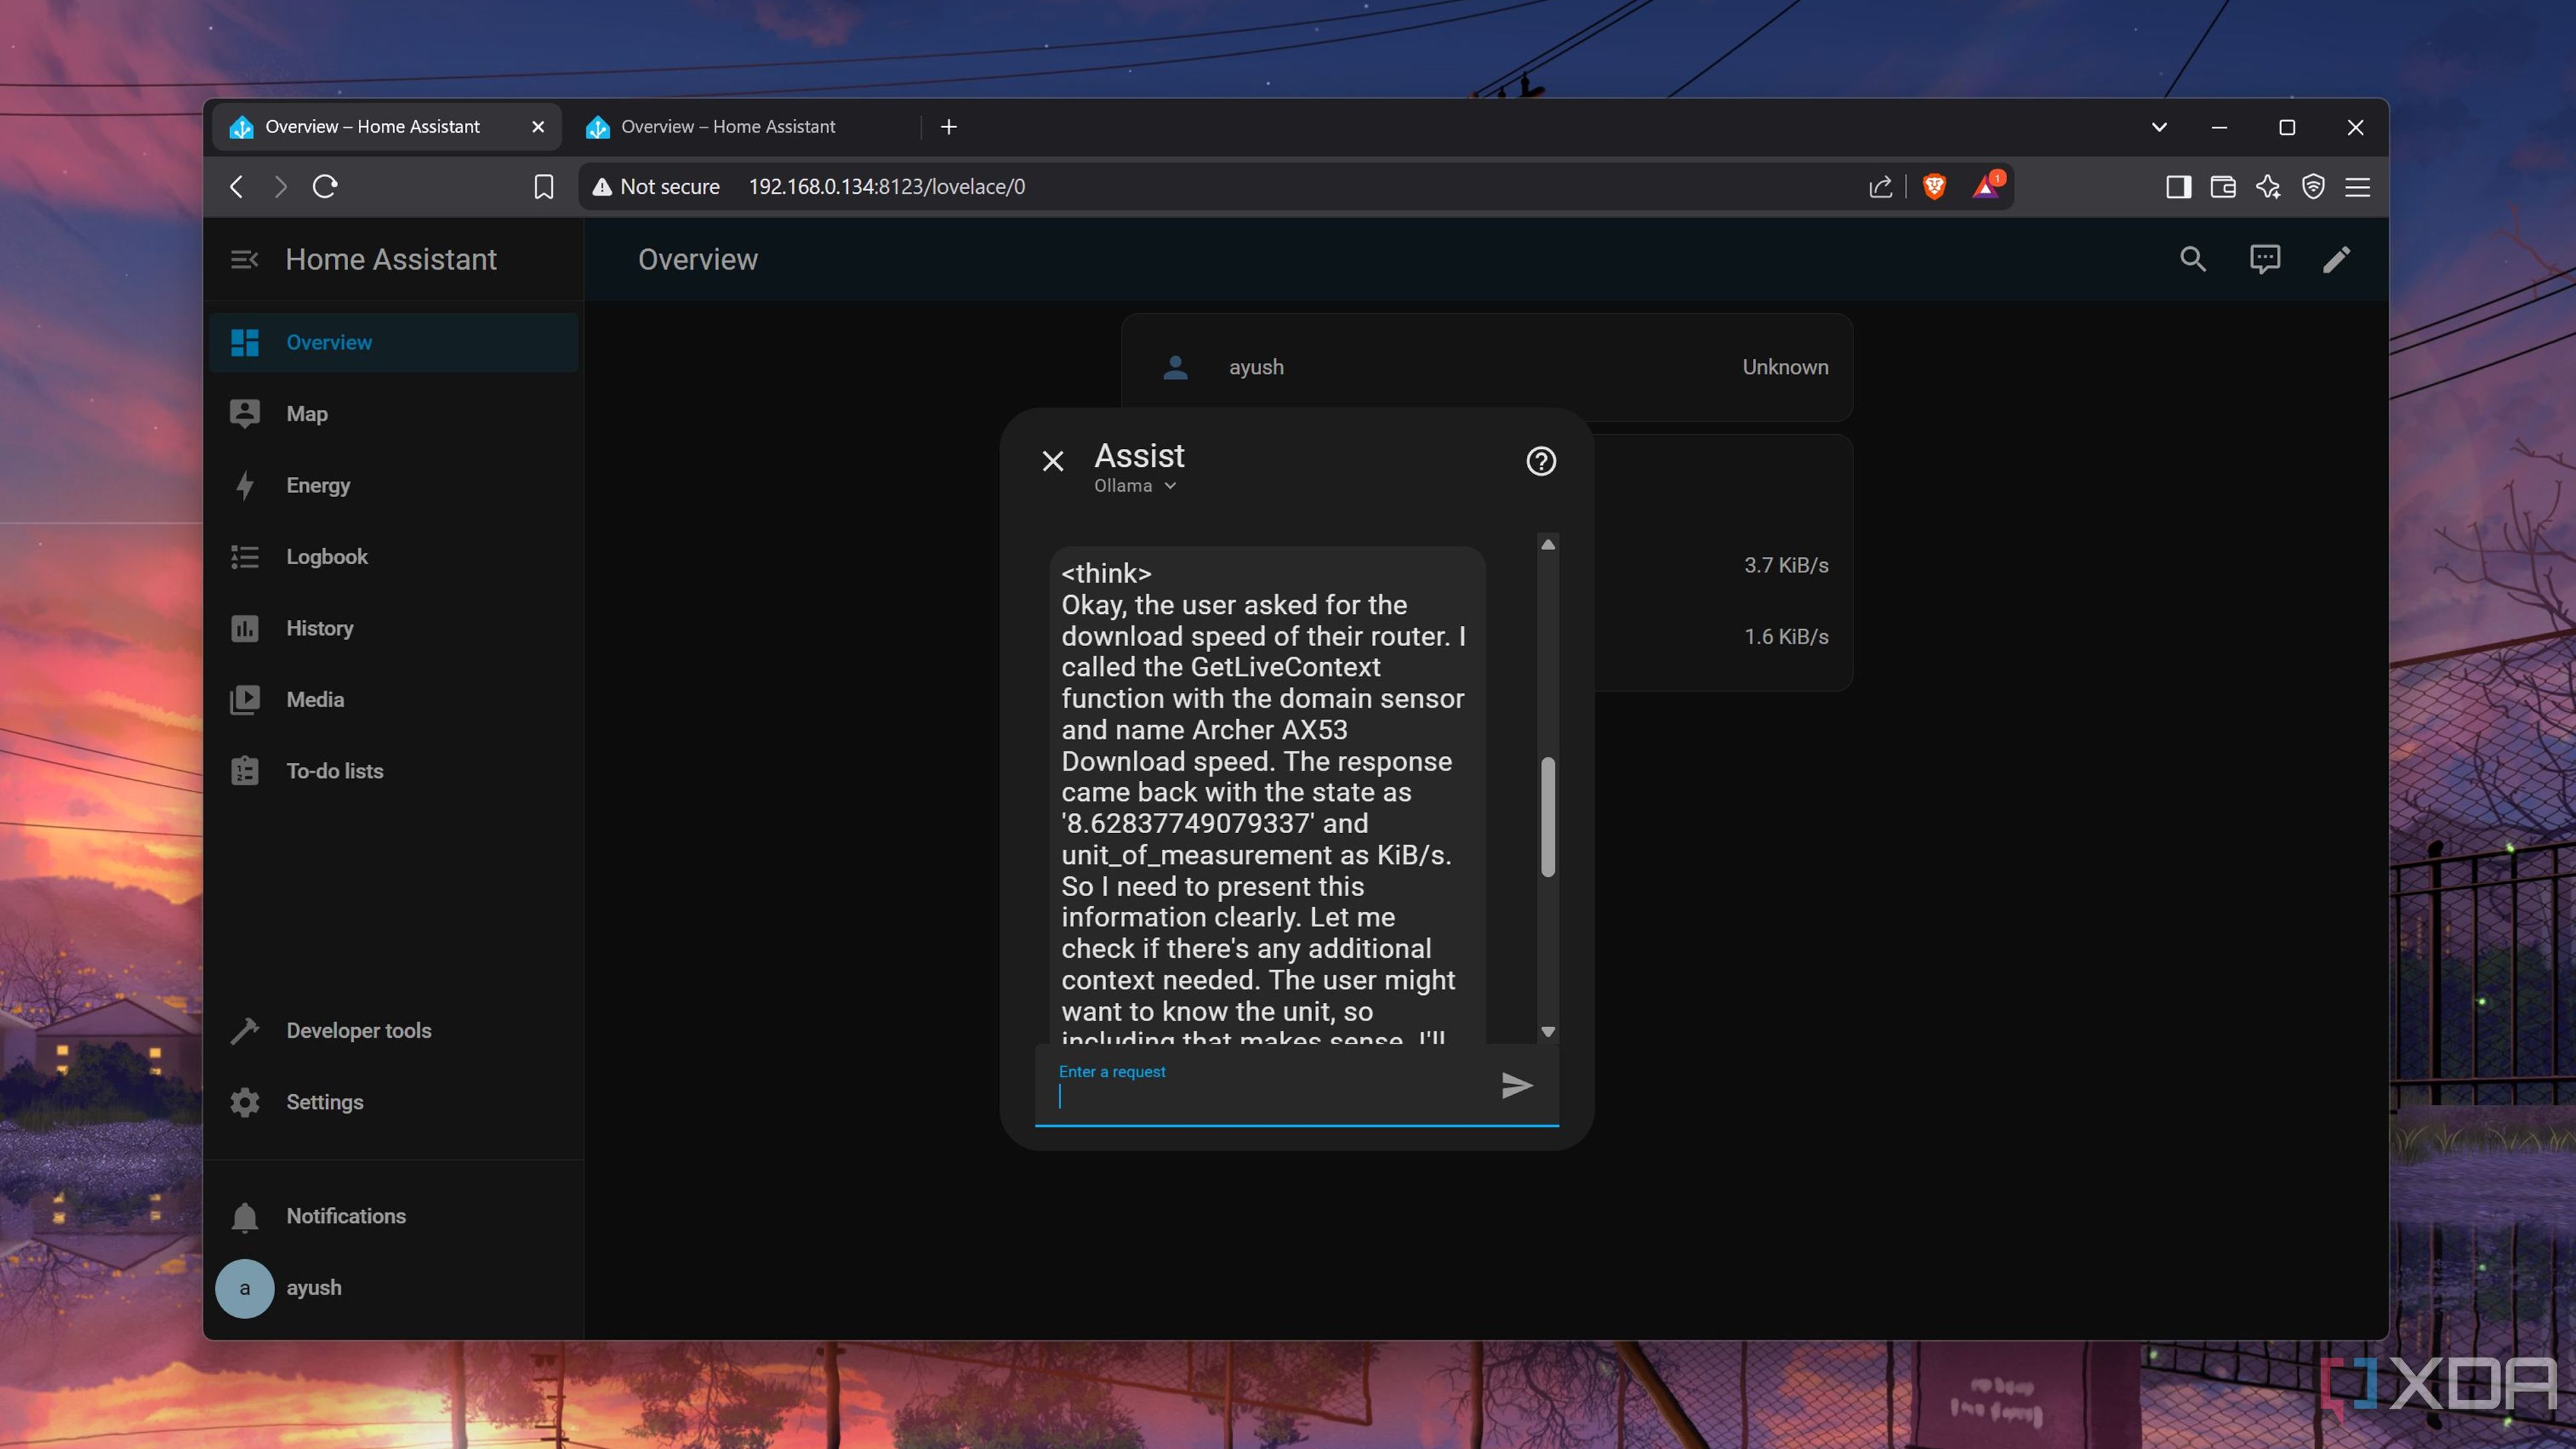
Assuming you’ve followed everything properly, you’ll find the newly-configured LLM inside the Assist section of the Overview tab. Once you switch to the Ollama-powered LLM, you can ask all sorts of questions related to your smart home. Better yet, you can even give it commands (or polite requests, if you don’t want to offend the AI lords ruling the dystopian future) when you want to control the devices in your Home Assistant-equipped living space.
If you’re looking for something cooler, you can add the Whisper and Piper add-ons to your Ollama and HASS setup to control your smart home with your voice. Heck, you can even add your home lab to HASS' dashboard once you arm the Home Assistant server with the Proxmox plugin from HACS.
Related
Does the free version of ESXi offer anything more than Proxmox?
With the free variant of ESXI back in town, is there really a need to migrate from Proxmox?


 English (US) ·